Leasing Workflow: Co-Occupants
This user guide outlines the basic steps for creating a proposal for co-occupant residents. Ensure you have met the pre-requisites before proceeding:
Must be in Future Resident or Waitlisted Status.
Primary Payer Selection
Appropriate contacts have valid email addresses
Correct apartment number is selected
Senior CRM
1. Click on Documents on a Future Resident

2. Click on New Quote Sheet
Any older quotes sheets will show here. To add a new one, click New Quote Sheet.

3. Fill out all of the Terms the Primary Residents
Description: Leave as is
Sales Counselor: Select from dropdown
Contract Type: Permanent
Payer Type: Leave blank
Unit: The apartment selection will carry over from the primary resident's profile. If you need to make changes, you can use the 3 dots next to the unit to select a different unit.
Physical Move-In Date: Put the date for the Primary Residents Physical move in date here (if unknown, get as close to the estimated date as possible. This date will be able to be edited before move in).
Financial Rate End Date: One year from the Financial move-in date. Use the term dates cheat sheet here for more information. This date should be the same for both residents.
Proposal Expires On: 30 days from deposit date (IL) or 14 days from deposit date (AL, WS, EC)
Primary Payer: Select the primary payer for the first resident, this payer will be applied to all charges for this resident.

4. Fill out the terms for the Co-Occupant
Include Co-occupant: Check off the checkbox, however this should be on by default if there's a co-occupant.
Care Level: Defaults based off Resident profile.
Co-Occupant Contract Type: Permanent
Co-Occupant Physical Move In Date: The Second residents physical move in date, this can be different than the primary residents date.
Co-Occupant Financial Rate End Date: Same as Primary Resident
Co-Occupant Primary Payer: This would be the primary Payer for the Co-Occupant only. (typically the same payer as the Primary Resident)

5. Click on Save & Next after all terms are filled out best to your knowledge

6. Charges for Primary Resident
Each resident has a separate tab for their own individual charges
Accommodation Rate: The start date should be the Financial Start Date, the rate will pull based on the apartment**
Level of Care: The start date should be the Physical Start Date, rate will pull based off what's in the system, also the recommendation will be suggested if a pre-assessment was done
Leave Second Resident field blank for the Primary Resident
Add Incontinence Care here any any additional recurring or one time charges (click here for a tango on how to add recurring or one time charges)
**If you notice that the rate is incorrect, send a ticket to helpdesk@bvsl.net with the apartment number and correct market rate.

7. Click on the Second Resident to see their individual Charges

8. Fill out the charges for the Second Resident and hit Save and Next
Accommodation: Required but shows up as 0
Levels of Care: Select a level of care if needed. The start date should be the Physical Start Date
Second Resident: This is where the second resident charge should be applied
Add Incontinence or any other additional recurring or one time charges (click here for a tango on how to add recurring or one time charges).

9. Add Concessions then hit Save and Next
Any Concessions will need to be added here per Resident.

10. Approvals
We dont use this step, just hit next

11. Click on Download Quote
Yardi displays their standard Quote sheet, however it doesnt contain all of our specific BV needs, to get to ours, you need to Download the quote sheet.
Review for accuracy. Specifically look at:
Payer selections
Rates
Dates
Return to the workflow to make any changes.

12. Click on Accept if the quote sheet is accurate
**Sales Stops here, the rest will be reviewed and completed by the BOD and ED

13. Click on Generate Document
**Start of the BOD & ED

14. Review this page for accuracy then hit Save and Next
This gives you the option to edit any dates if they have changed

15. Go through the charges of each Resident
The rate is locked at this point, but if the dates are adjustable/
If any rates/concessions need to be adjusted, we will need to reopen the quote sheet to make those changes.

16. Click on Save & Next

17. Who is Signing?
Signature Type: E-Signature is the electronic signature sent through RentCafe or to the contact/residents email. Manual is a wet signature aka signing in person.

18. Role
We only need to select the role for those that will actually be signing now.
**For Electronic Signatures, only select a role for contacts that will be signing. Otherwise, this will not move to Countersign unless every single role has signed.

19. Click on Save & Next

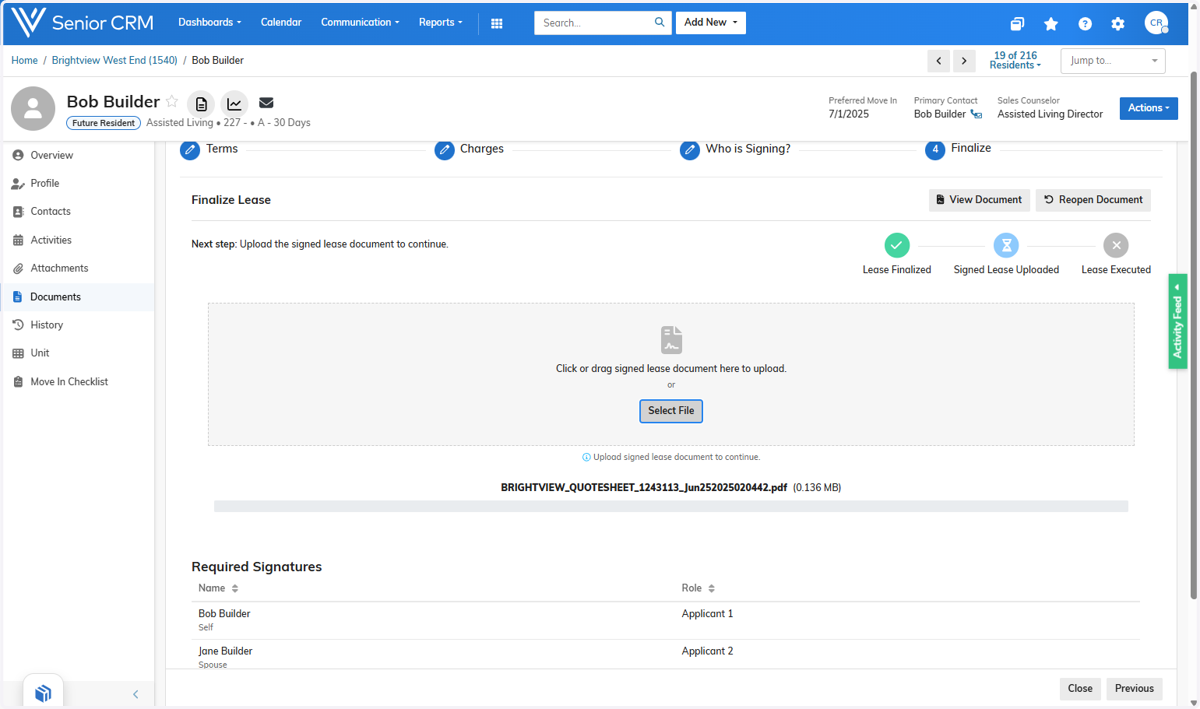
20. Click on Finalize Lease

21. Click on view Document to print out the Lease

22. Load in the signed lease
**Required for Manually signed leases to move forward to Move In/manage services
23. Click on Execute Lease after loading lease
