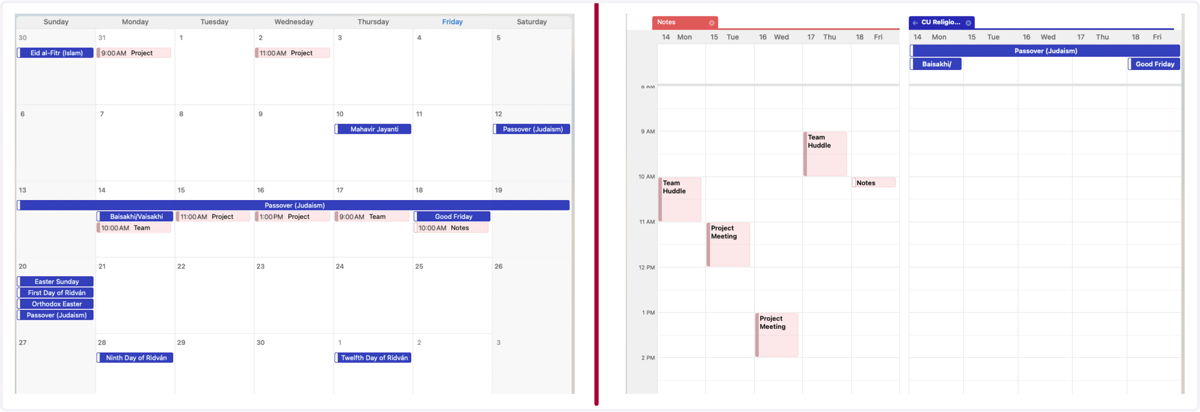
Steps for subscribing to a shared calendar in Outlook on the web
1. Click on the link below and follow the steps.
Click Calendar - Chapman University. Your browser window should open. If prompted, log in with your Chapman credentials.
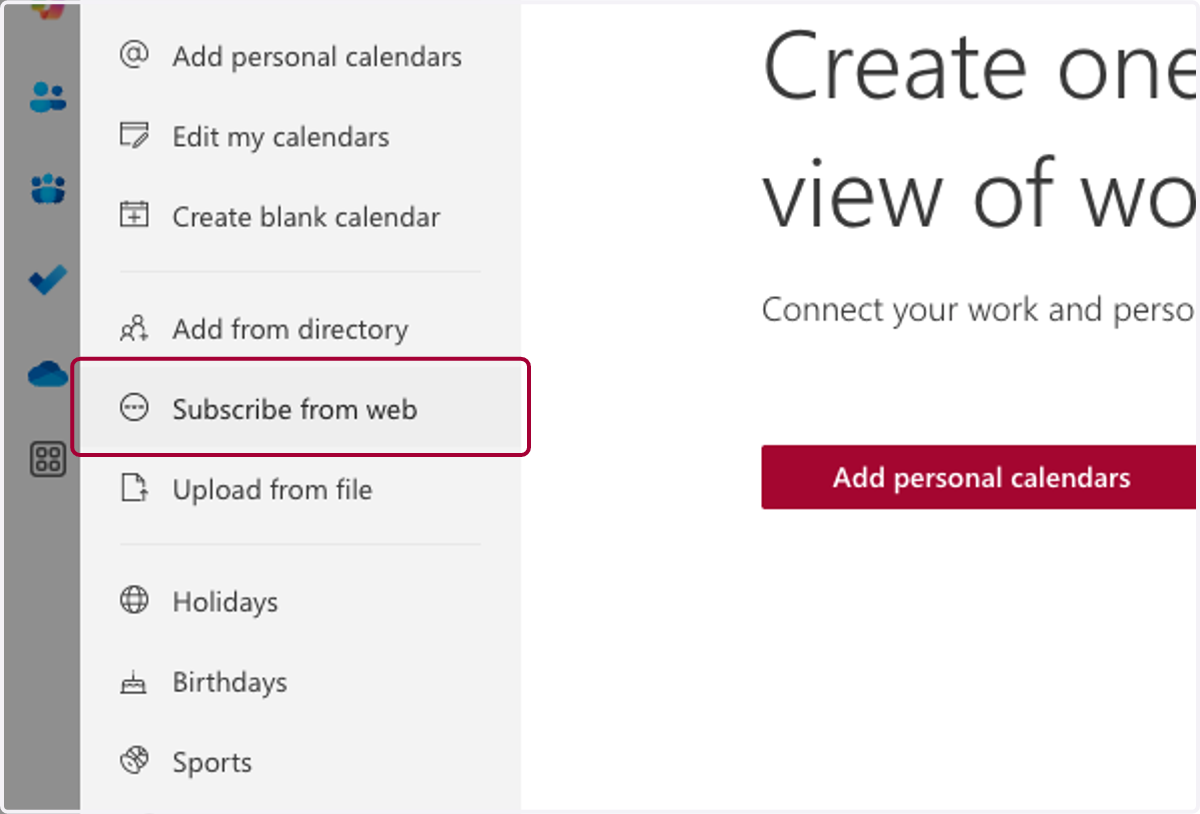
2. Add the calendar subscription link.
Copy and paste this URL into the dialog box:
https://outlook.office365.com/owa/calendar/07dd1735f0f34b7baec0a7a2bdb9cf06@chapman.edu/bc91bc524600424b9b27a3c2c597c3d88930237726266476650/ca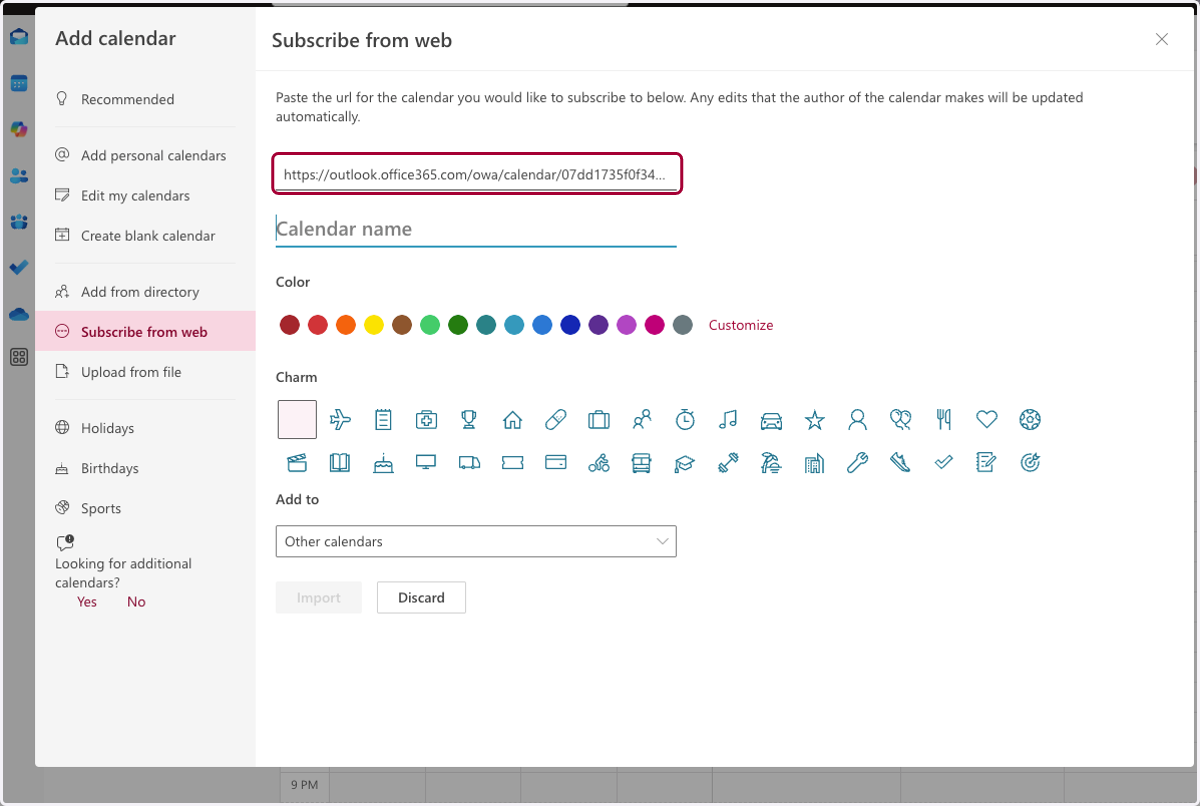
3. Add the calendar name.
We recommend using 'CU Religious Observances.'
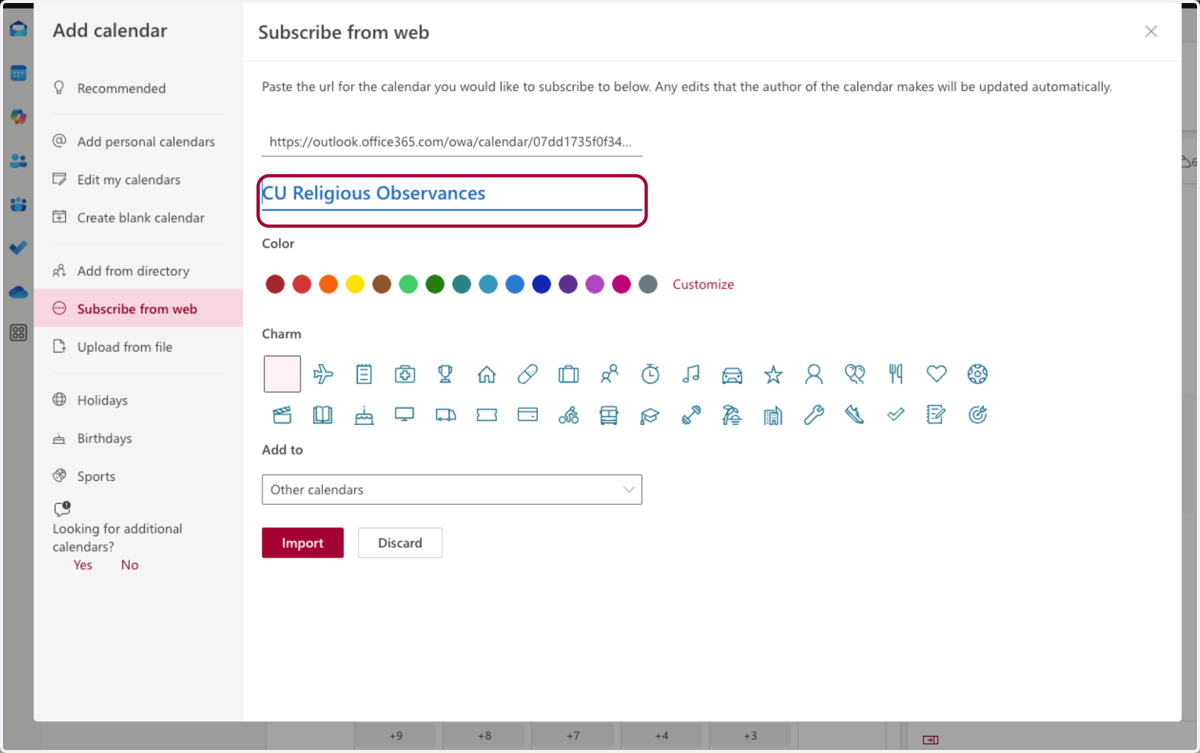
4. Personalize the calendar.
Select a color and a charm (icon).
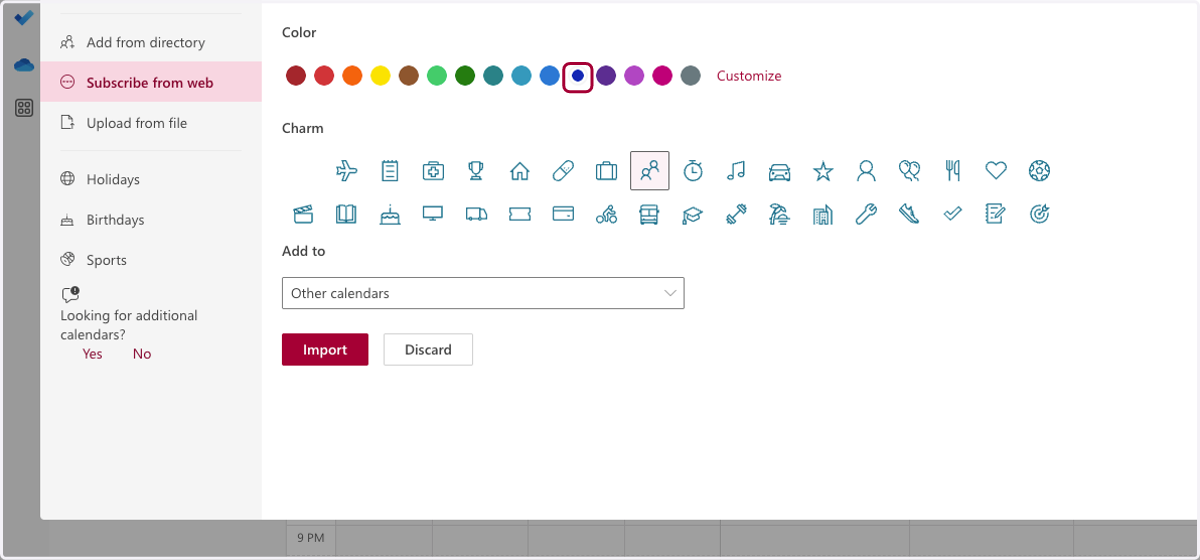
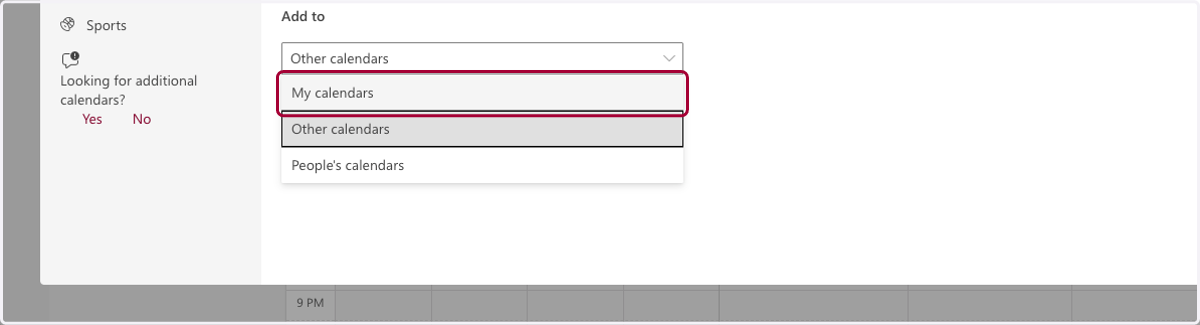
5. Select the location for the calendar.
Click on the dropdown menu and select 'My calendars.'
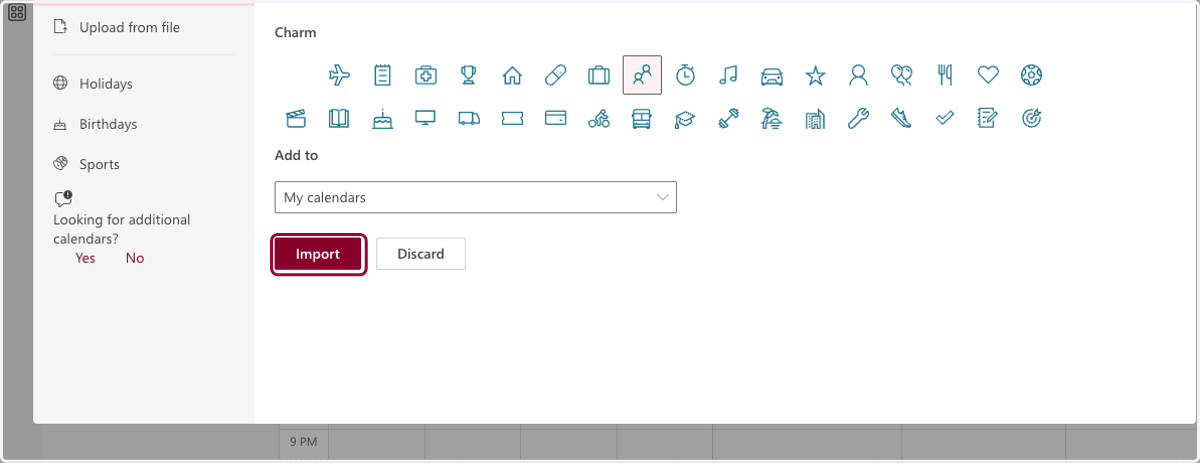
6. Finish importing the calendar.
Click on the 'Import' button.
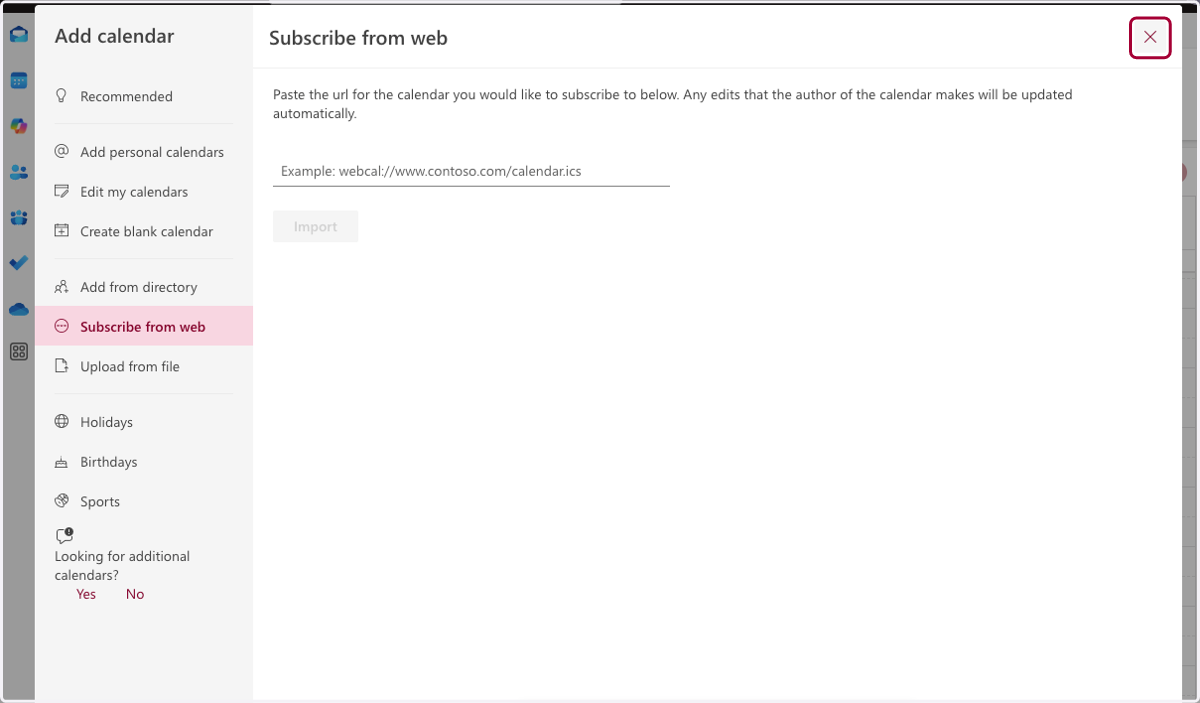
7. Close the window.
Click on 'X' in the top right corner to close the 'Add calendar' window.
8. Customize your view for a better experience.
Use the view options in the menu bar to customize your viewing experience.
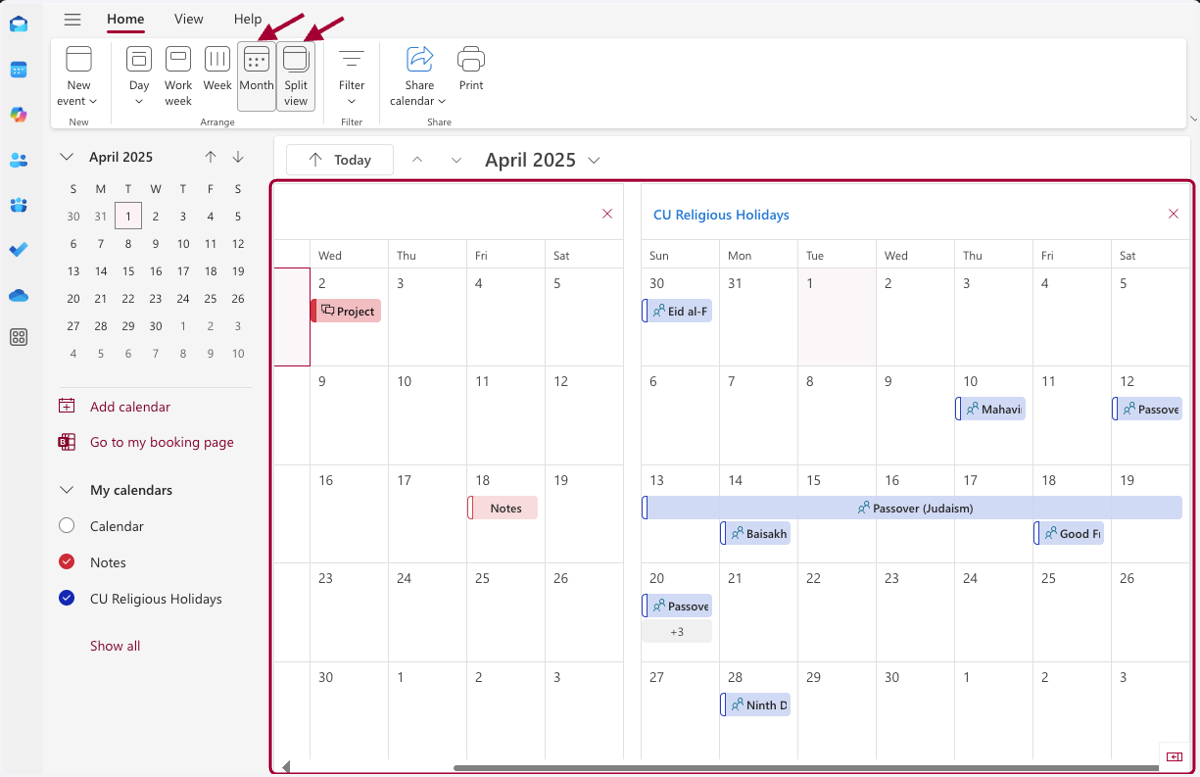
9. Customize your view in Outlook for Windows/Mac.
Click on the links below to learn how to change your Outlook calendar view. We recommend turning on 'Overlay' for a better experience.