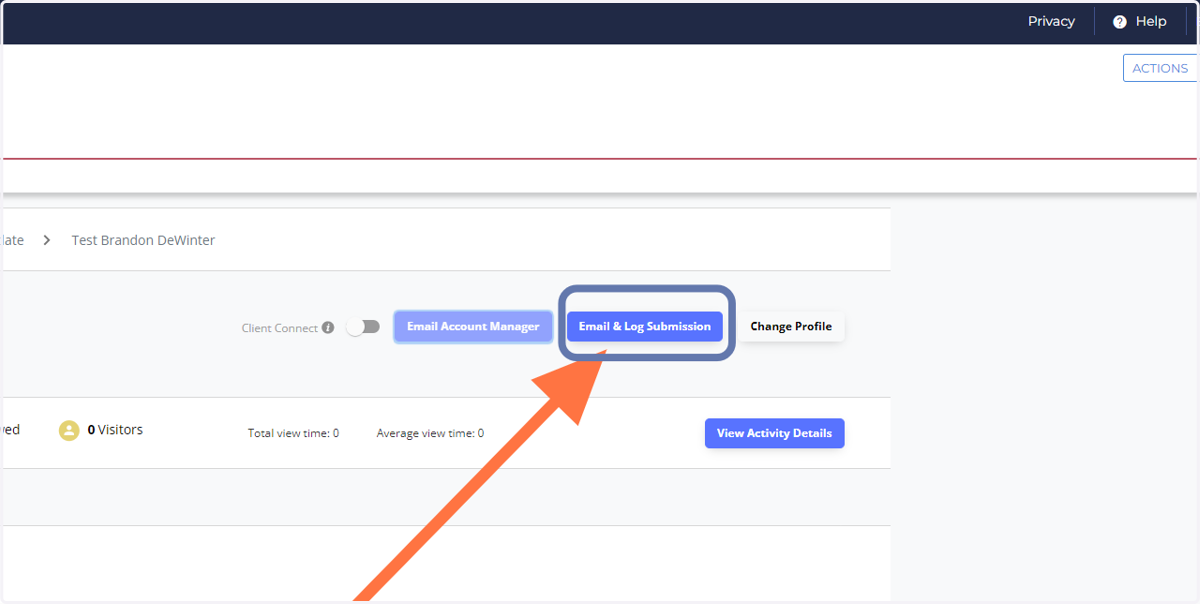
3DIQ Bullhorn Submission Workflow (Desker/Recruiter) - DWC
1. Log-in to Bullhorn
URL: staffing.bullhorn.com
2. Assigned Desker: Run a Candidate Search in Bullhorn
Take the search results to a Tearsheet (if more than 500) or to a Distribution List (if less then 500)
3. Assigned Desker: Send out your "Blast" to defined Candidate pool
Use email template in Bullhorn
4. Assigned Desker: Clearing Call with the Candidates that reply to the Blast and express interest in the role.
Candidates that are Interested are then "Submitted to the Job in Bullhorn"
See Step #5 below
The updated Candidate resume must also be loaded onto the Bullhorn Candidate record at this time
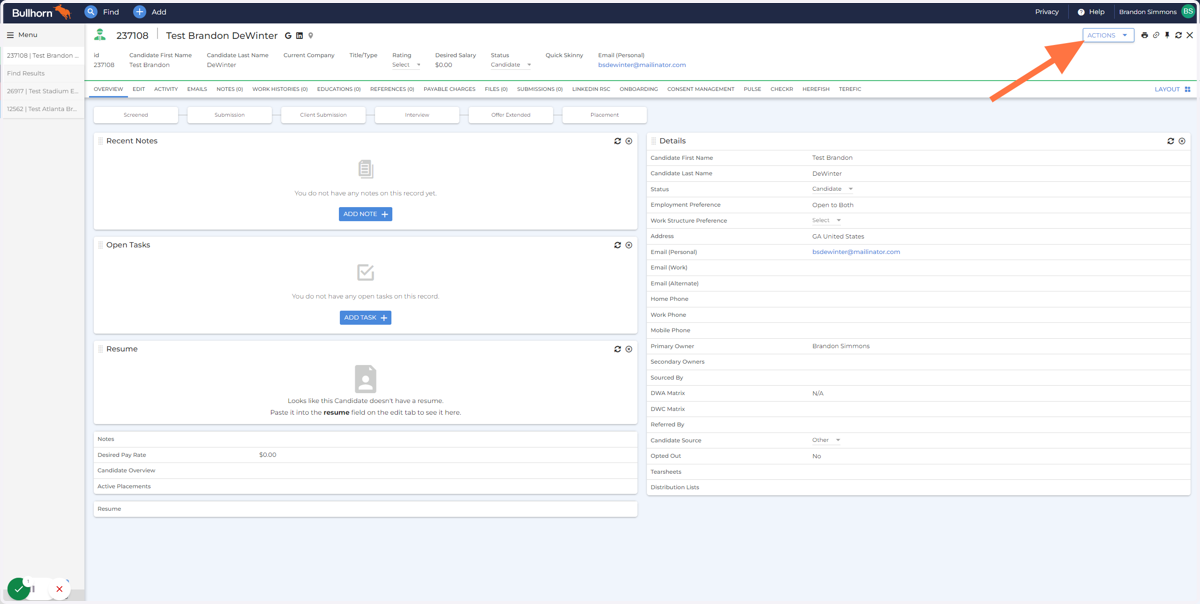
5. Desker: Navigate to the Candidate Record and Click on the "ACTIONS" menu
You can do this from the Job record as well - wherever you are at in Bullhorn (Candidate or Job), you can create the Submission
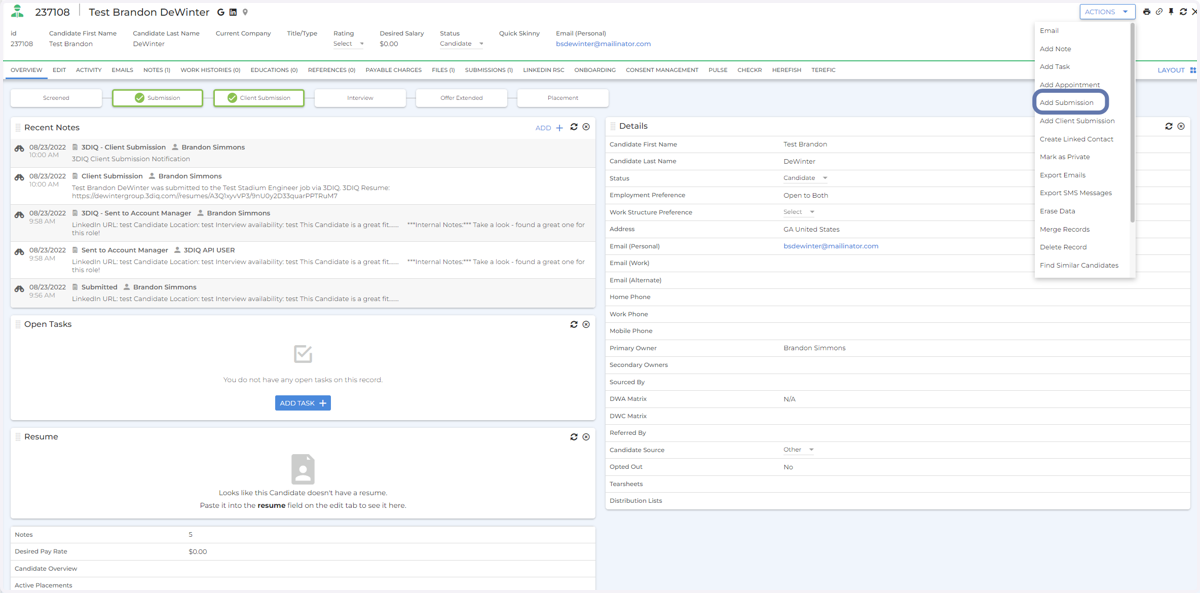
6. Desker: Click on Add Submission
This is the step of adding a Candidate to a Job in Bullhorn for consideration by your Account Manager/Sales person to send to the Client.
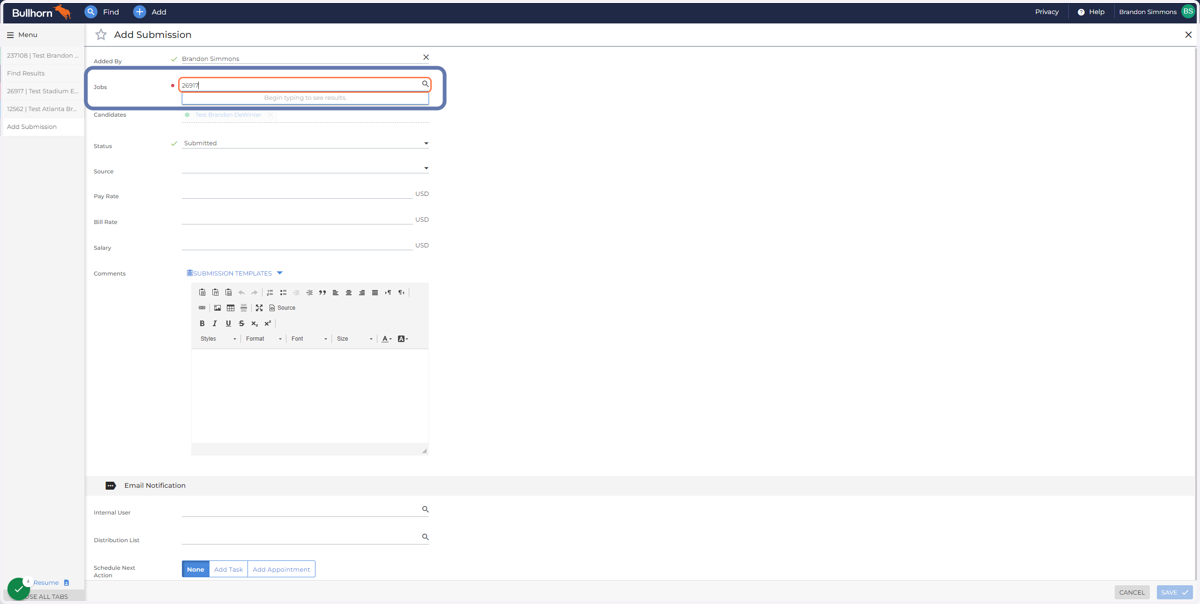
7. Enter the Bullhorn Job (ID # or Name) that you would like to Submit to
Click the Job as it appears so that it is selected
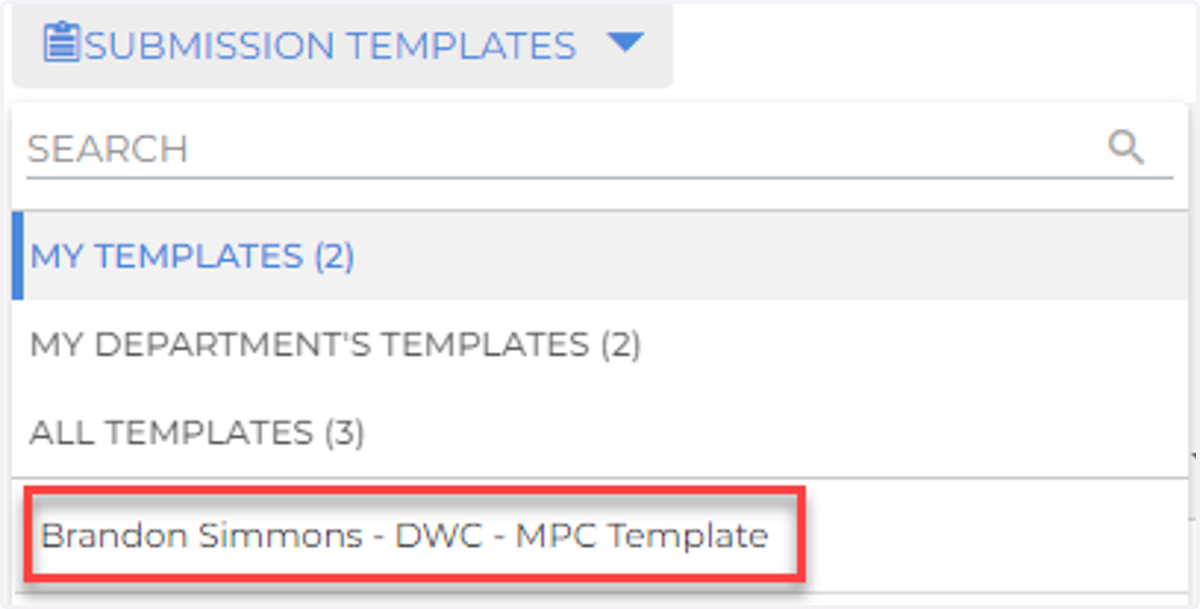
8. Click on SUBMISSION TEMPLATES
You can use the "Brandon Simmons - DWC - MPC Template" or feel free to create one of your own! This template will automatically appear as "Recruiter Notes" when you create the 3DIQ Candidate Profile.
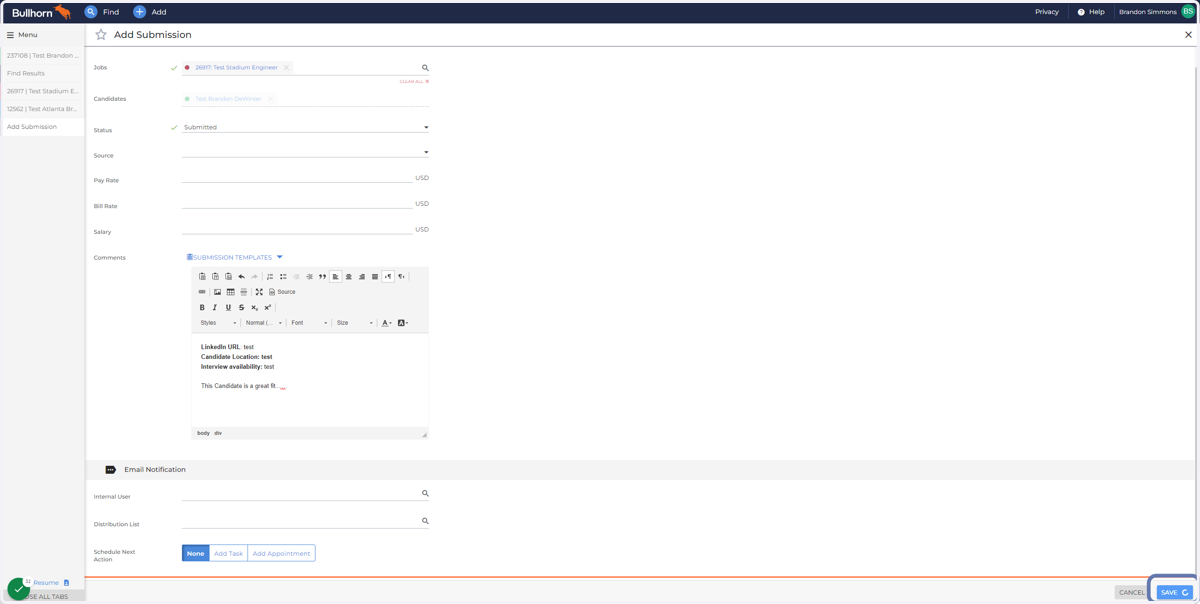
9. Click on SAVE
Once you have completed filling out your template, click "SAVE"
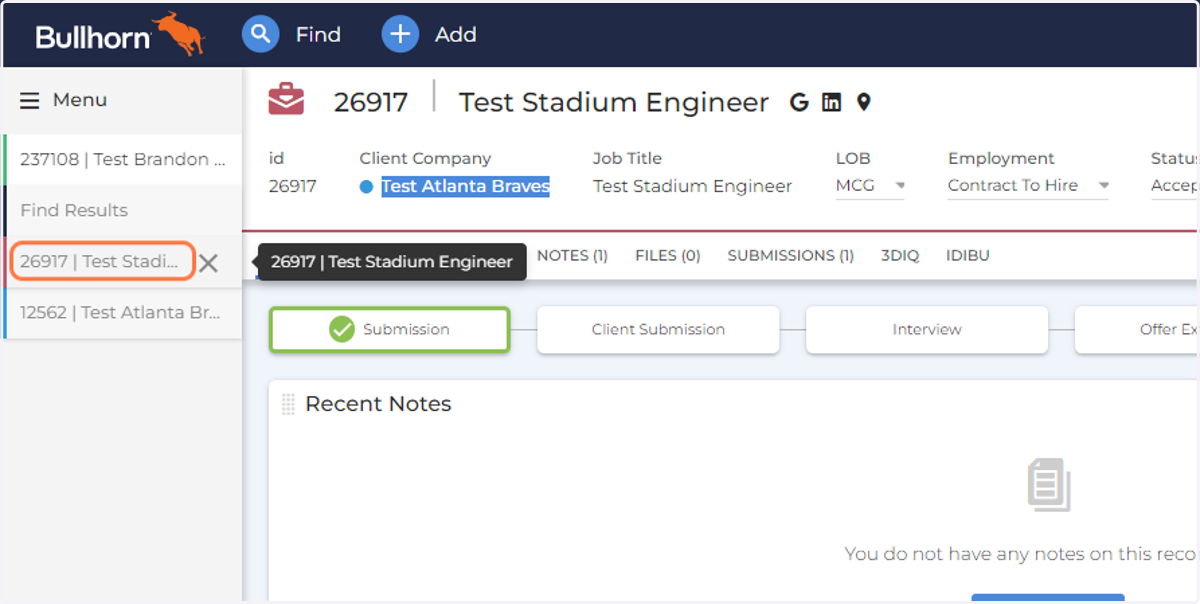
10. Desker: Open the Job
In Bullhorn, open the Job that you submitted the Candidate to
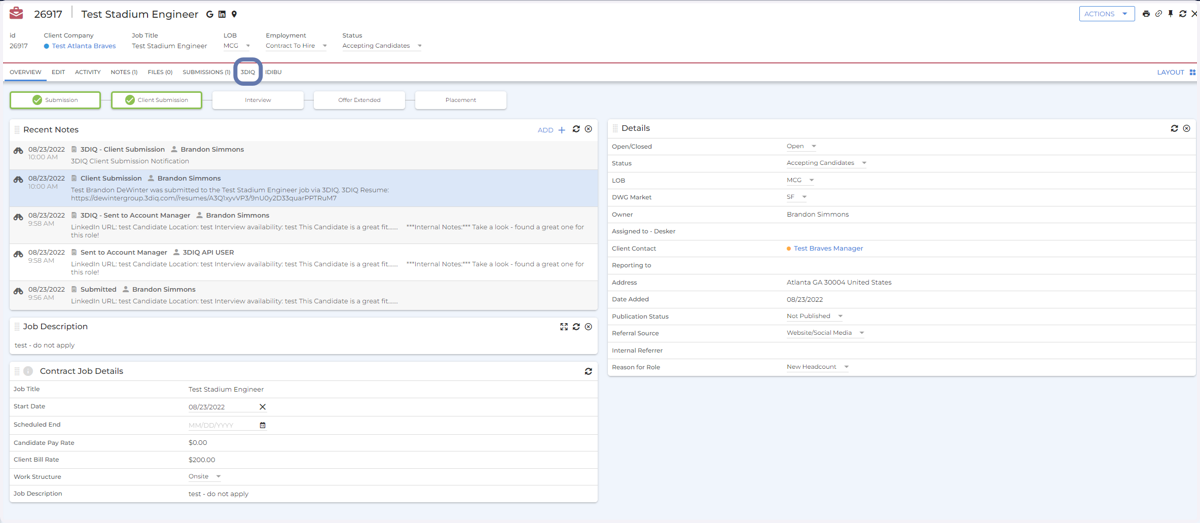
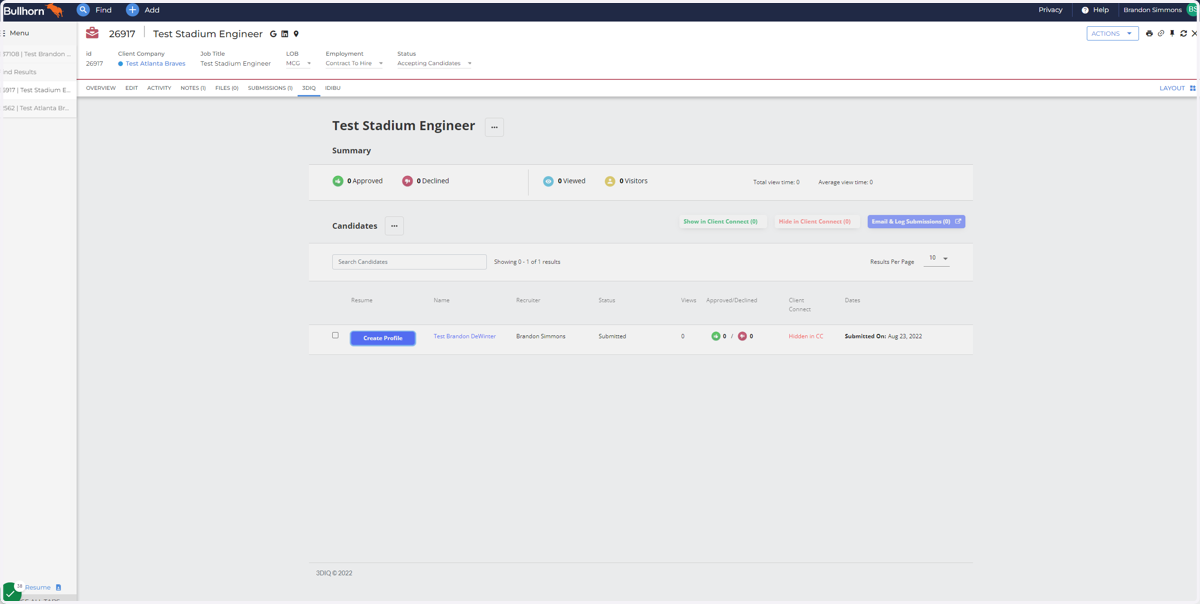
11. Recruiter: Click on "3DIQ" tab in Bullhorn
12. The Candidate Profile loads in 3DIQ
You may have to refresh Bullhorn if the Candidate has not had time to load into 3DIQ (it only takes a few seconds)
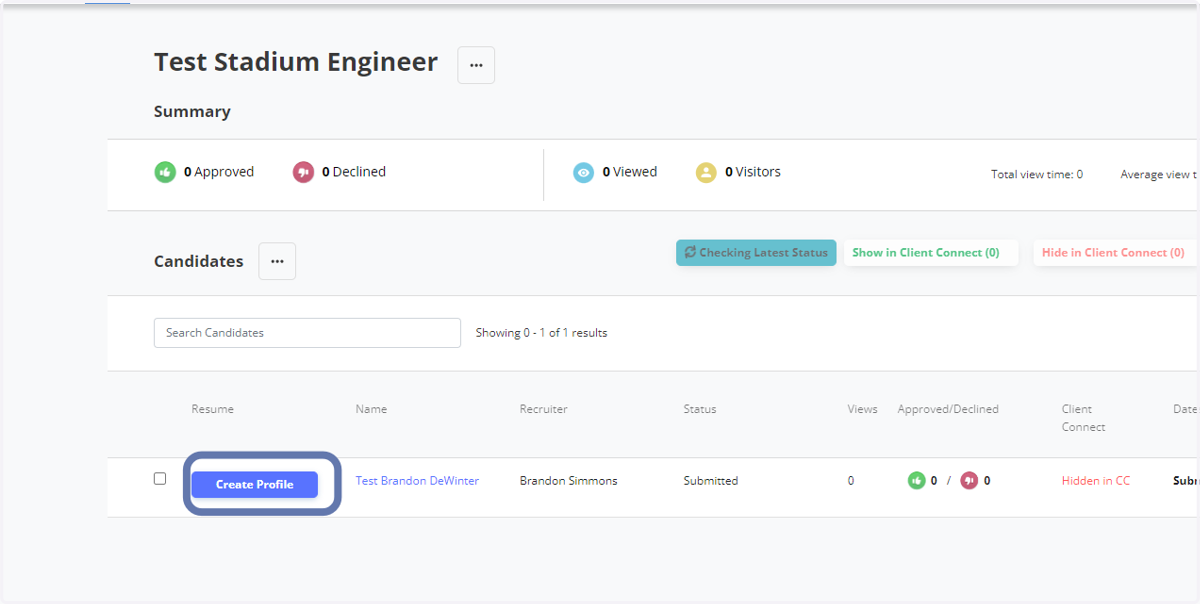
13. Click on Create Profile
Choose the Candidate or Candidates (you may send as many Candidates as you like at one time - instructions below) you want to create profiles for by selecting the checkbox next to the Candidates name and select "Create Profile"
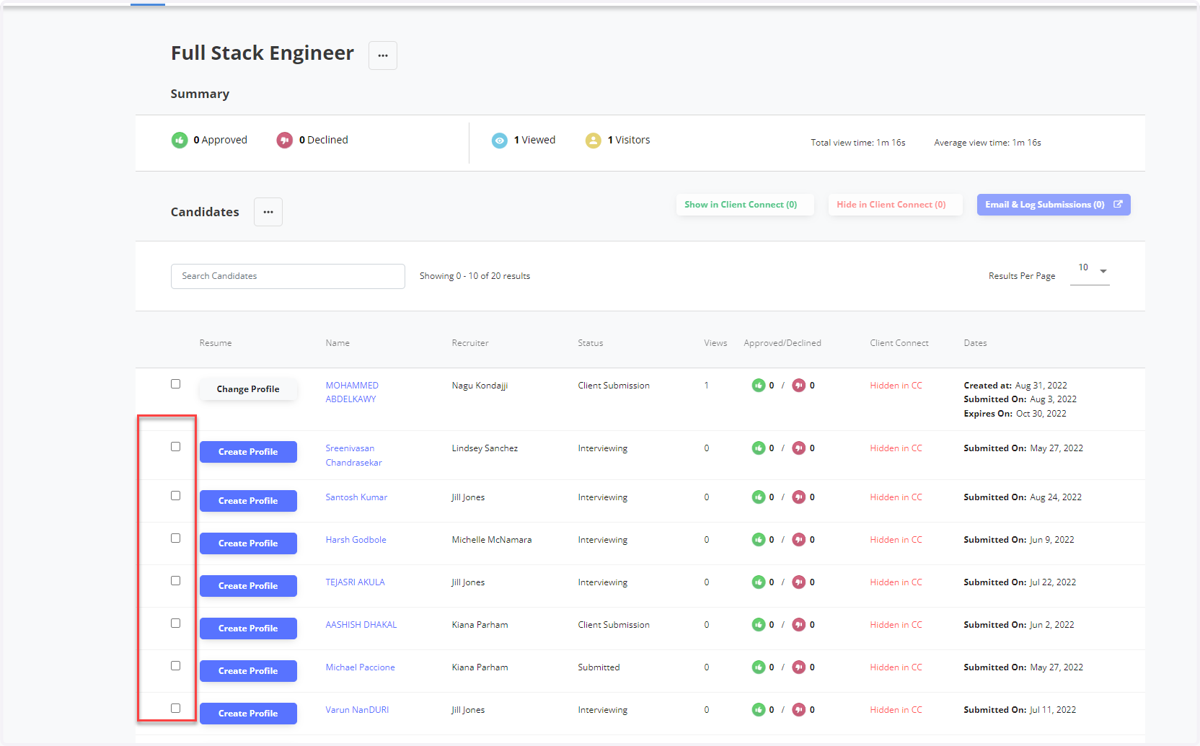
14. Recruiter: Submitting multiple candidates for a job within the same email
This is done by selecting multiple Candidate checkboxes next to their name instead of a single one.
You have the ability to submit multiple candidates to a job while sending only one email to the client. This simplifies the process by listing a separate link for each candidate profile for the client to review.
Unlike a single candidate submission when you submit multiple candidates at the same time the Candidate Summary notes do not populate in the email. You may want to add a personalized note for the client to highlight each candidate's qualifications.
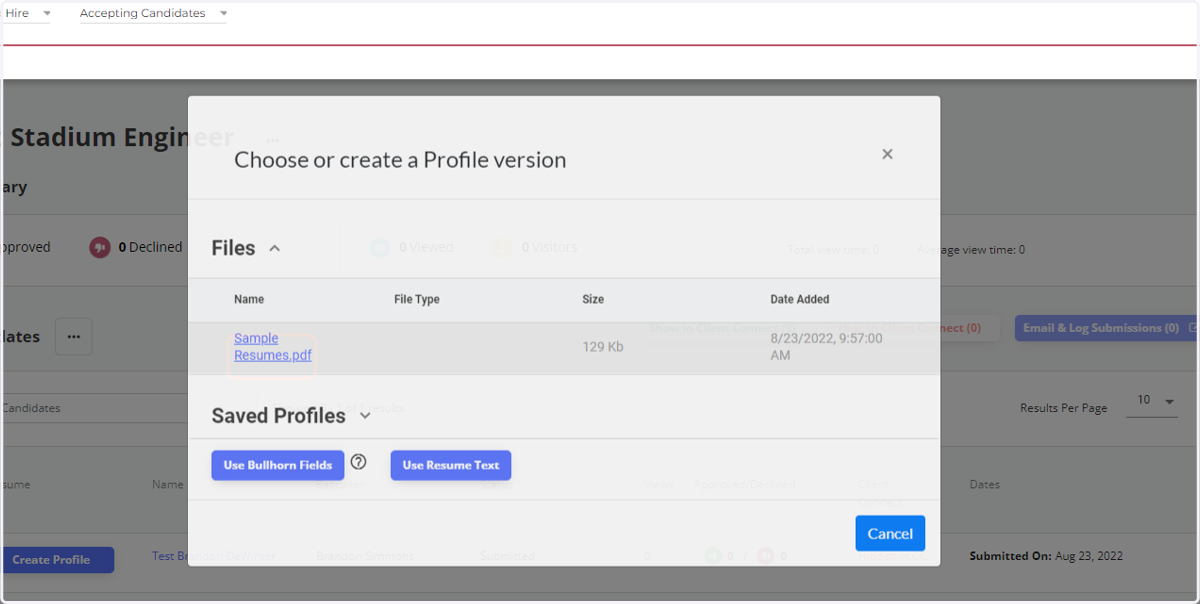
15. Recruiter: Choose or Create a Profile Version
The resume that you want to use must be saved in the Files section of the Bullhorn Candidate record - choose the one you want by selecting the highlighted blue text of the resume file name.
Note - If you have previously created a profile for this Candidate in 3DIQ, you can choose to use that and just edit - that choice will only be available if you have previously created a profile using 3DIQ for this Candidate.
16. Recruiter: Internal Notes
If you are sending this Candidate to an Account Manager for review prior to sending to the Client, enter your notes to them in this field.
These notes are only visible to your Account Manager - the client will never see any information entered into this box.
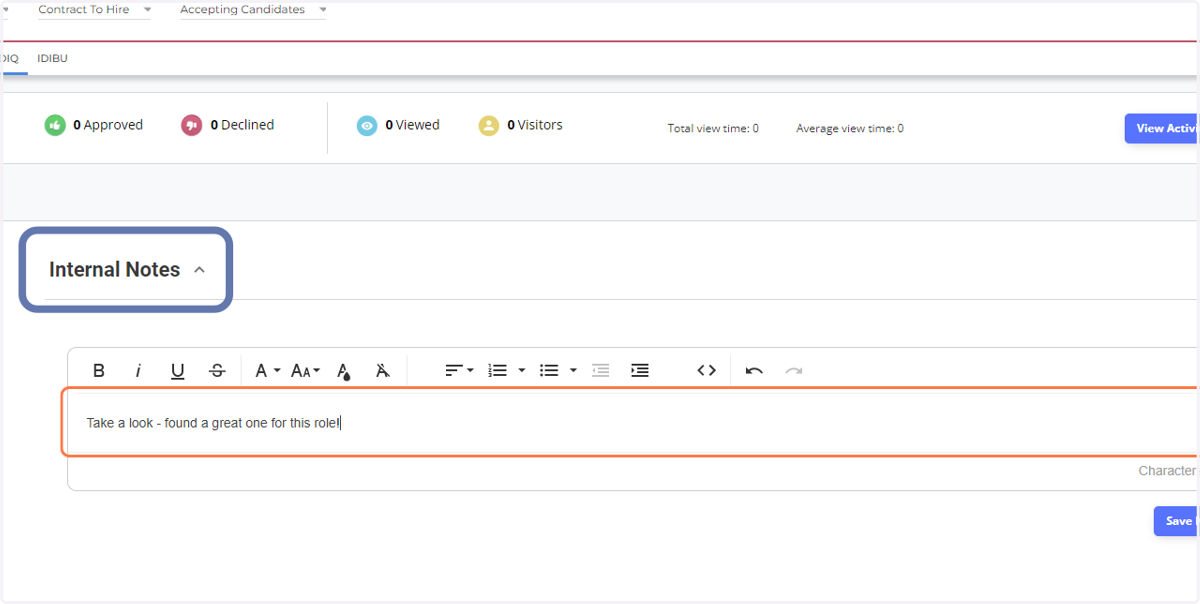
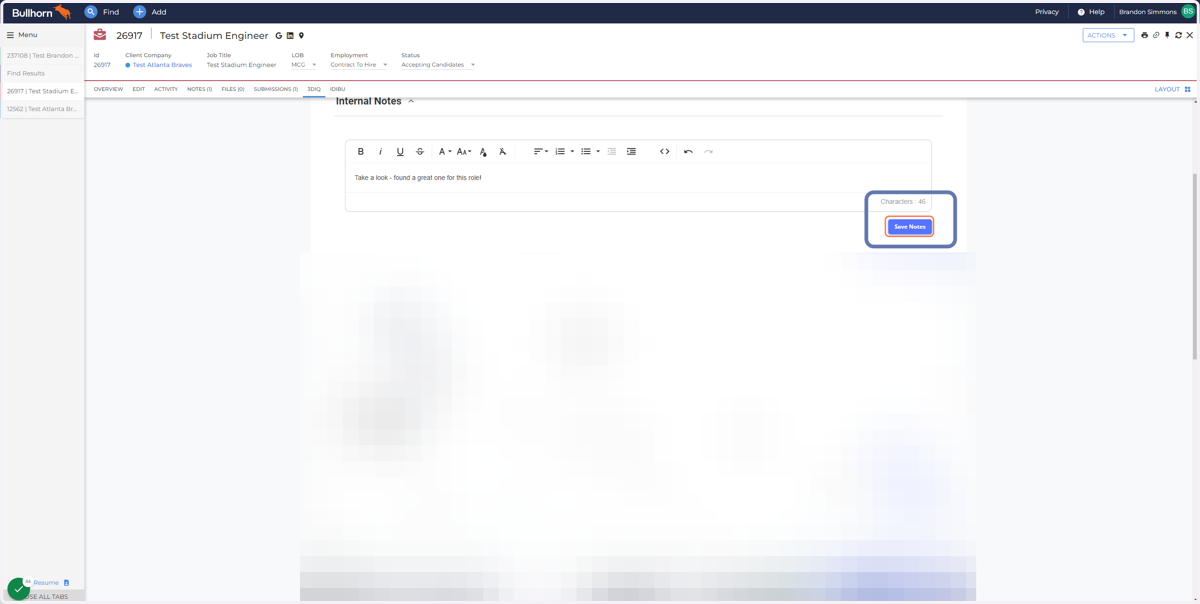
17. SAVE Internal Notes
Ensure that you click save on the Internal Notes after you have completed them
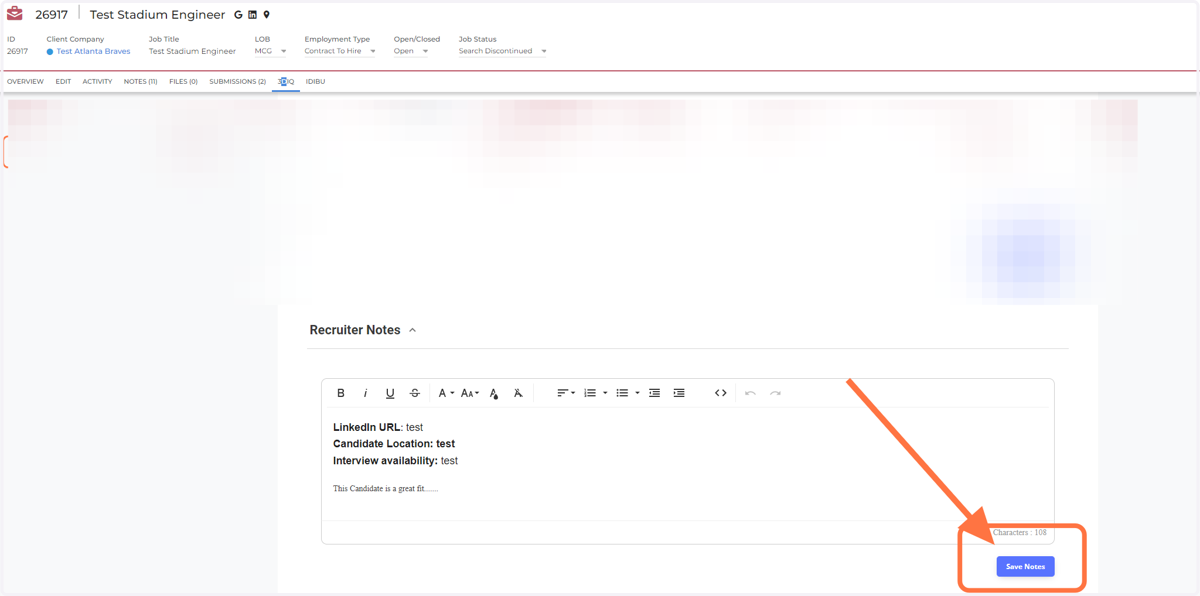
18. Recruiter Notes
Either complete or edit (if needed) the Recruiter Notes that you want the client to see (remember that the template you choose when you submit the Candidate in Bullhorn is what you will see here).
These notes are visible to the client.
Make sure to click "SAVE" after you have entered the notes.
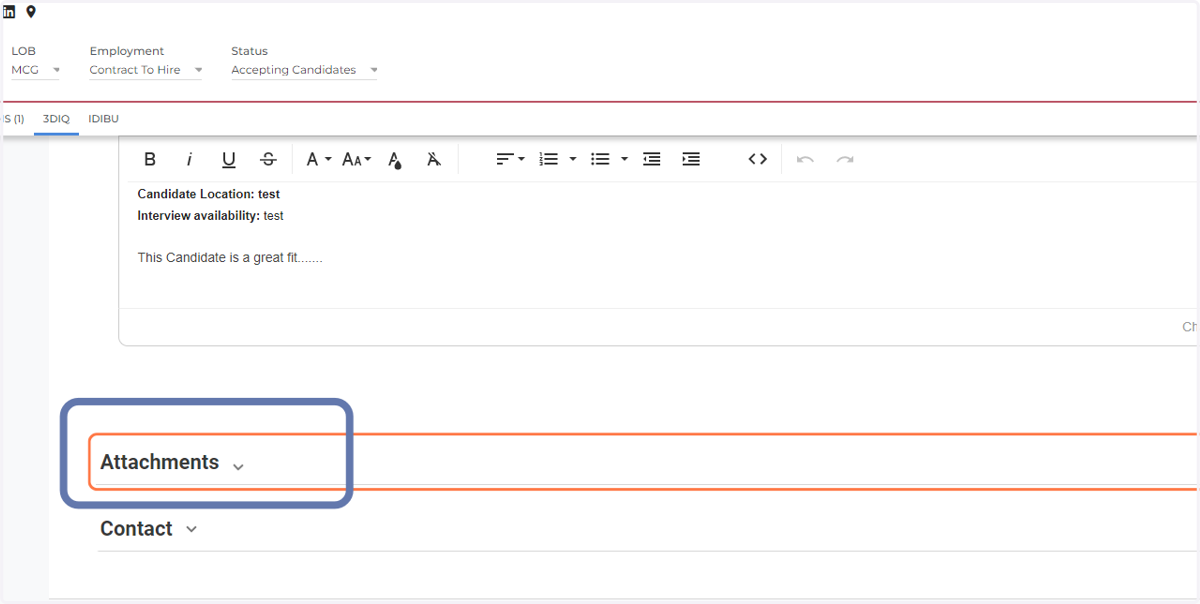
19. Attachments
If you need to add any attachments - do that here by expanding this section and loading the document either from a Bullhorn Candidate record or your Desktop
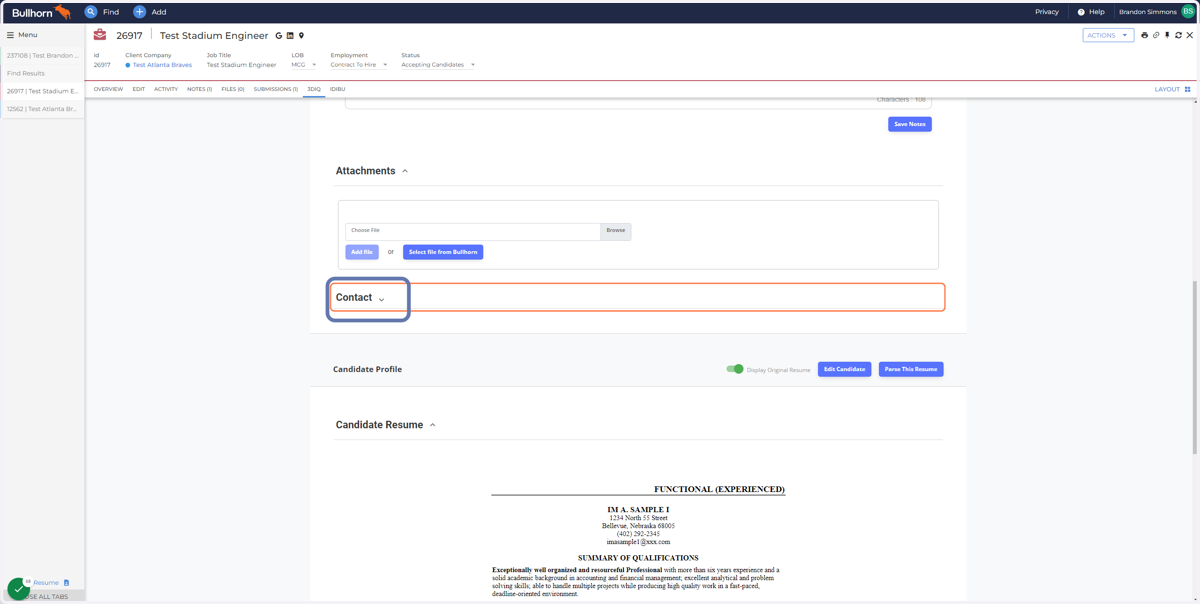
20. Contact
The Contact shown to the Client will always pull from the Job Owner field in Bullhorn
21. Recruiter: Email Account Manager (If the Candidate needs to be reviewed internally prior to sending to Client)
Choose "Email Account Manager" if you are sending this to a sales person/Account Manager internally for review before it goes to the Client.
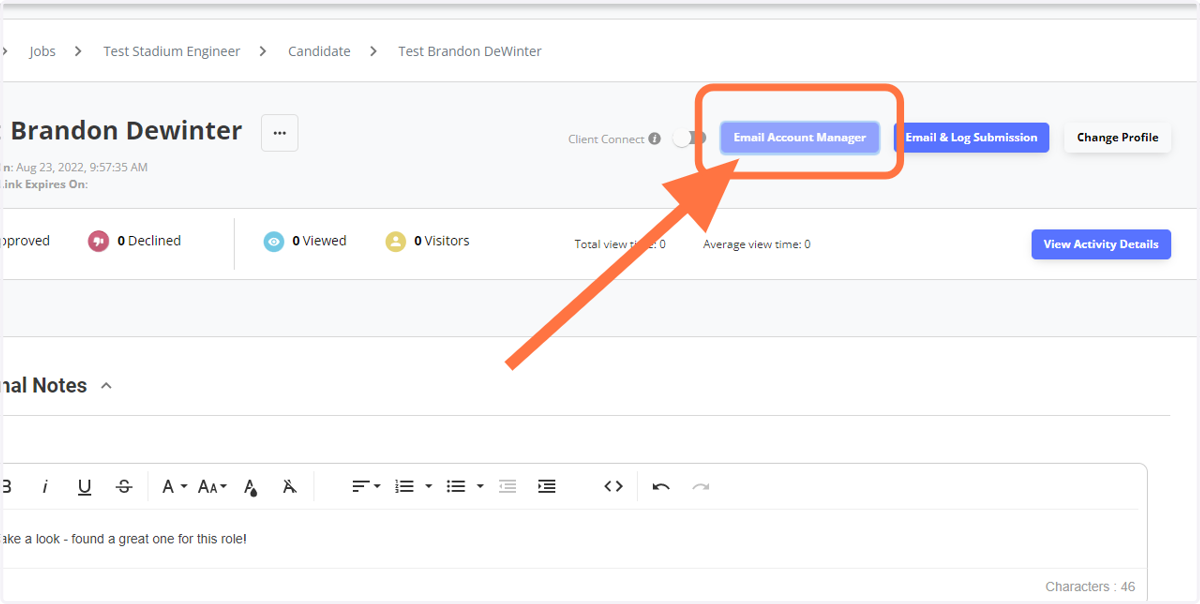
22. Recruiter: Save & Log Submission (If sending directly to Client)
Choose "Save & Log Submission" if you are sending this directly to a client and do not require it to be internally submitted first.