Onboarding Anzenna: Connecting Jamf
Anzenna
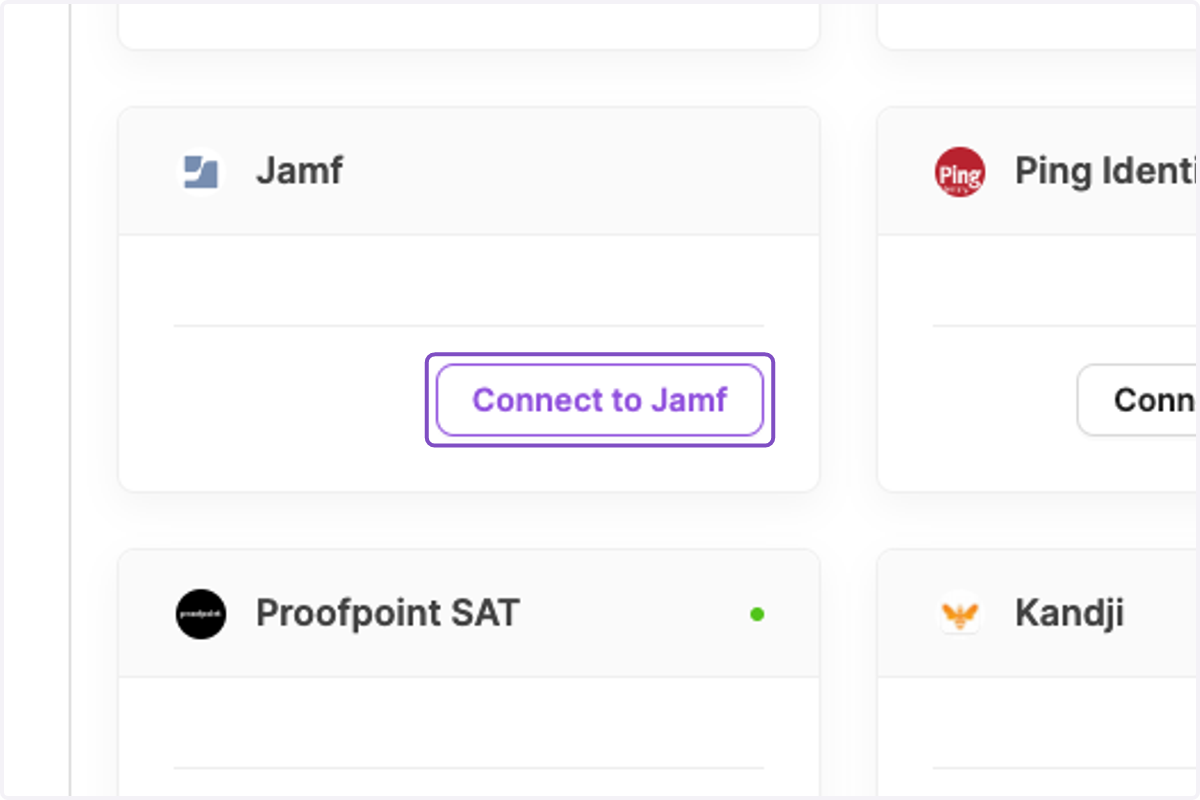
1. Click on Connect to Jamf
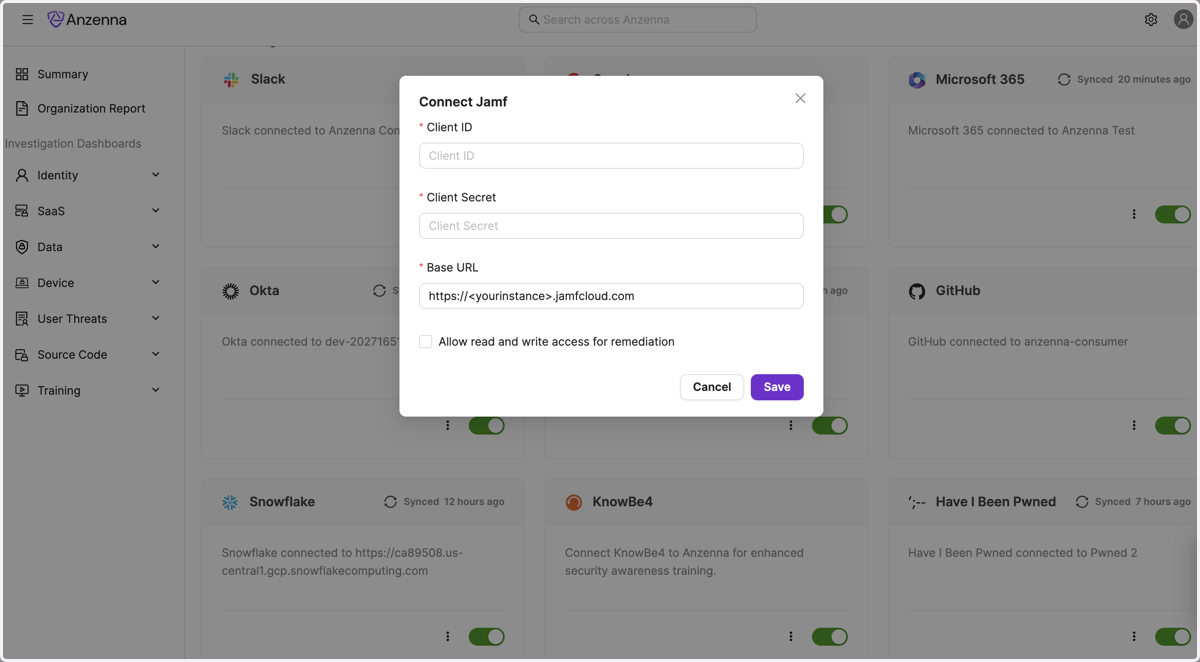
2. Fill your Jamf instance URL.
In this example, we used "https://<yourinstance>.jamfcloud.com"
Jamf
Then go to your Jamf instance.
3. Click on Settings, System, API Roles and Clients
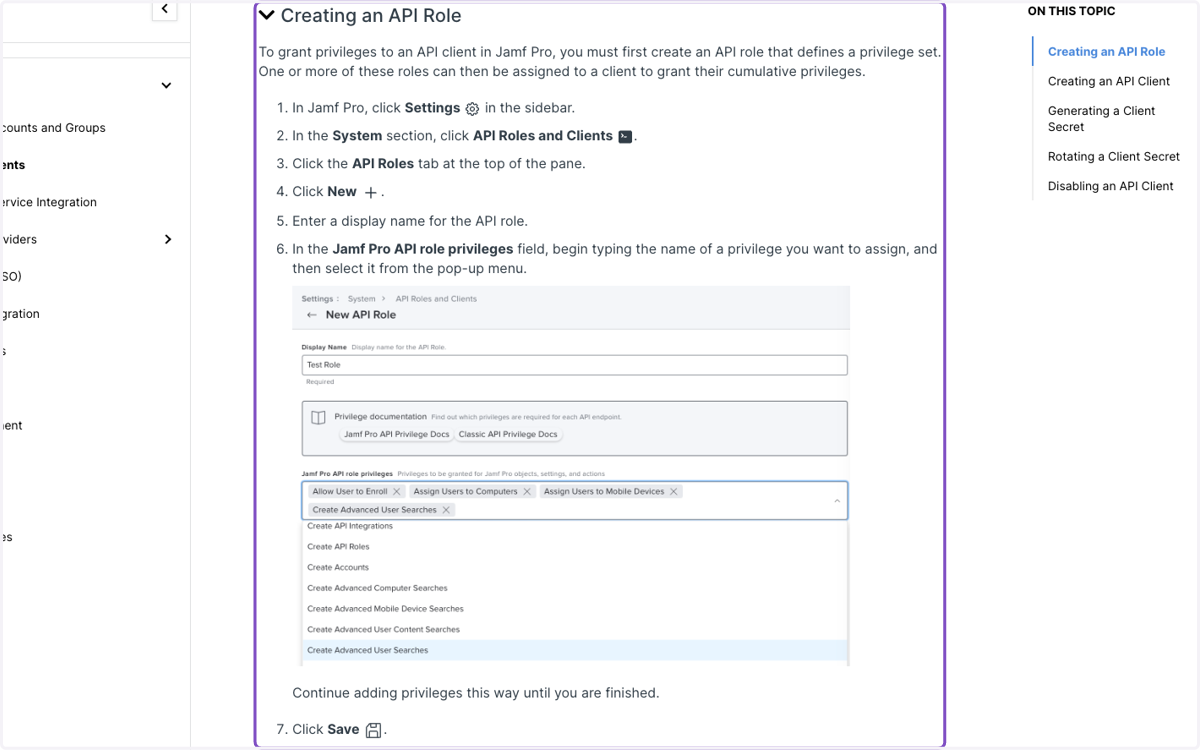
4. Click on API Roles tab, and hit New (+)
Enter a display name for the role
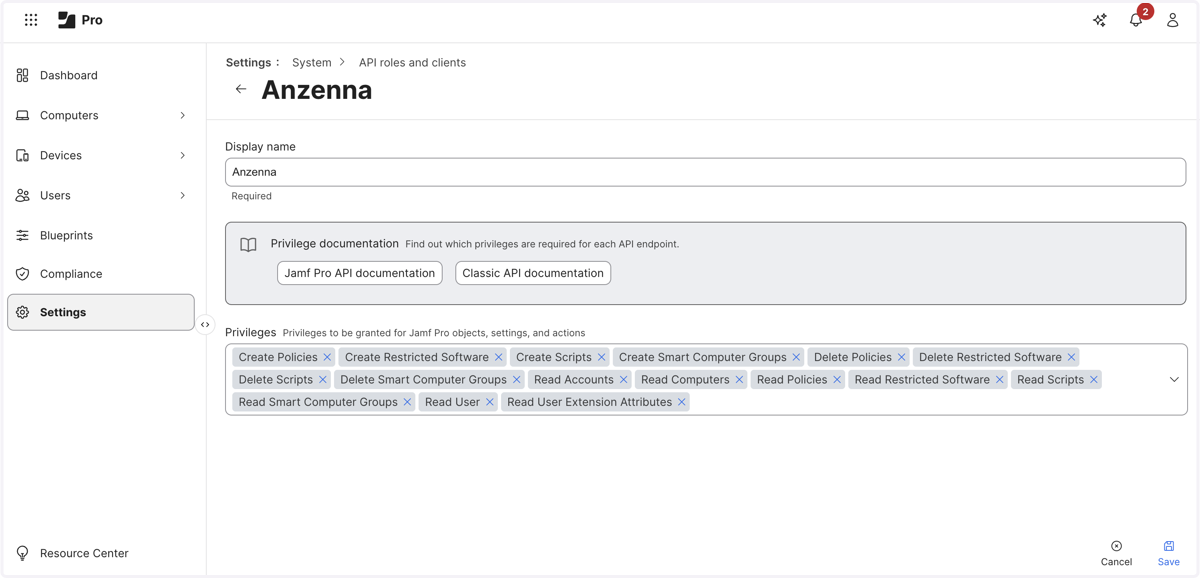
Then add the following privileges:
Read Computers
Read Mobile Devices
Read User
Read User Extension Attributes
Read Accounts
Read Policies
Read Smart Computer Groups
Read Static Computer Groups
[optional] View Disk Encryption Recovery Key (only needed if encryption status check is needed.)
View Recovery Lock (only needed if activation lock check is needed.)
If you'd like to enable remediations, please provide these additional privileges:
Create Policies
Delete Policies
Read Scripts
Create Scripts
Delete Scripts
Create Smart Computer Groups
Delete Smart Computer Groups
Create Restricted Software
Read Restricted Software
Delete Restricted Software
Save
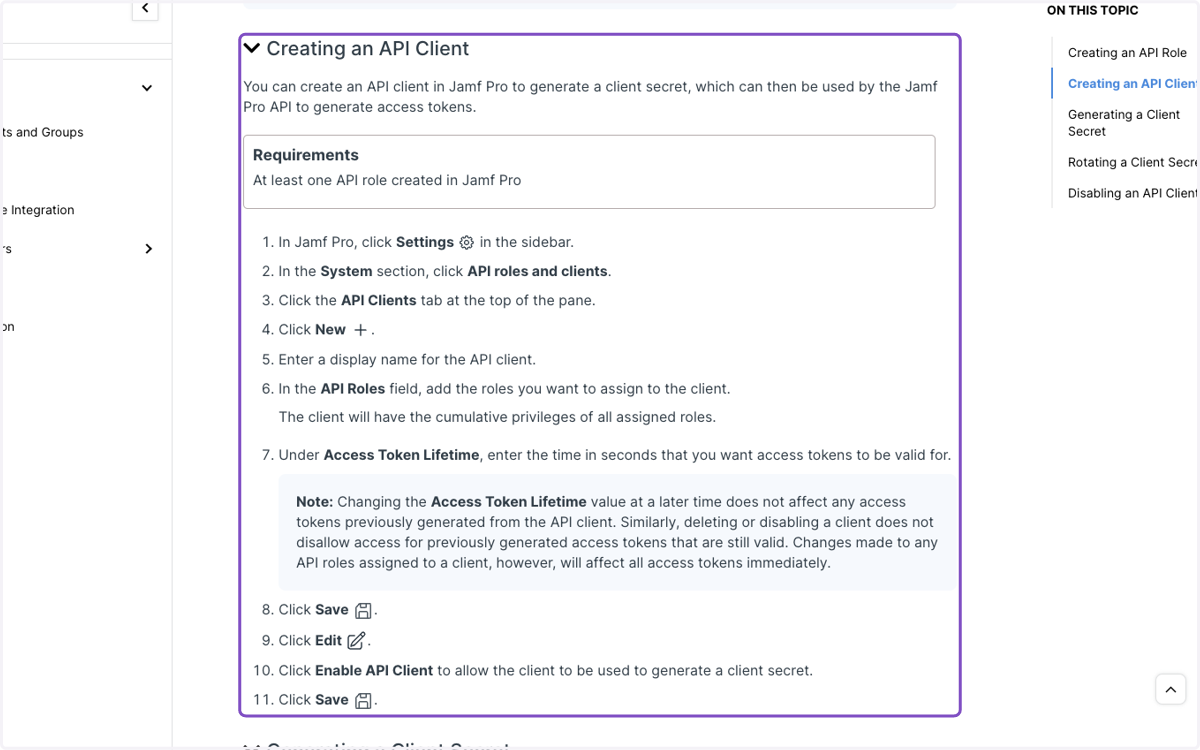
5. Click on API Client tab, and hit New (+)
Enter a display name for the API Client
In API roles field, choose the API role you just created
Hit Save
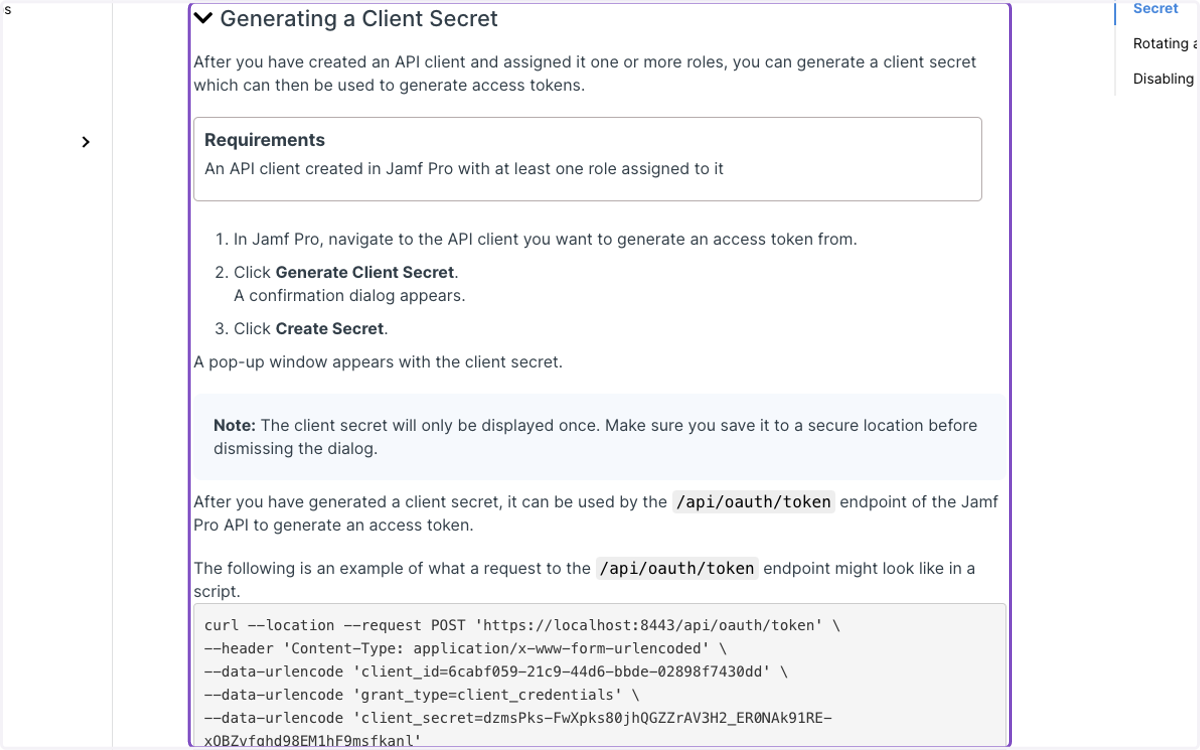
Copy the client ID
6. Click on Generating a Client Secret
Copy this value
Anzenna
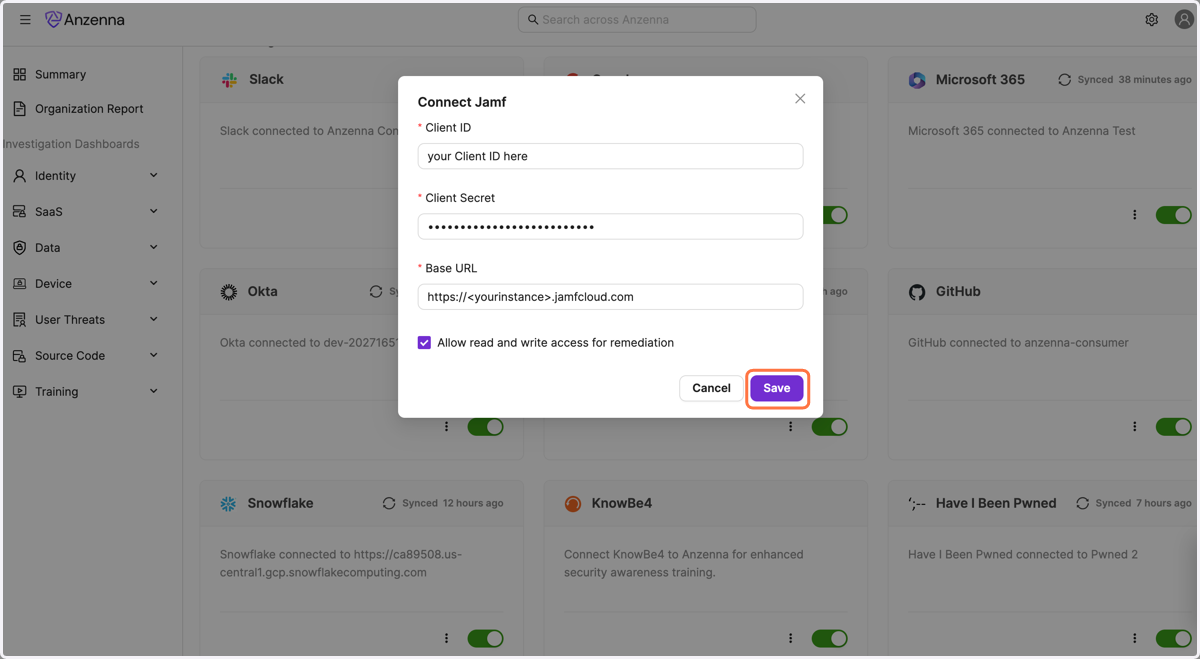
7. Now go back to Anzenna and put client ID here
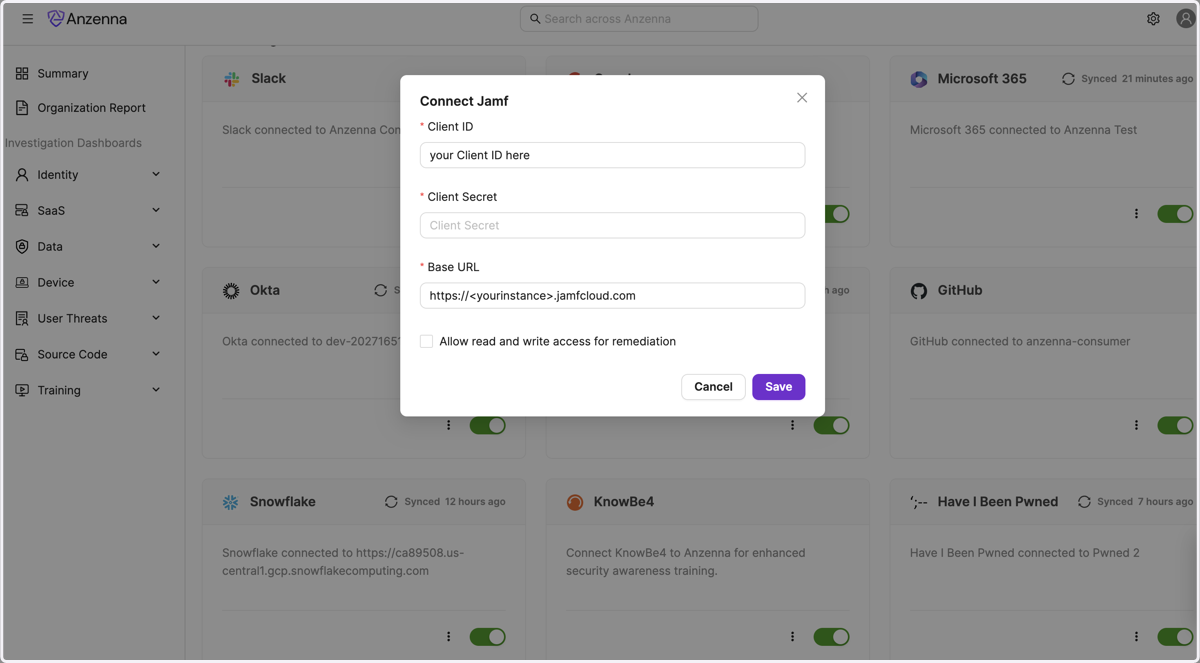
8. And Client secret here
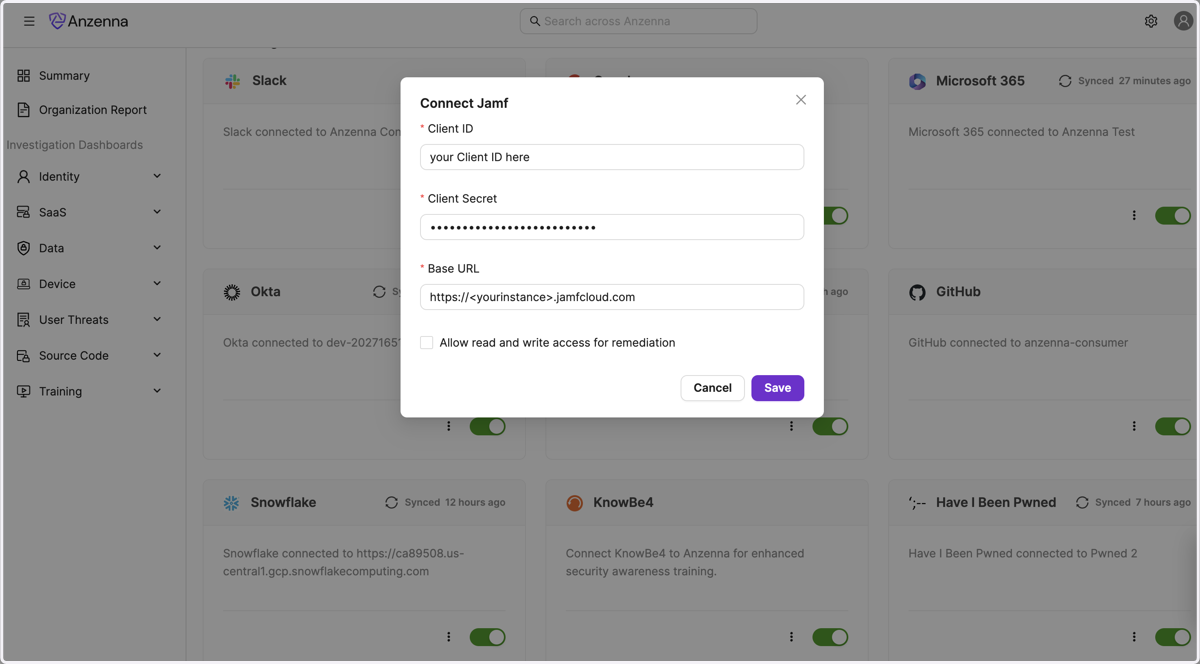
9. [Optional] Enable remediation

10. Click on Save
11. You are all set!