Intelligent Agent – No Course Access

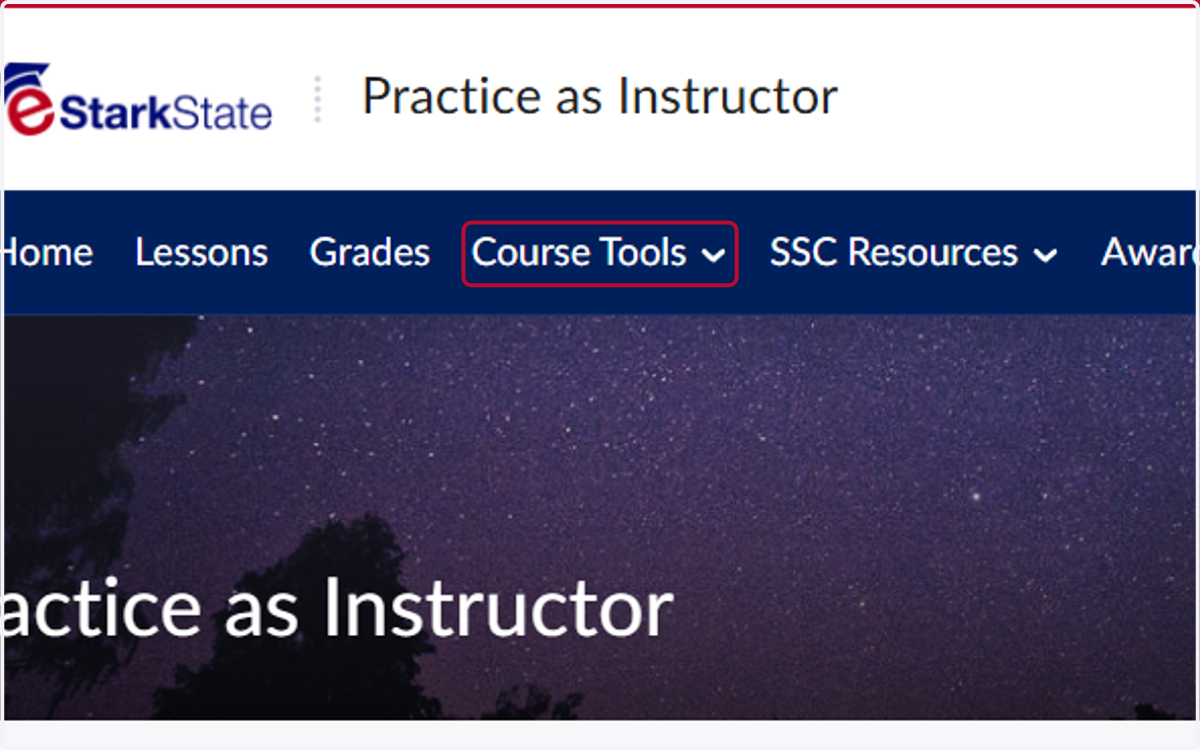
  1. 1. Click on Course Tools

    Click on Course Tools
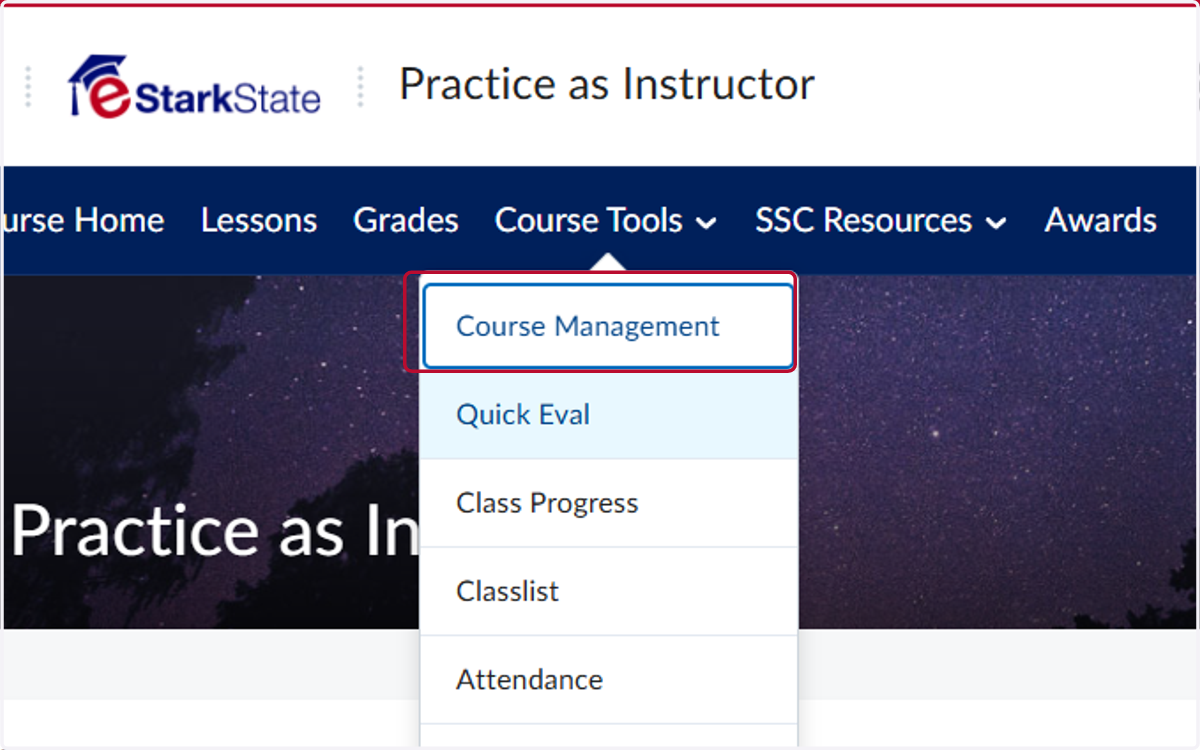
  2. 2. Click on Course Management

    Click on Course Management
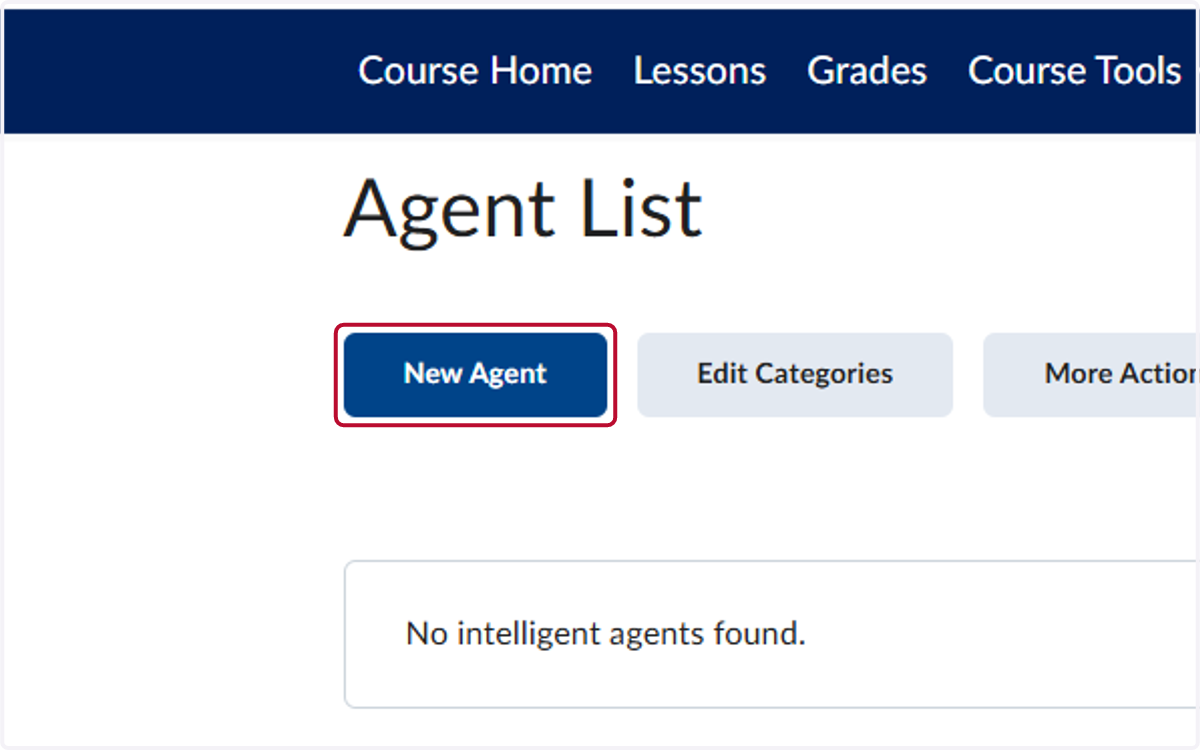
  3. 3. Click on New Agent

    Click on New Agent
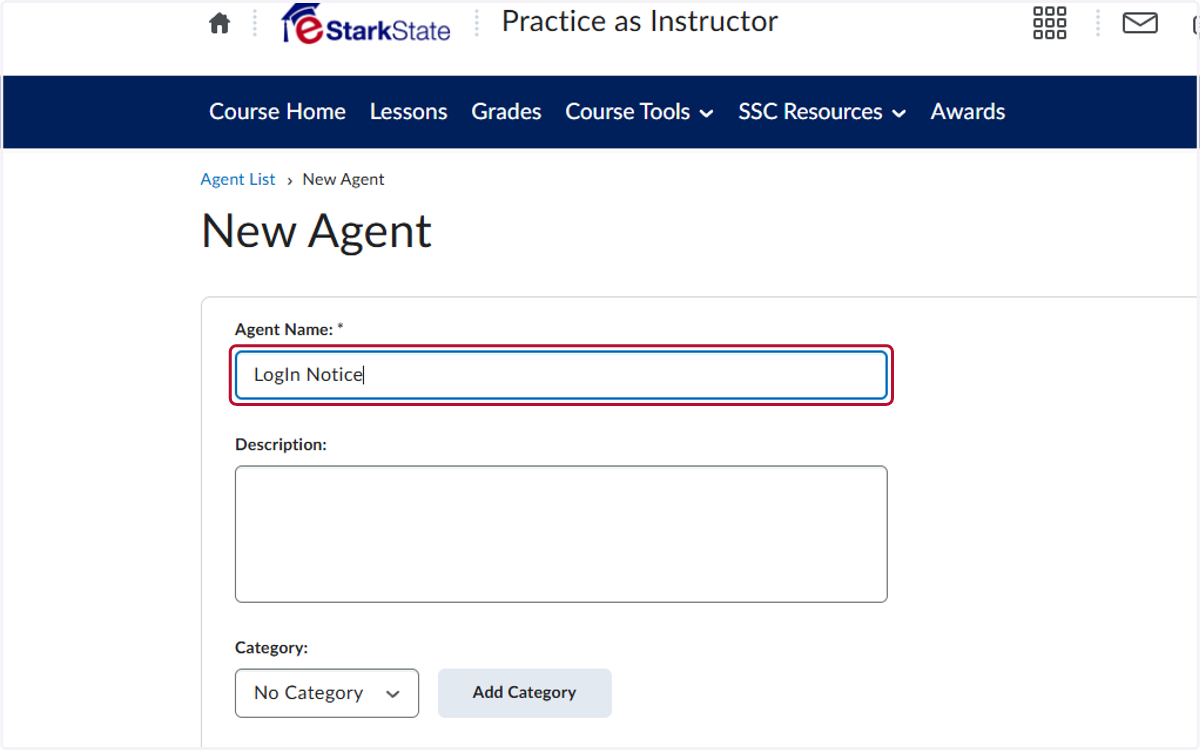
  4. 4. Type the name of the

    Type the name of the
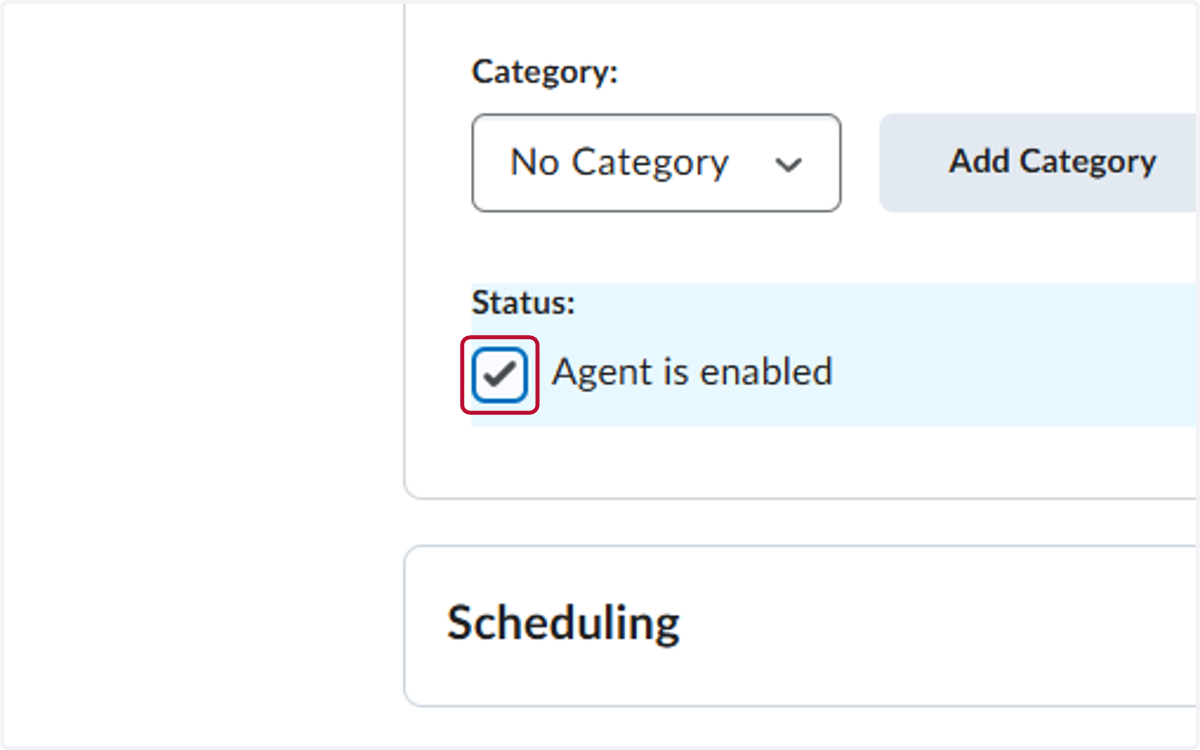
  5. 5. Check Status

    Check Status
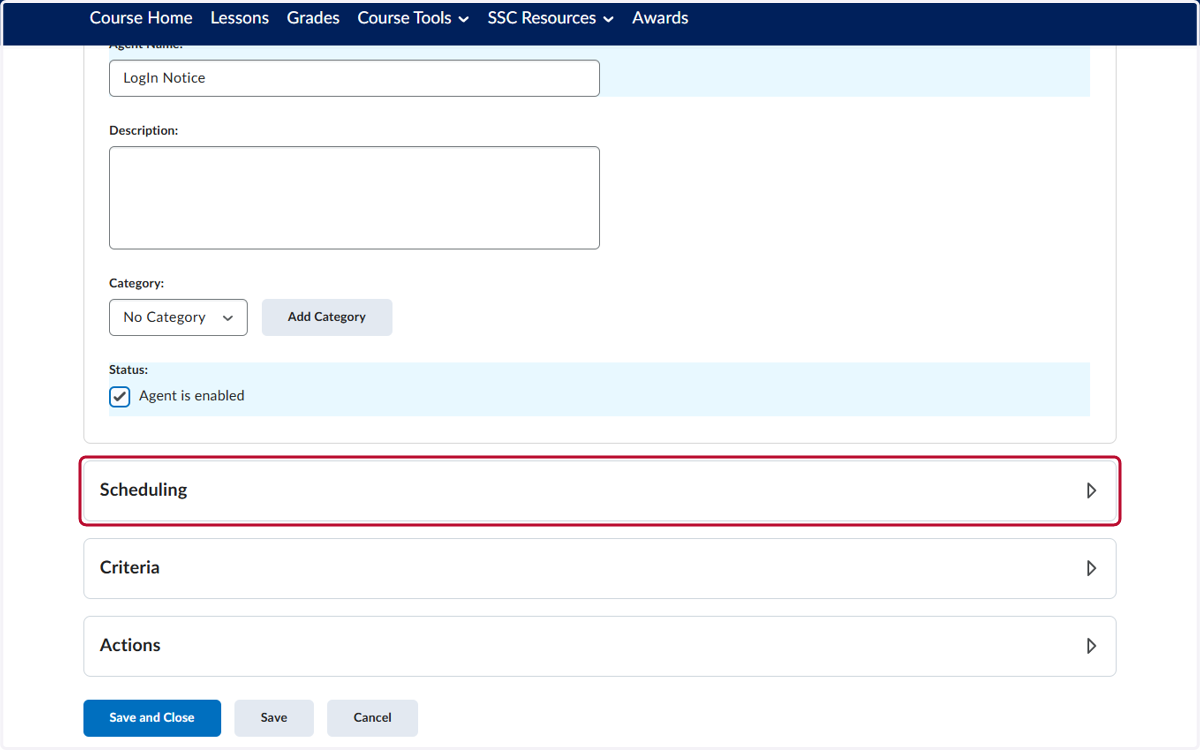
  6. 6. Click on Scheduling

    Click on Scheduling
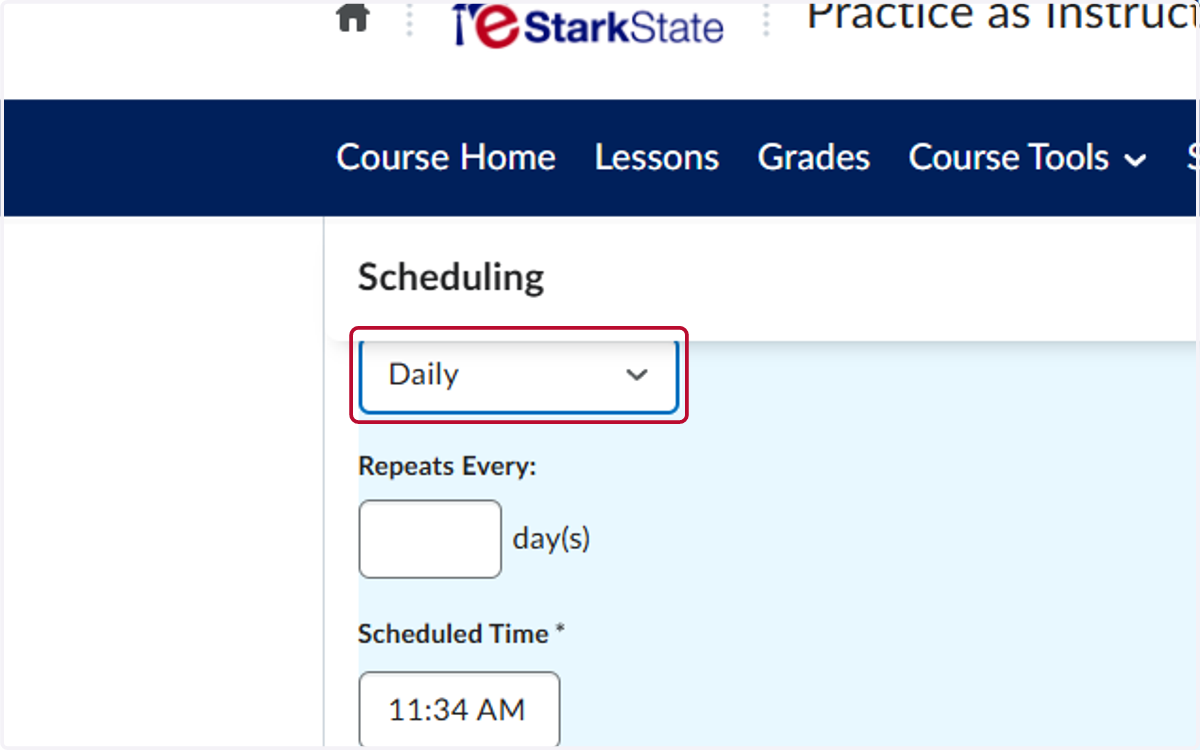
  7. 7. Select Daily from Frequency

    Select Daily from Frequency
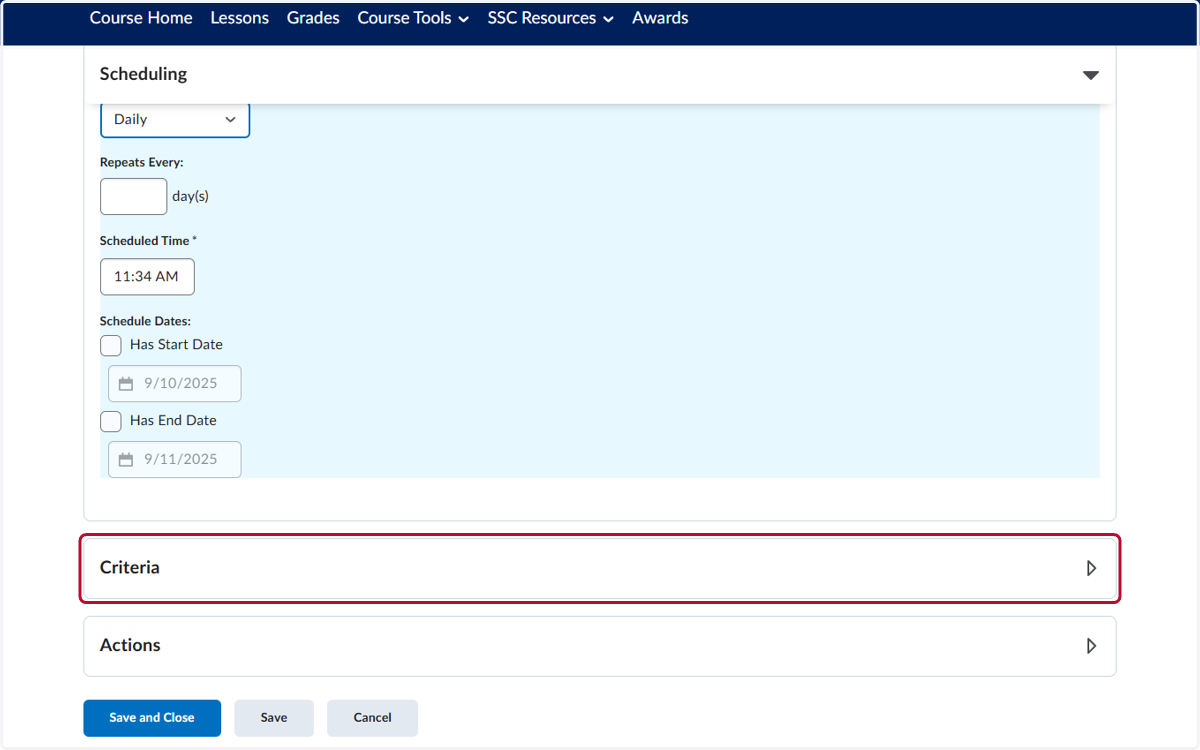
  8. 8. Click on New Agent…

    Click on New Agent…
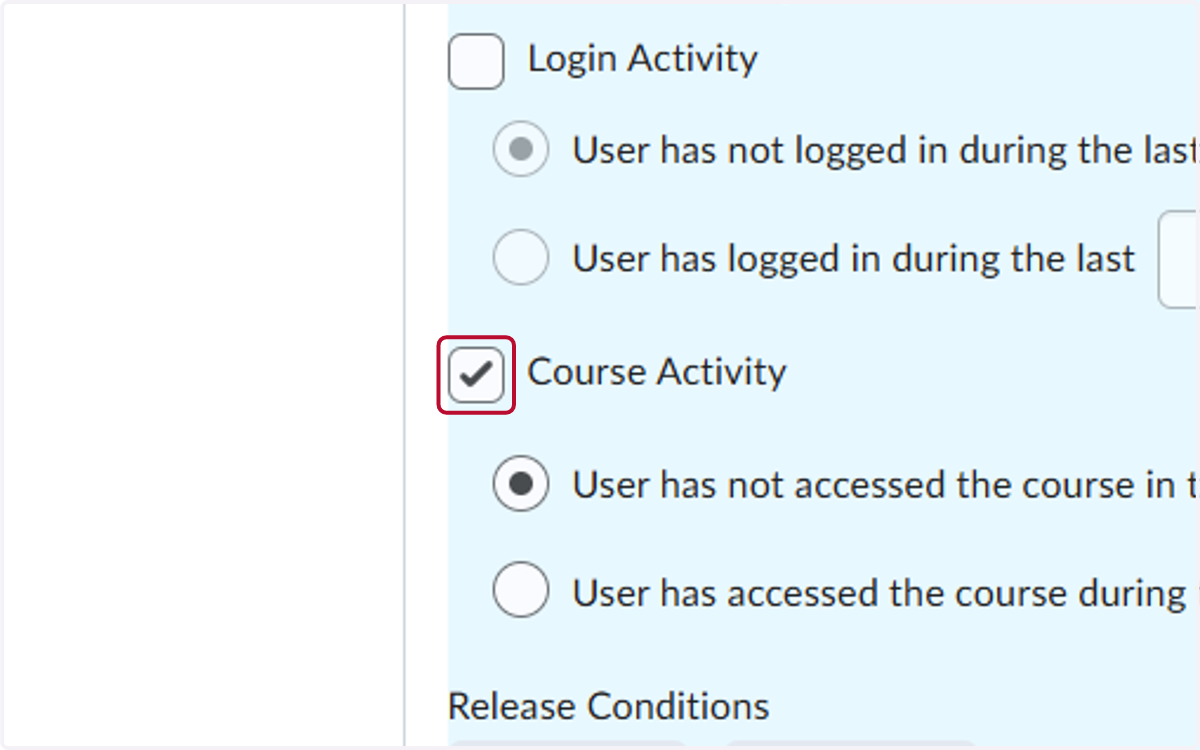
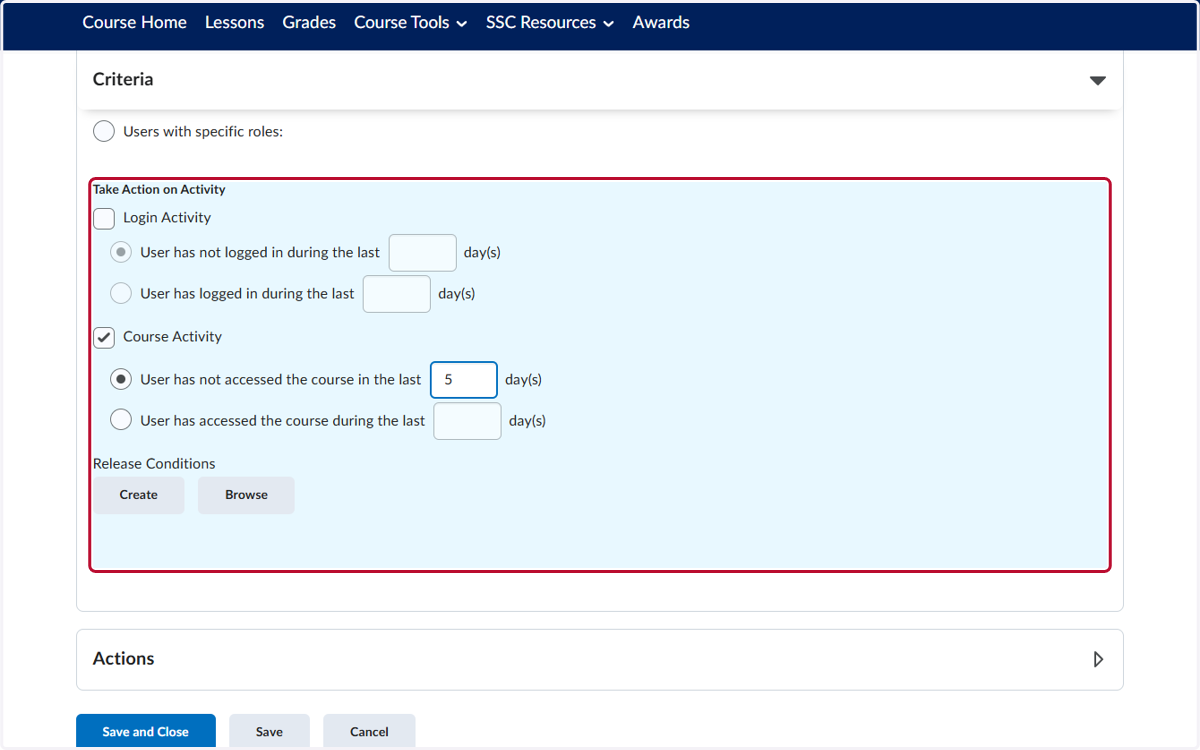
  9. 9. Check Course Activity

    Check Course Activity
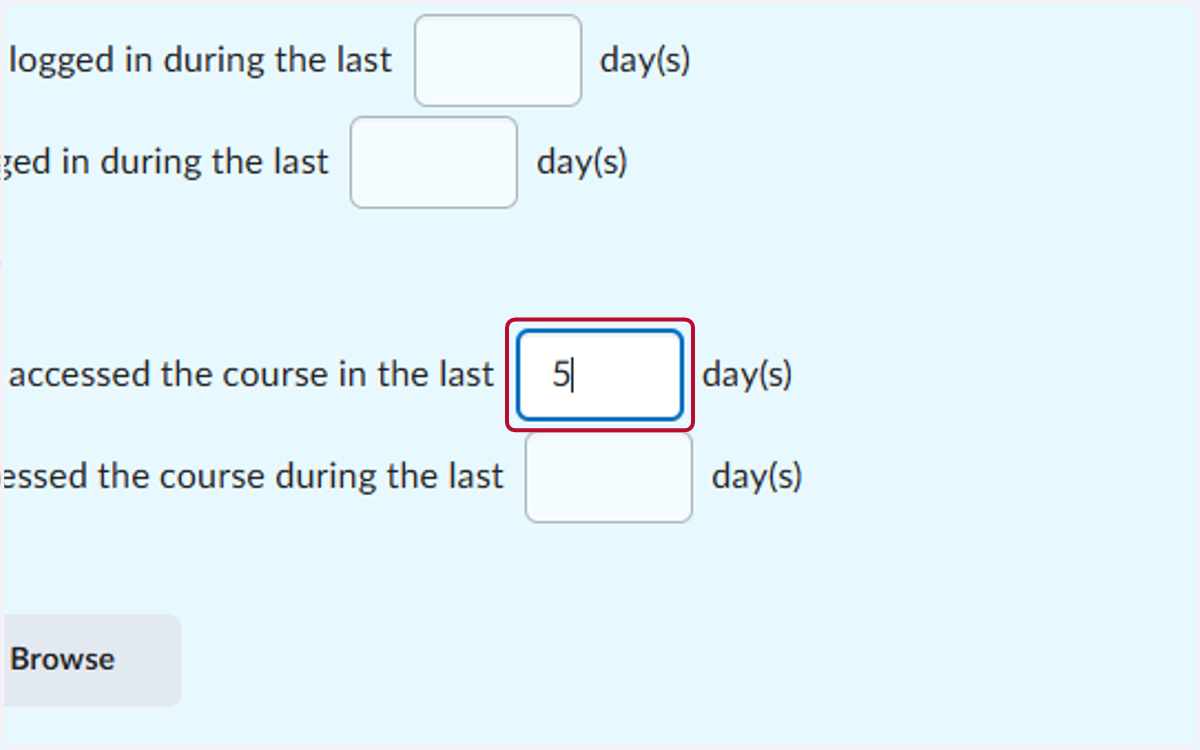
  10. 10. Type the number of days

    Type the number of days
  11. 11. Click on New Agent…

    Click on New Agent…
  12. 12. Check Send an email when the criteria are satisfied
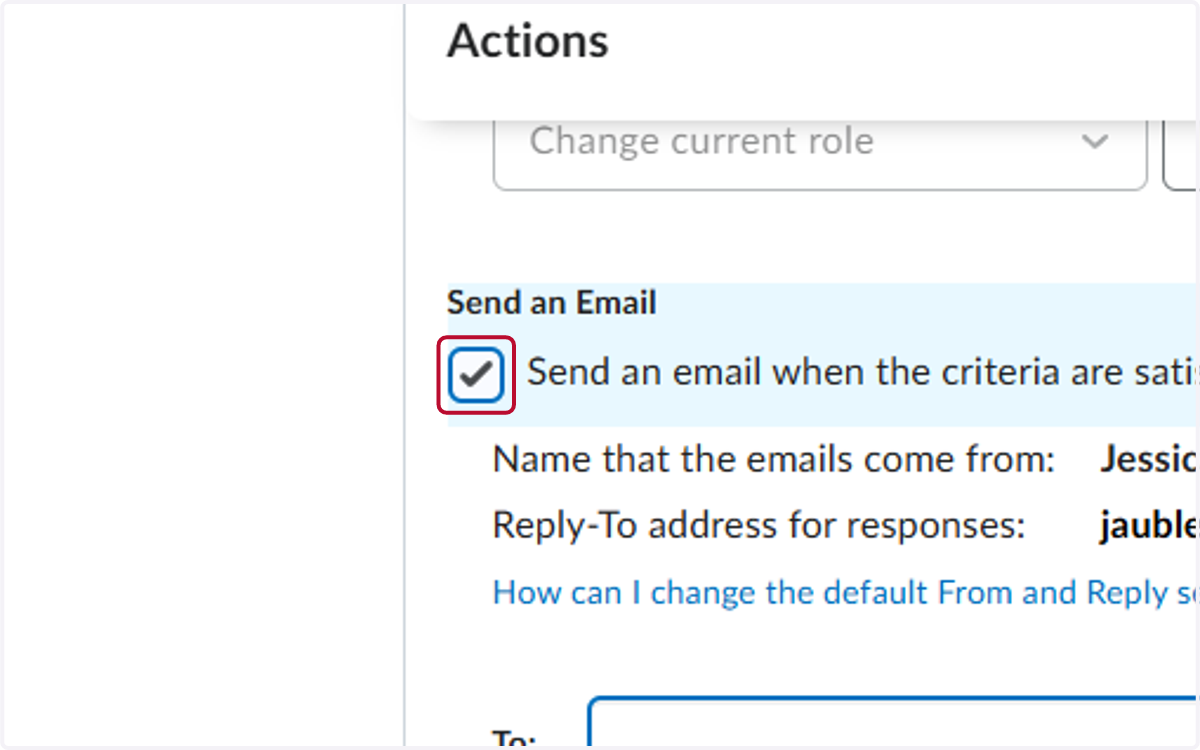
    Check Send an email when the criteria are satisfied
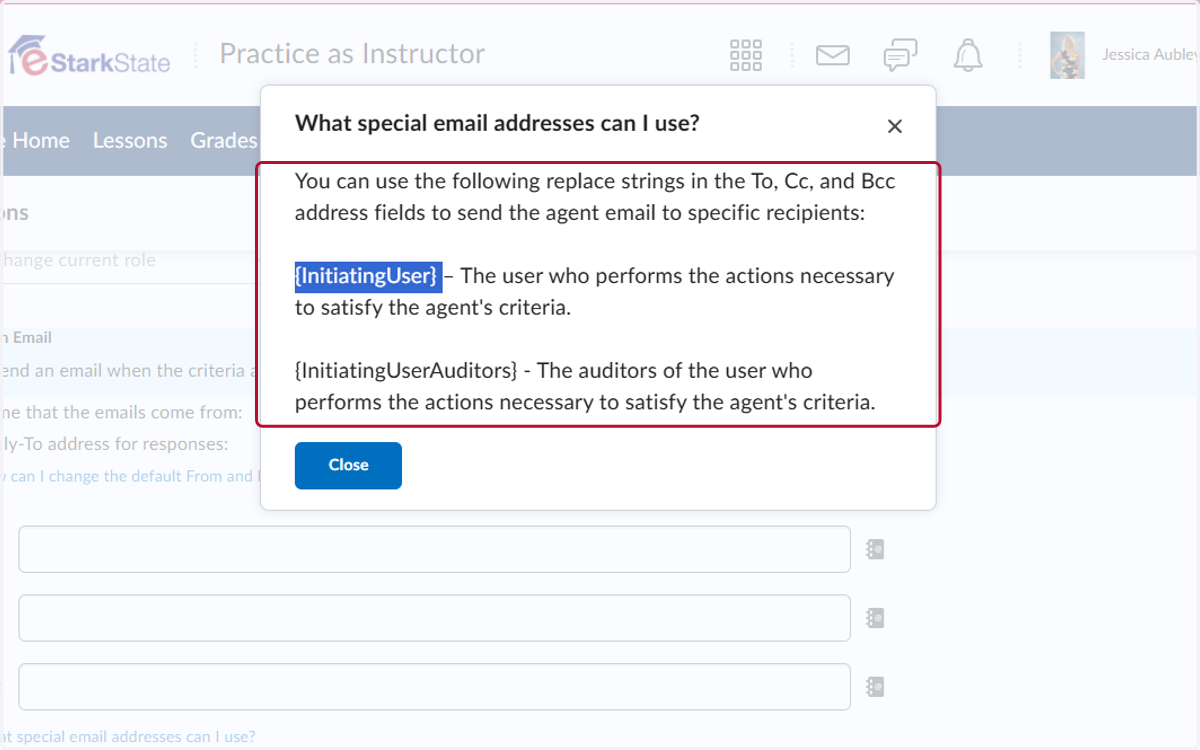
  13. 13. Click on What special email addresses can I use?
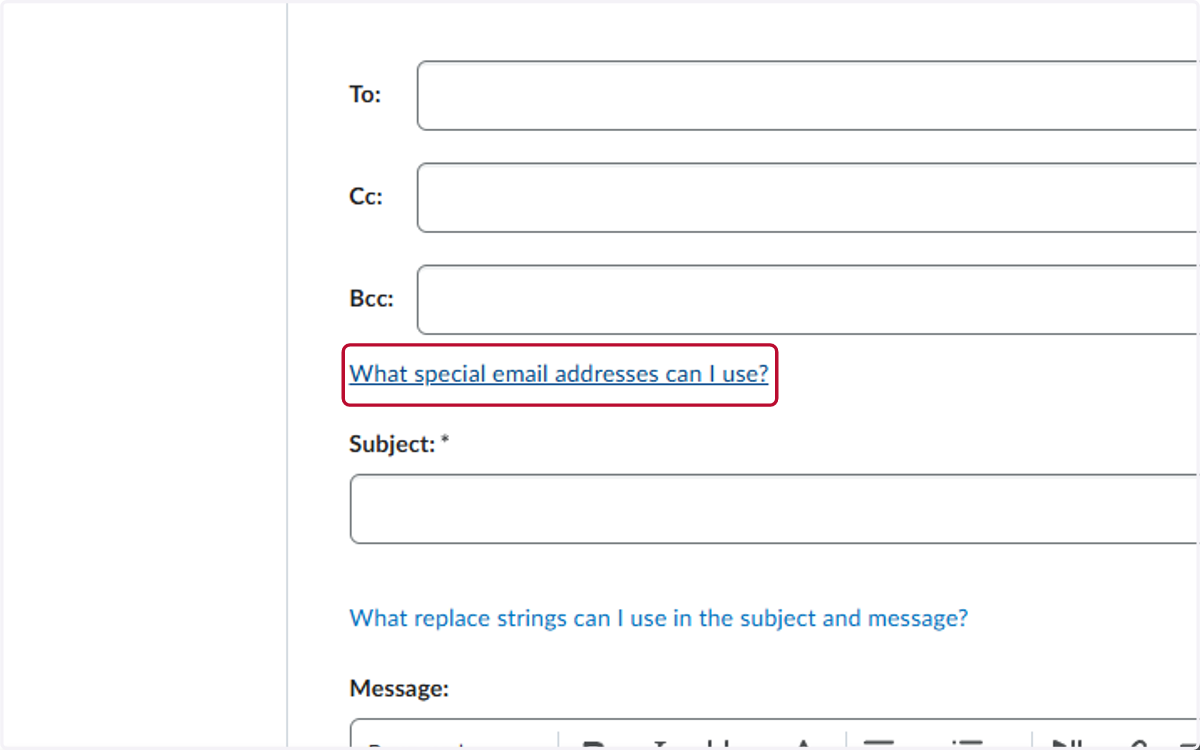
    Click on What special email addresses can I use?
  14. 14. Copy the {InitiatingUser} title

    Copy the {InitiatingUser} title
  15. 15. Paste "{InitiatingUser} " into input
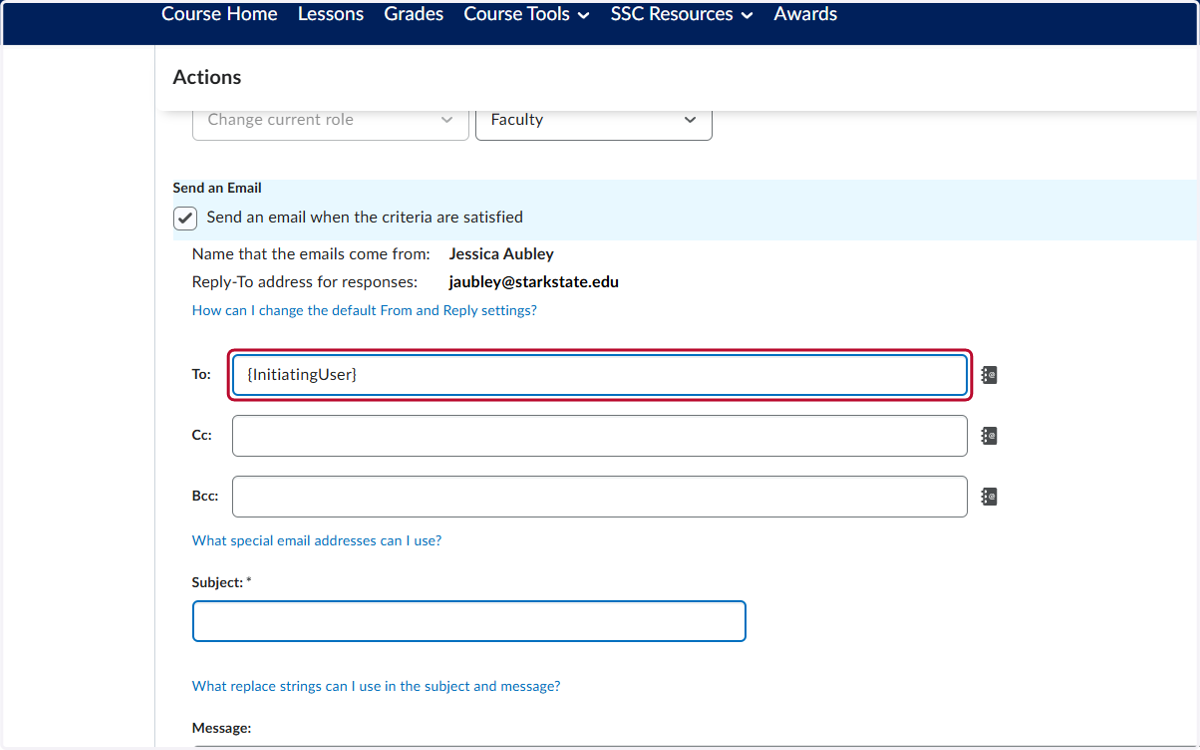
    Paste "{InitiatingUser} " into input
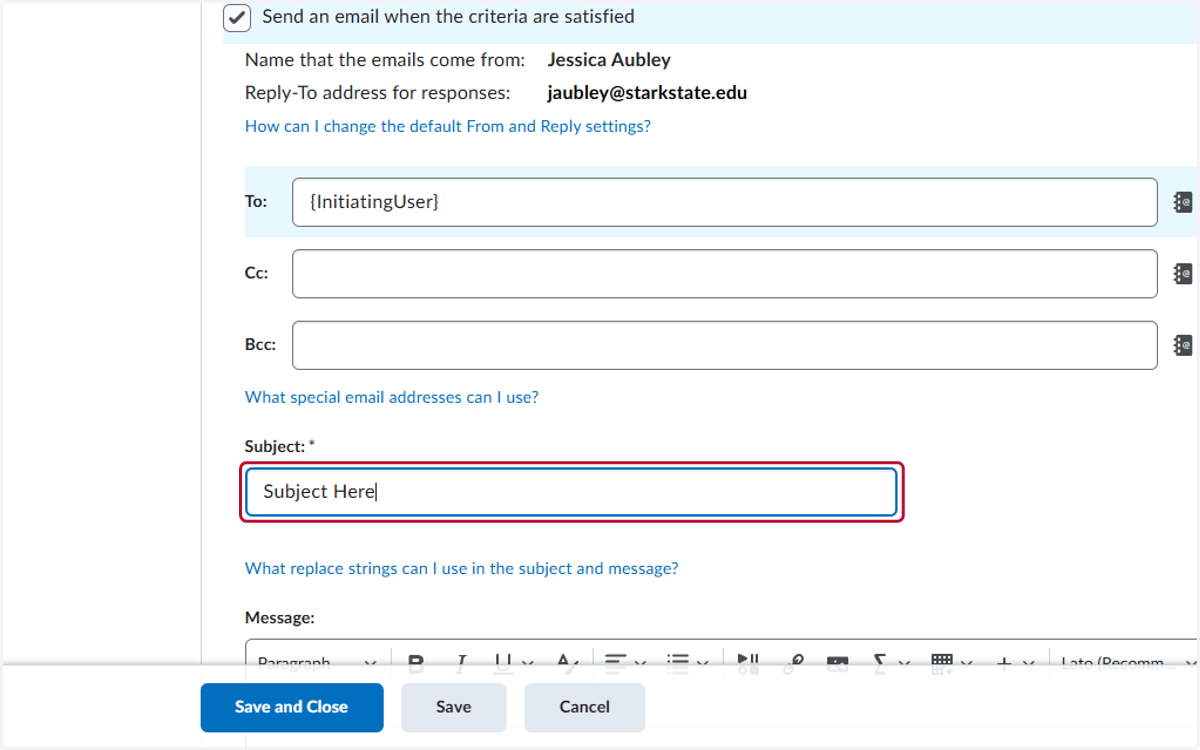
  16. 16. Type the Subject

    Type the Subject
  17. 17. Click on Message and type your message
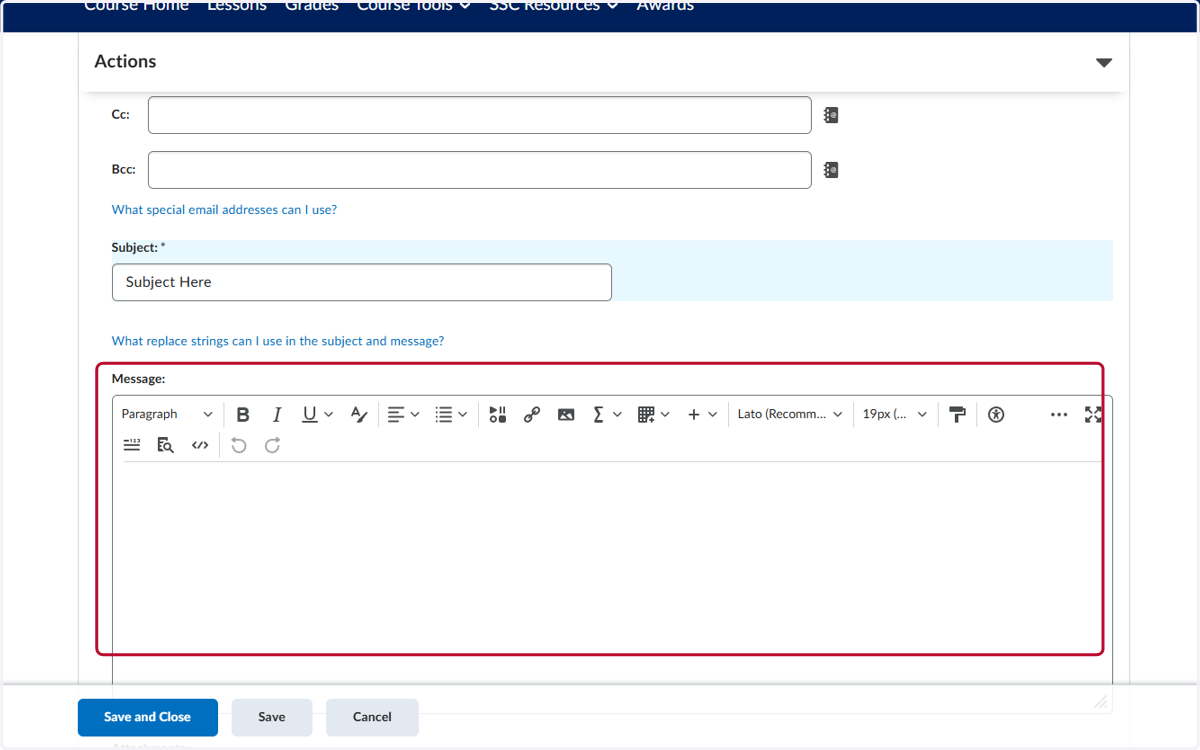
    Click on Message and type your message
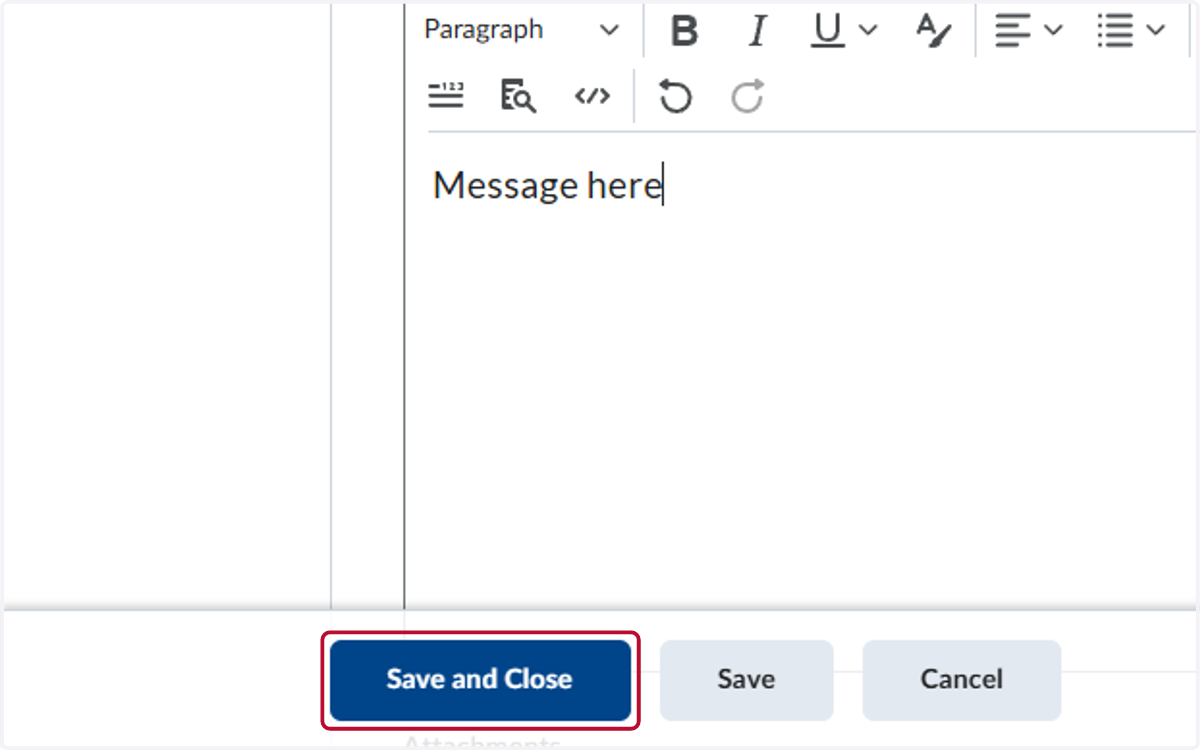
  18. 18. Click on Save and Close

    Click on Save and Close