How to Create a Route in MileMaker
Milemaker
1. Go to app.milemaker.com
Login with your username and password to get started
2. After logging in, you will be taken to the 'ROUTING' tab within MileMaker.
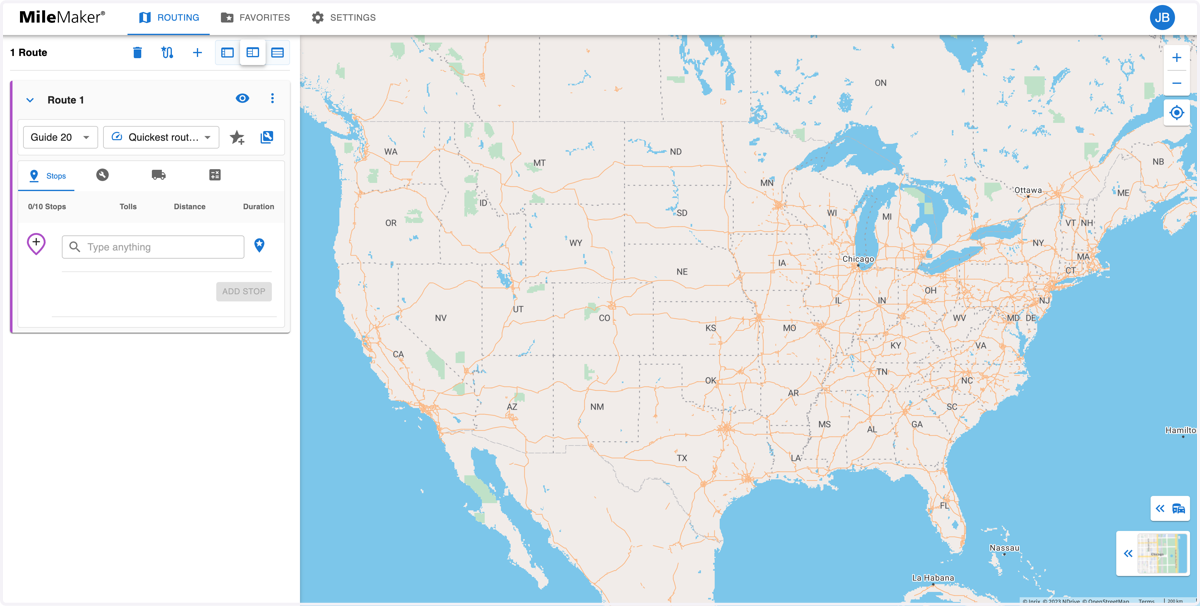
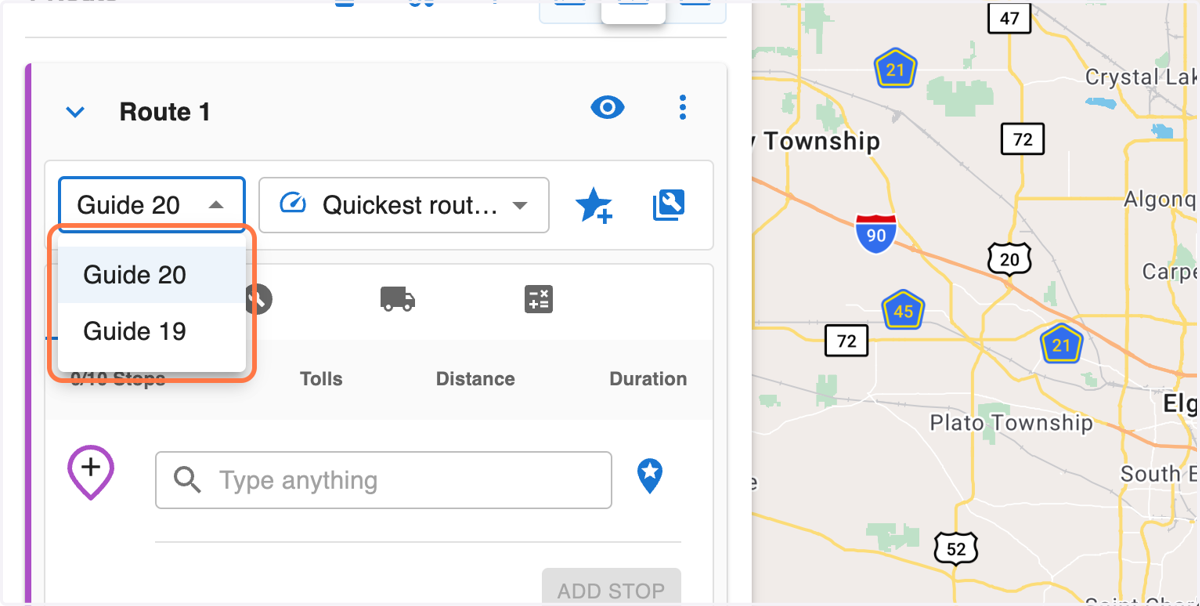
3. On the left side panel, click the Guide Dropdown to select between Guide 19 and Guide 20.
Guide 19 was originally released in 2008, and is still used for rating purposes by some customers. Guide 20 is the latest routing guide, released in 2023, and is based upon the most updated road network. We recommend using Guide 20 for the most accurate mileage.
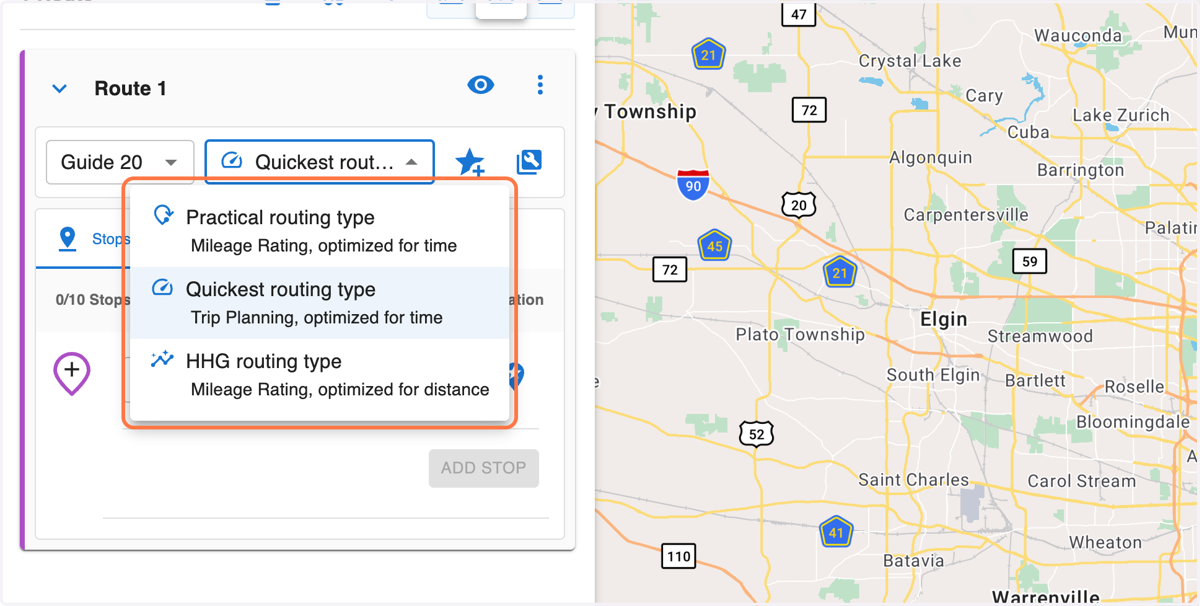
4. Click on the Routing Type dropdown to select between Practical, Quickest, and Household Goods (HHG) routing types.
Practical routing type - calculates the most time-efficient route between locations. Practical routes are not calculated with HHG Tariff Mileages. Practical routes are also best suited for freight rating and auditing.
Quickest routing type - calculates the fastest route between locations using live data such as real-time traffic conditions. Quickest routes are best suited for truck routing and dispatching.
HHG routing type - calculates the shortest distance between locations over truck-usable roads. All MileMaker HHG Mileage routes give you HHG Tariff Mileages, which are used as a standard for freight rating and auditing.
5. Click the 'Configuration' tab to specify parameters you'd like to avoid, and the time to depart.
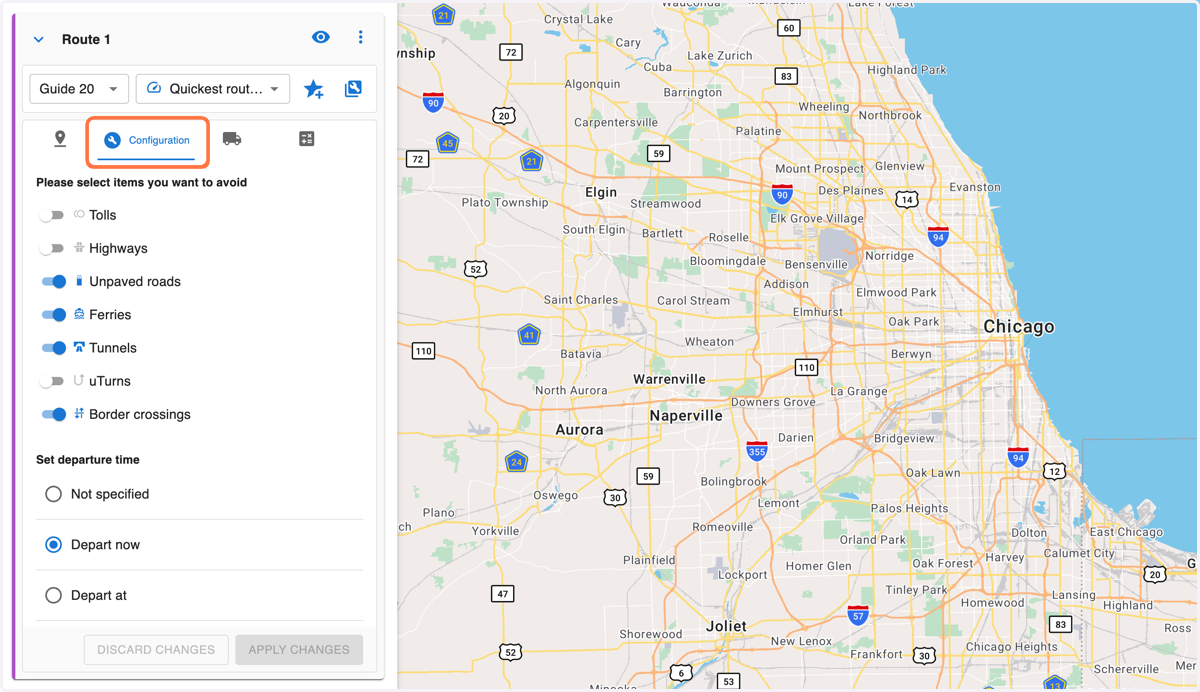
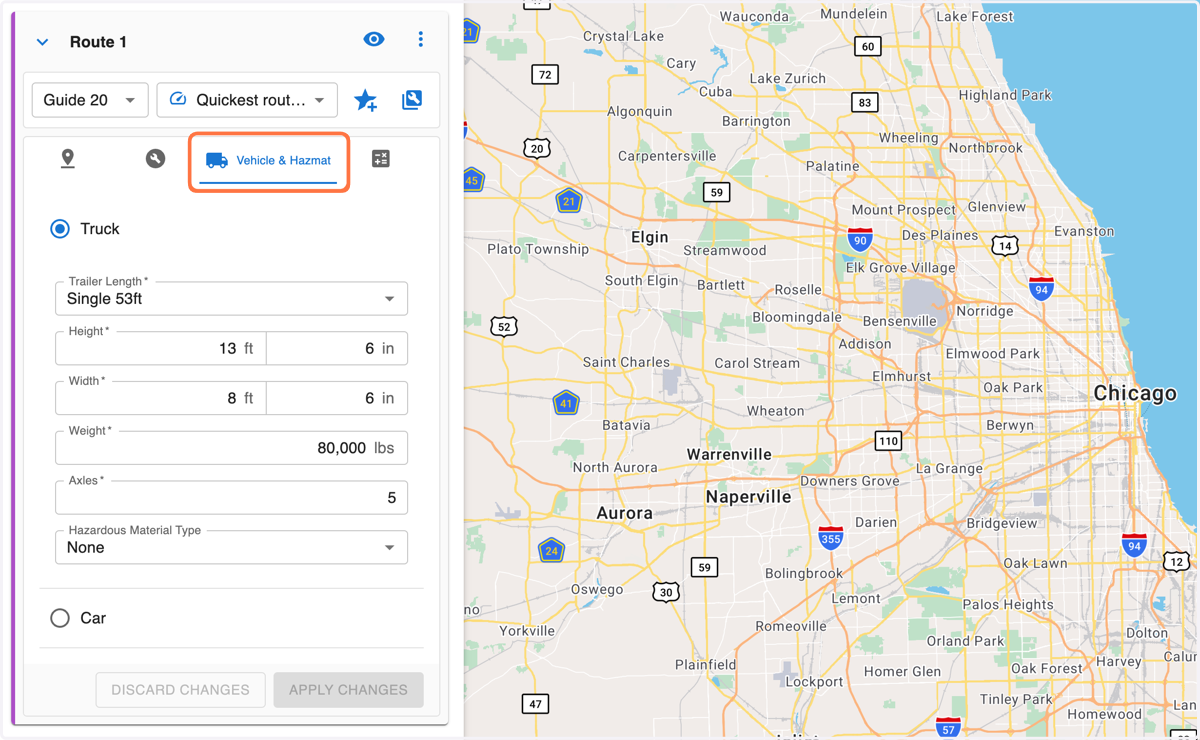
6. Click on the 'Vehicle & Hazmat' tab to specify Trailer Dimensions, Weight, Axles, and Hazmat categories.
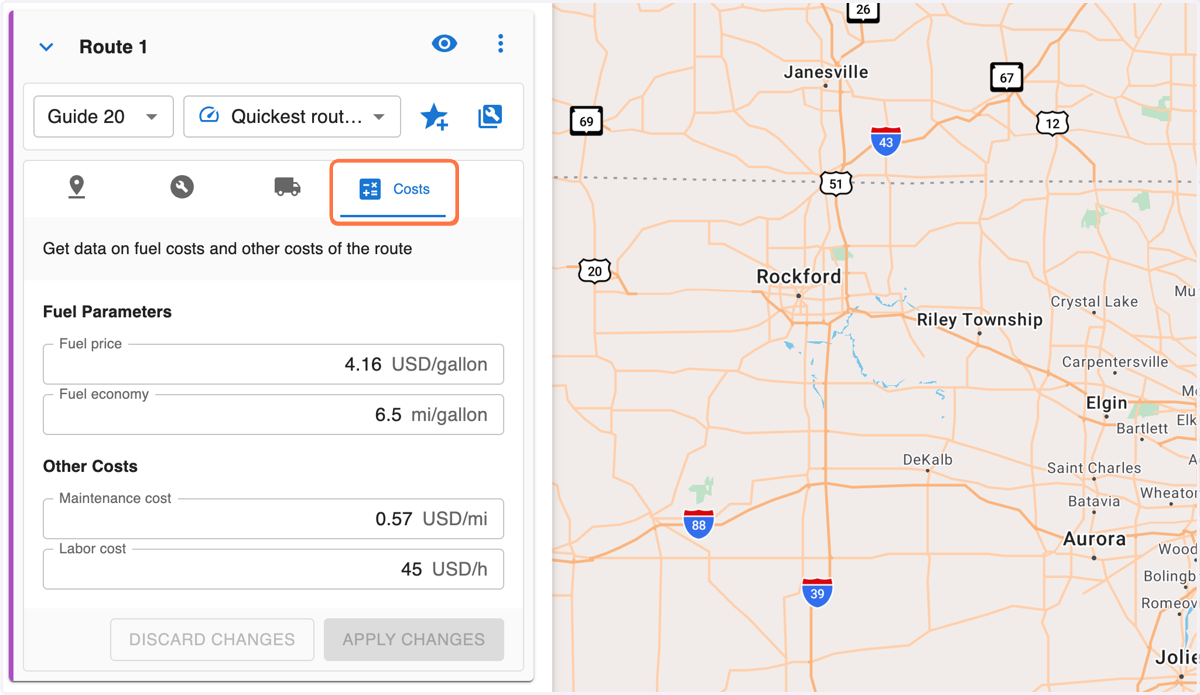
7. Click on the 'Costs' tab to specify Fuel price, Fuel economy, Maintenance cost, and Labor costs.
MileMaker will use these values to calculate estimated costs for the route
8. Click on the 'Stops' tab to enter your origin, destination, and up to 8 waypoints in between.
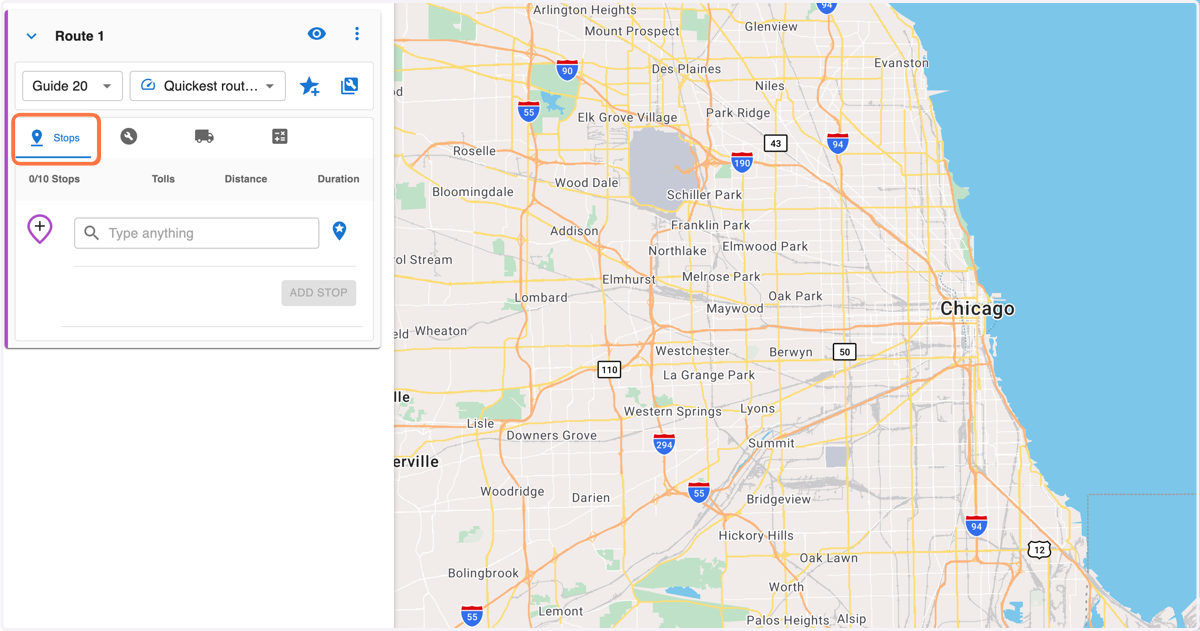
9. Use the search bar to enter the first stop.
Accepted values include zip codes, cities, addresses, points of interest, geo-coordinates, and SPLC codes.
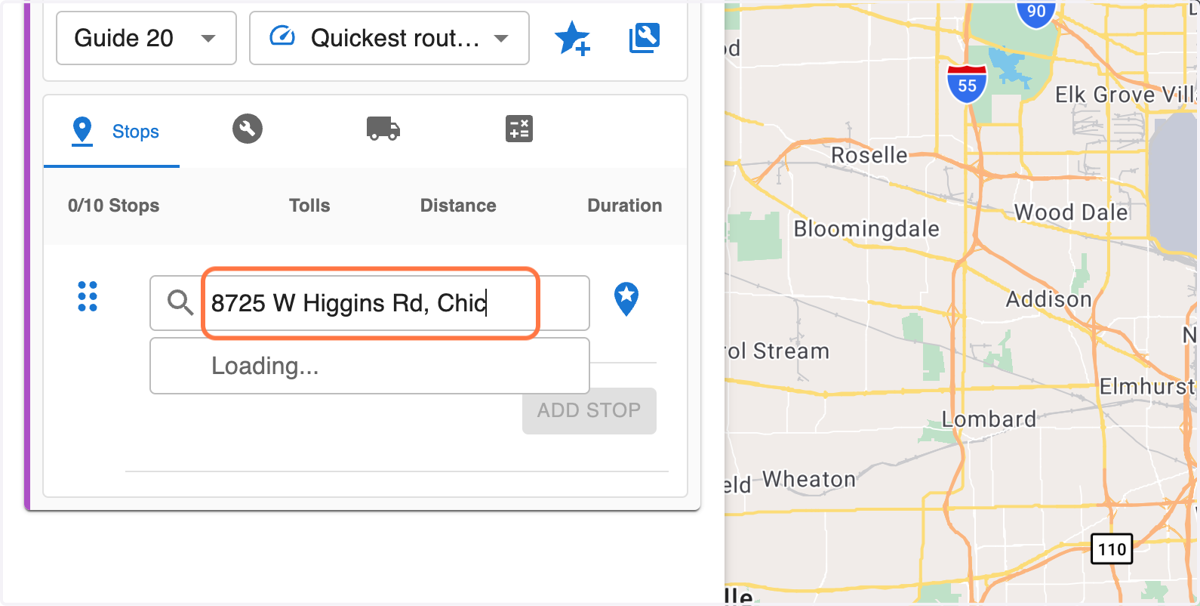
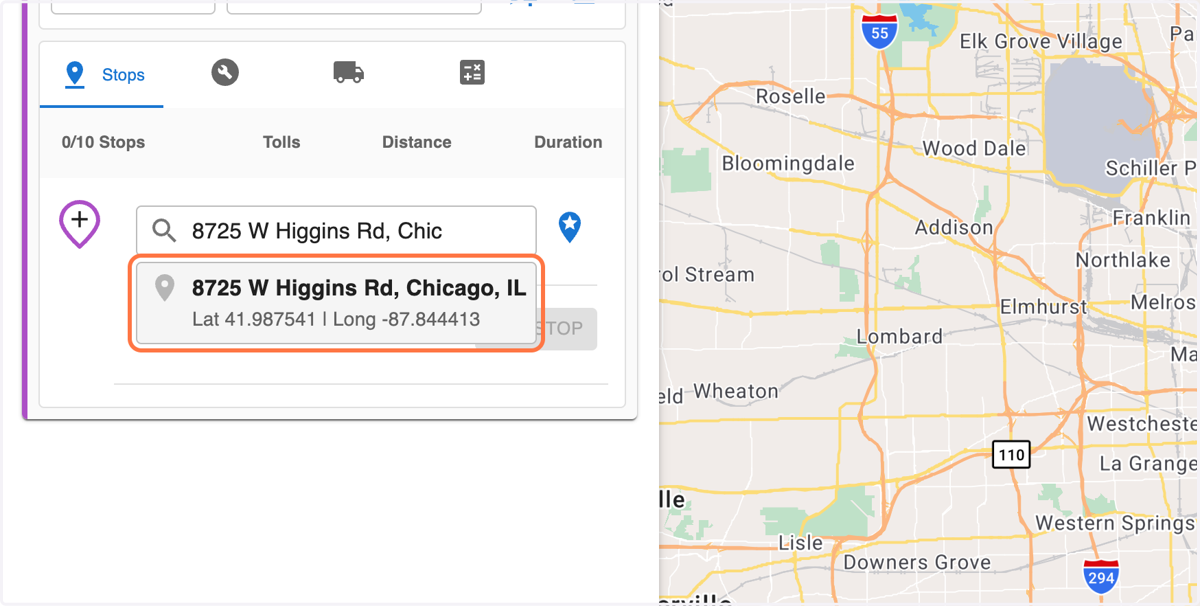
10. Select the best match from the search results.
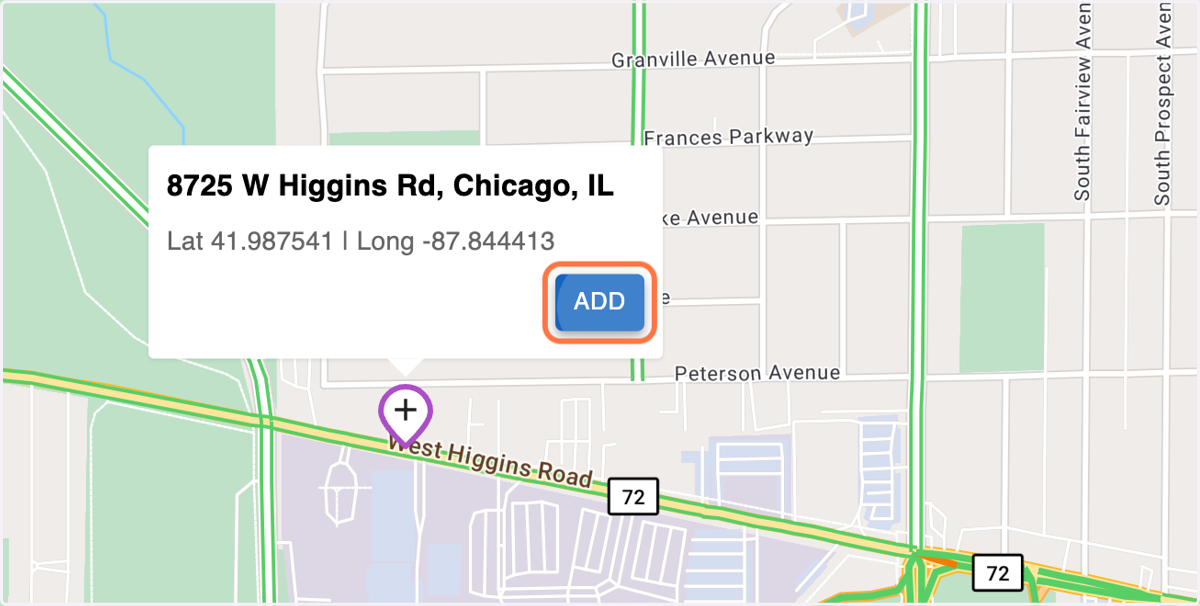
11. Confirm that the location is correct on the map, and then click 'ADD' to add the stop to your route.
12. Repeat the previous 3 steps to add additional stops
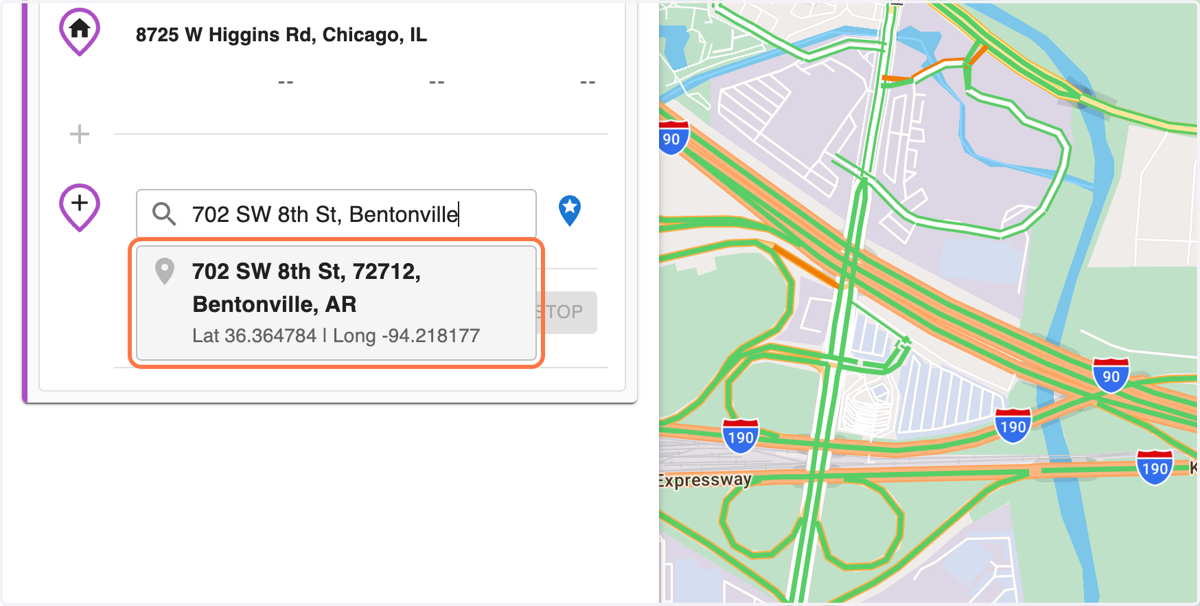
13. Once you have added 2 or more stops, a route will automatically be calculated based on your selected route settings.
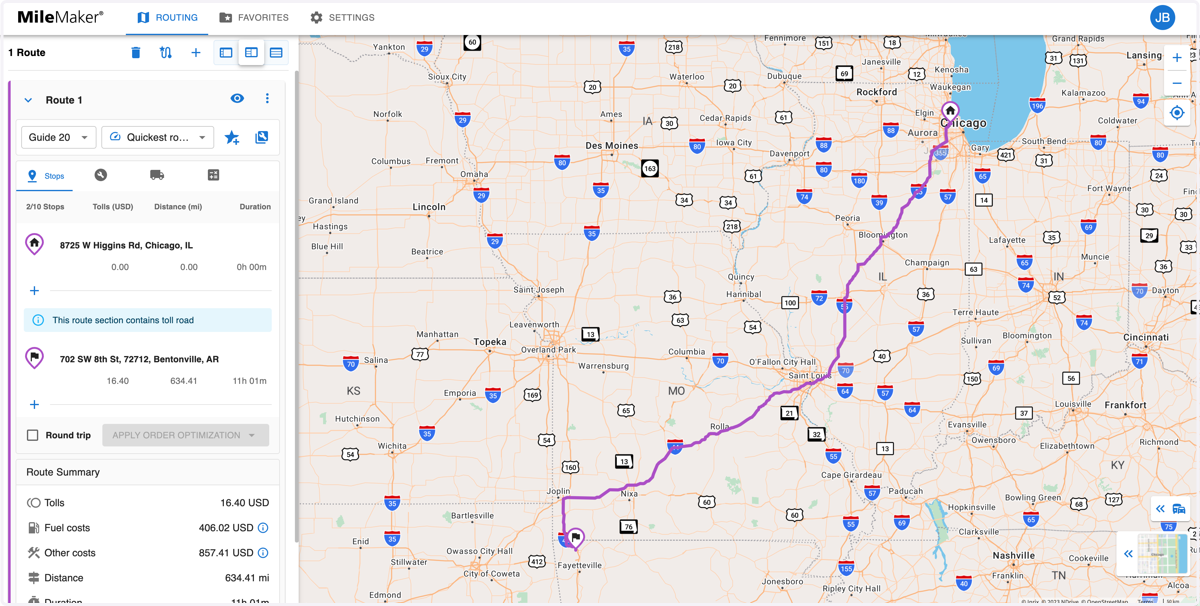
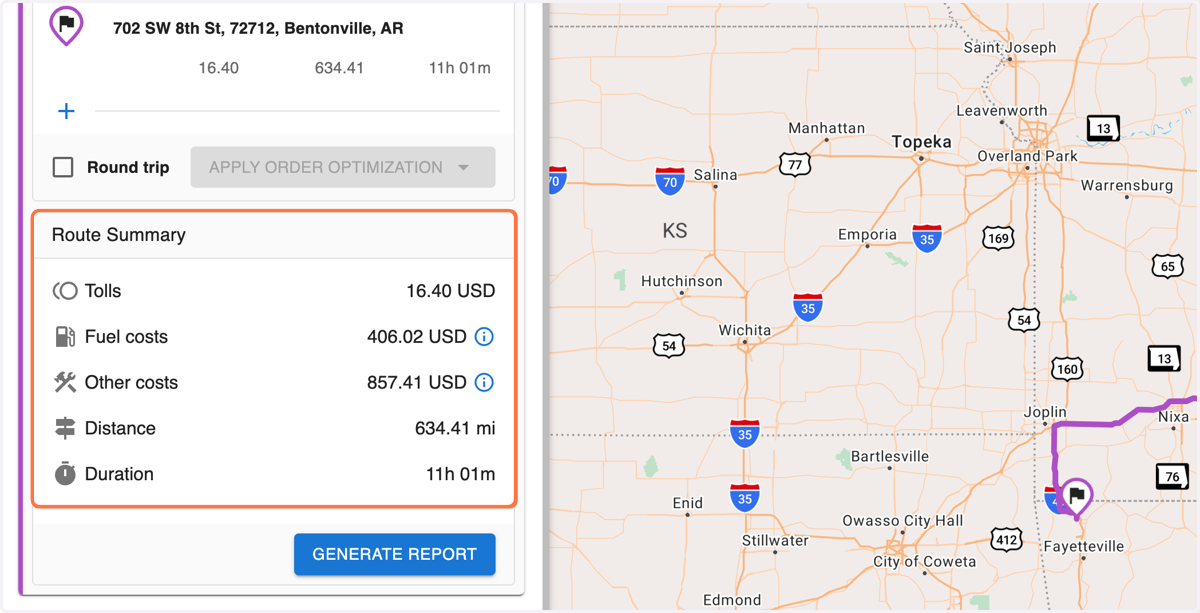
14. On the bottom left of the route panel, you will see a summary of key information for this route.
The summary includes Toll costs, Fuel costs, Other costs (maintenance & labor), Distance, and Duration.
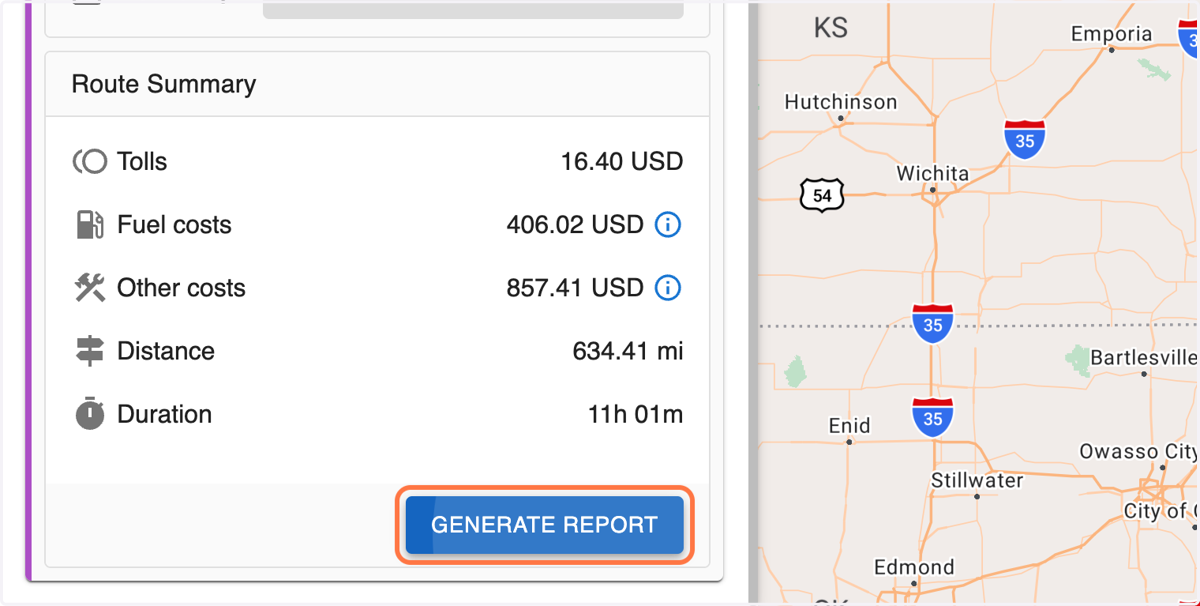
15. Click on GENERATE REPORT
16. The Route Report will open in a new tab, providing more detail for this route.
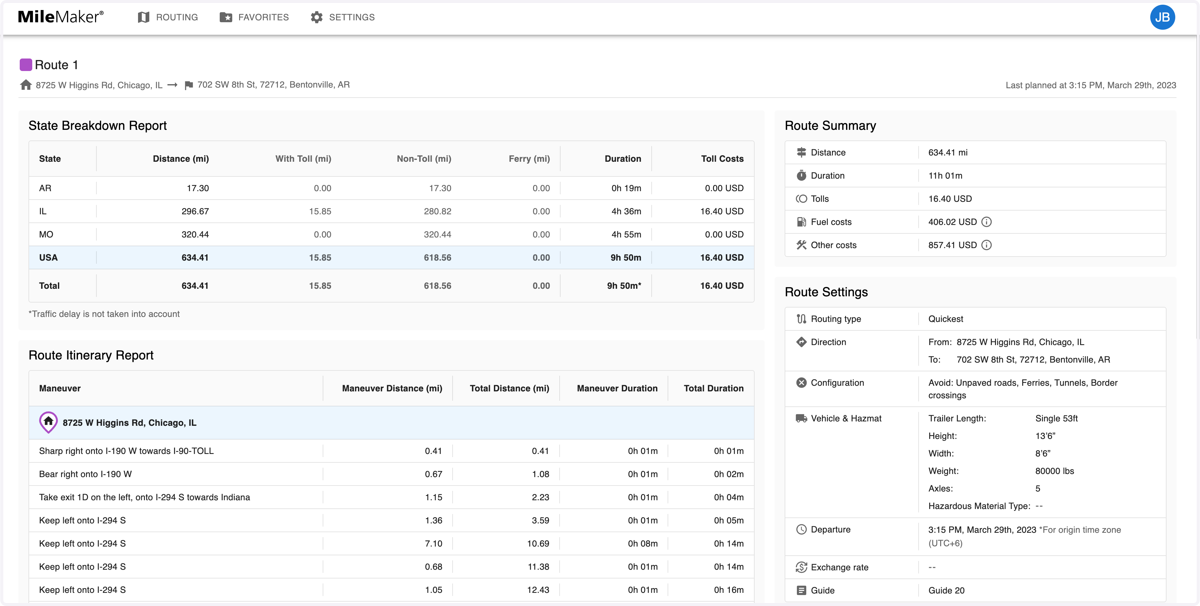
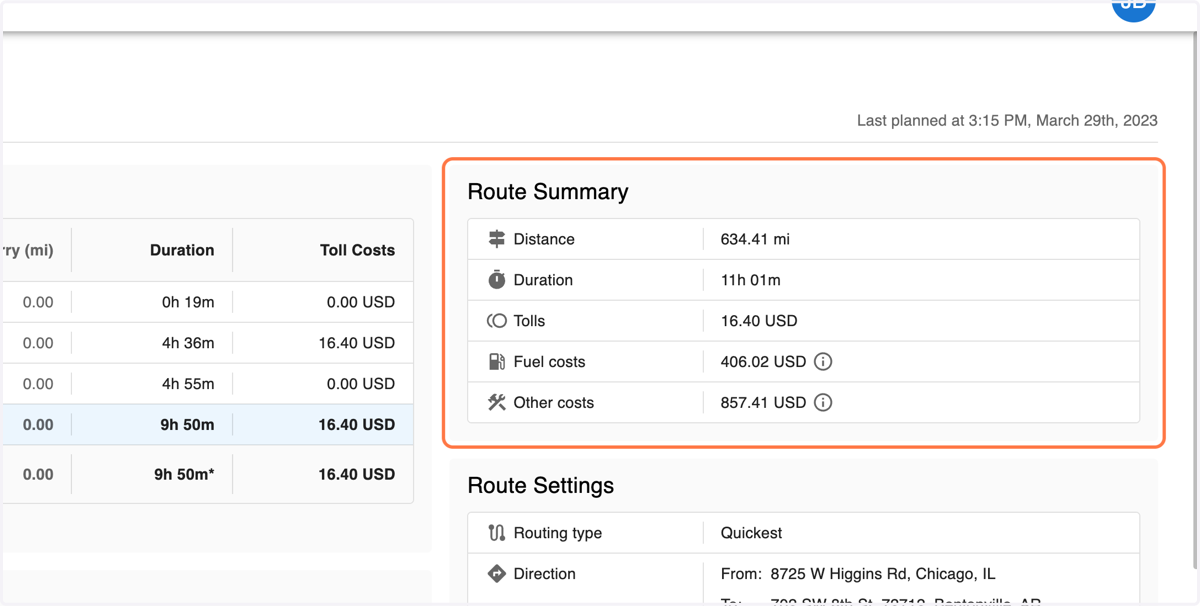
17. The Route Summary in the top right shows the same key statistics seen in the route panel on the previous screen.
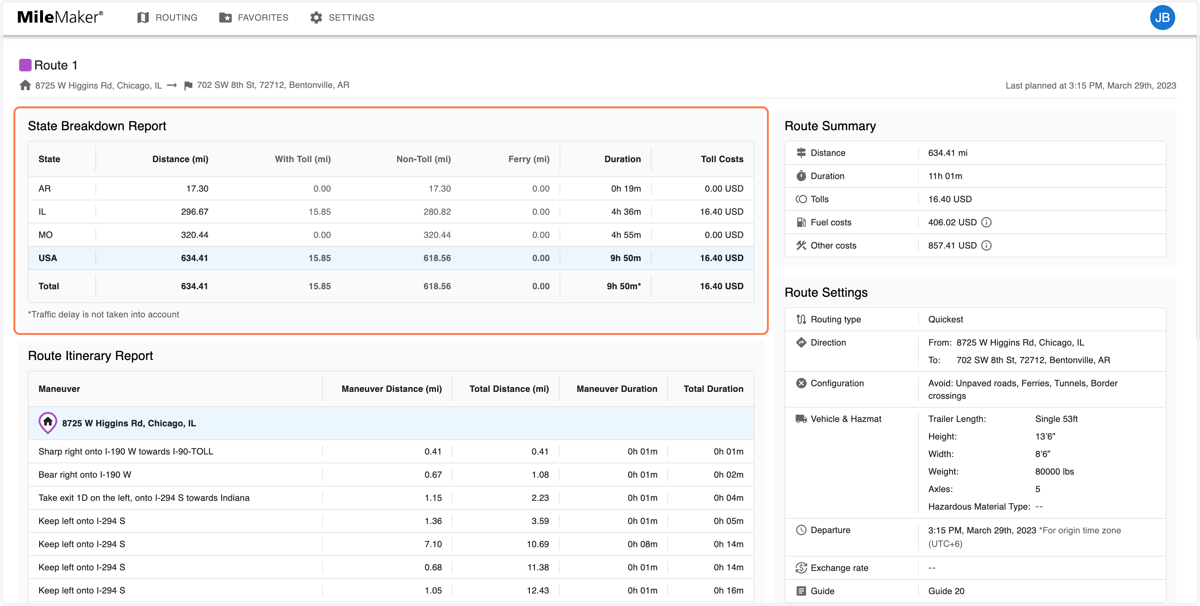
18. The State Breakdown report shows these same key statistics broken down by each country, and each state or province that this route crosses.
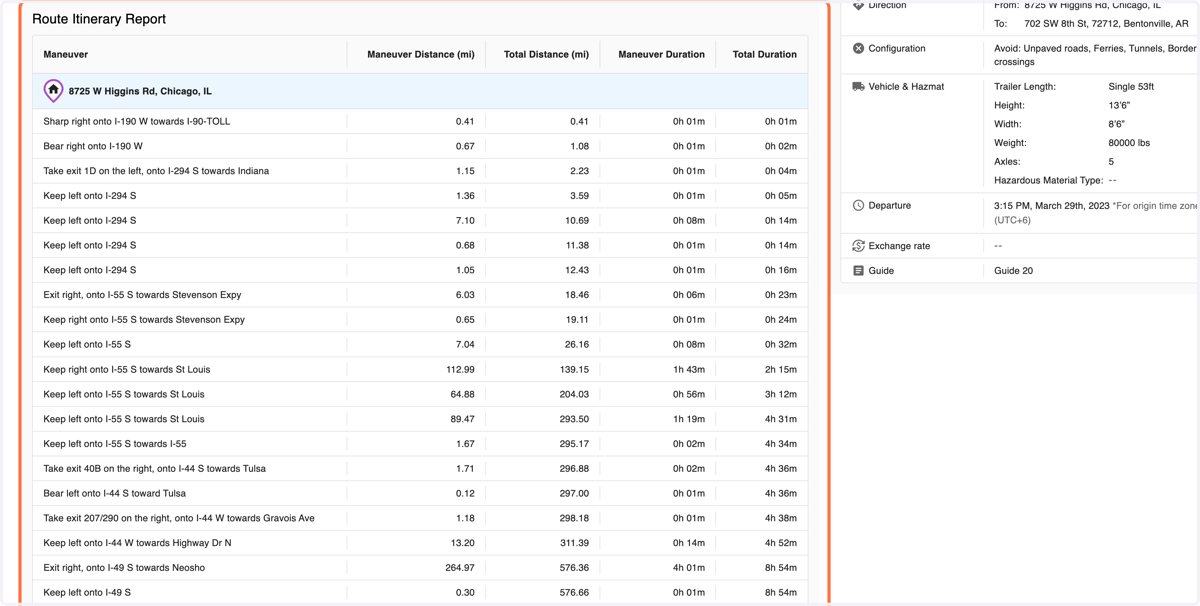
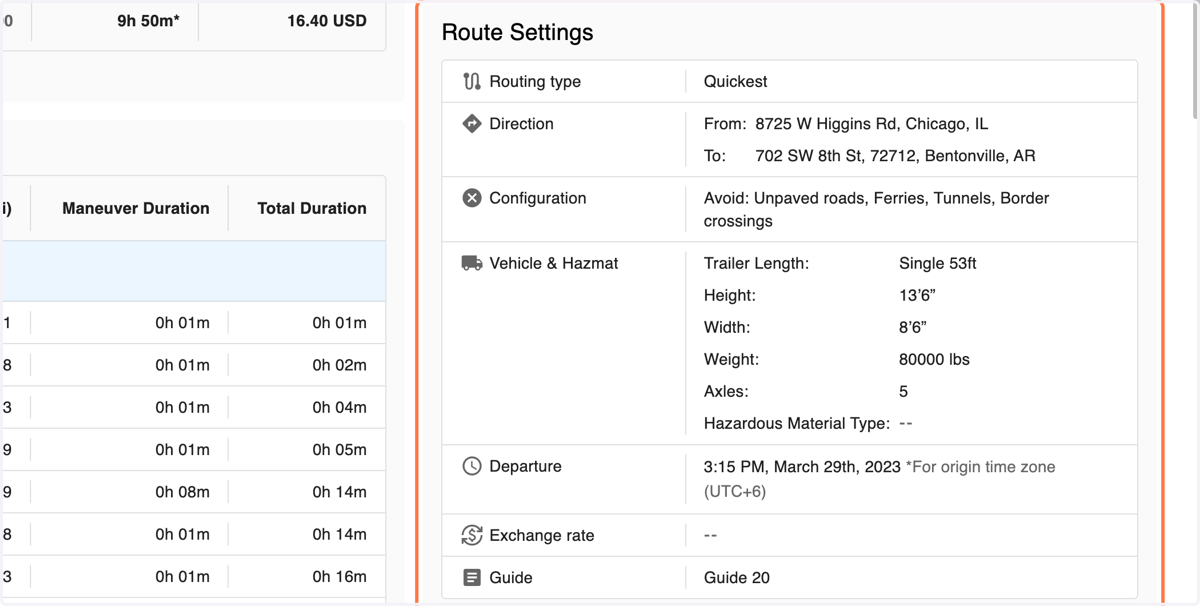
19. The Route Settings section shows the settings and configurations used to calculate this route.
20. The Route Itinerary report provides full turn-by-turn directions for each leg of the route.
Note: Turn-by-Turn directions are only available in Guide 20.