Deep Dive Into the Gradebook: A Teacher Guide
Meet your best friend; the Student Gradebook!
In this tutorial you will learn all you need to know to navigate your student's Gradebook like a pro and keep track of how they are doing.
Login
1. To get started, you'll have to be logged in to your teacher account.
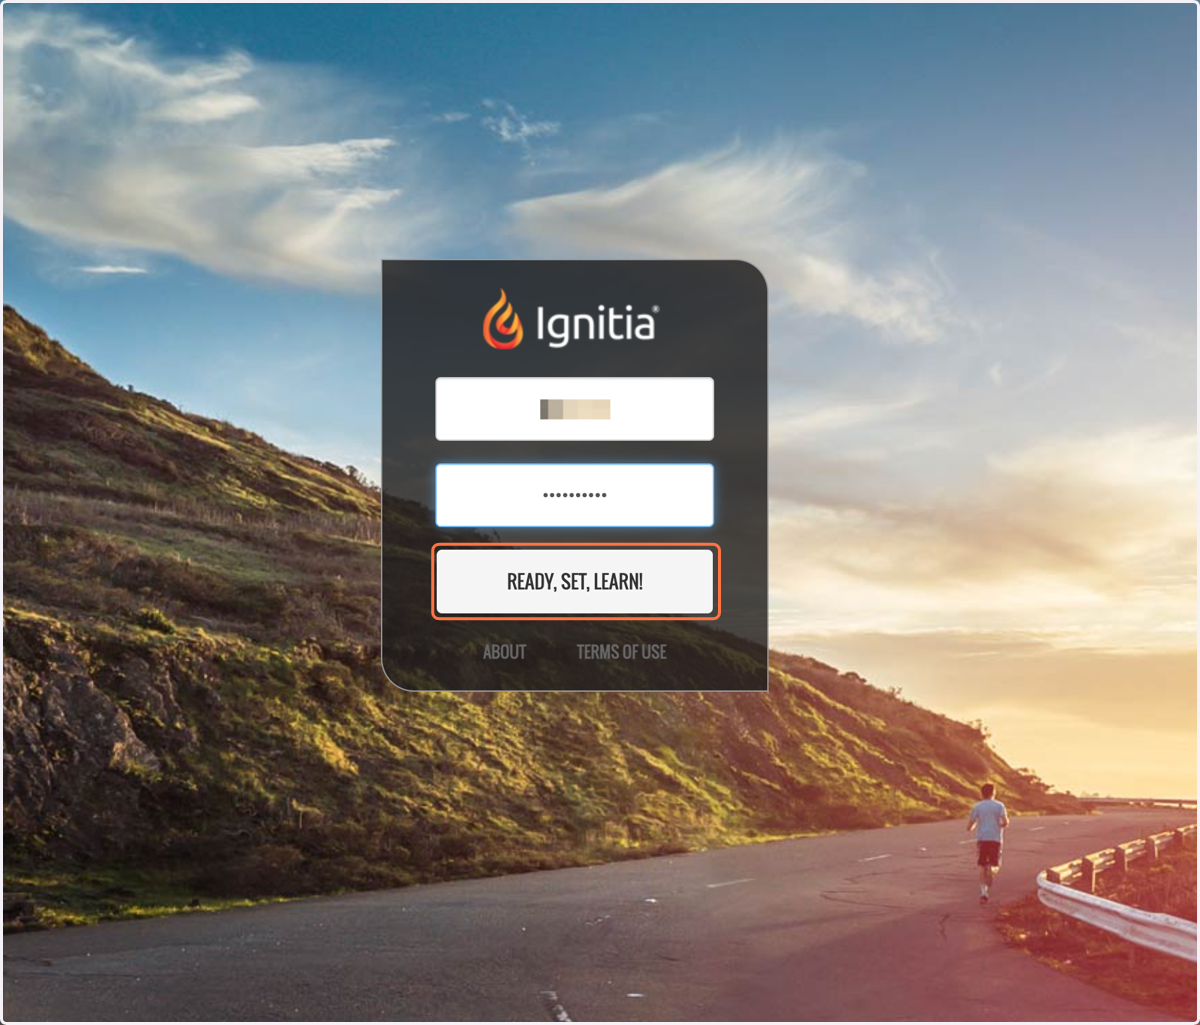
Accessing the Student Gradebook
This is the technically correct way to get there, but there is another way that we will go over later.
2. Click on the GRADEBOOK tab
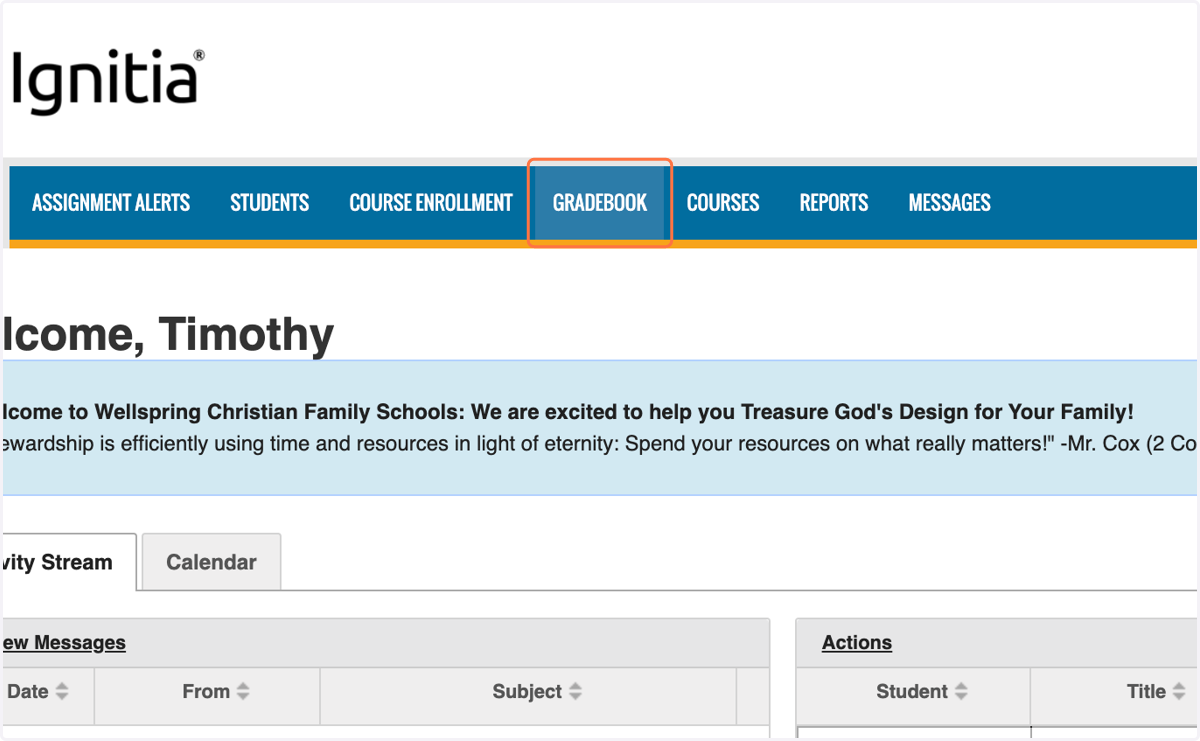
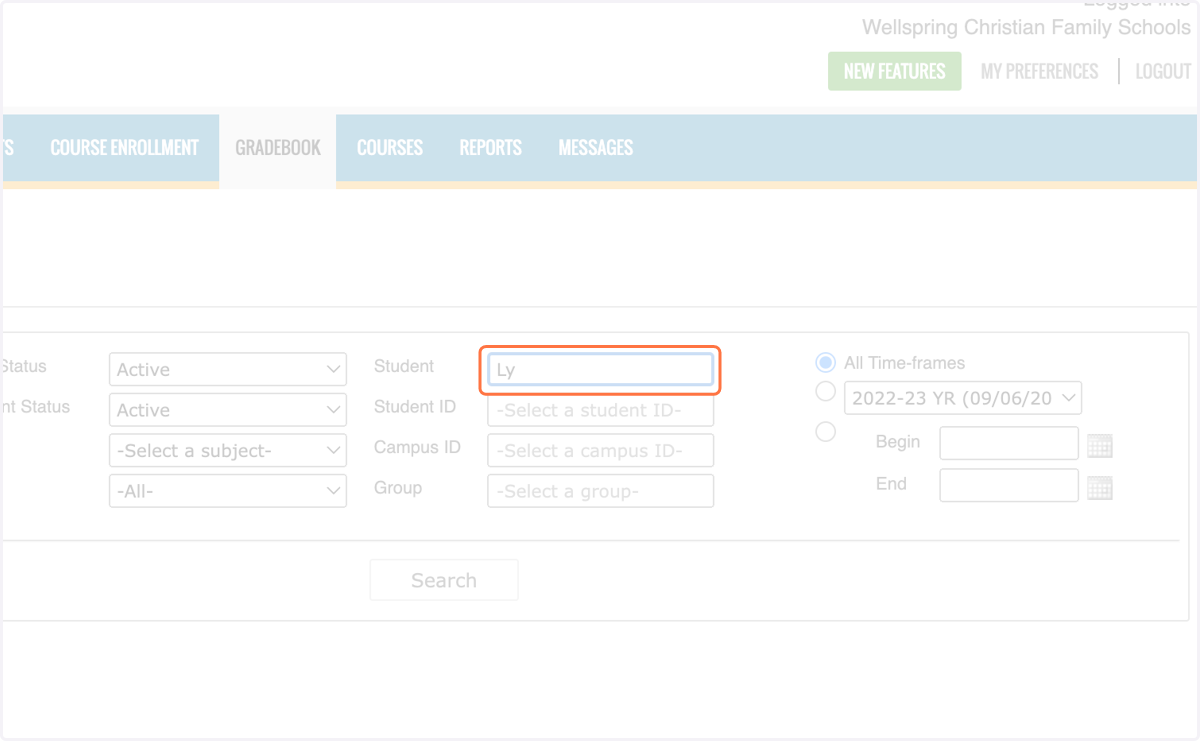
3. Filter for your student by typing a few letters of their name in the 'Student' field.
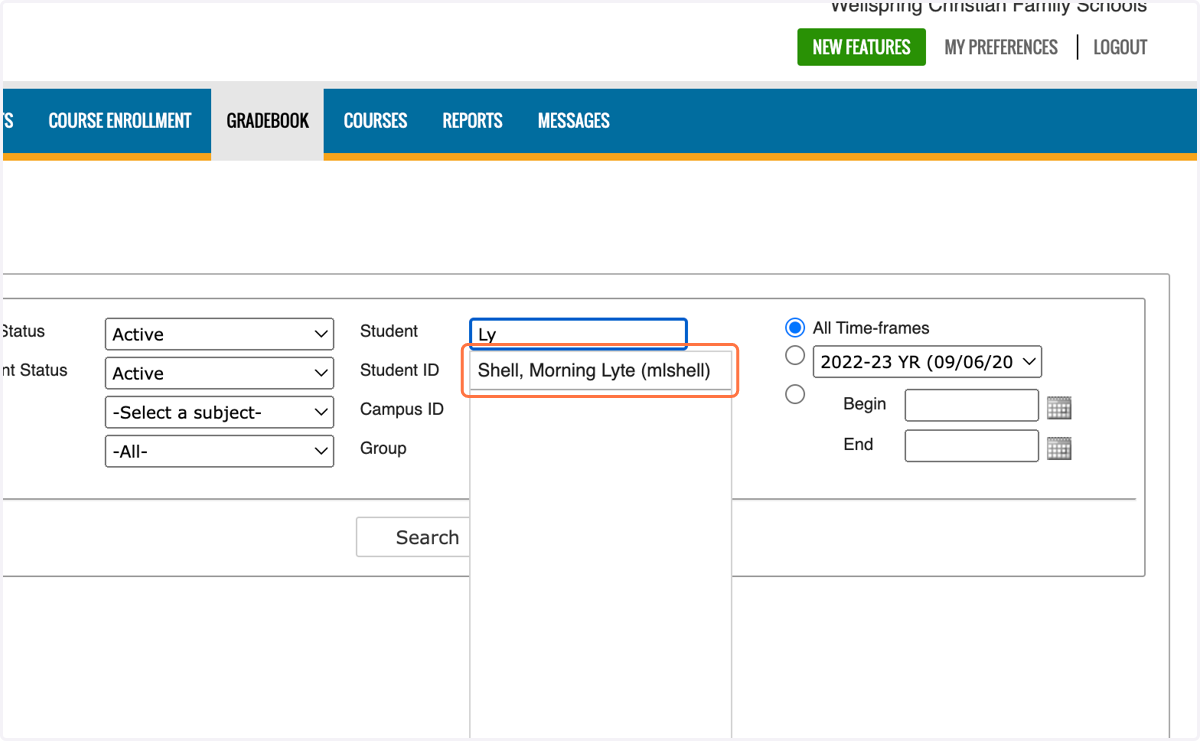
4. Click on their name when it shows up in the dropdown menu.
5. This is their Gradebook!
Let's look at all the features offered here.
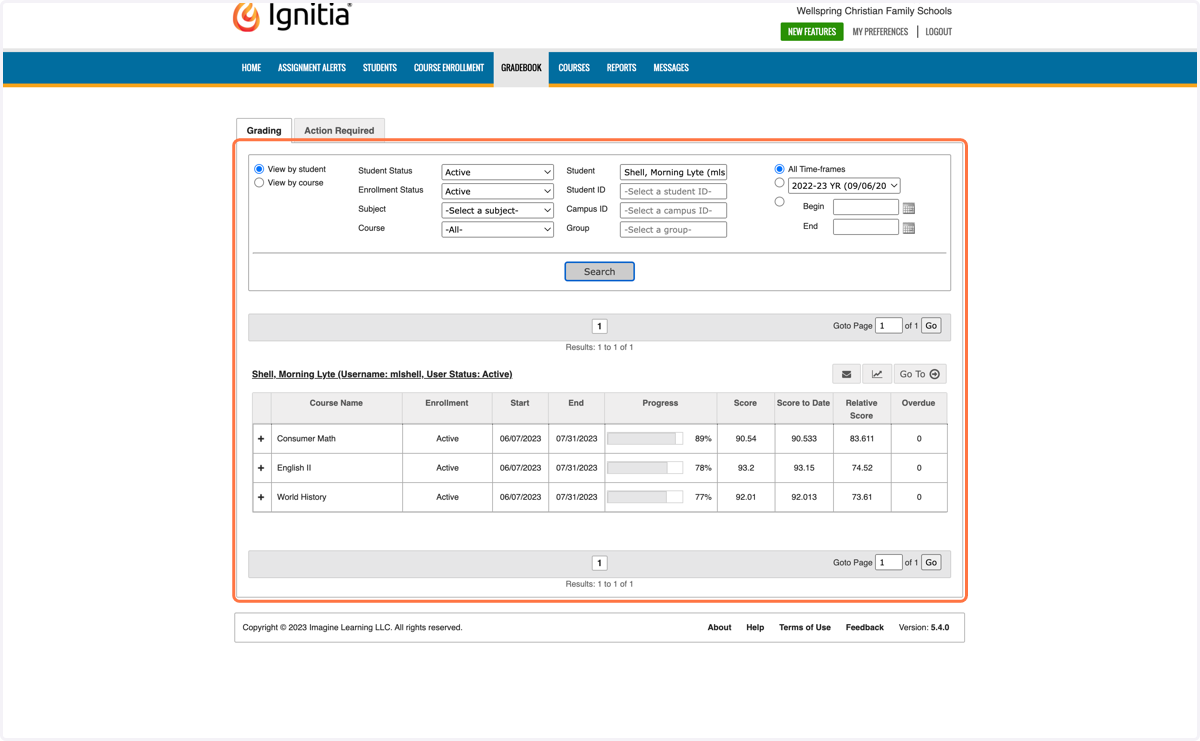
Collapsed Course View
Ignitia courses are based off of Alpha Omega Publishing's LifePac. Each course has around 10 Units, and each unit has it's individual set of assignments. When you first get to the Gradebook, you see a listing of each course your student has been enrolled in.
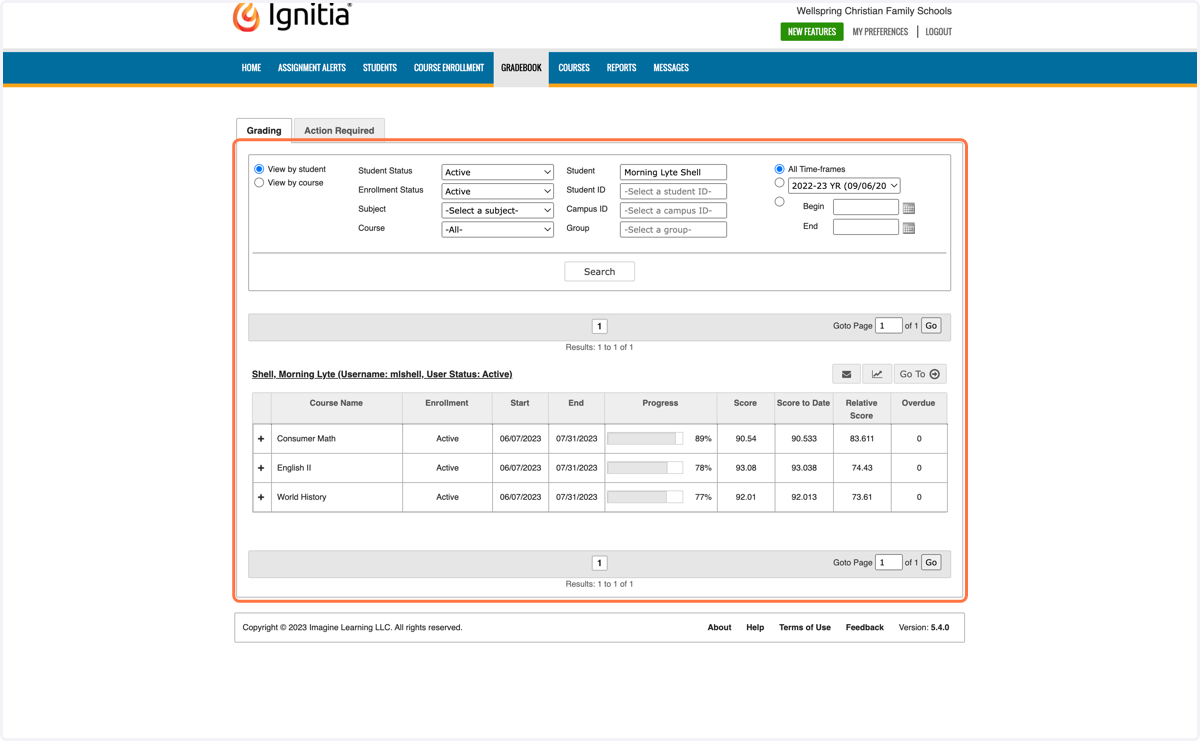
6. Course Name
All courses are listed alphabetically by name in the first column.
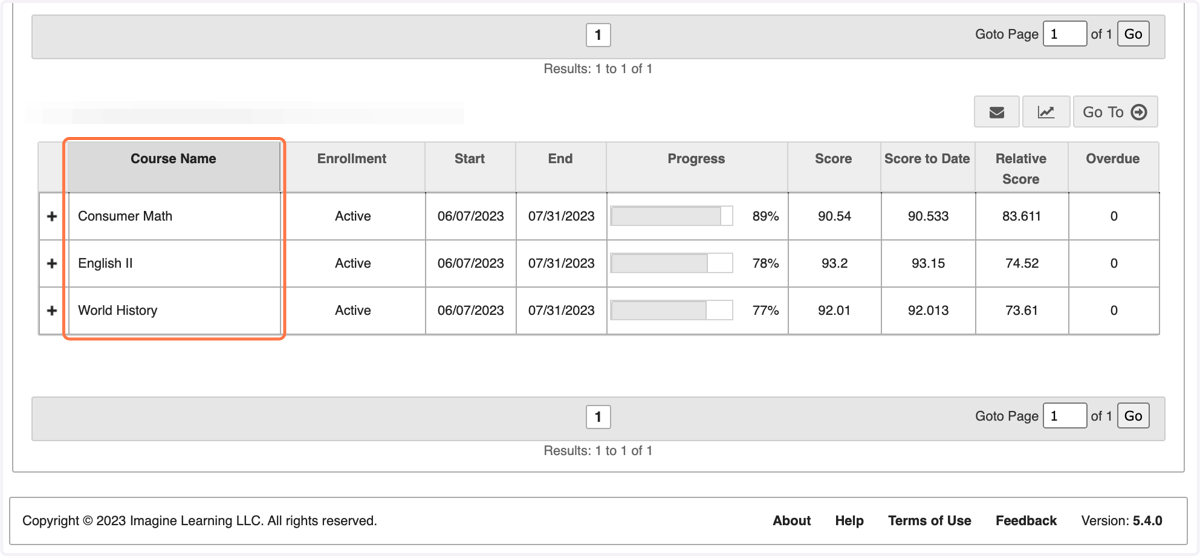
7. Enrollment
This is not very important to you as a TOR (Teacher Of Record). It simply shows the status of the student's course enrollment, whether it is Active, On Hold, or Archived. From your view as a TOR you will only see active enrollments.
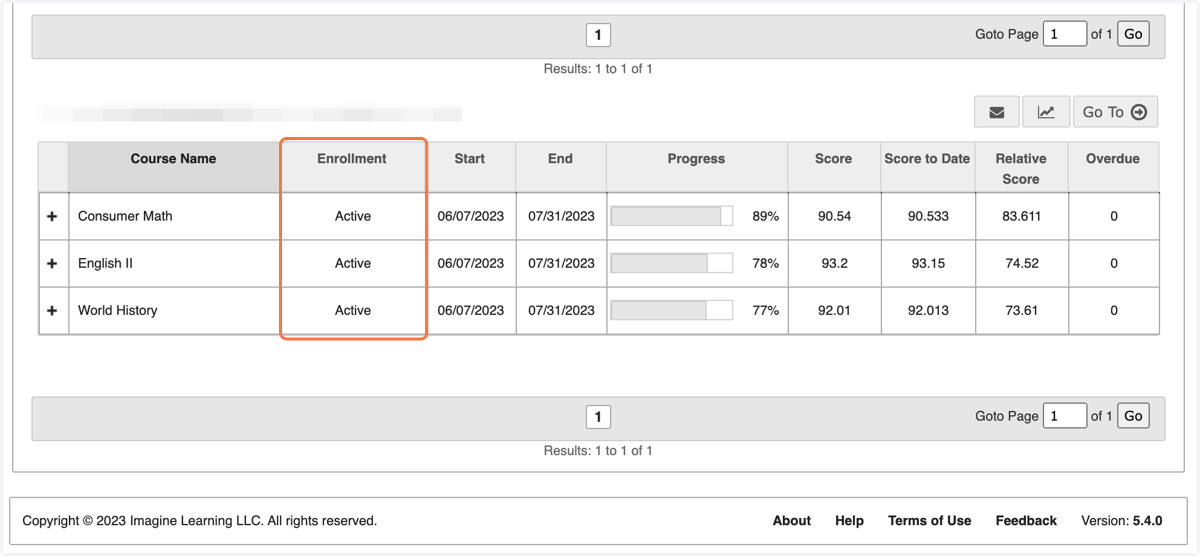
8. Start
This column shows the course term start date.
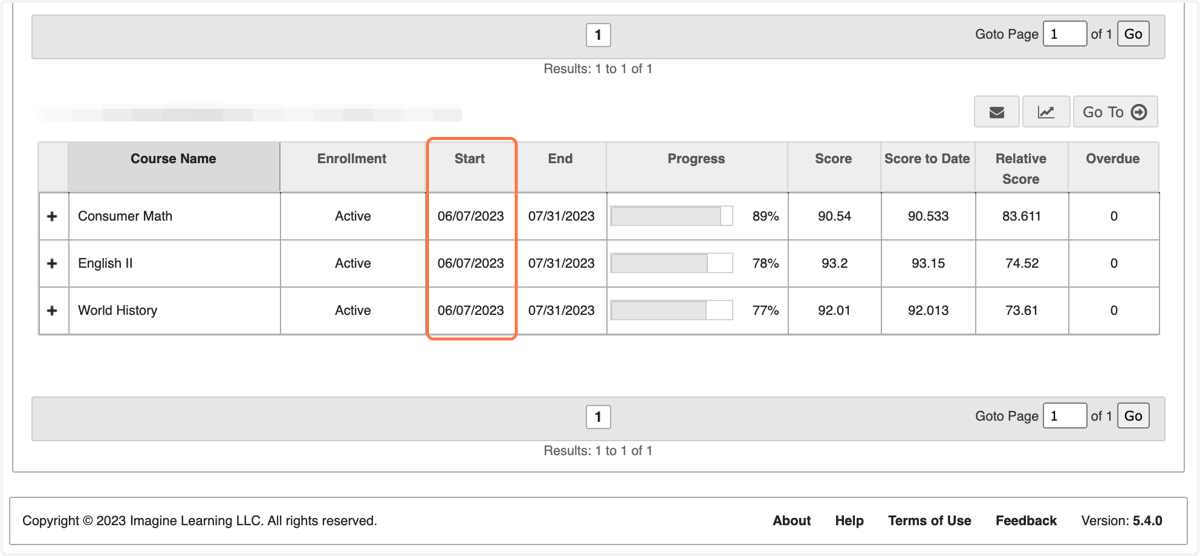
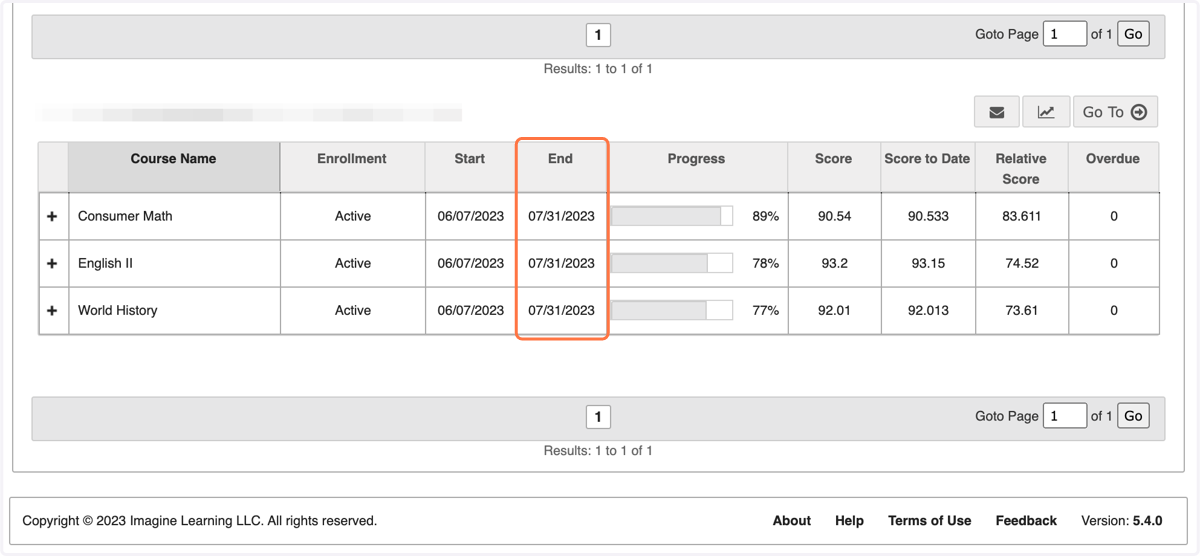
9. End
This column shows the course term end date.
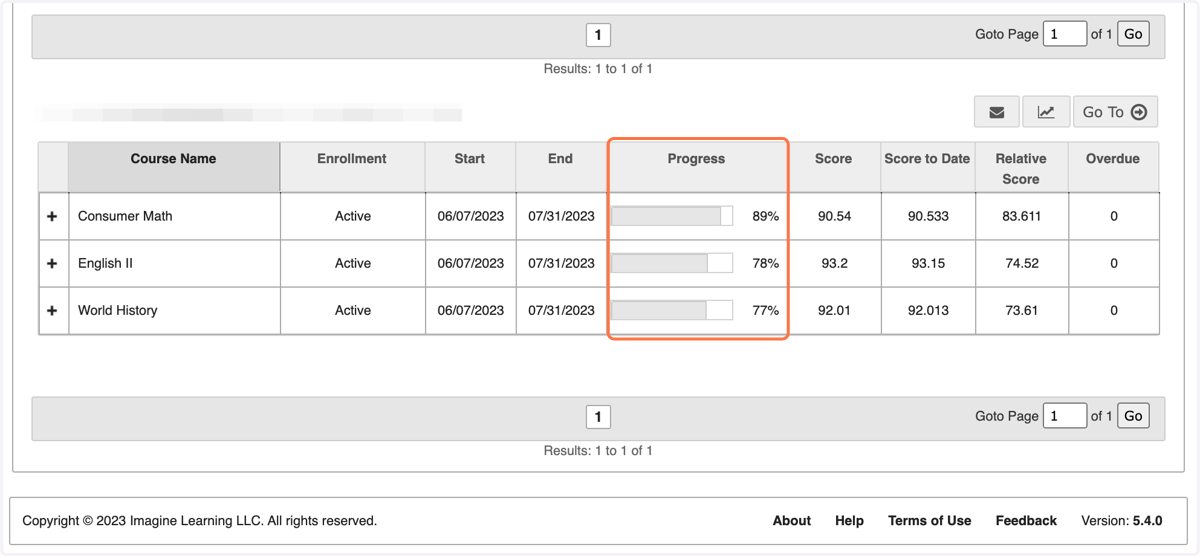
10. Progress
The Progress column displays the student's progress through each course with a progress bar and a percentage.
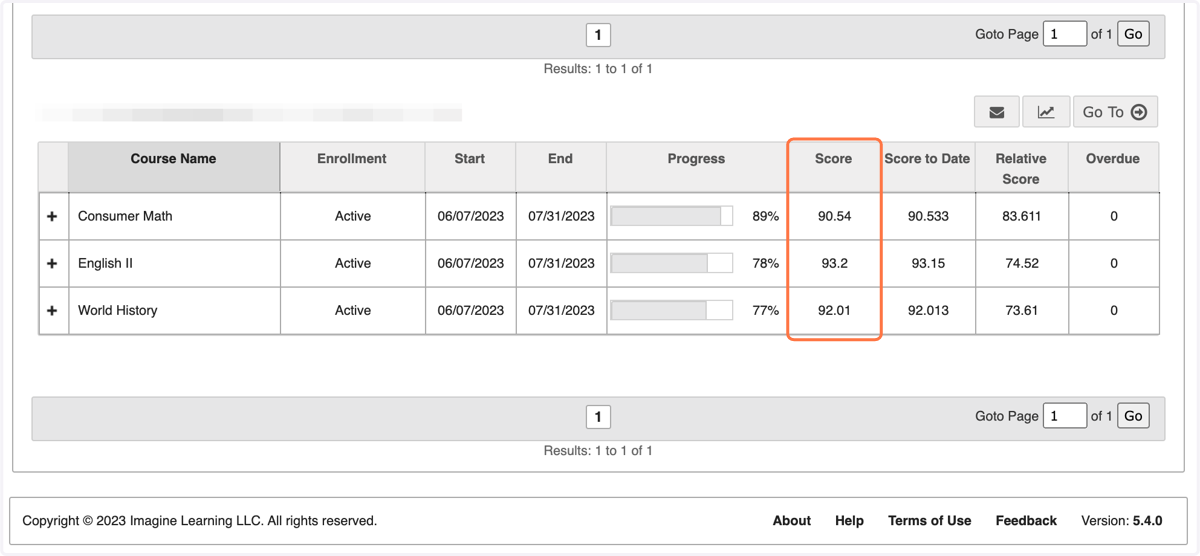
11. Score
Here you can find the student's current grade for each course
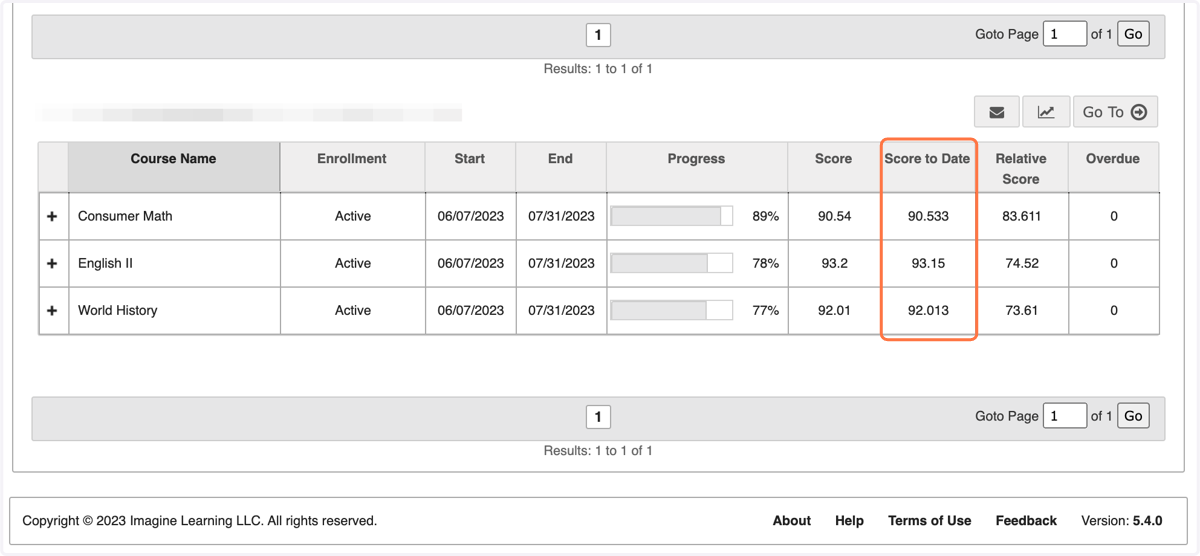
12. Score to Date
This score calculates in a penalty for overdue assignments.
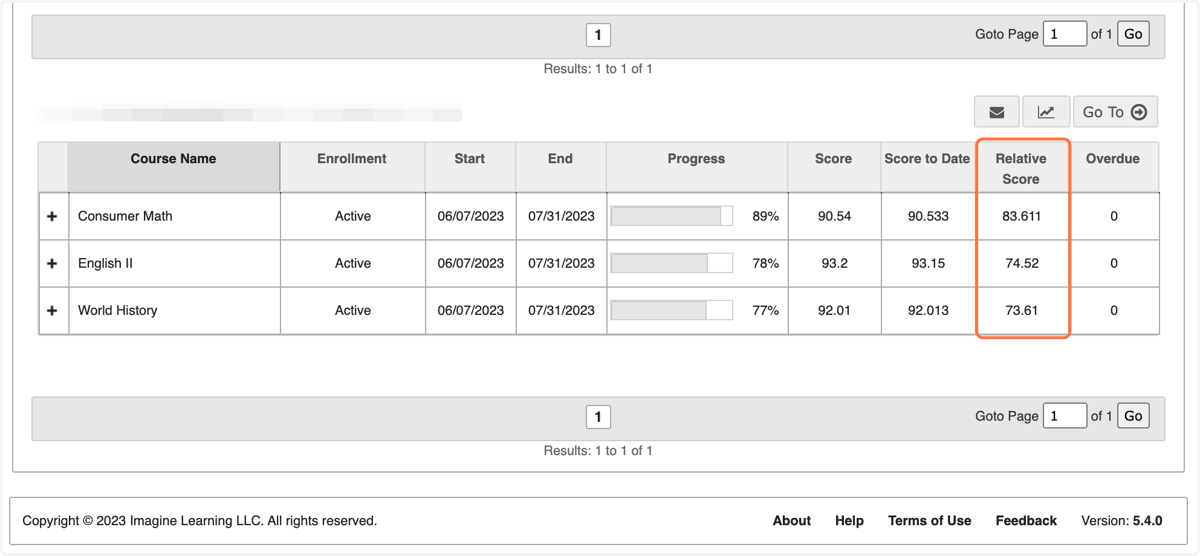
13. Relative Score
This score is calculated by factoring 0% into the average as the score for all incomplete work. Once the student completes a course, all three scores will match.
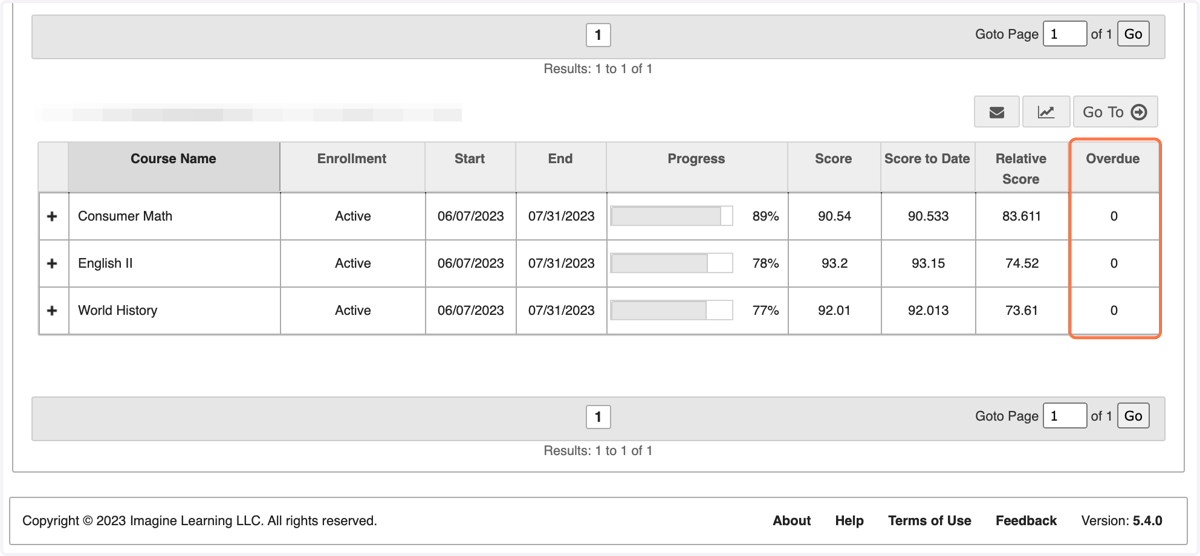
14. Overdue
This column shows you the total number of assignments that are overdue in each course.
Expanded Unit View
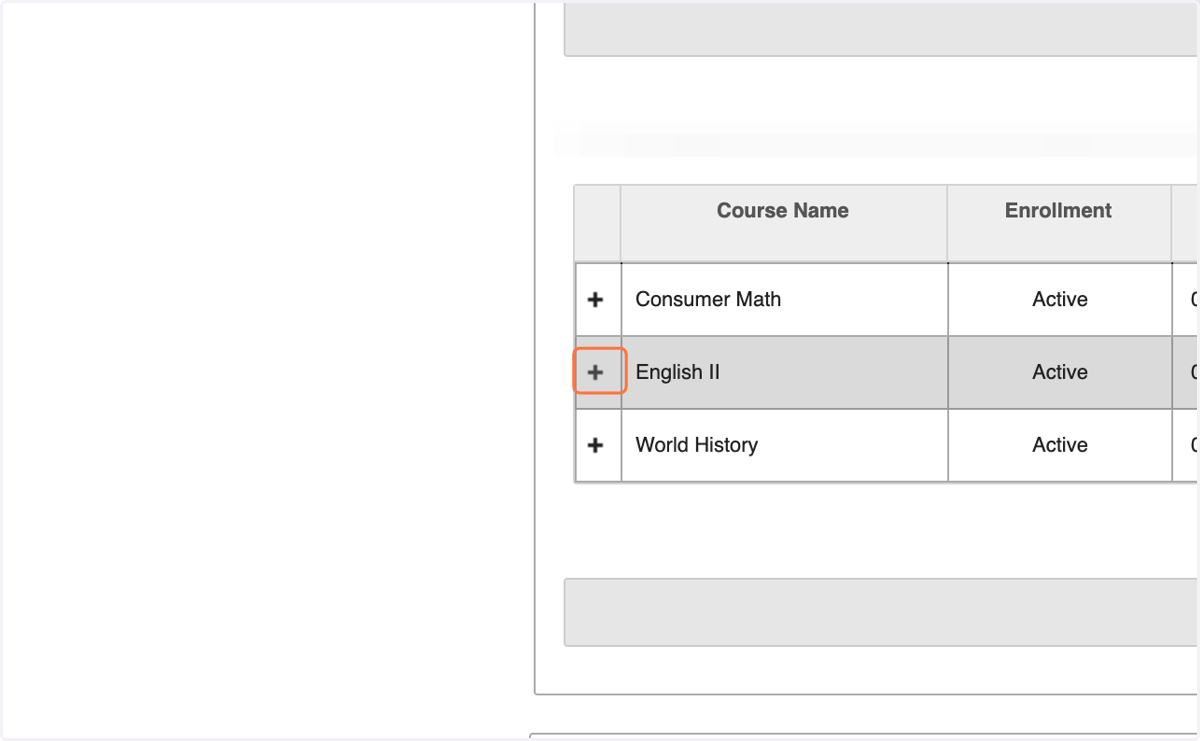
To view each of the units inside an individual course, click the little '+' icon to the left of the course title. You will now be able to see all the units within the course.
15. Click the little plus to expand the course to unit view.
16. You can now see each individual unit, displayed with it's own details.
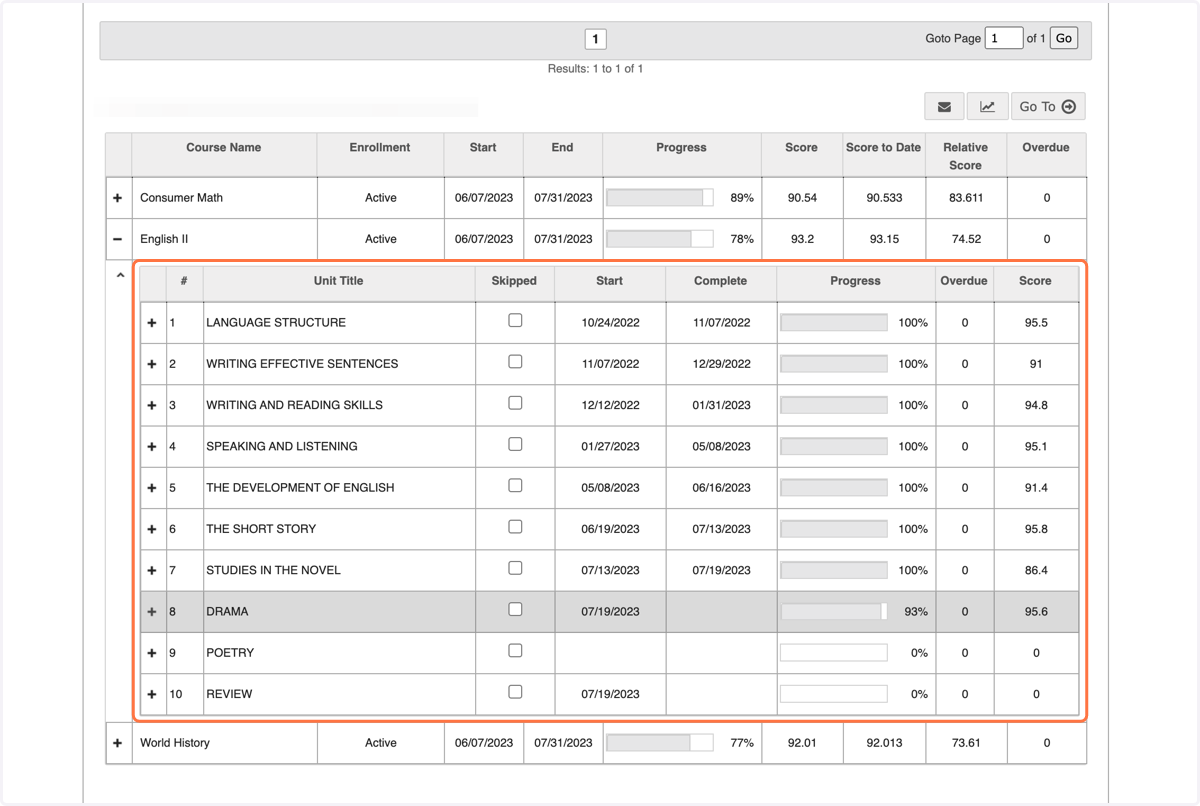
17. Unit Title
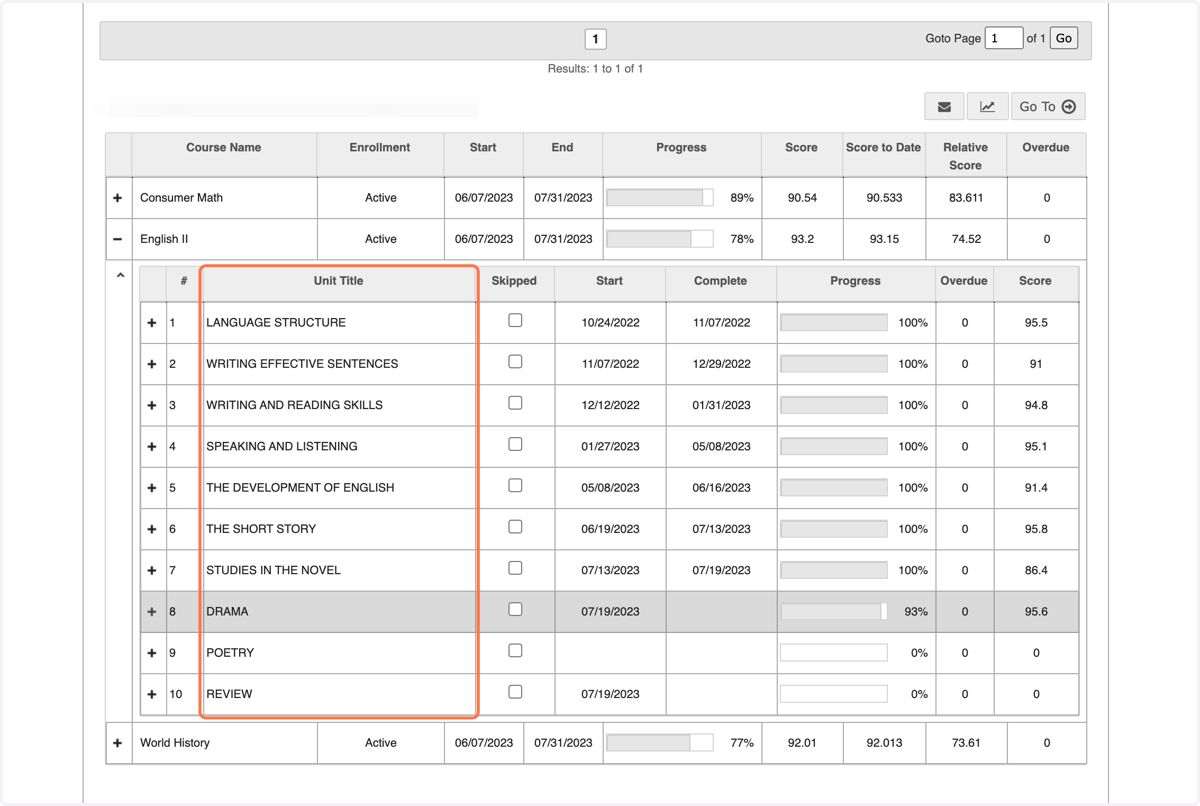
18. Skipped
This column indicates whether or not the unit has been skipped. If a unit were skipped the box in this column would be blue with a white checkmark.
NOTE: This permission is usually turned off for TOR accounts.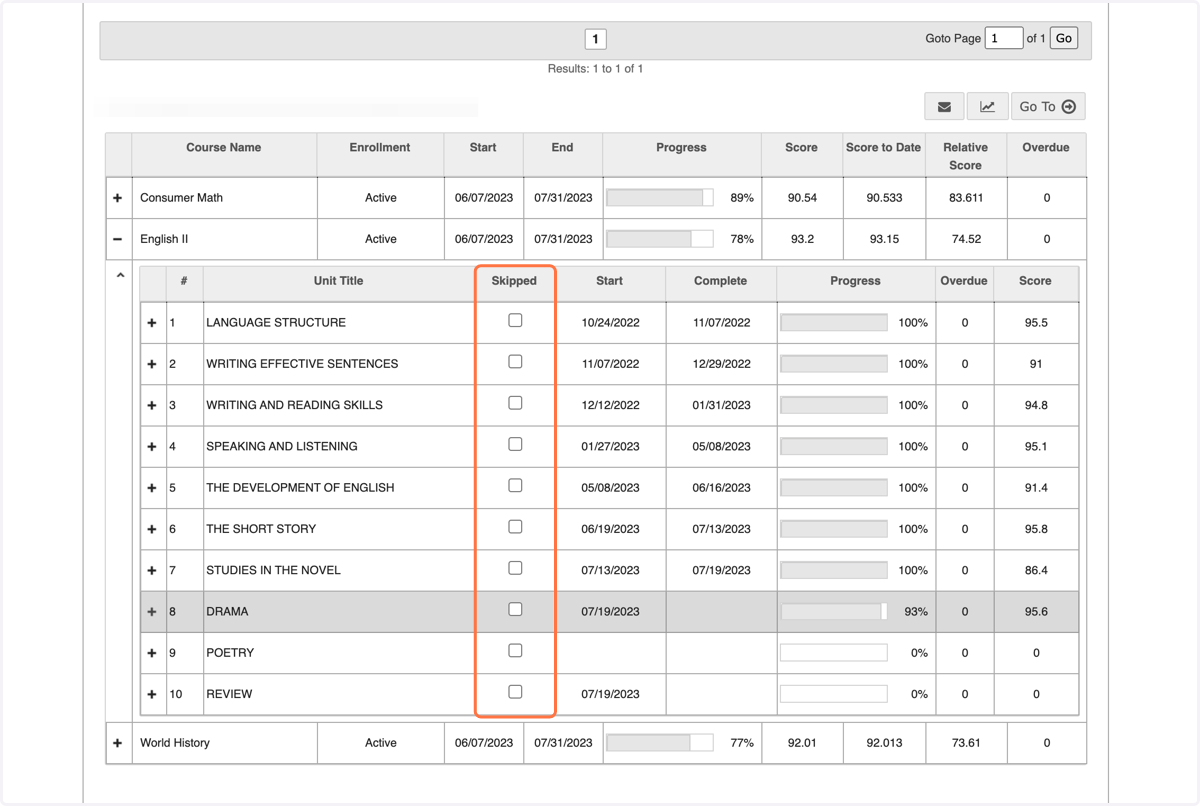
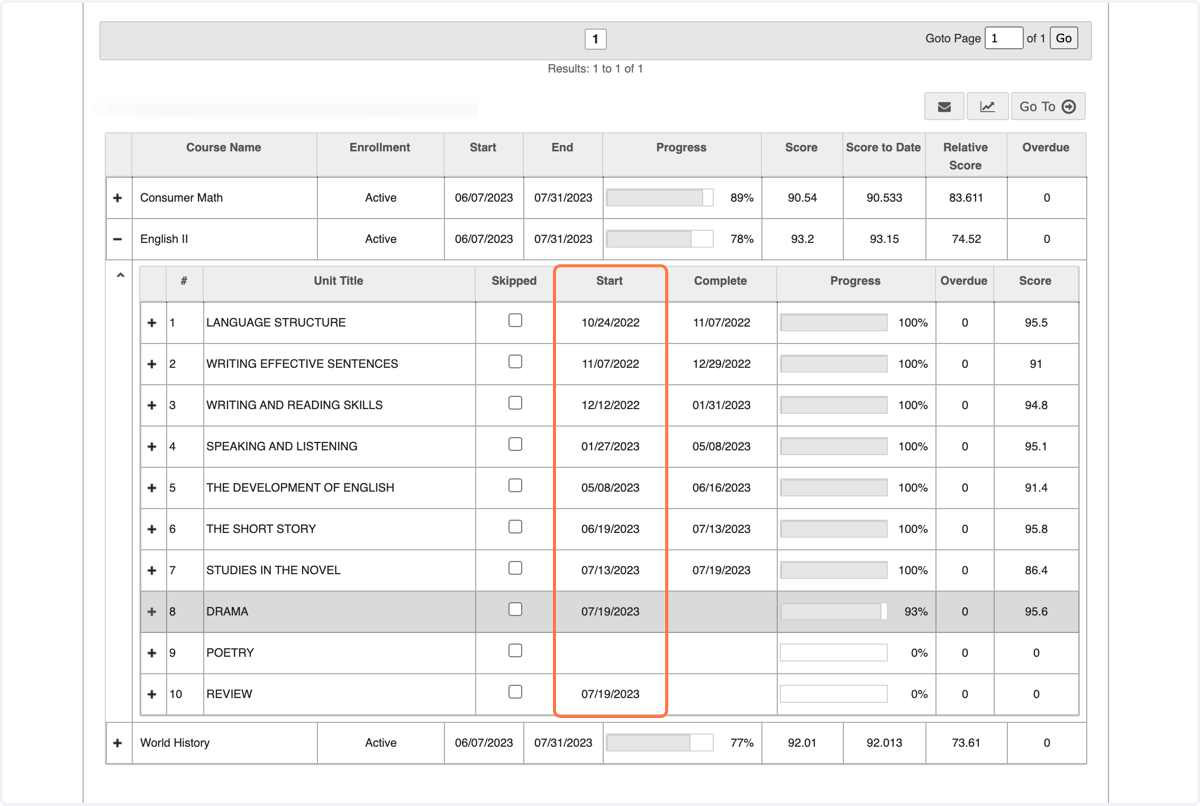
19. Start
Each unit has it's own start date which reflects the date the student opened the first assignment in the unit.
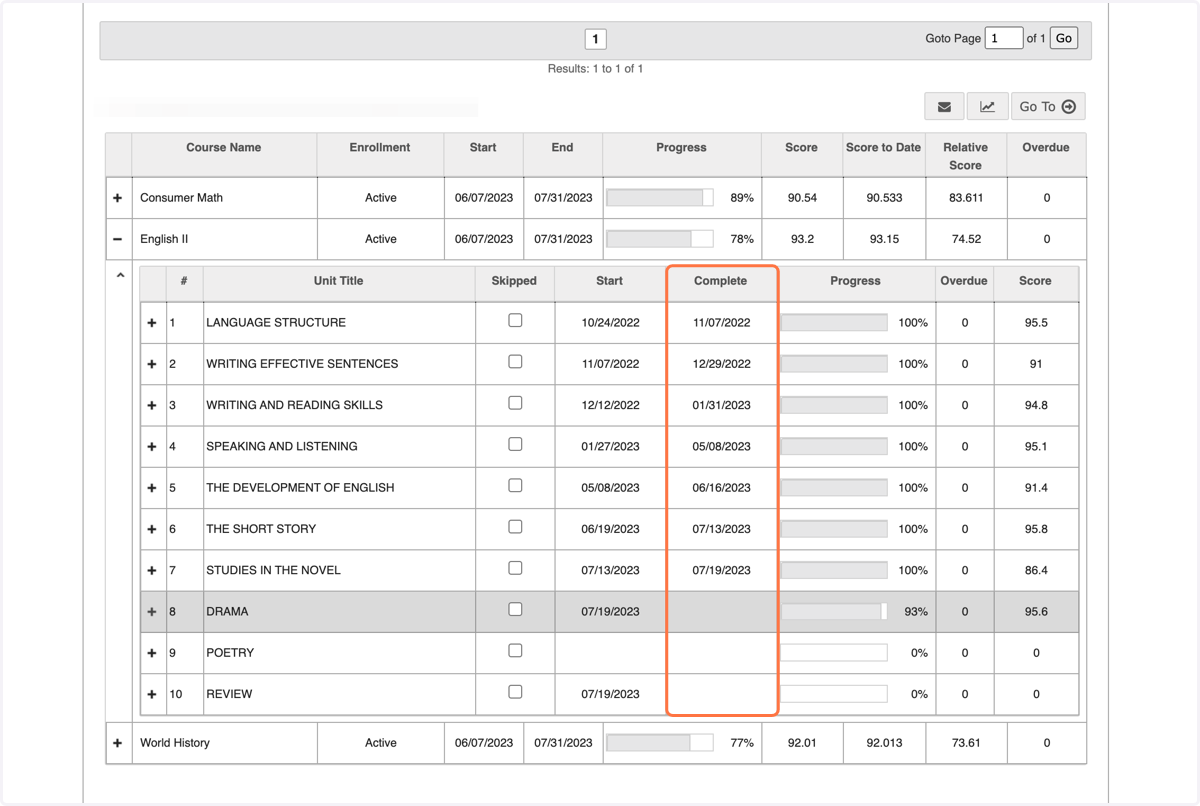
20. Complete
Each unit has it's own completion date. This reflects the date the student turned in their last assignment in the unit.
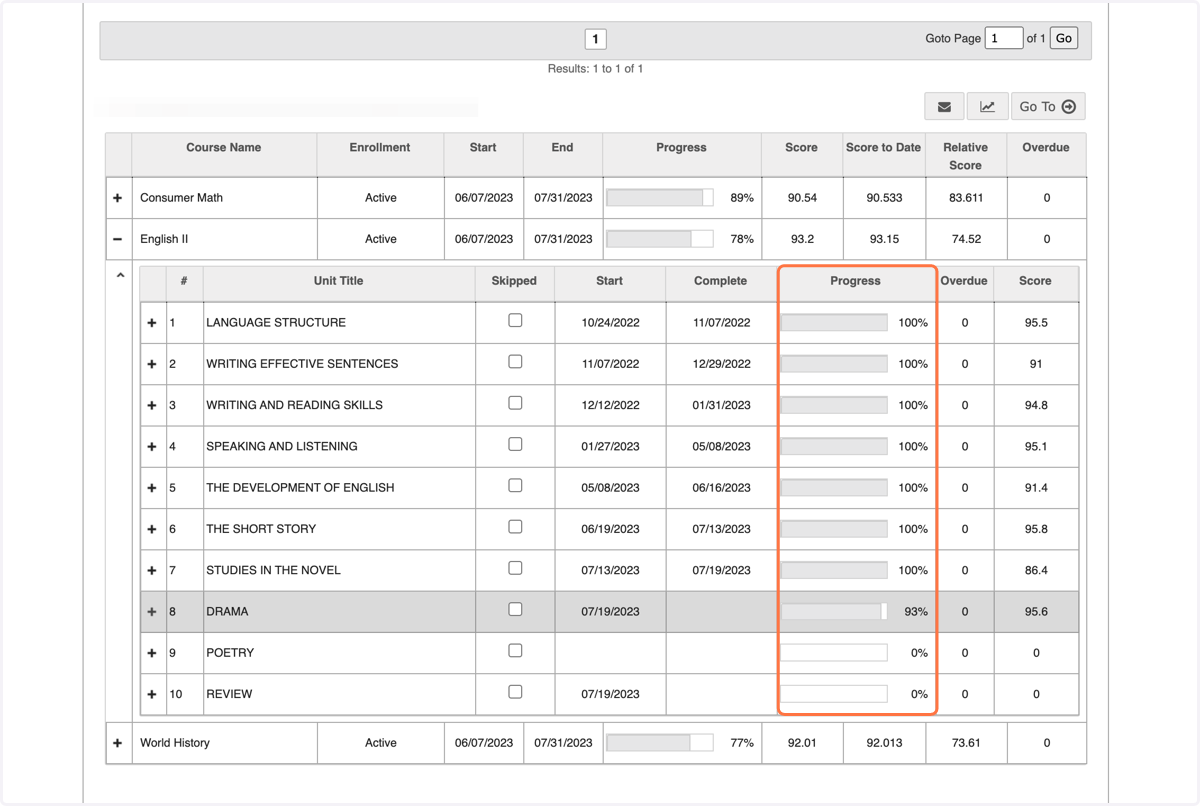
21. Progress
Each unit also has a progress and percentage bar indicating student's progress through the unit. Pay close attention to these when reviewing a student's gradebook; they can help to indicate where a student needs your assistance. See this tutorial for more.
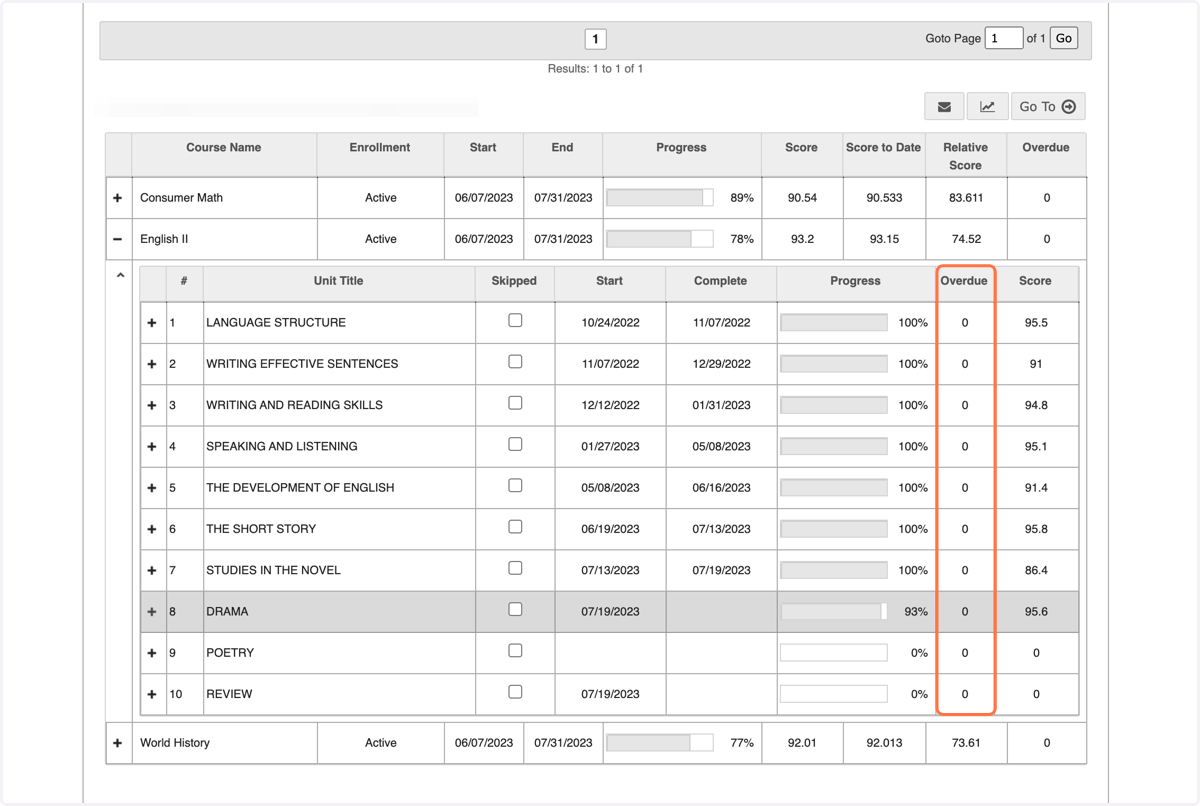
22. Overdue
This column displays the number of assignments that are overdue within that unit.
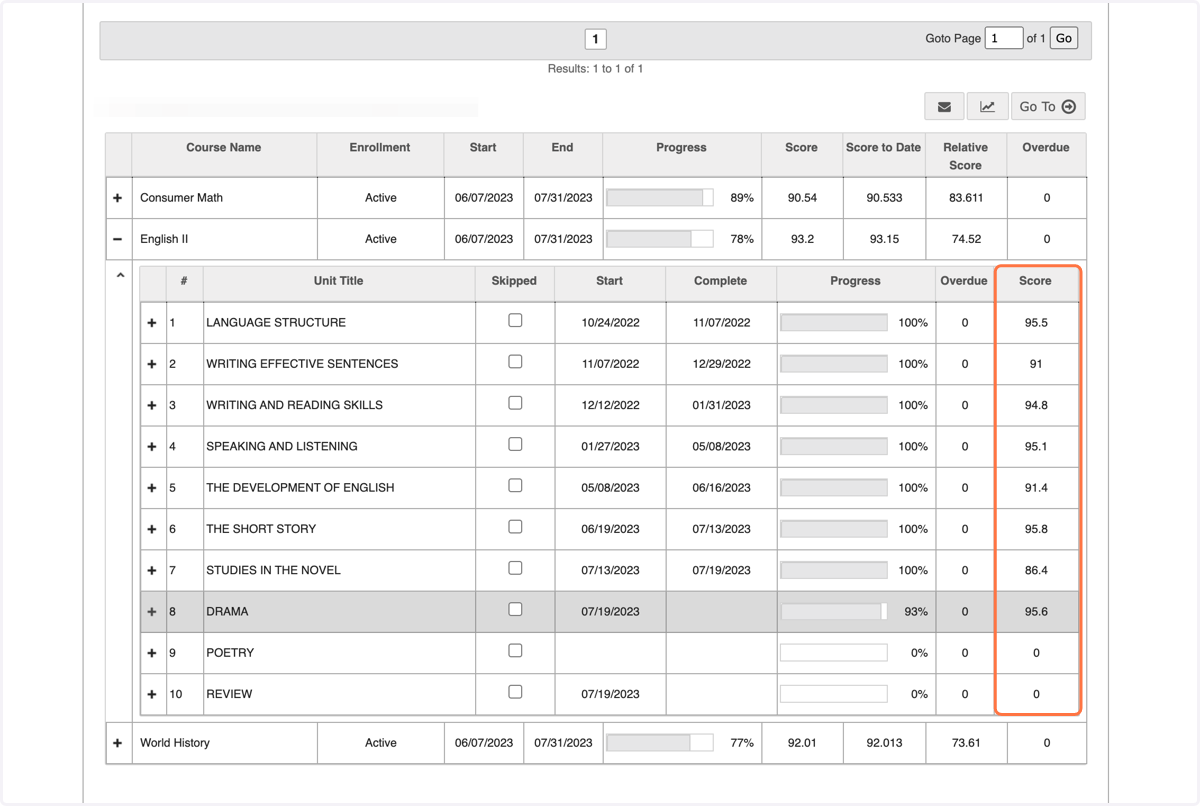
23. Score
Here you can view the current score for each unit.
Expanded Assignment View
Now lets look at the table of contents within one of the units.
24. To view the assignments in a unit, click on the little '+' icon to the left of the unit title.
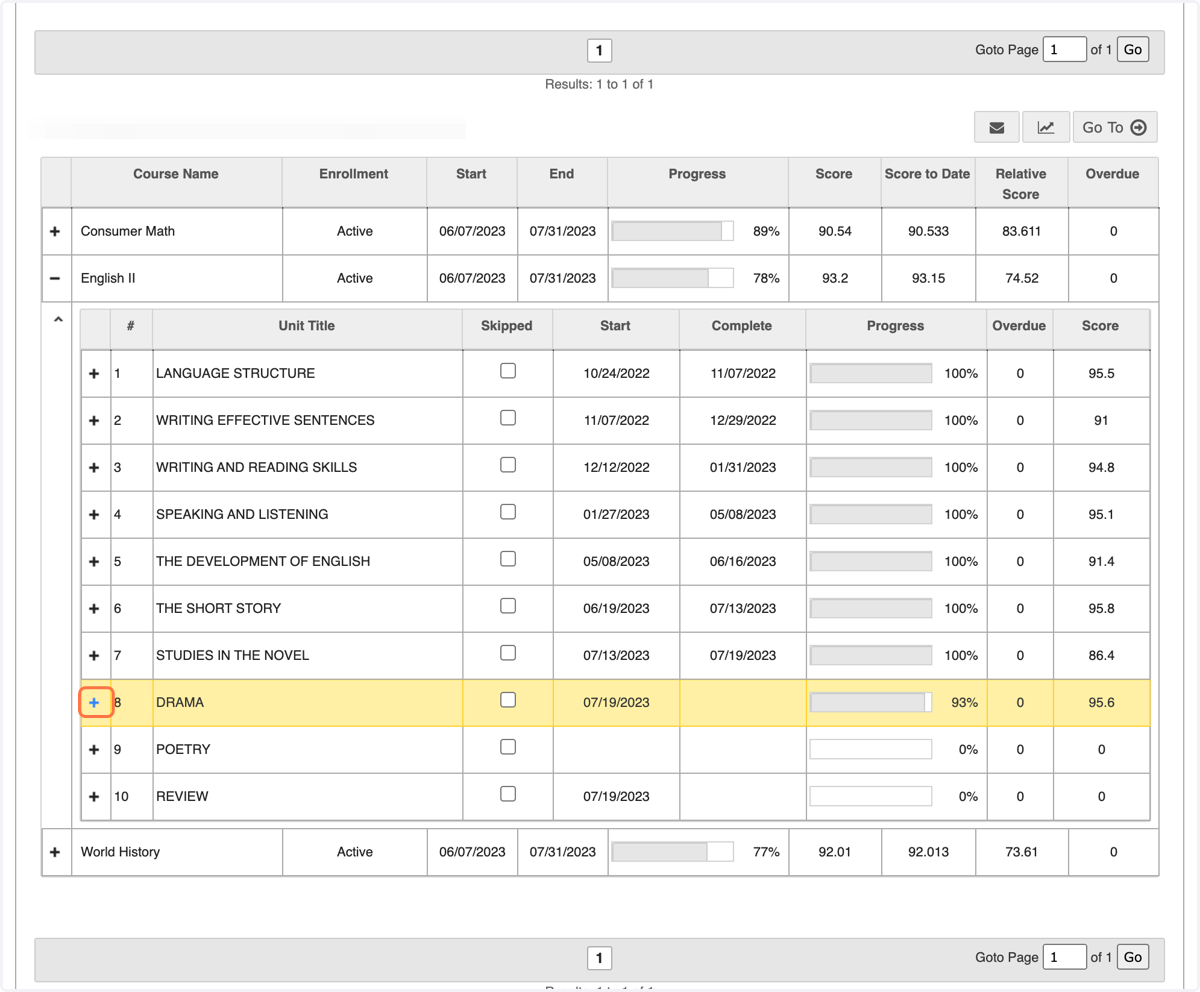
25. You can now see every assignment in the selected unit.
As in both the course and unit views, each assignment has columns of info displayed as well.
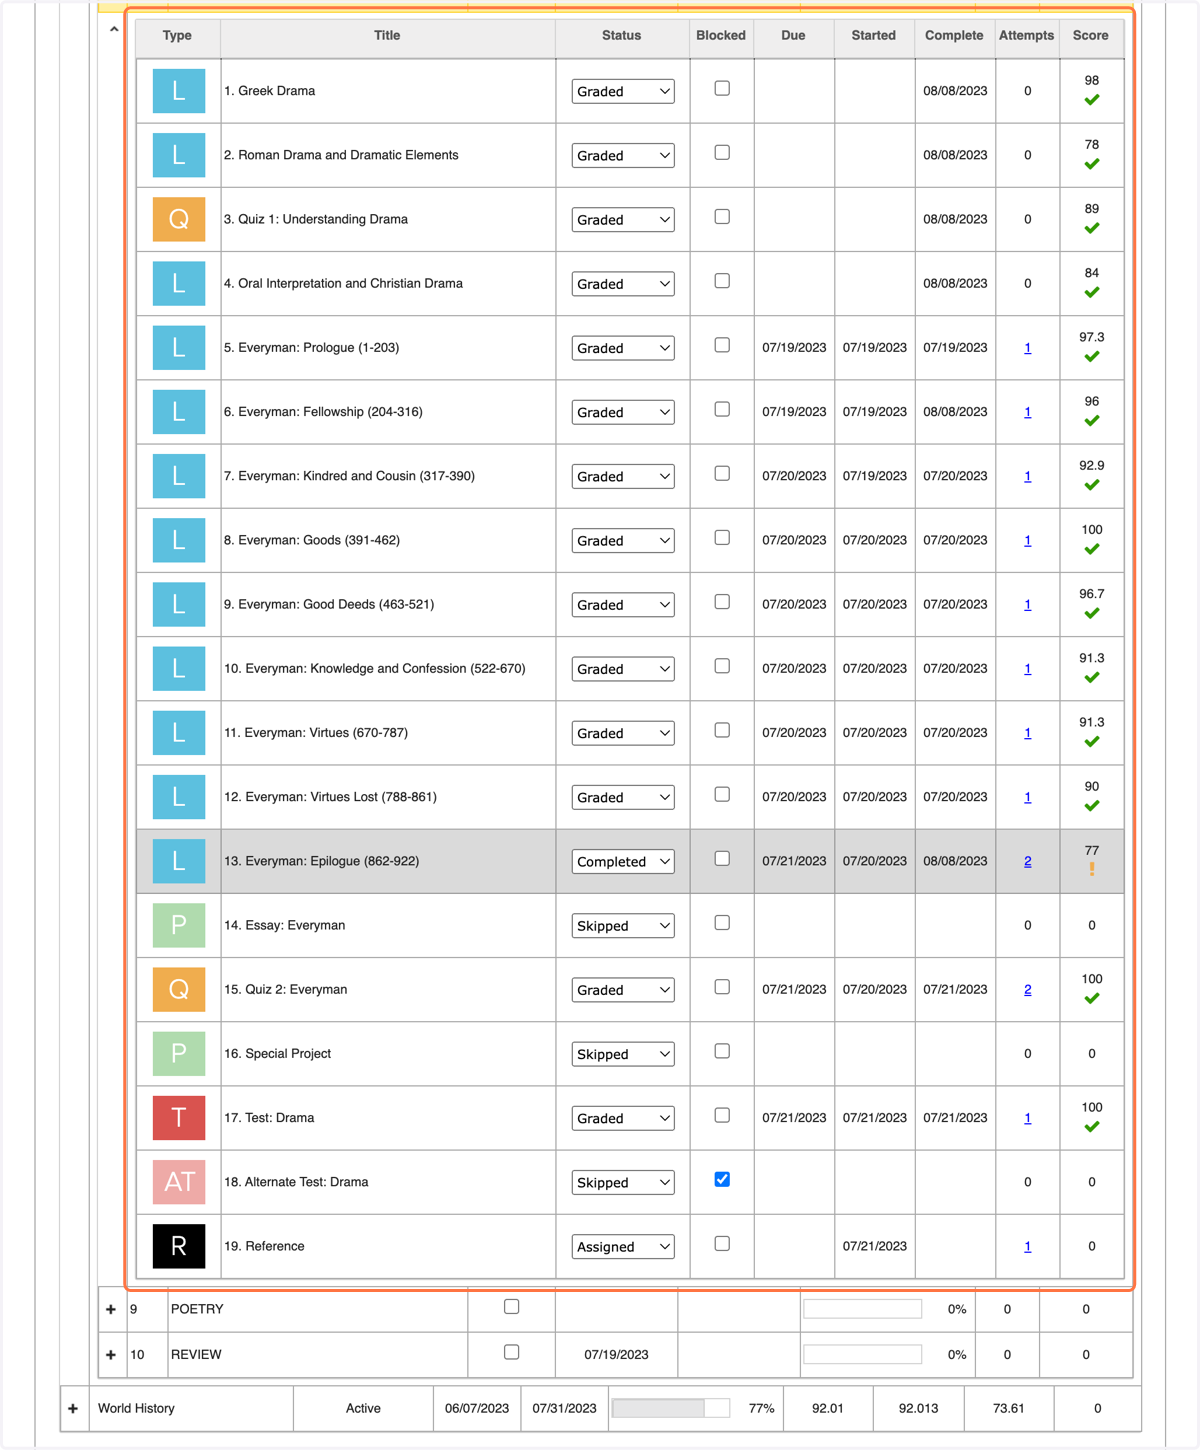
26. Type
The first column is assignment type. There are 4 basic assignment types: Lesson (indicated by a white L on a light blue field), Project (indicated by a white P on a light green field), Quiz (indicated by a white Q on an orange field), and Test (indicated by a white T on a red field).
Alternate Tests and Quizzes will be indicated by adding an A before the T or Q.Some courses will also include unit References or additional resources, and those will be indicated by a white R on a black field. However, not all courses include those.
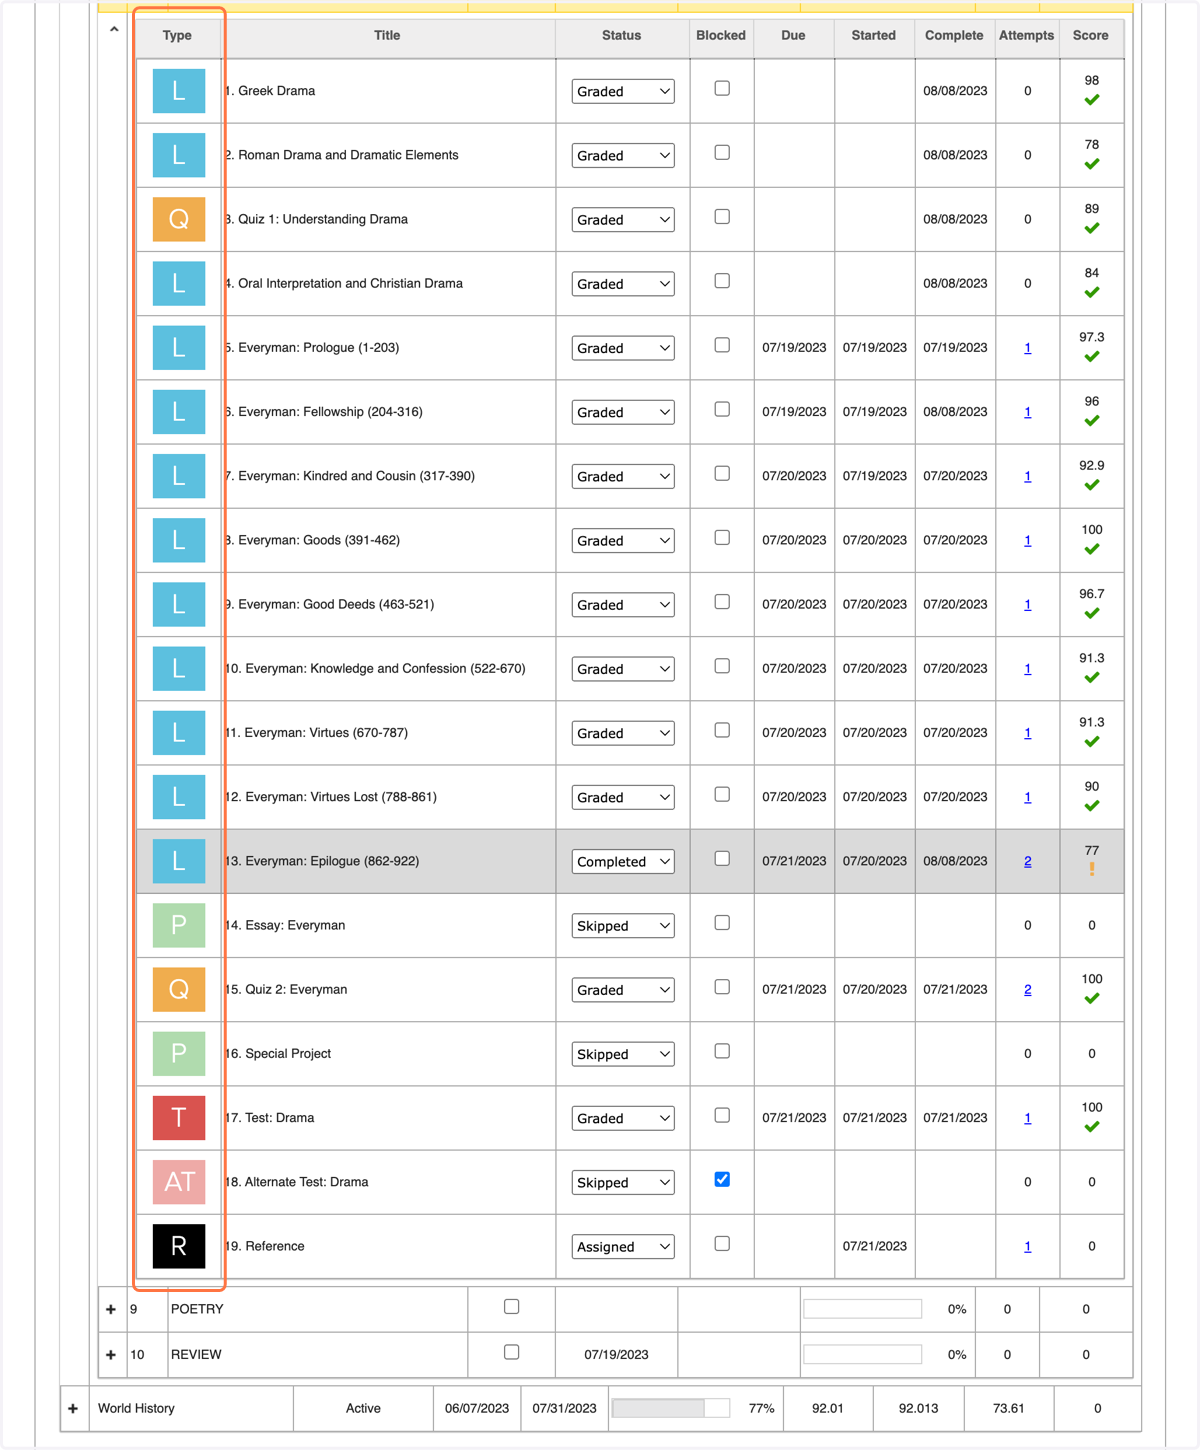
27. Title
This column lists each assignment title
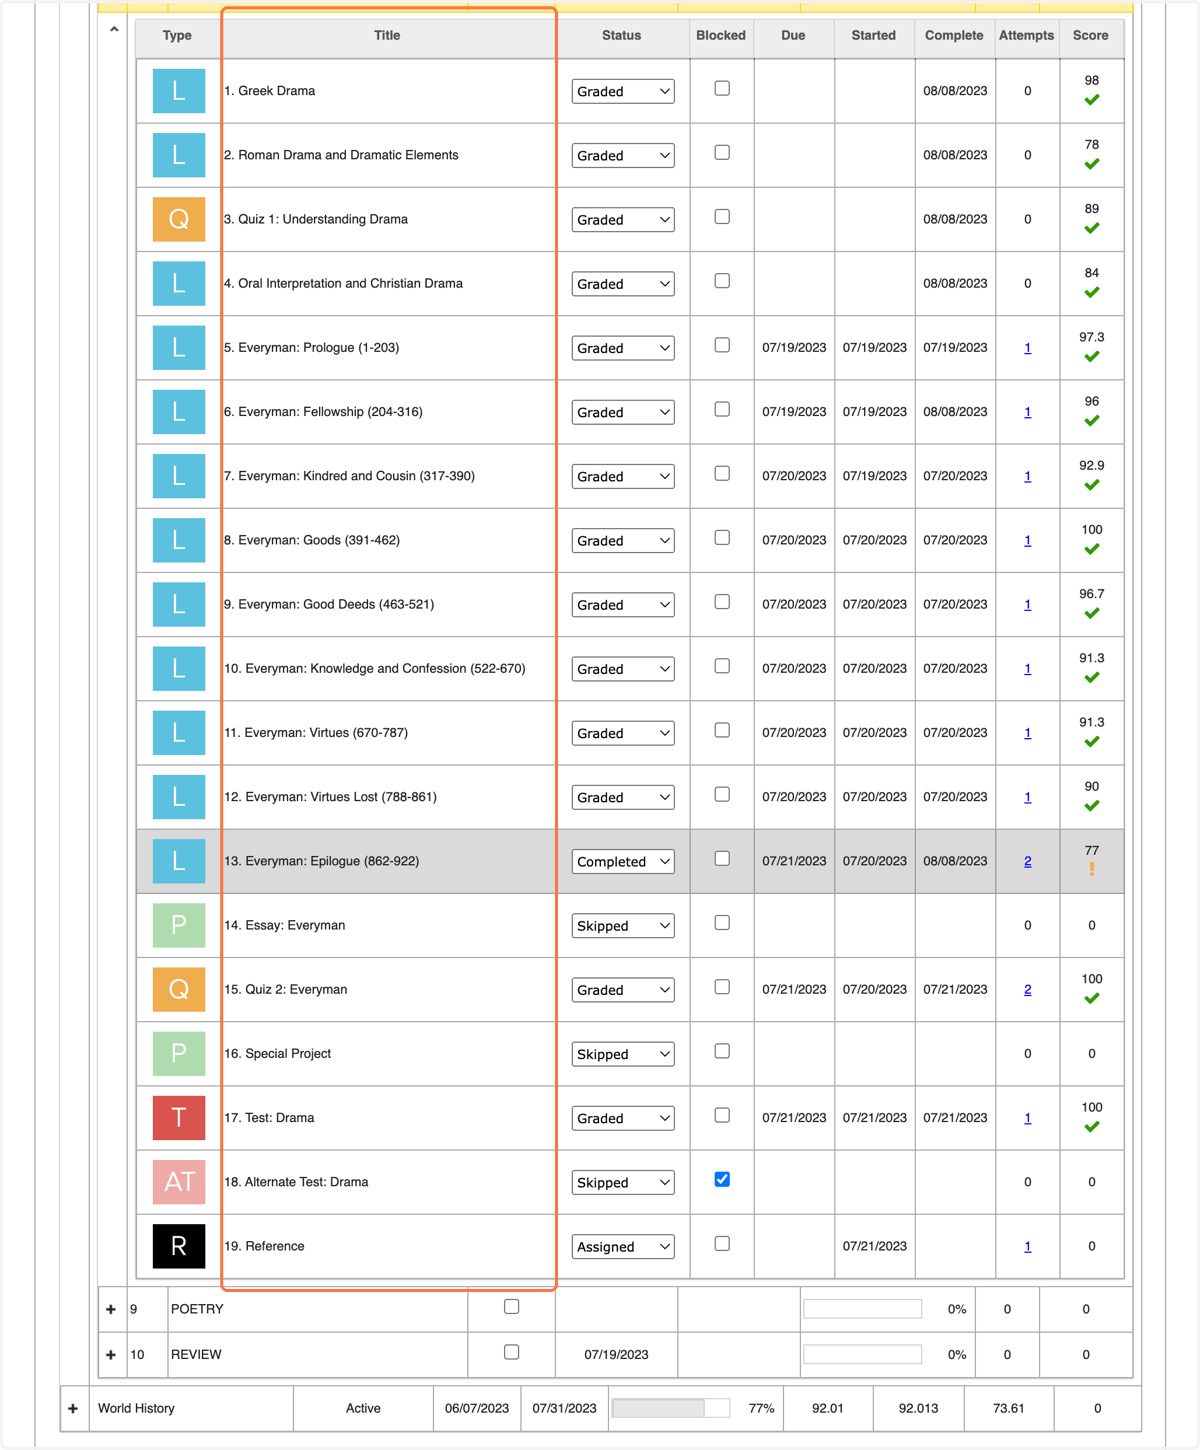
28. Status
This column shows the status of each assignment, whether it is Skipped, Assigned, Not Started, Completed or Graded.
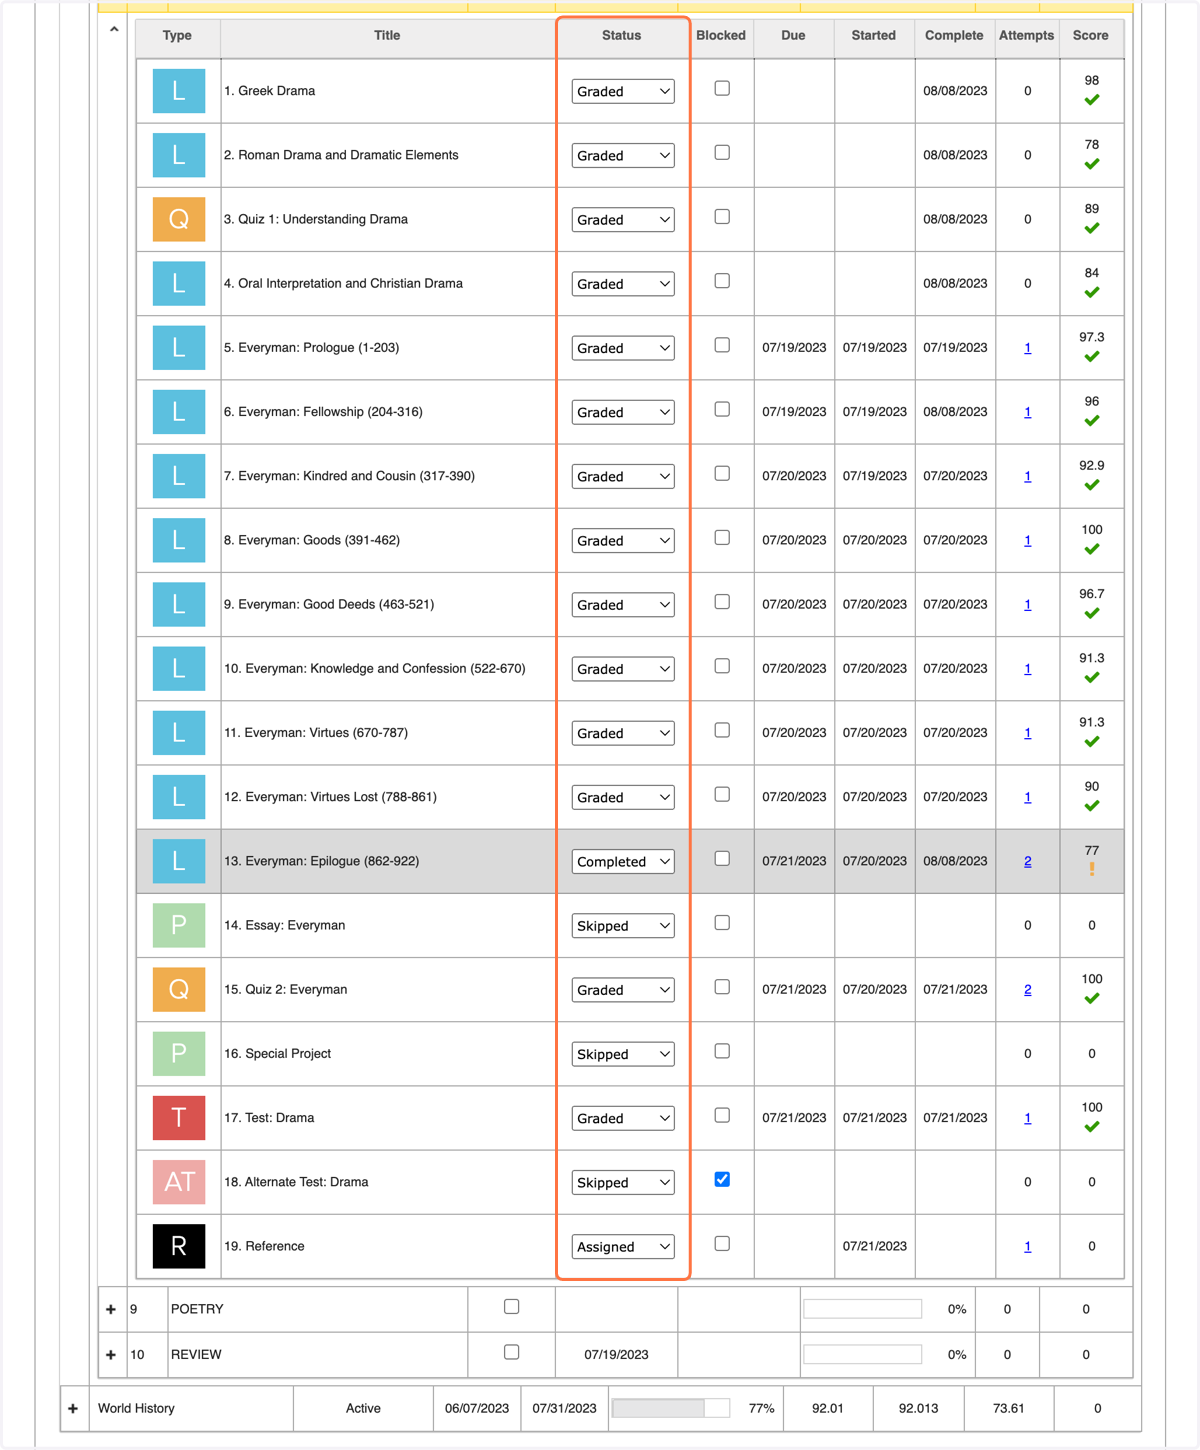
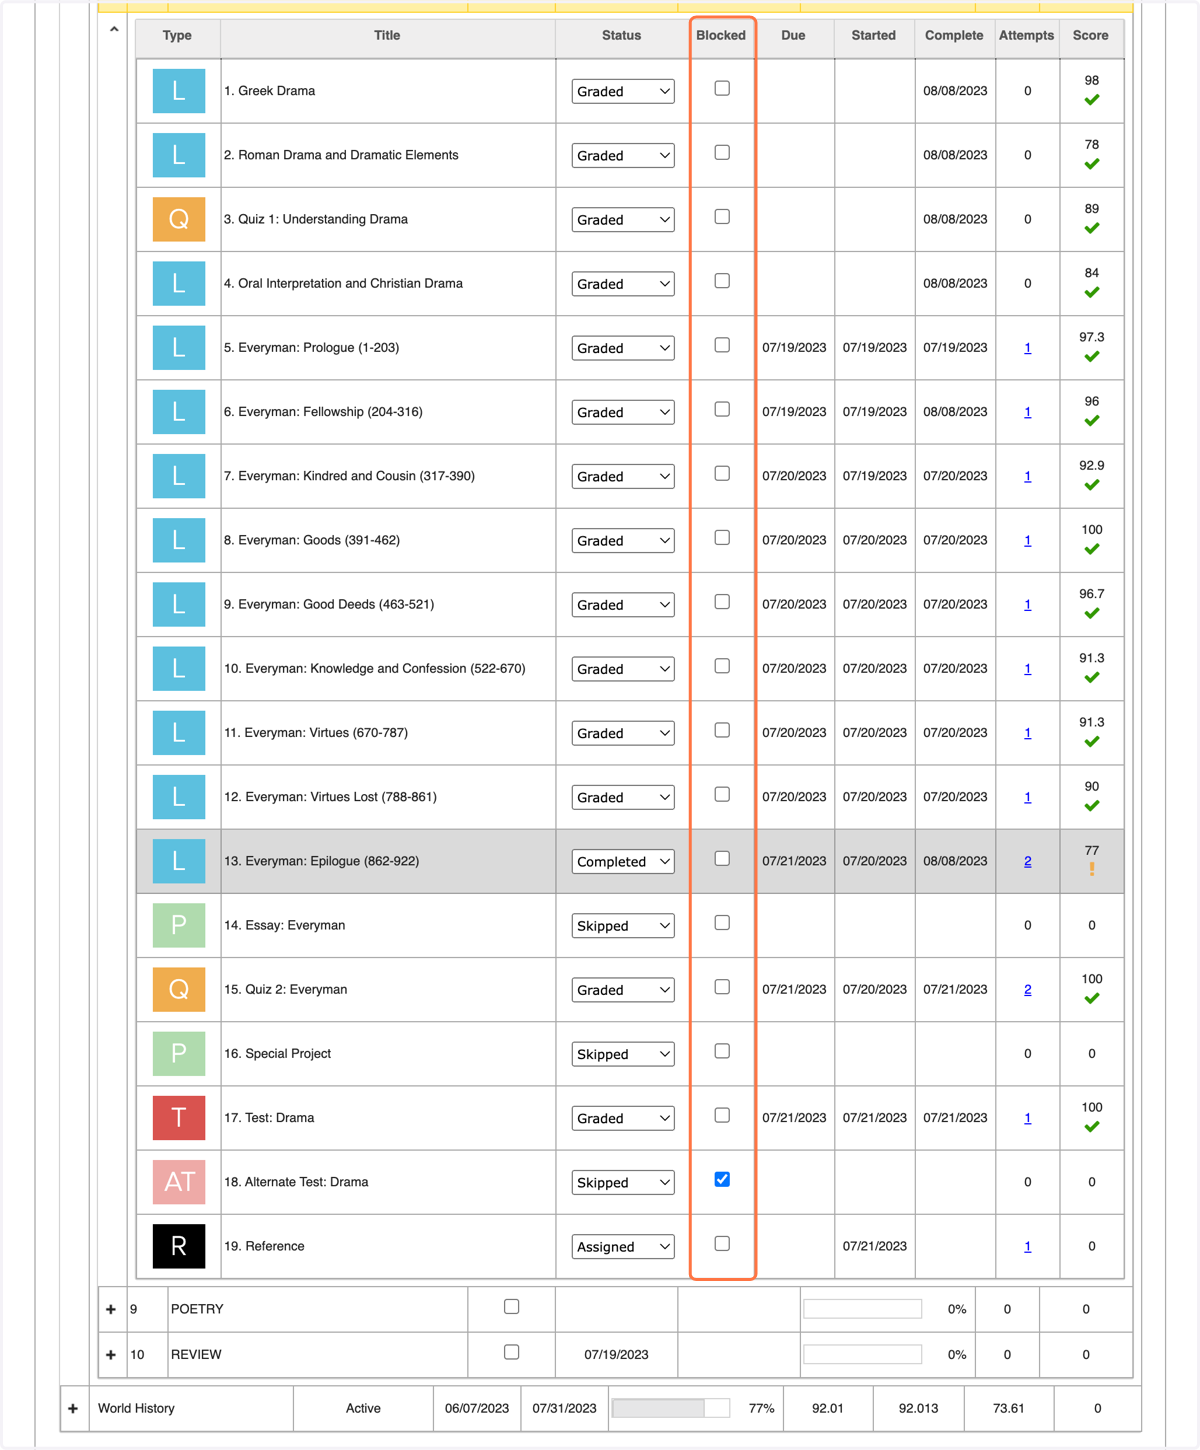
29. Blocked
This column indicates whether or not the assignment has been blocked. You should not need to do anything with this column
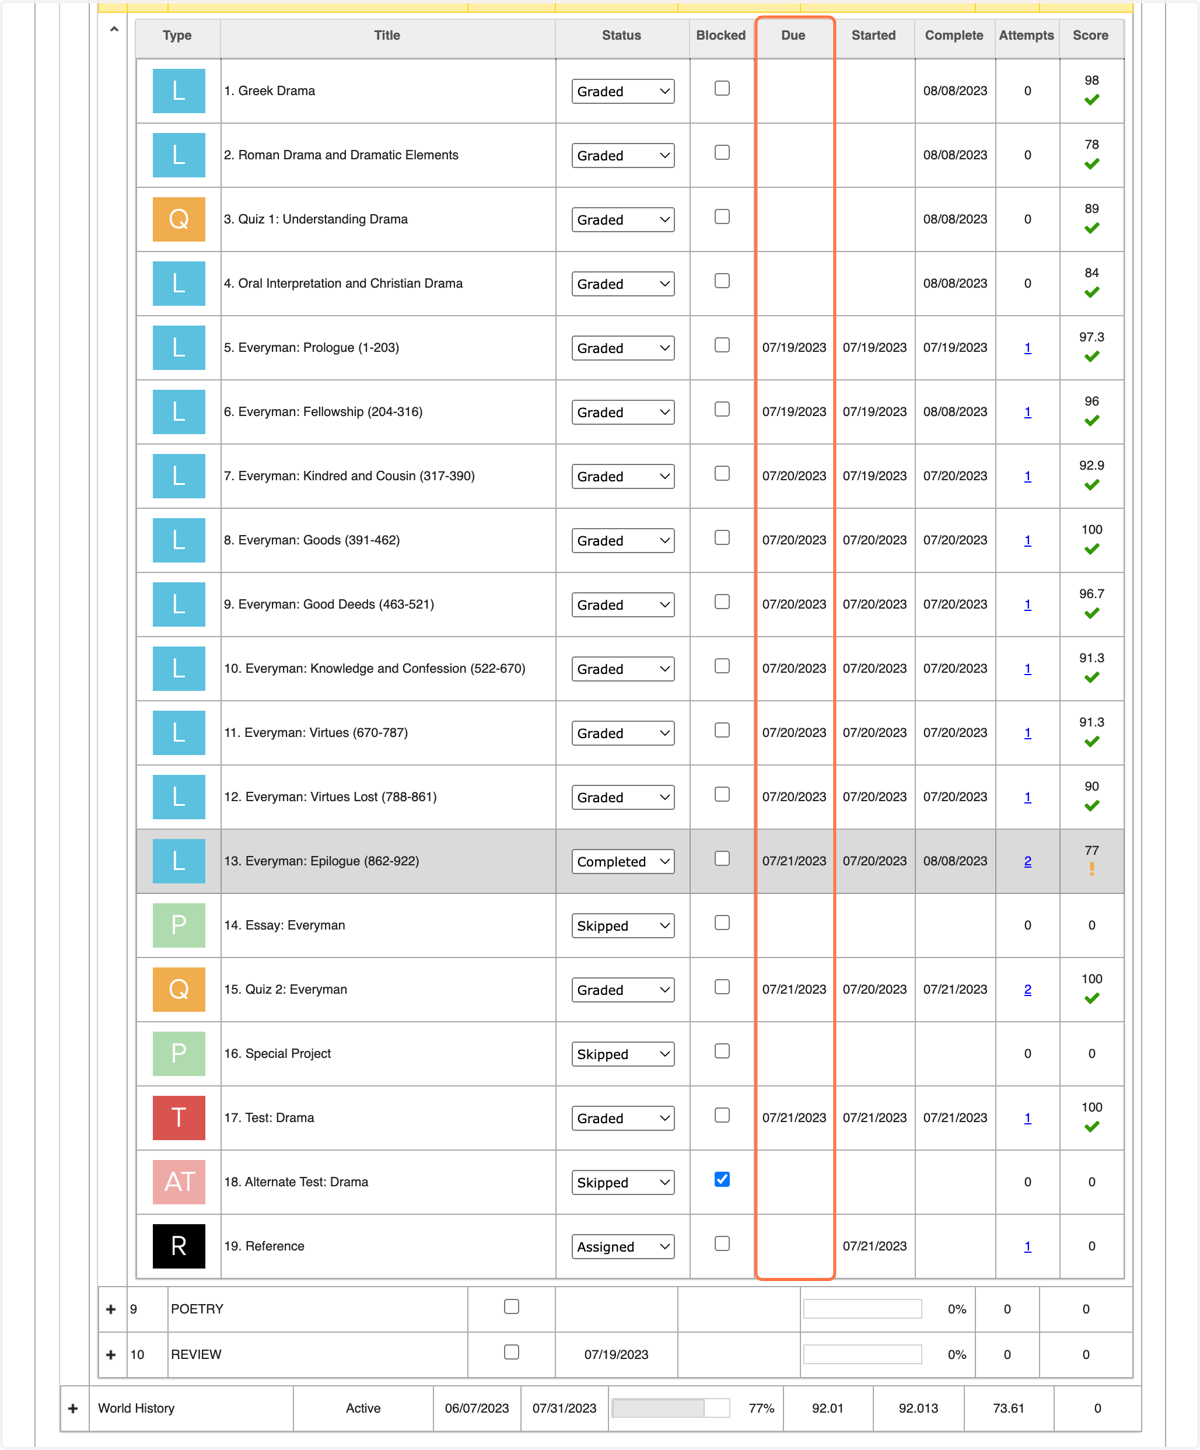
30. Due
This column displays each assignment due date.
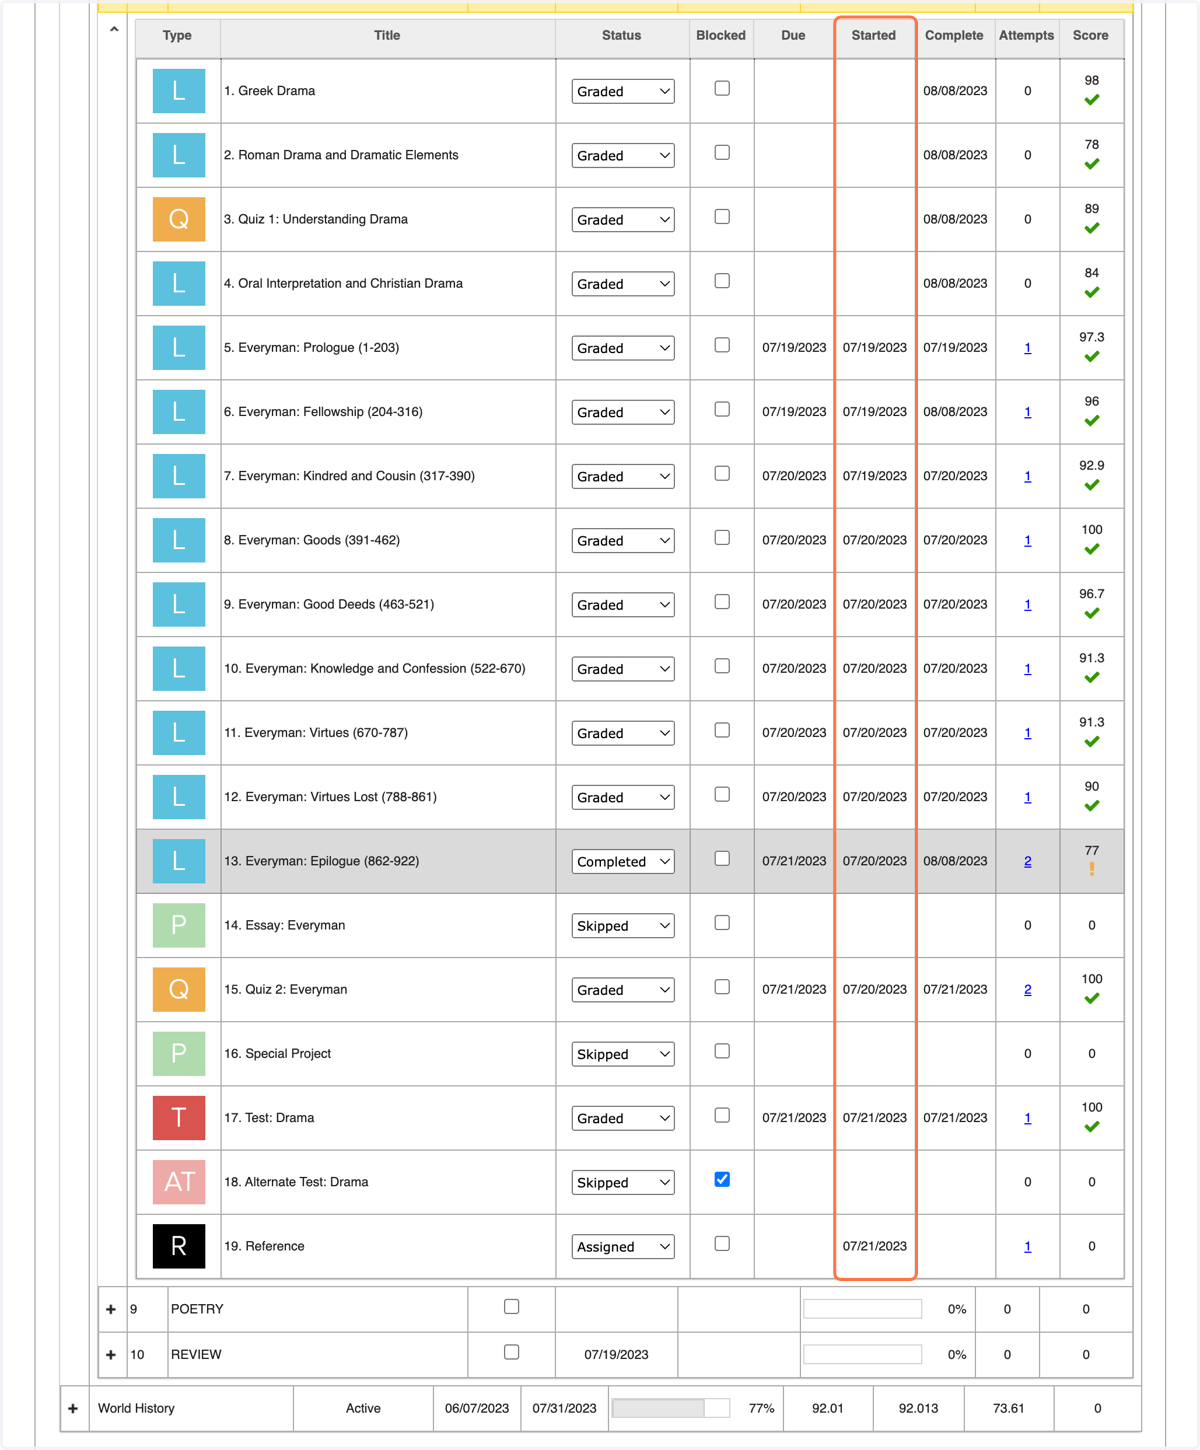
31. Started
This column displays the date the student first opened each assignment.
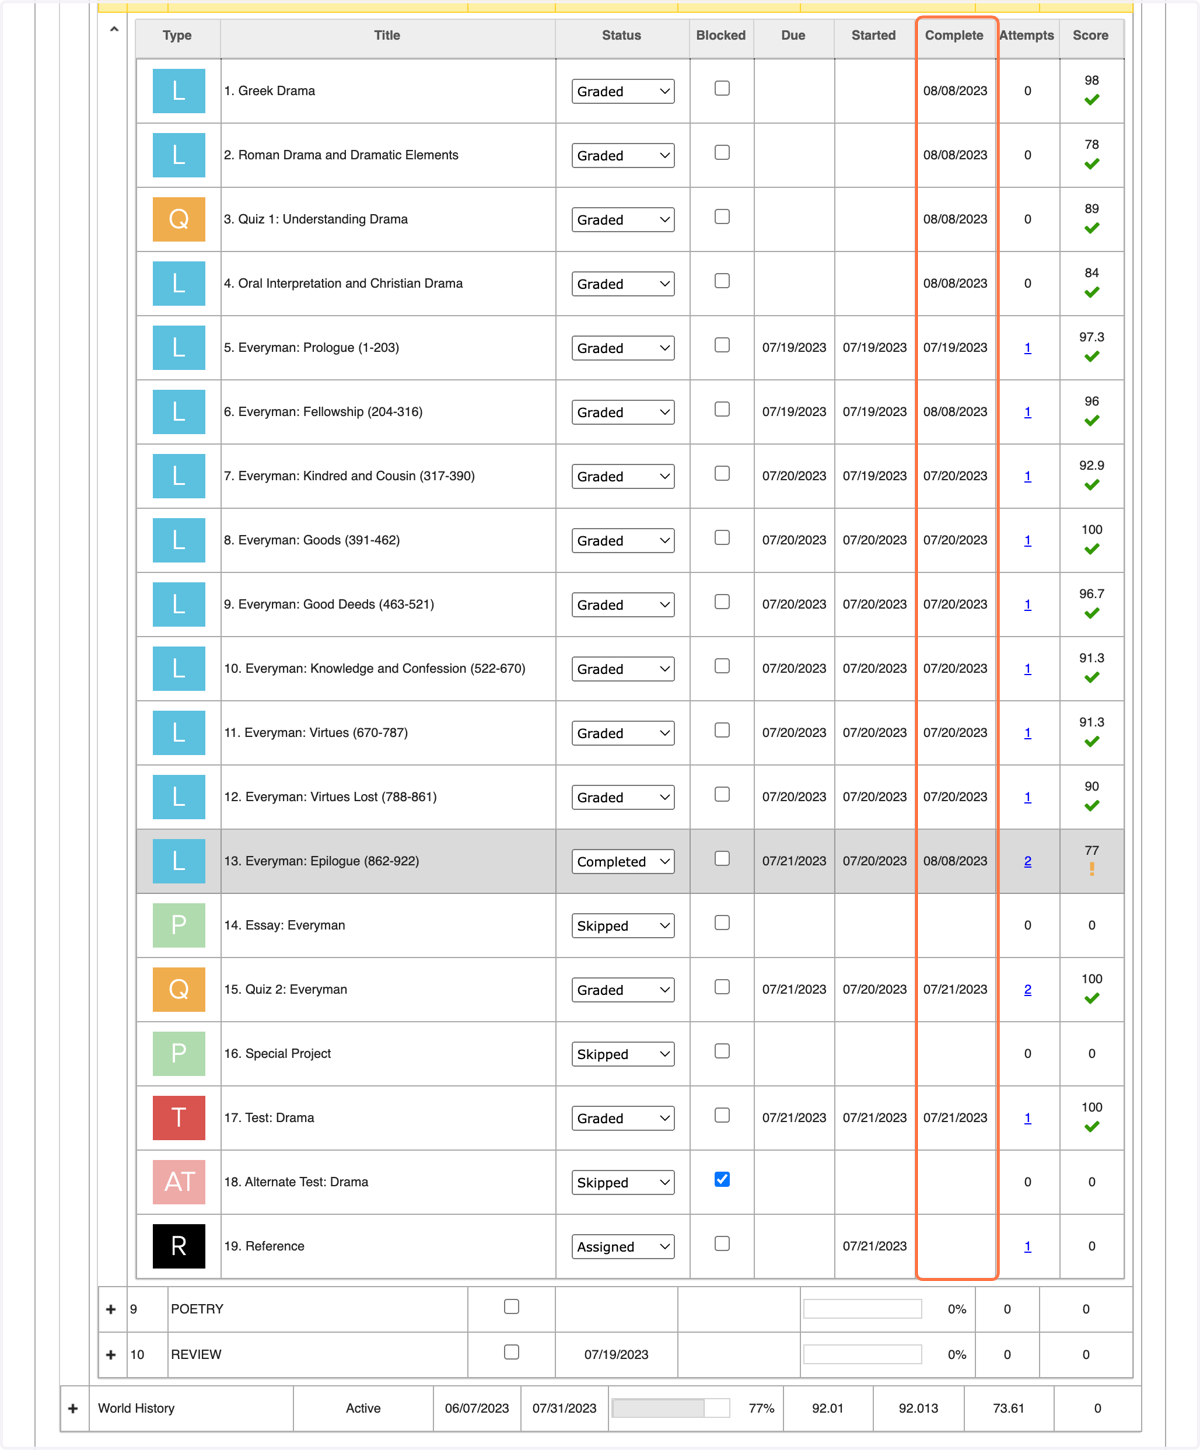
32. Complete
This column displays the date the student turned in their assignment.
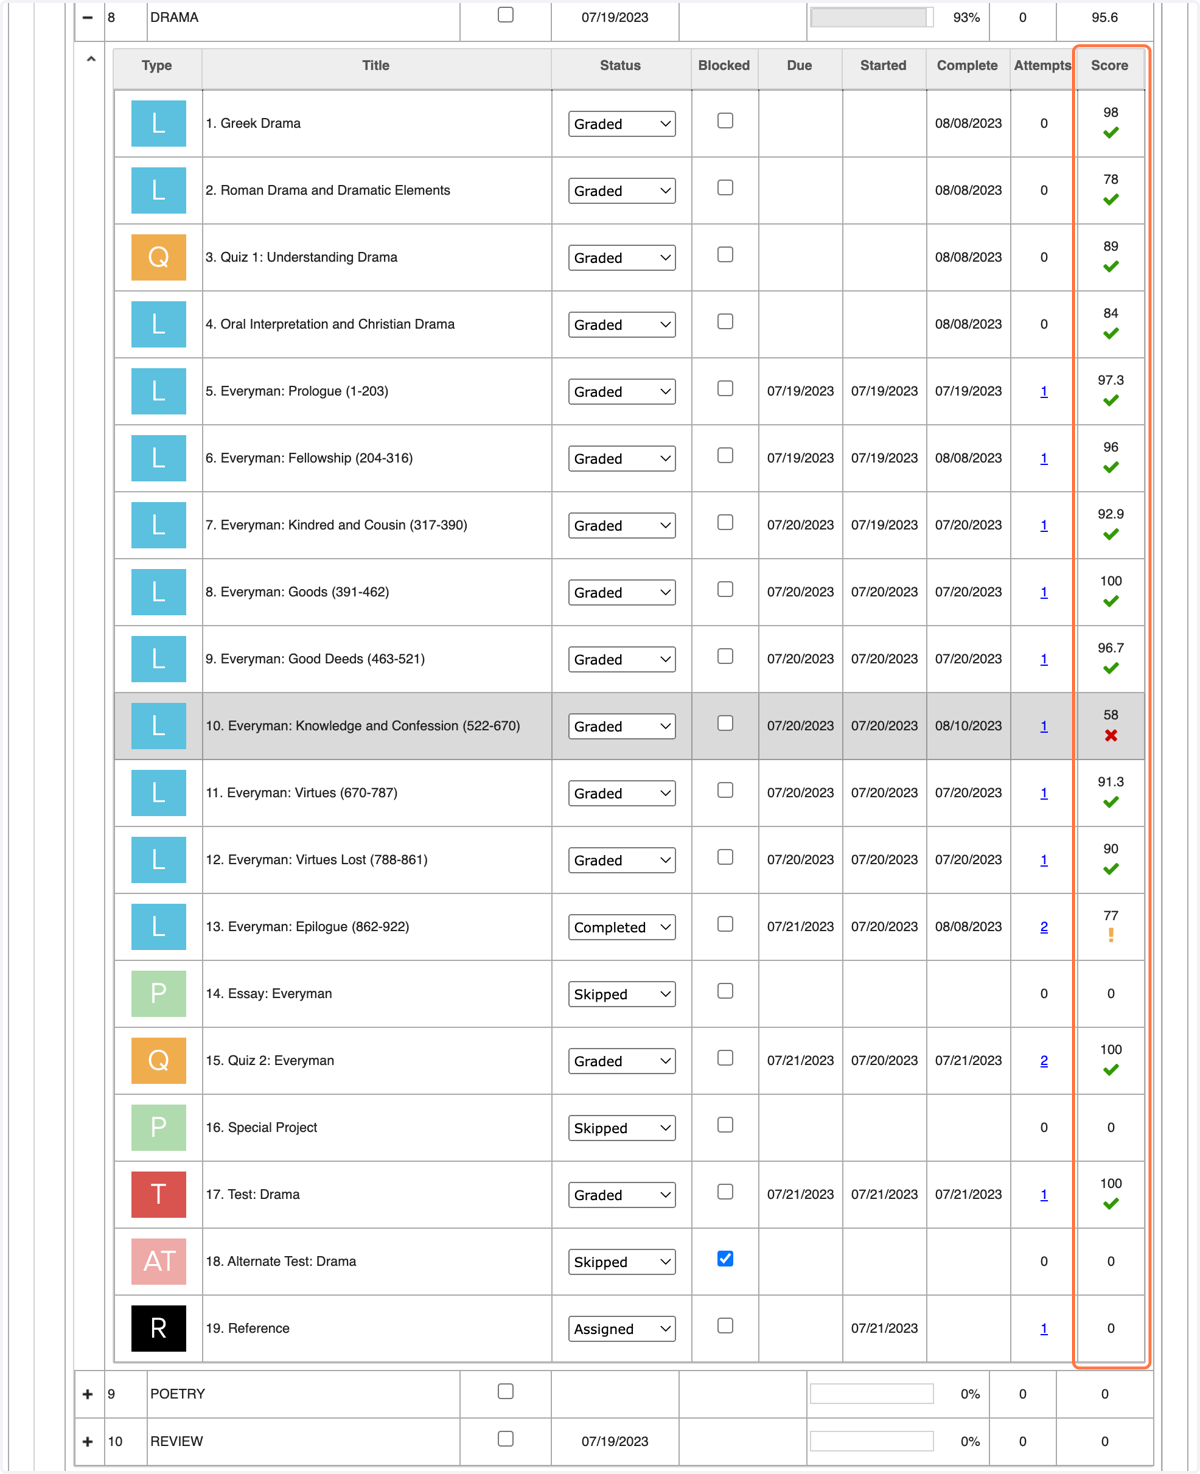
33. Score
This column shows the score for each assignment, along with one of three indicator icons.
A green check means the student met or surpassed the pass threshold.
A red x means they failed to meet the pass threshold.
A yellow exclamation point (!) means that there is at least one question within the assignment that the TOR must grade as the system is unable to process the answer.
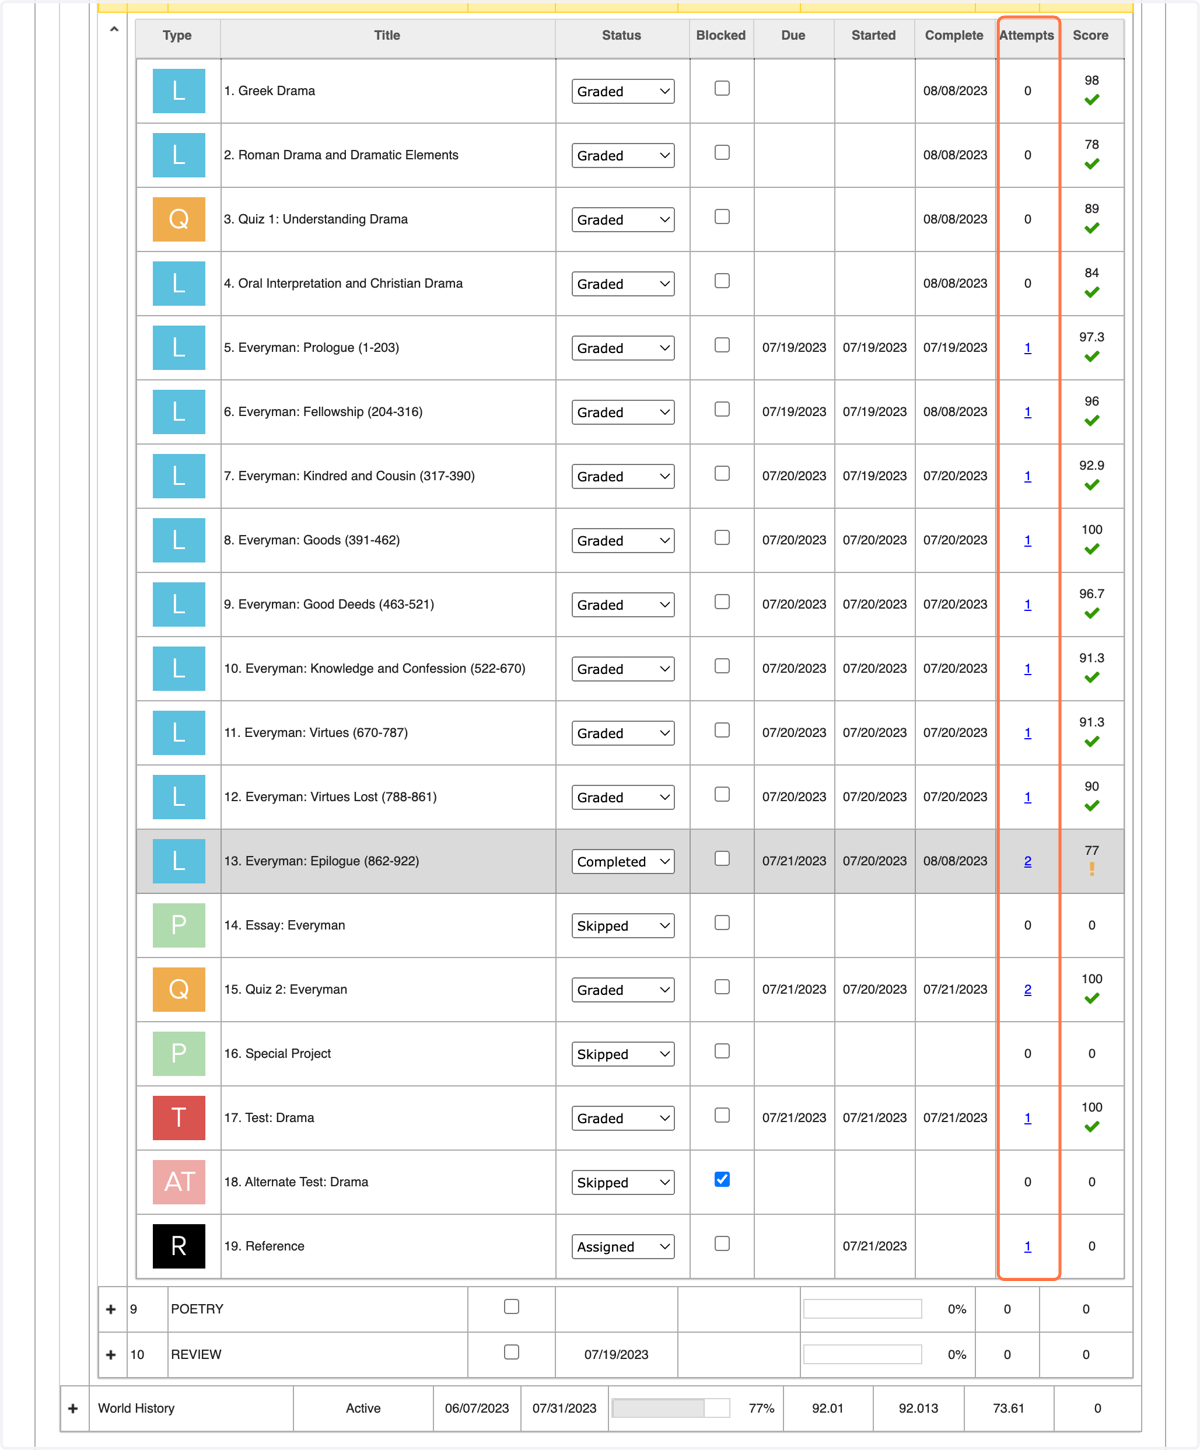
34. Attempts
This column displays the number of times the student has attempted each assignment.
Viewing Attempts Data
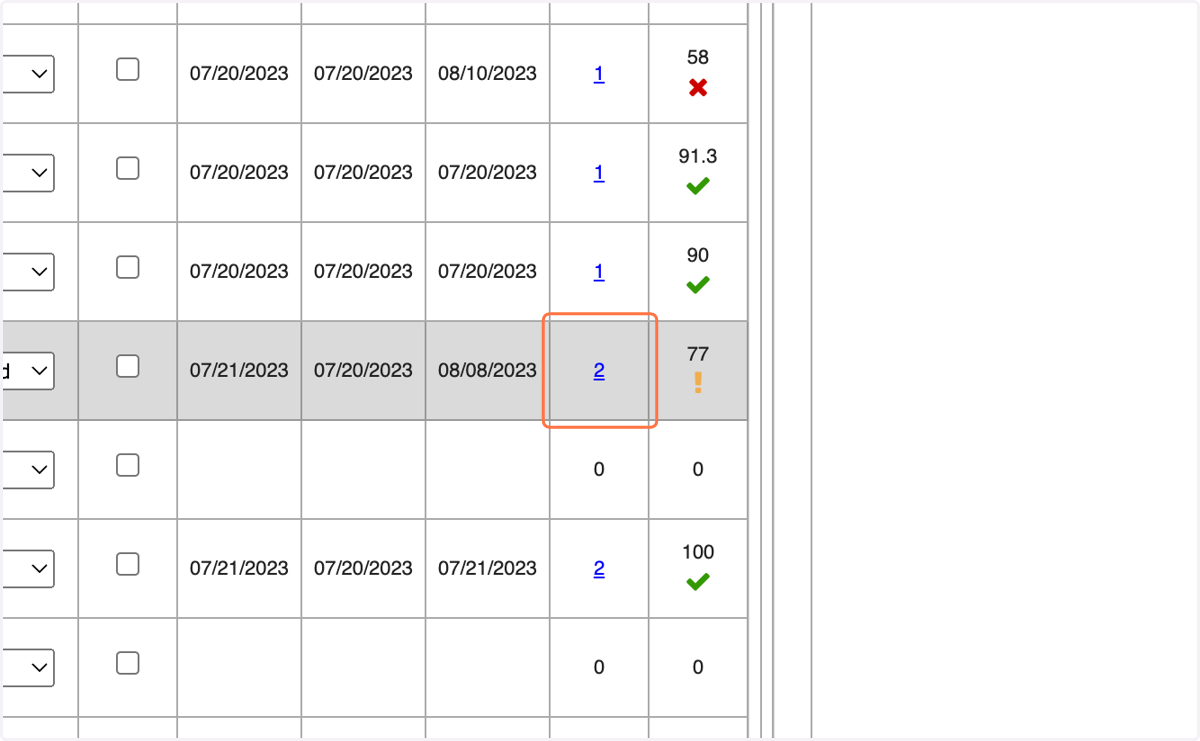
35. Access the data on each attempt
You can view details about each attempt on an assignment by clicking on the attempt number.
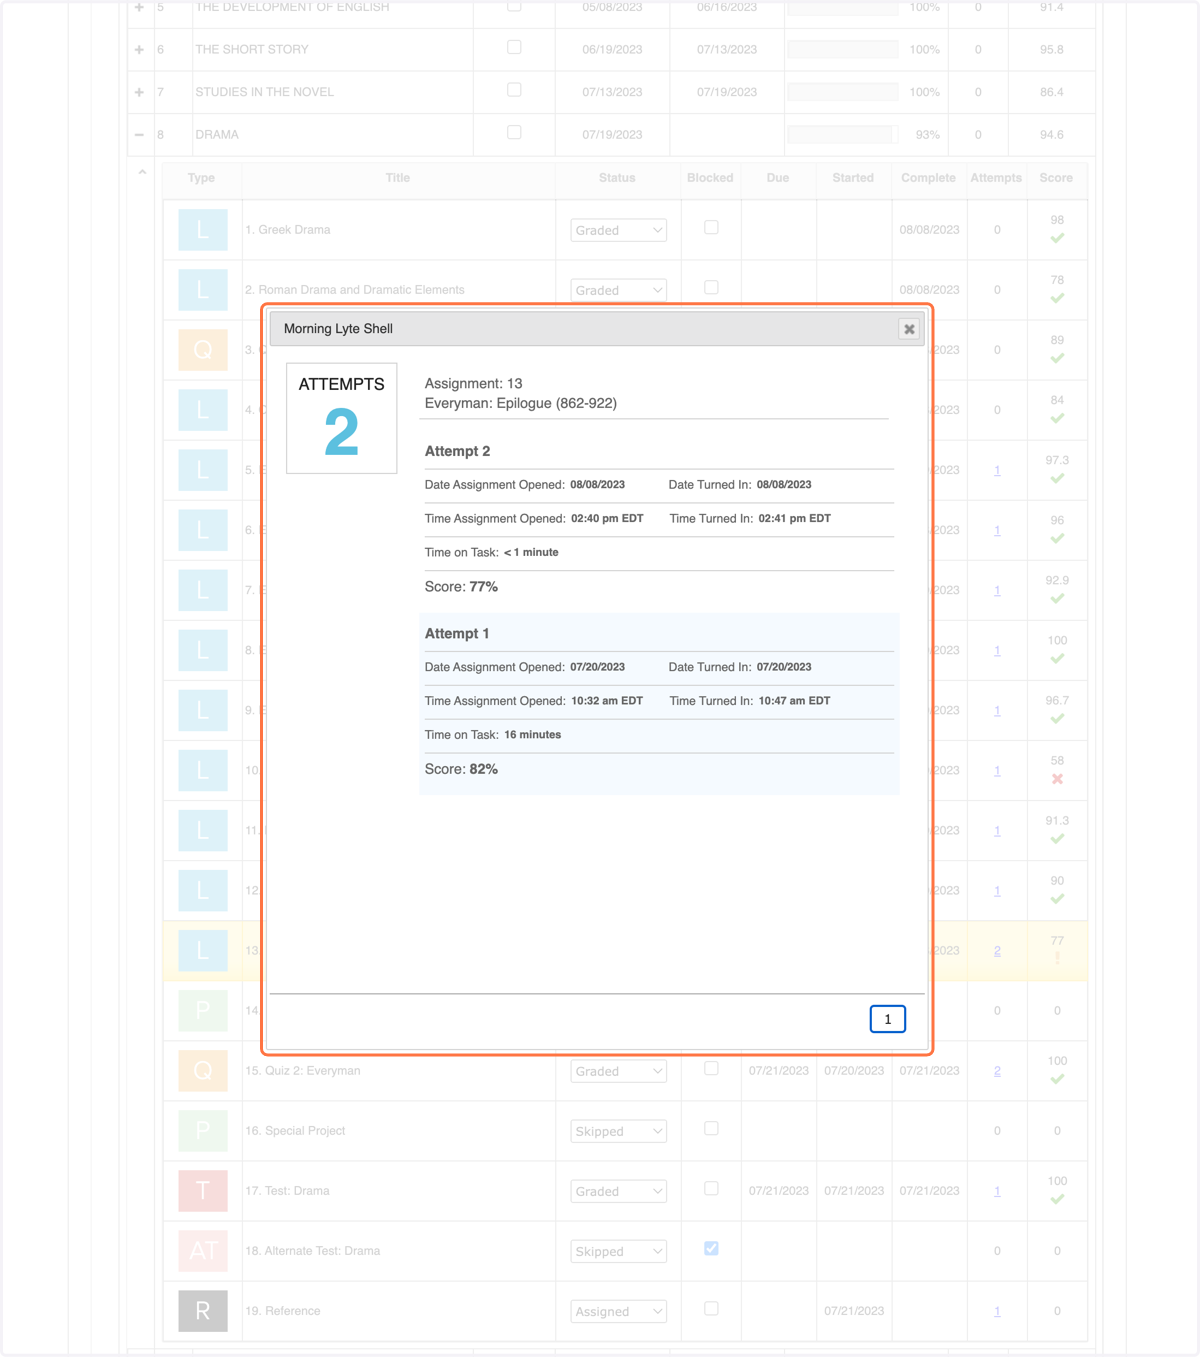
36. View the data
From this little window you can see lot's of potentially helpful information on each attempt the student made.
Accessing the Gradebook, Method #2
Here is the second (and my preferred) way to access a student's Gradebook.
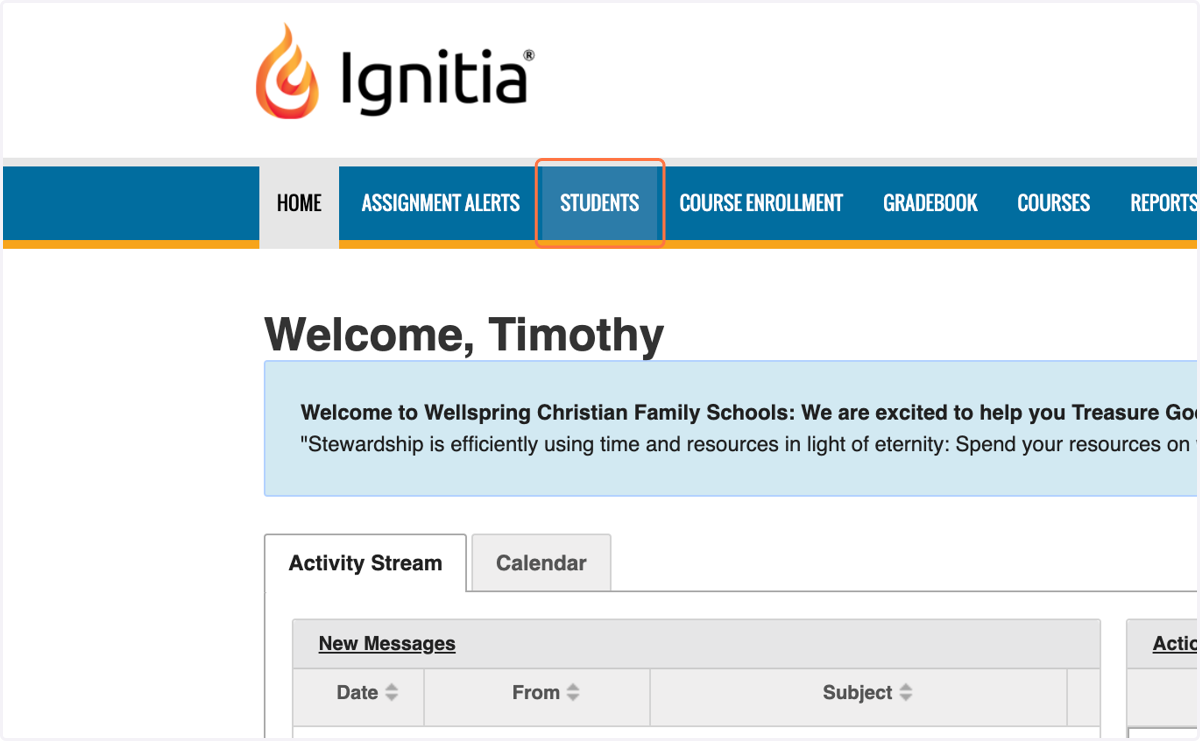
37. Click on the STUDENTS tab
In this example we're starting back from the HOME page, but you can do this from anywhere in the account.
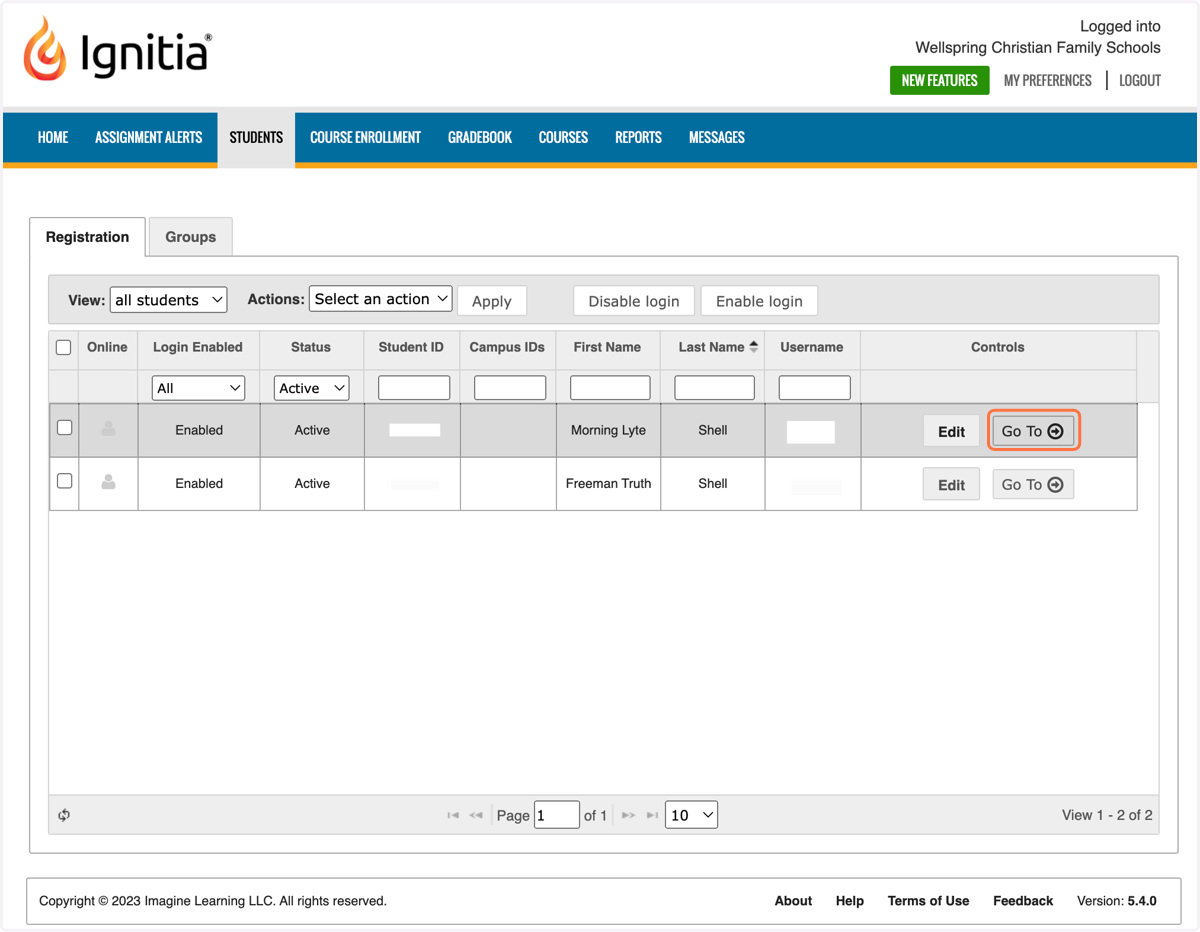
38. Click 'Go To"
You will be able to see a list of all your students (this may be only one for you). All the way to the right of the menu is a button that says 'Go To' . Click it.
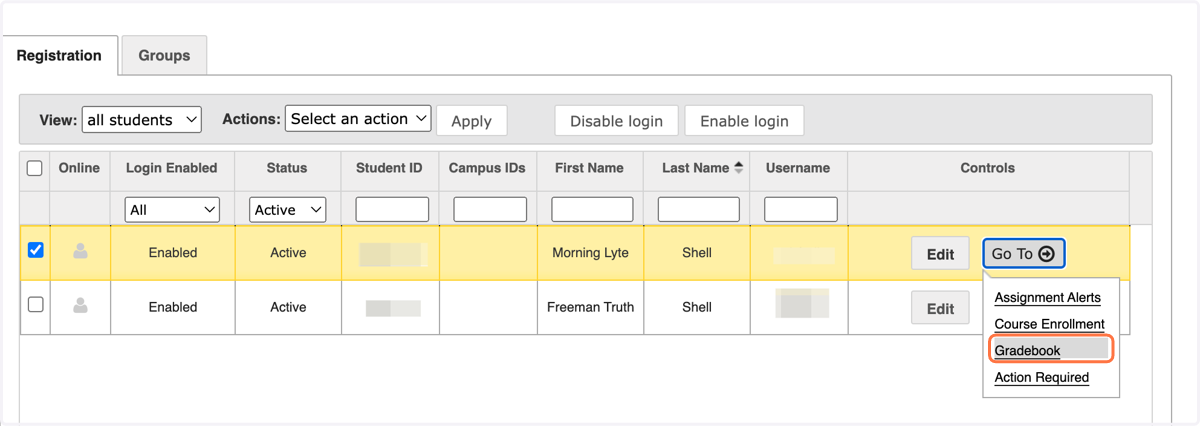
39. From the dropdown menu, click on Gradebook
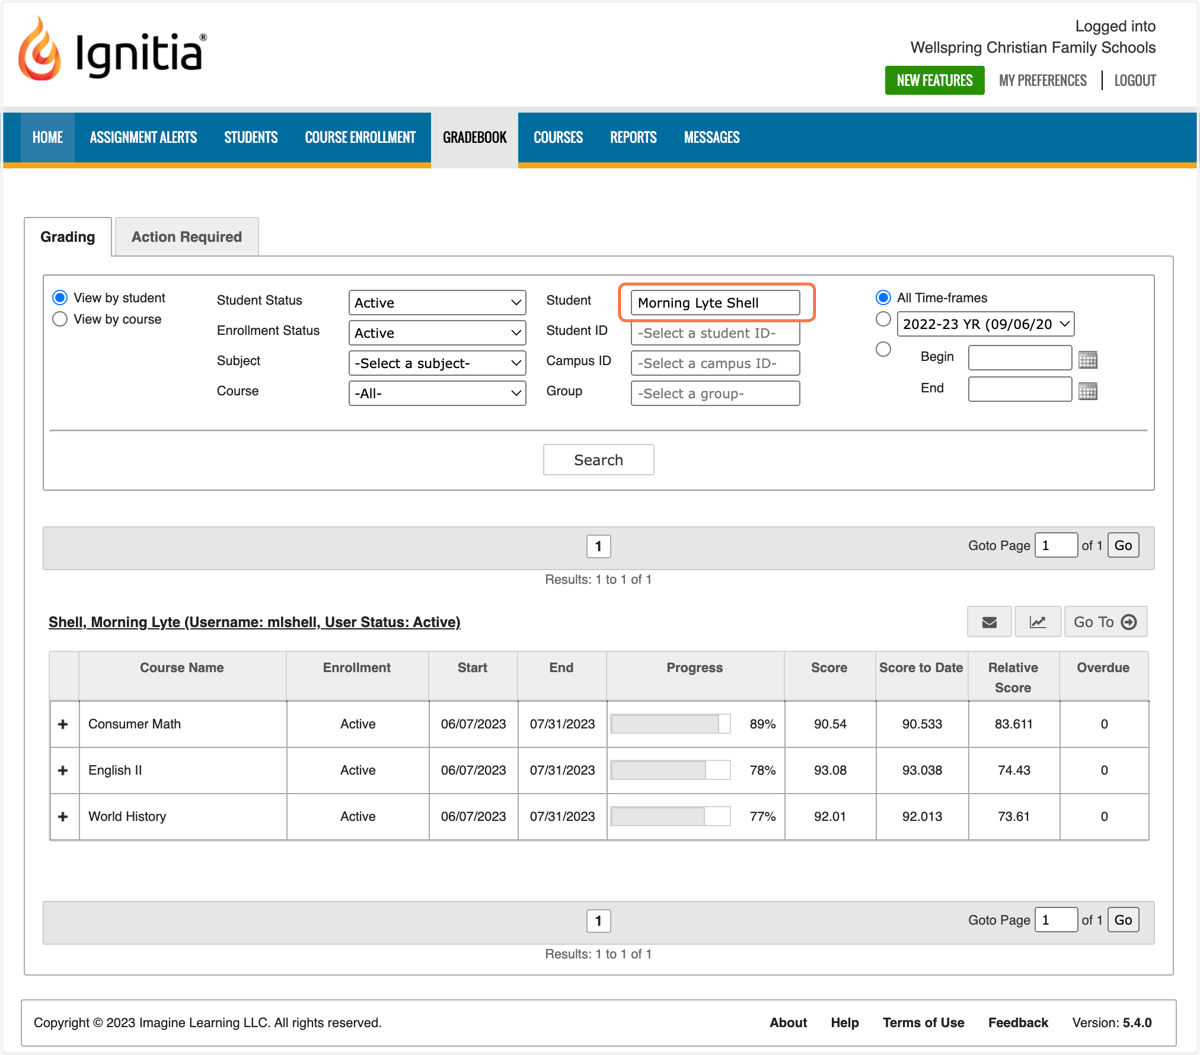
40. The system will automatically filter for that student and take you directly to their gradebook.
41. Access the Gradebook from anywhere by using the 'Go To' button.
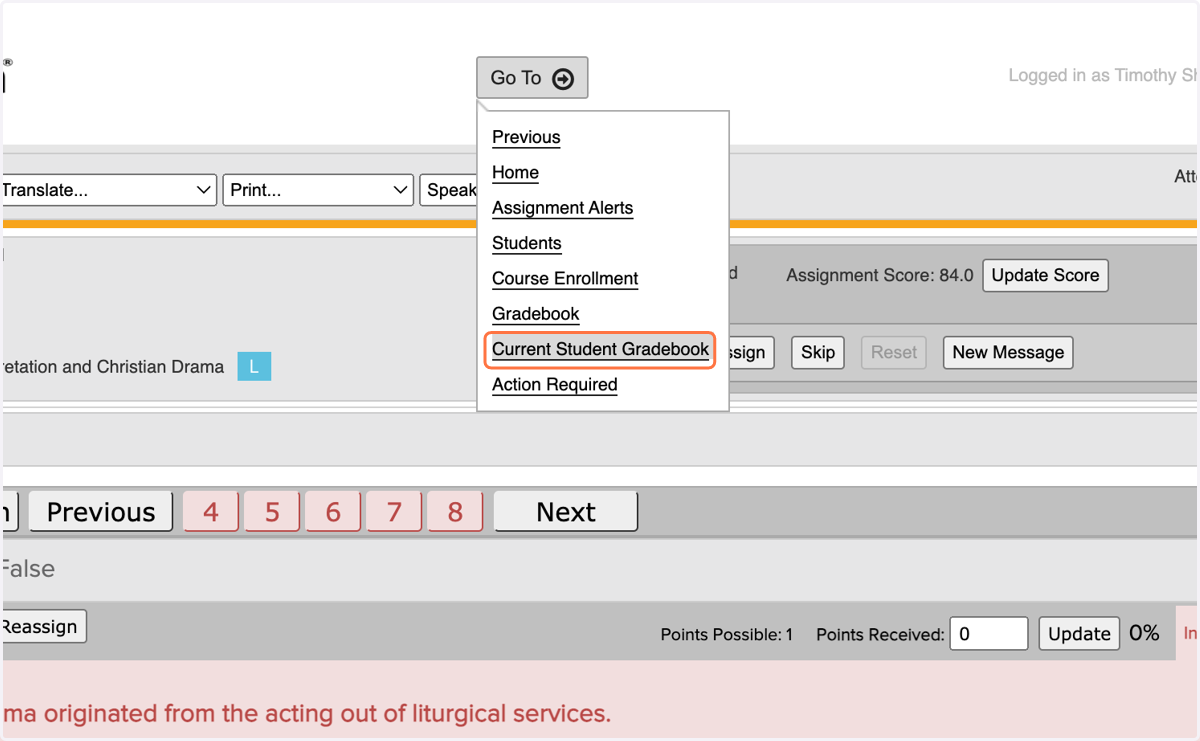
No matter where you are working you can get back to your student's Gradebook as long as you can find a 'Go To' button
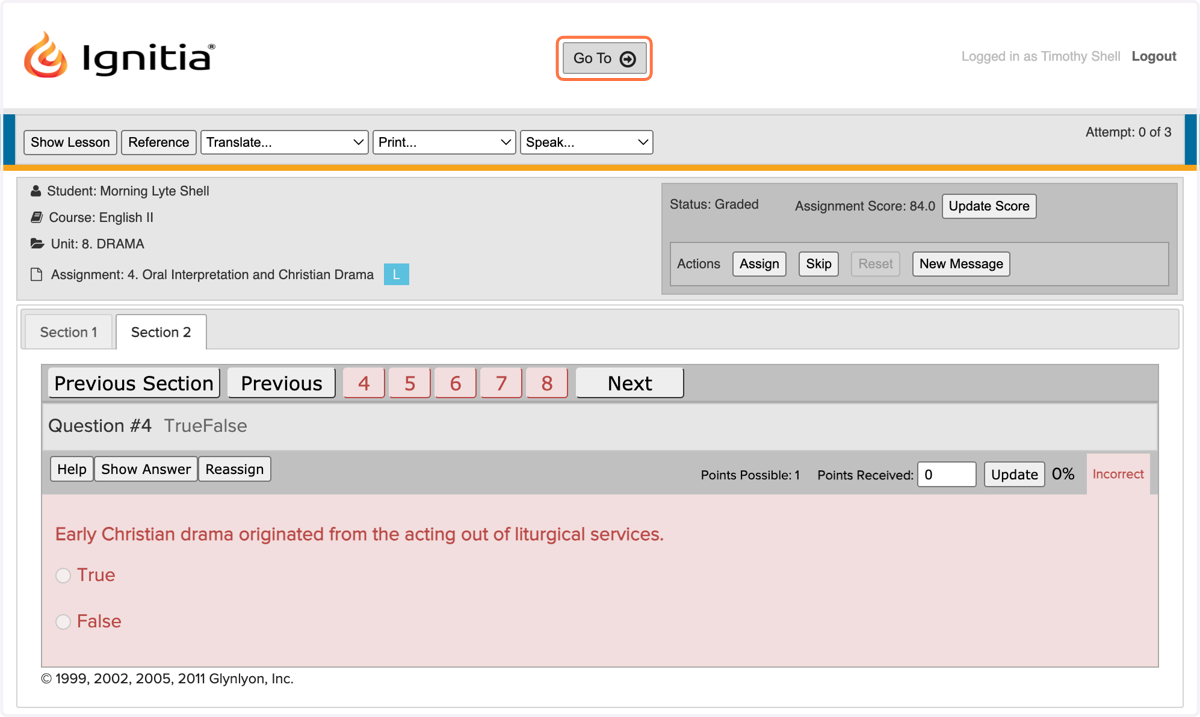
42. Click on Current Student Gradebook
Make sure to choose 'Current Student Gradebook' when you do or it will take you to the unfiltered Gradebook.
43. And you're back to the Gradebook!
You're Done!
That's the end of this tutorial!
If you would like to continue learning about Ignitia or didn't find the answer to your question here, check out more tutorials on our website: wcfs.edu/ignitia-member-resources or contact us directly via email (ignitia@wcfs.edu) or our Ignitia assistance line: (204) 675-4846