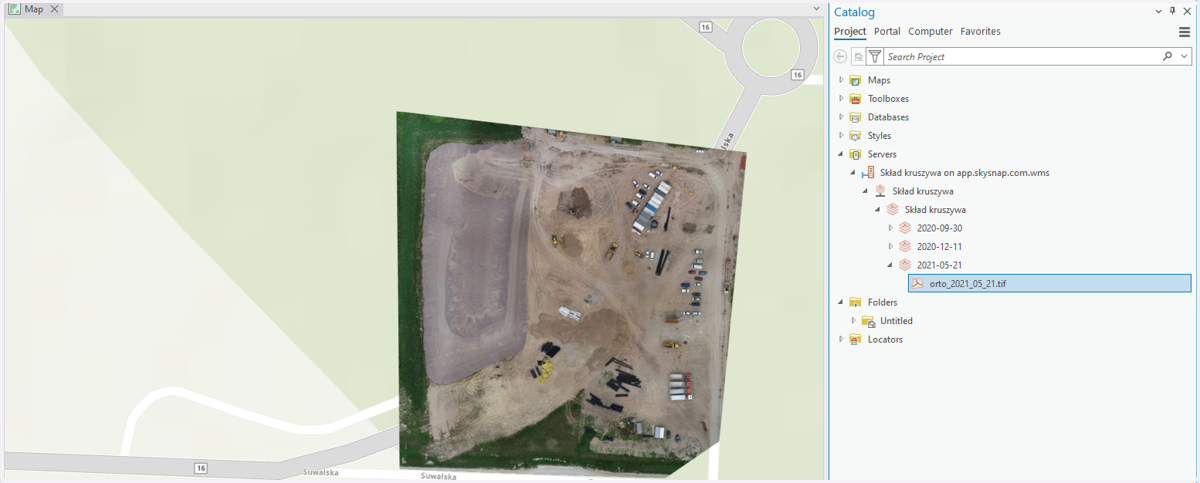
Connecting the WMS service
Instructions describing the connection of orthophotos located in the SkySnap portal to popular programs:
AutoCAD Civil 3D
Bentley OpenRoads
QGIS
Global Mapper
ArcGIS
General link to WMS: https://app.skysnap.com/wms/site/XX , where:
XX - site number, located in the site link on the portal.
Example:
When we enter a specific project in the portal and see a link to the page https://app.skysnap.com/site/17/46/, the link to the WMS service for this site will look like this https://app.skysnap.com/wms/site/17
Also note that the user must have access to this site in order to correctly display the connected data. The user should at least have the role of Viewer in the portal in the context of the data he wants to display.
AutoCAD Civil 3D
1. Set the appropriate coordinate system (the same as the site system in the portal) in AutoCAD Civil 3D
AutoCAD Civil 3D requires that the project to which you want to connect the WMS has a coordinate system set up.
2. It is important to set the appropriate WMS version (as in the screenshot) and indicate the appropriate coordinate system when adding a WMS
Connection name: Any connection name
Server name or URL: https://app.skysnap.com/wms/site/XX , where XX is the site number (see the beginning of the instructions)
Version: 1.1.1
Then you need to enter your username and password. These are the same details you use to log in to the SkySnap portal.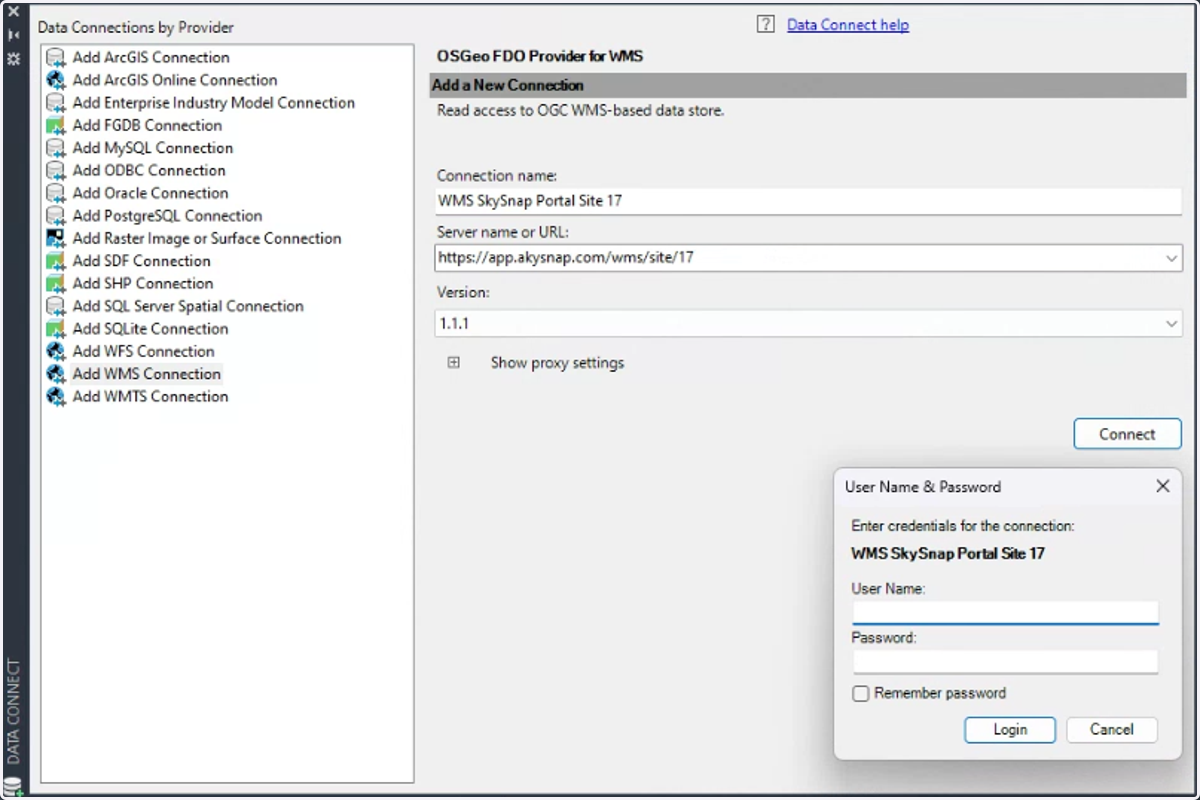
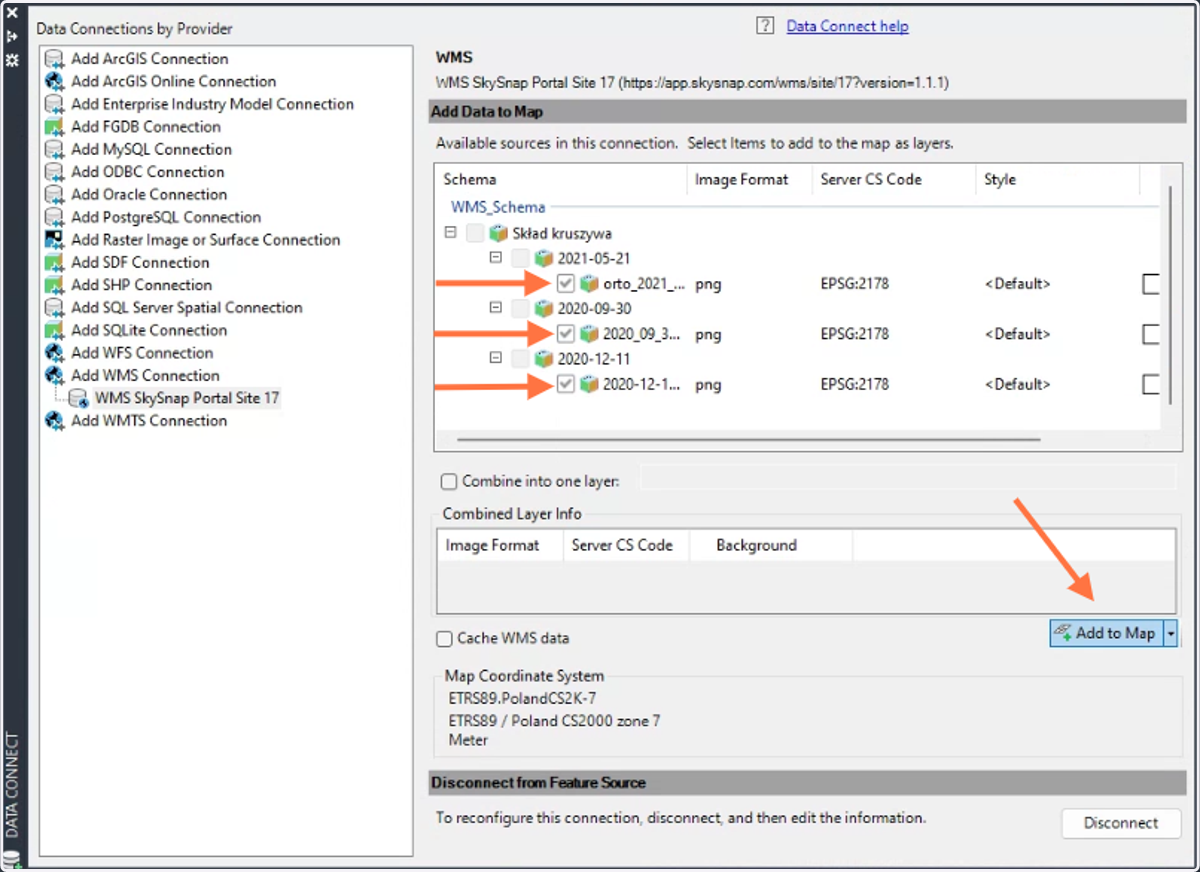
3. Select the data you are interested in and click the "Add to Map" button
Bentley OpenRoads
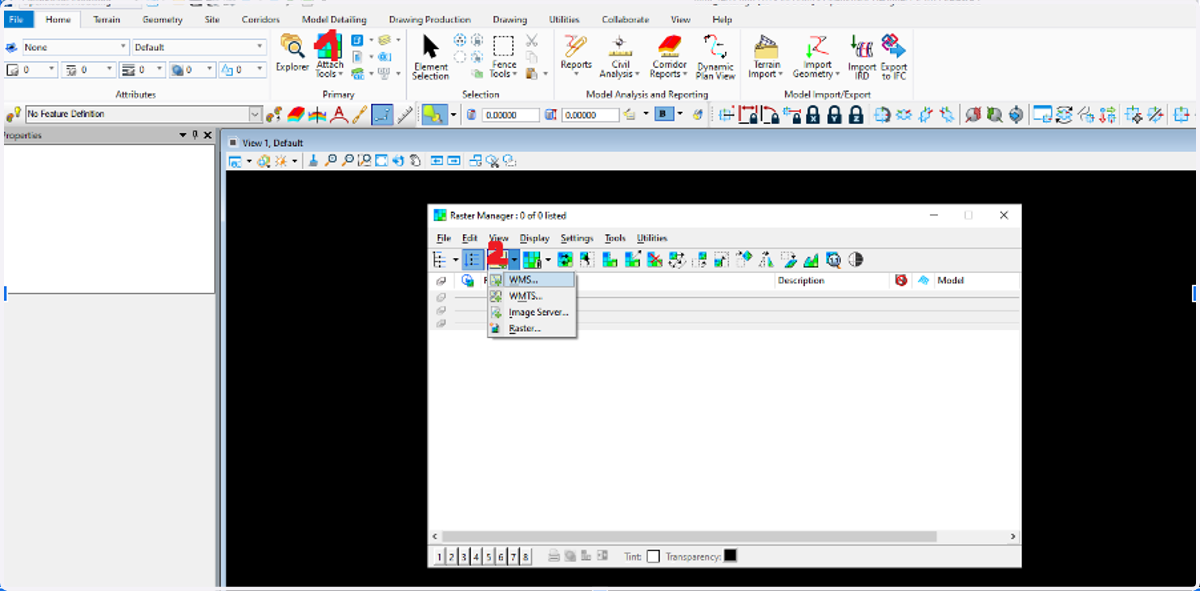
4. Select WMS option in the raster manager window
5. Paste the WMS link to the site (see the beginning of the instructions), then enter the username and password
The username and password are the same as when logging in to the SkySnap portal.
The user must have access to the site to be able to display the data correctly.
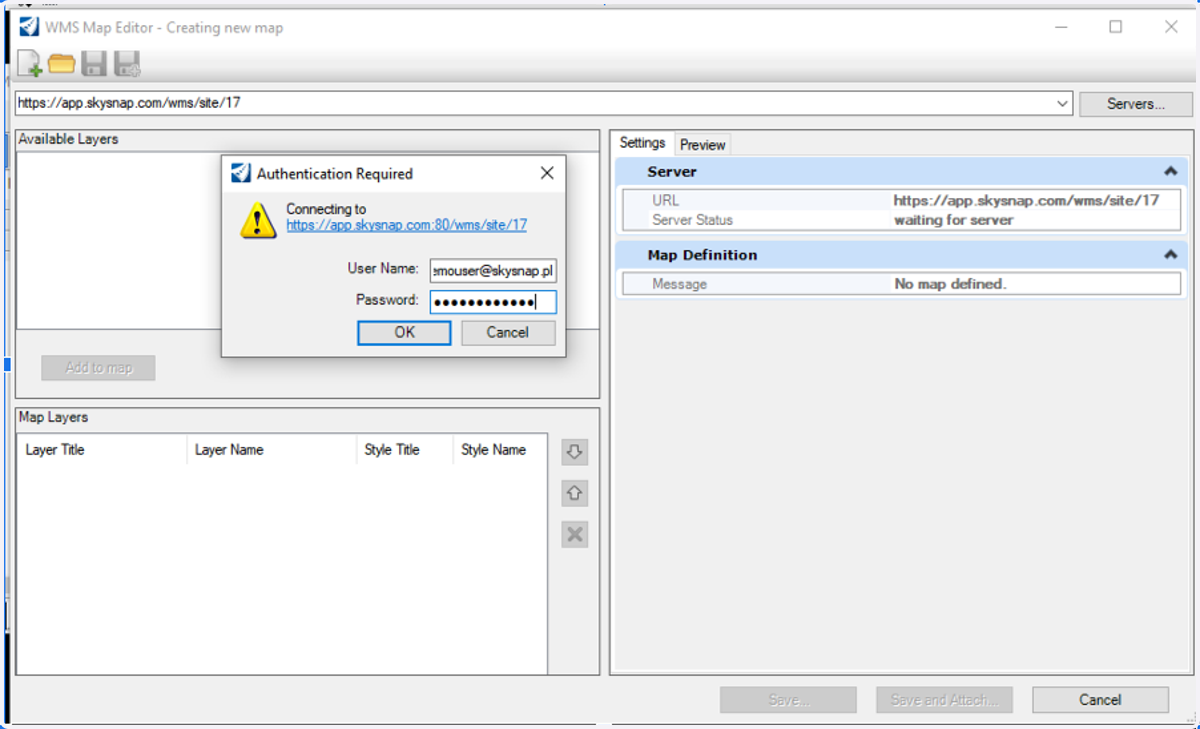
6. A list of orthophotomaps uploaded to the portal appears (all orthophotomaps from a given site divided by date (project))
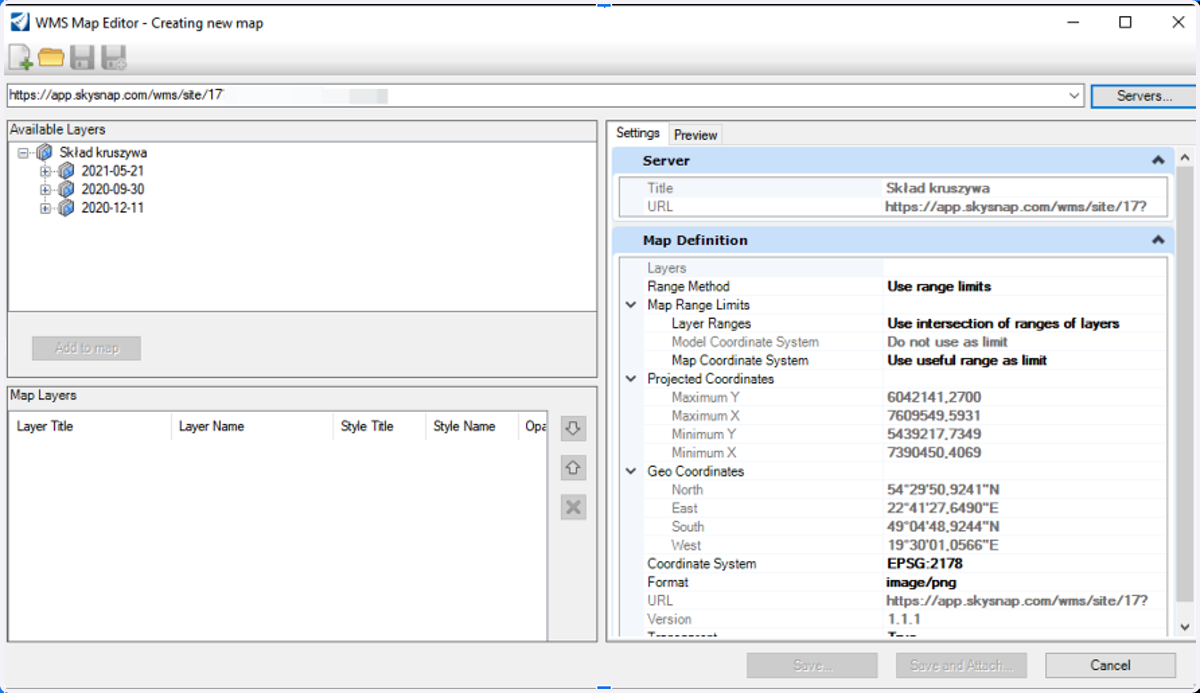
7. Expand one of dates (projects), select the orthophotomap and then click "Add to map"
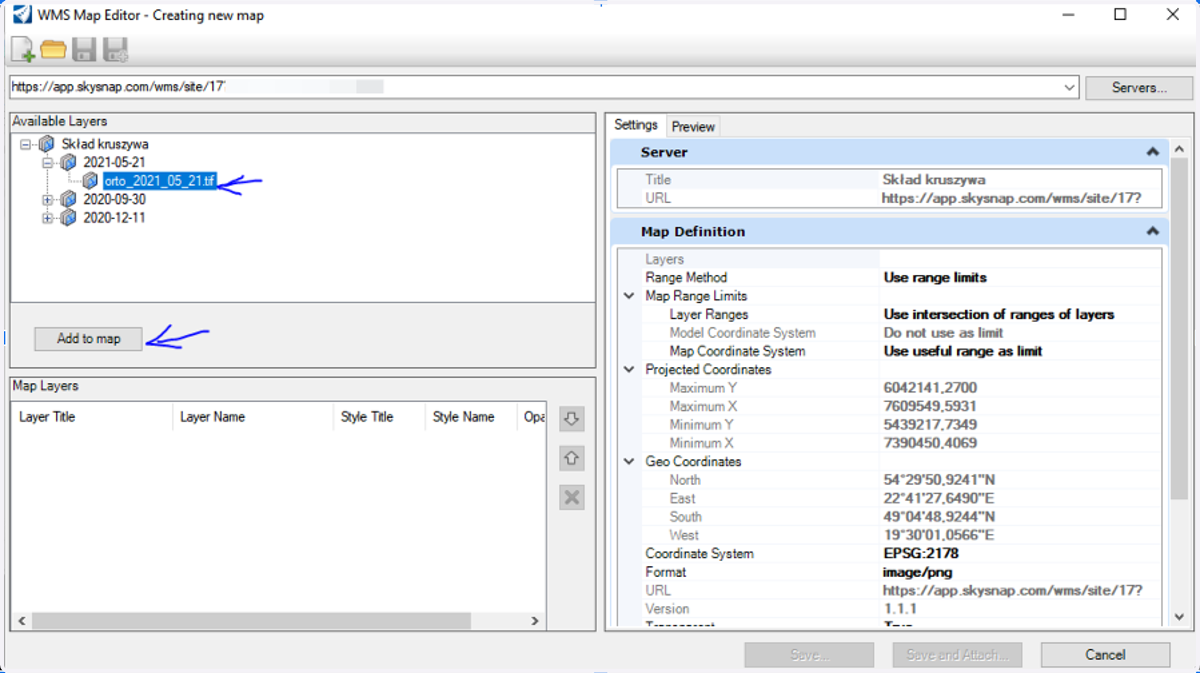
8. Select the "Save and Attach" button
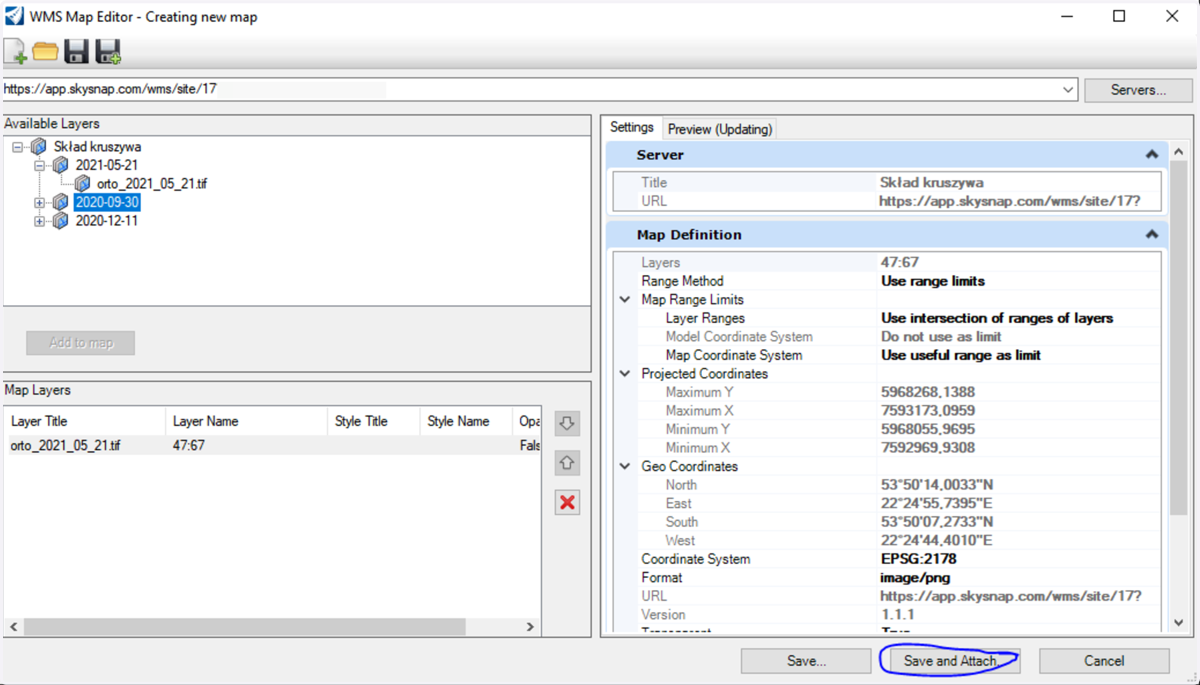
9. Save the configuration to a file
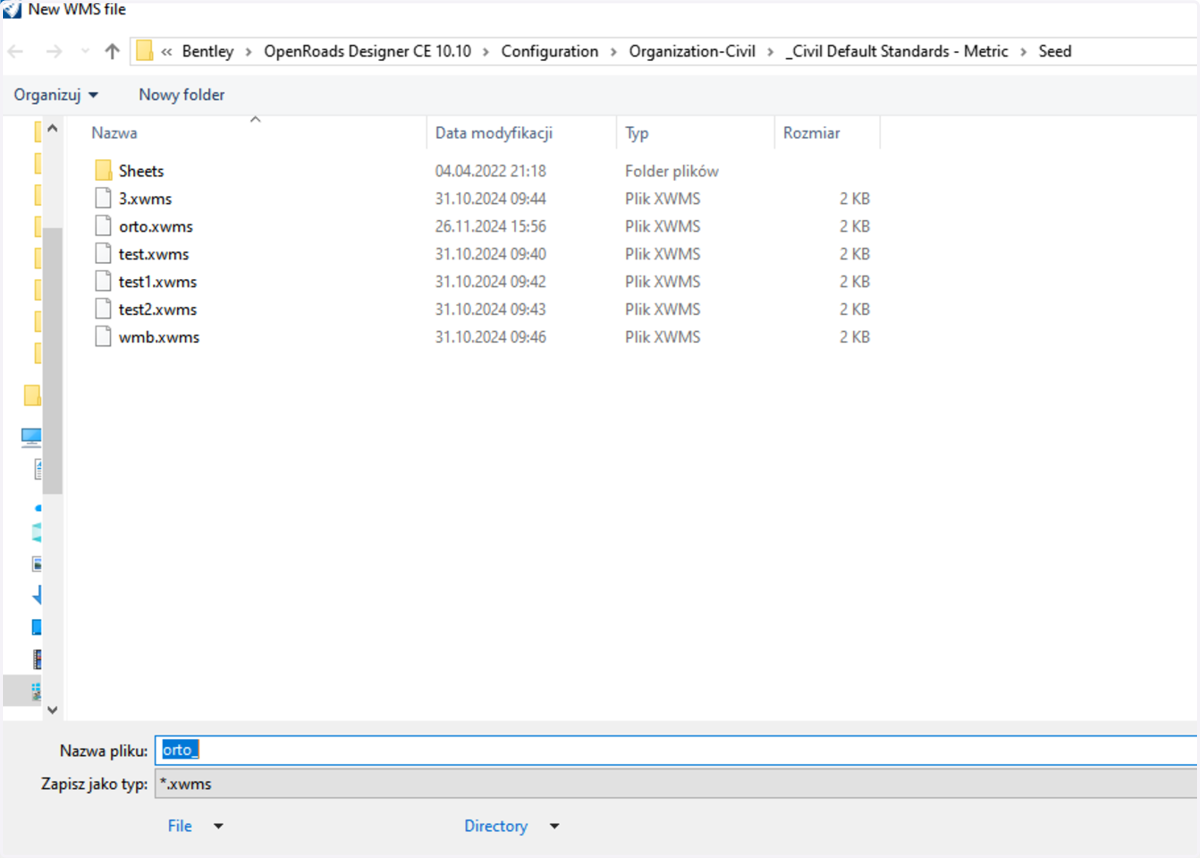
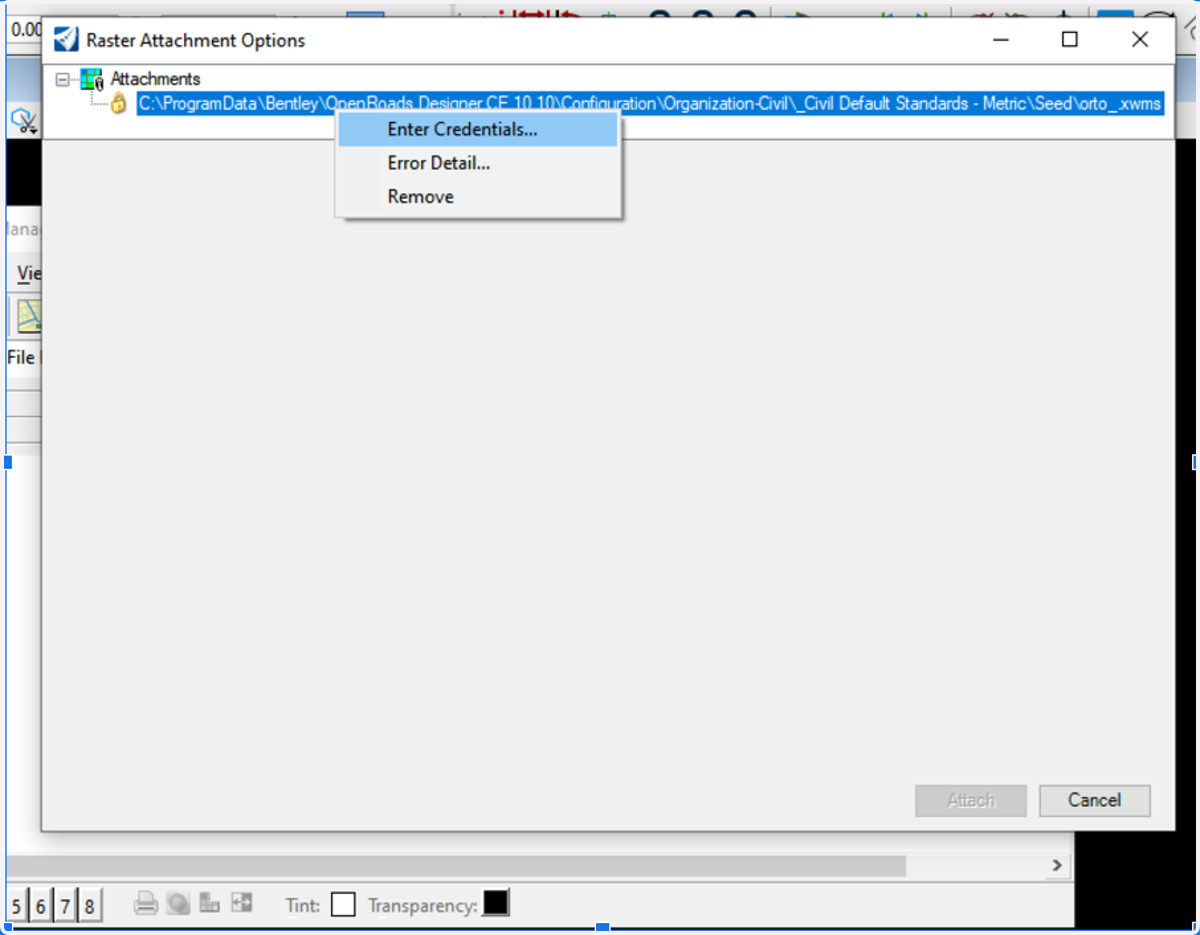
10. Then in the options, right-click and select "Enter Credentials"
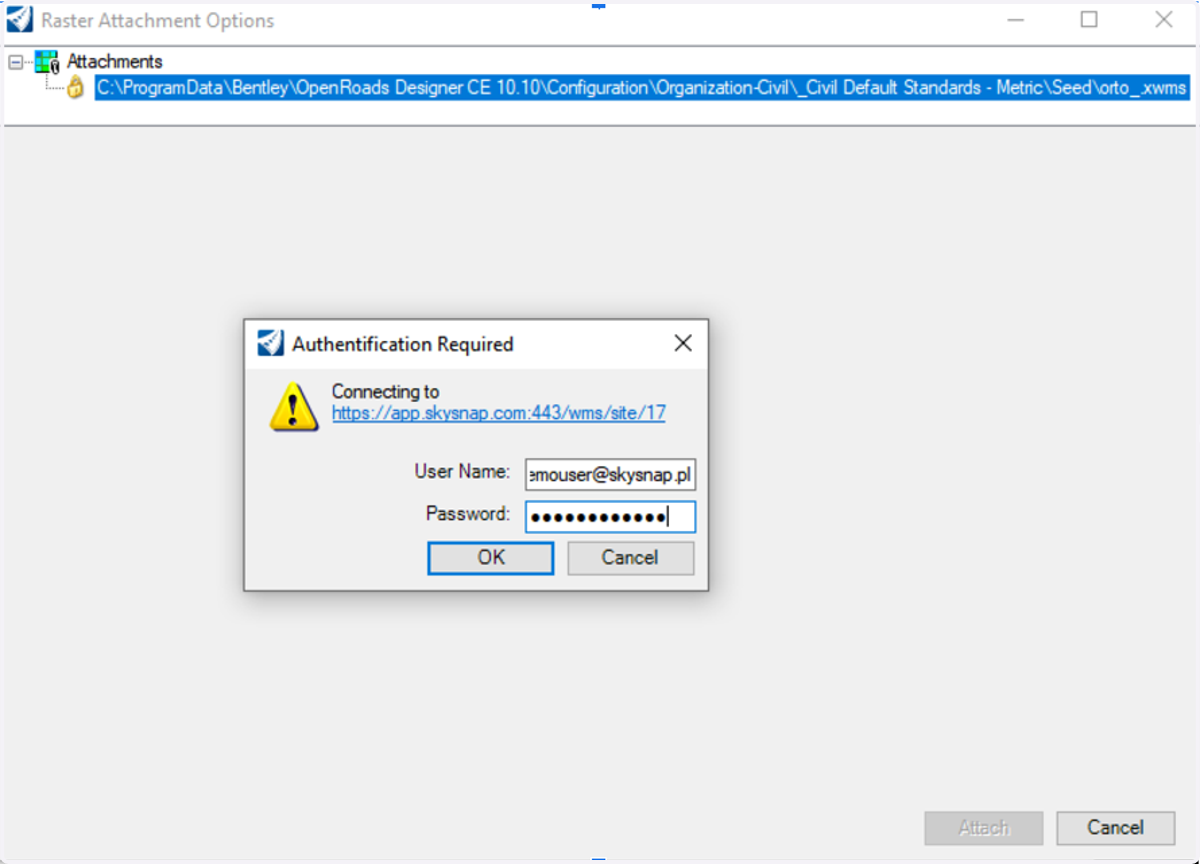
11. Enter the same login and password again
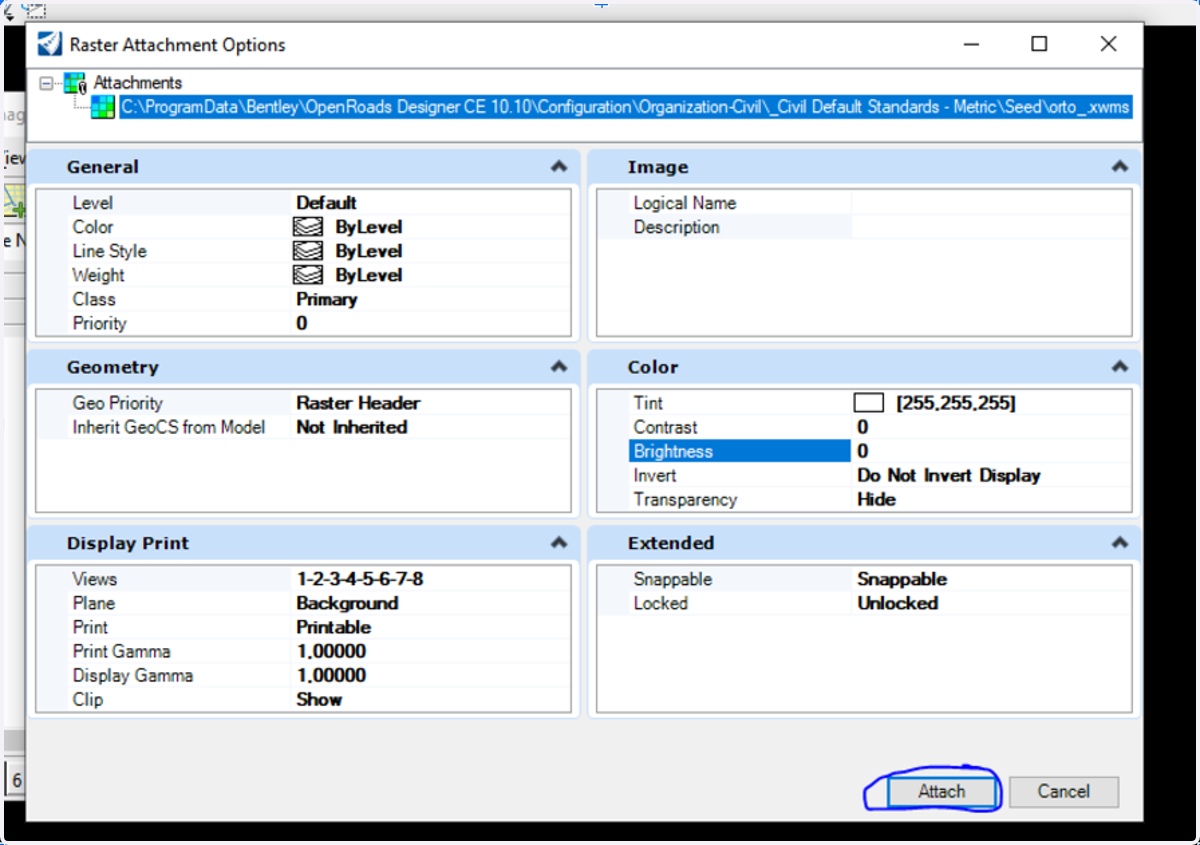
12. Confirm with the "Attach" button.
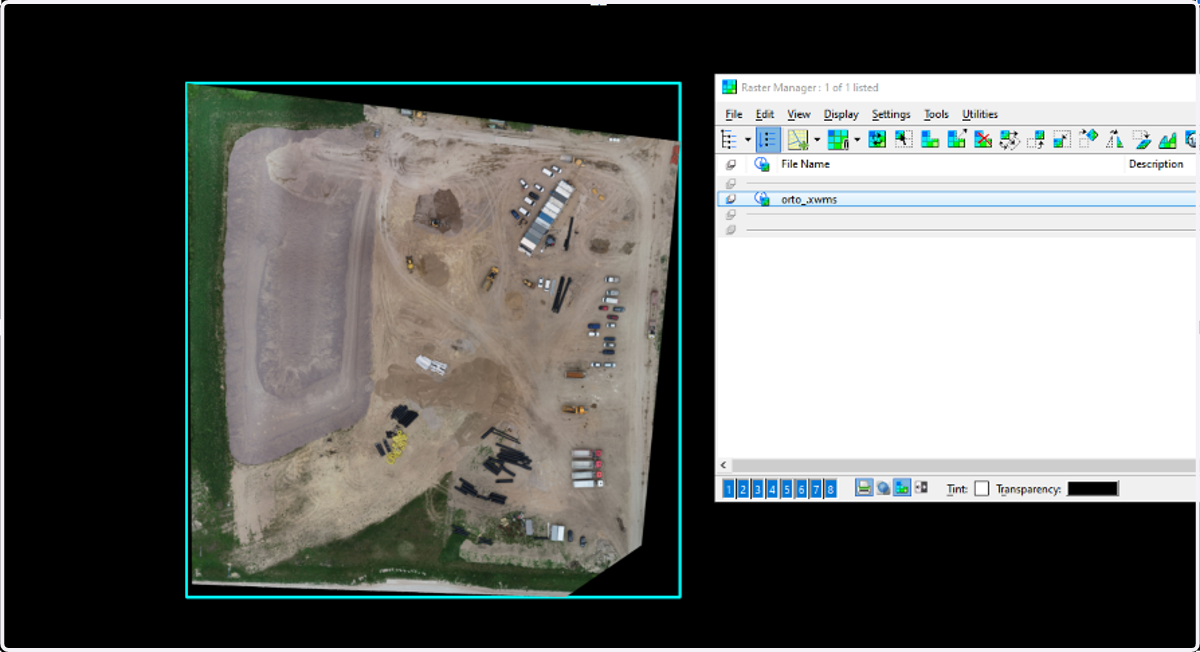
13. Orthophotomap from SkySnap portal is now visible in OpenRoads
QGIS
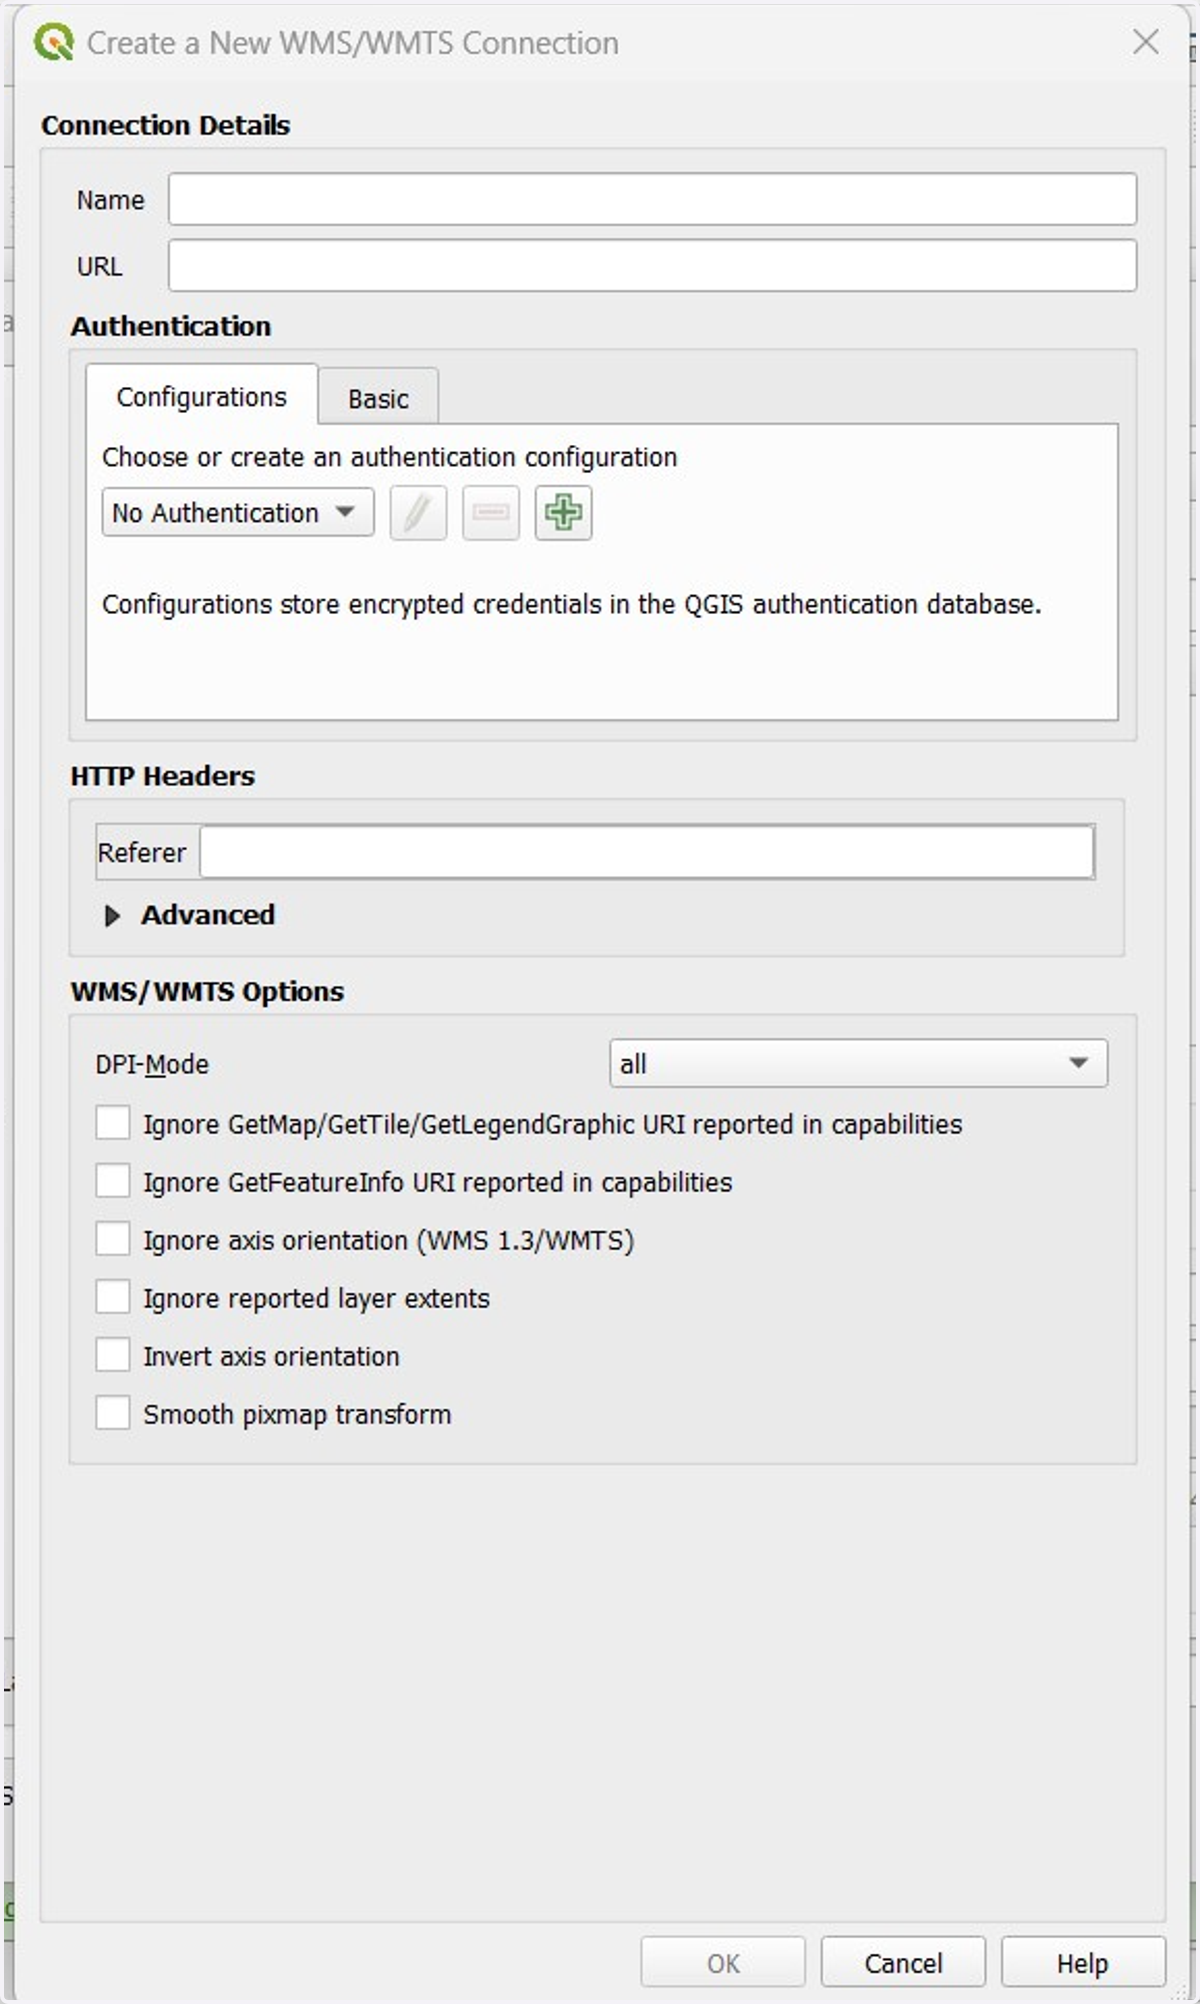
14. Create a new WMS connection
Enter the appropriate values in the fields:
Name: Any name of the connection
URL: Link to the WMS service https://app.skysnap.com/wms/site/XX ,
where XX is the site number (see the beginnig of the instructions)
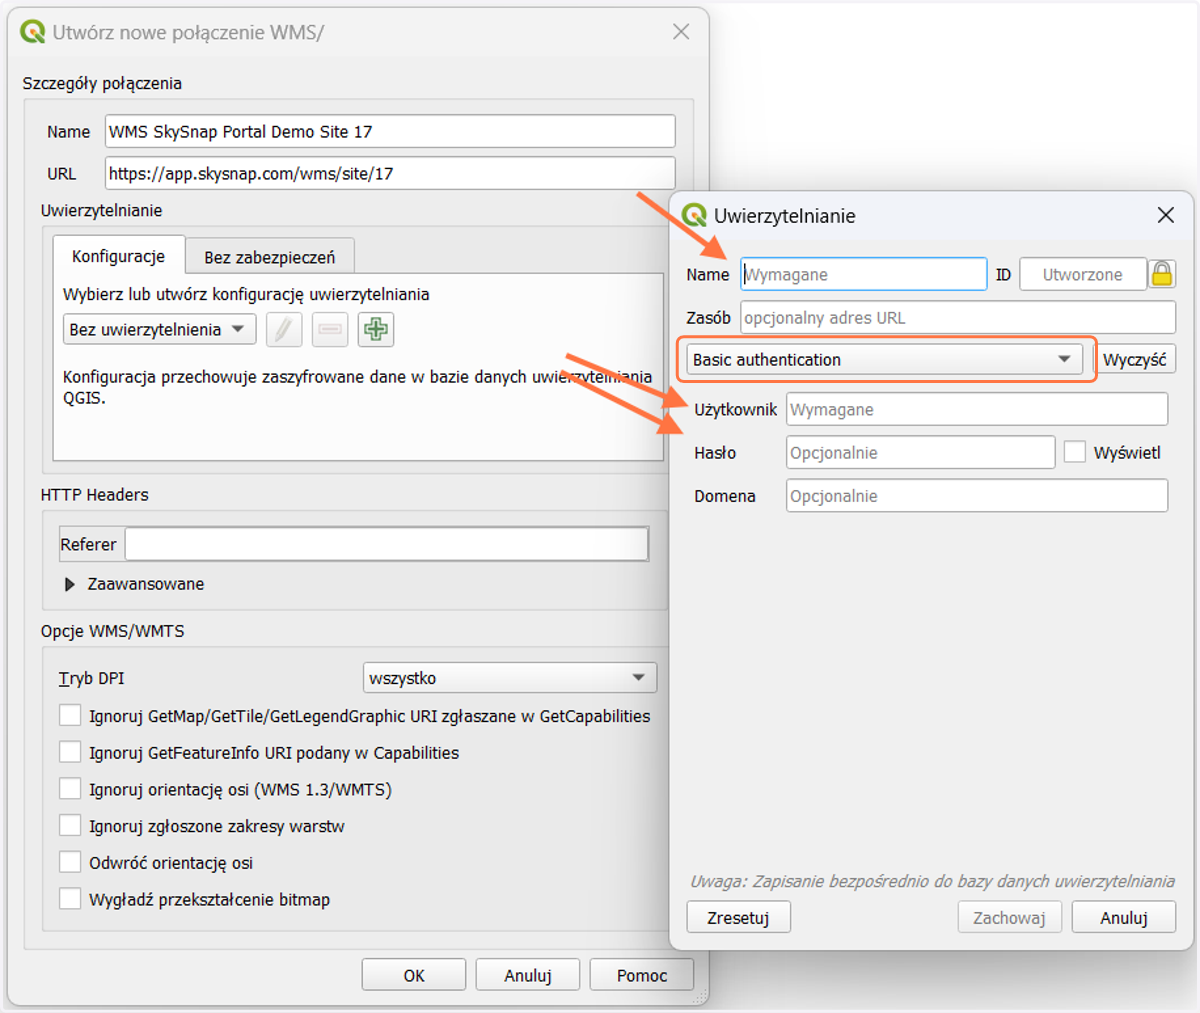
15. Then select a new authentication configuration
Configuration
Name: Any name in QGIS
Next, make sure that the authentication option "Basic authentication" is selected
User: username as in the SkySnap portal
Password: user password as in the SkySnap portal
Global Mapper
16. Open window to create new WMS connection
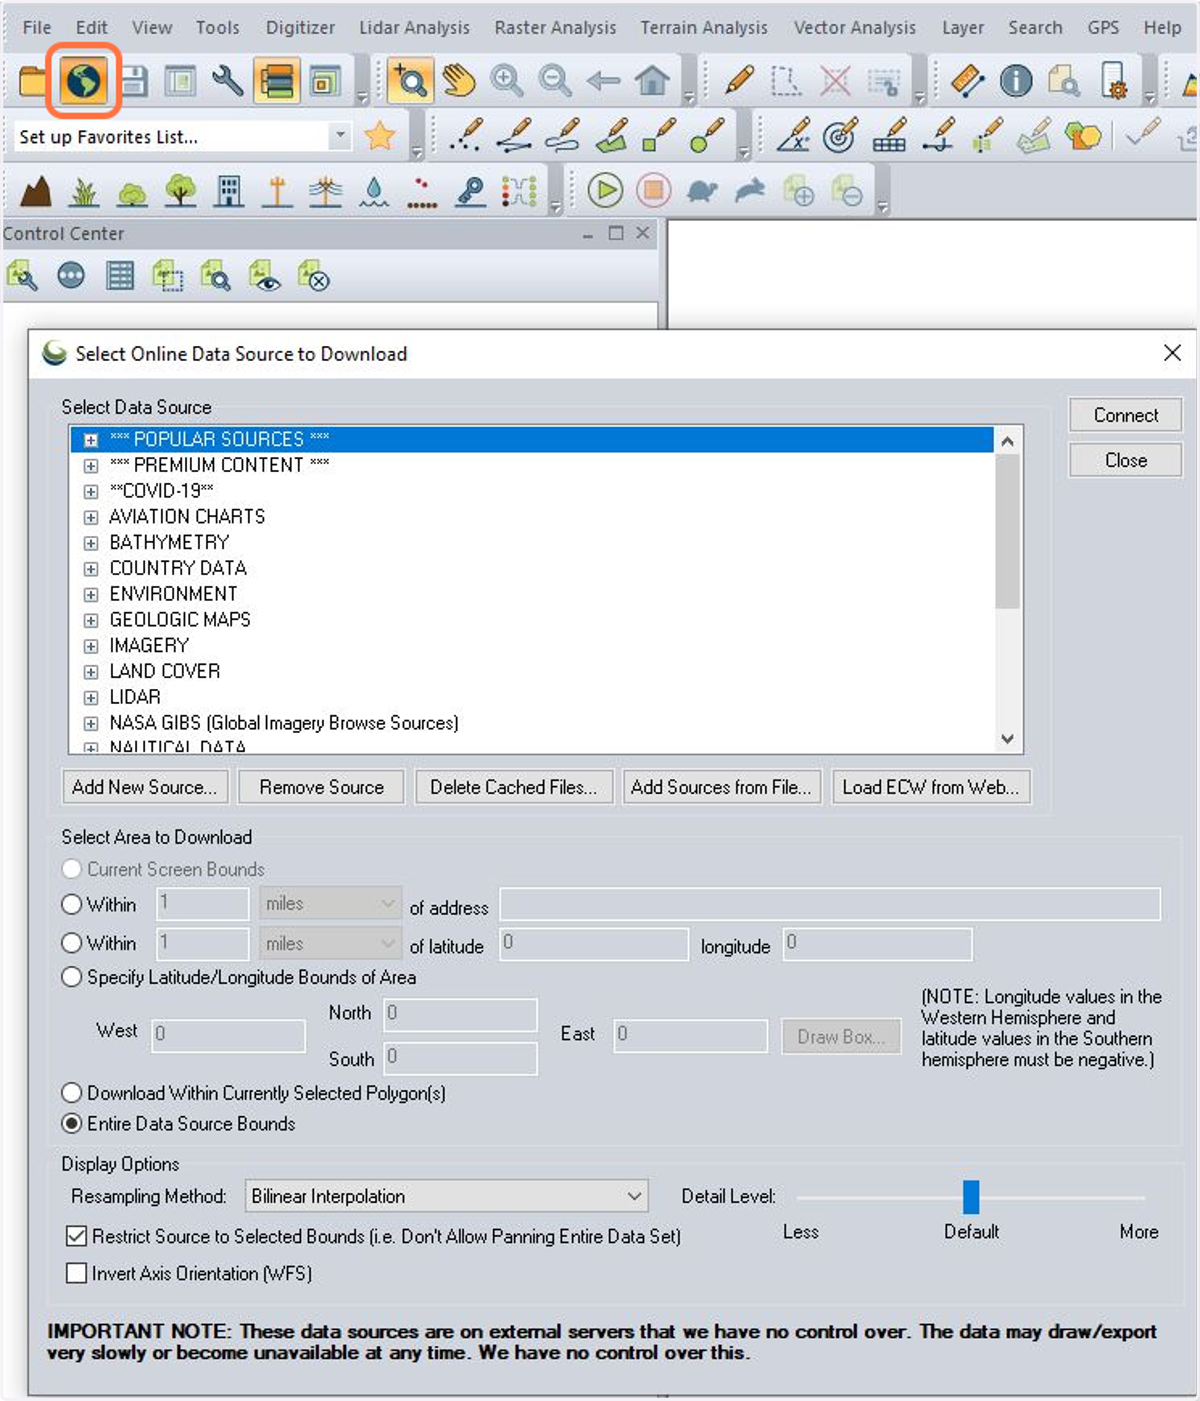
17. Click "Add New Source..." button, a then select "WMS option from the list and confirm by clicking "OK" button
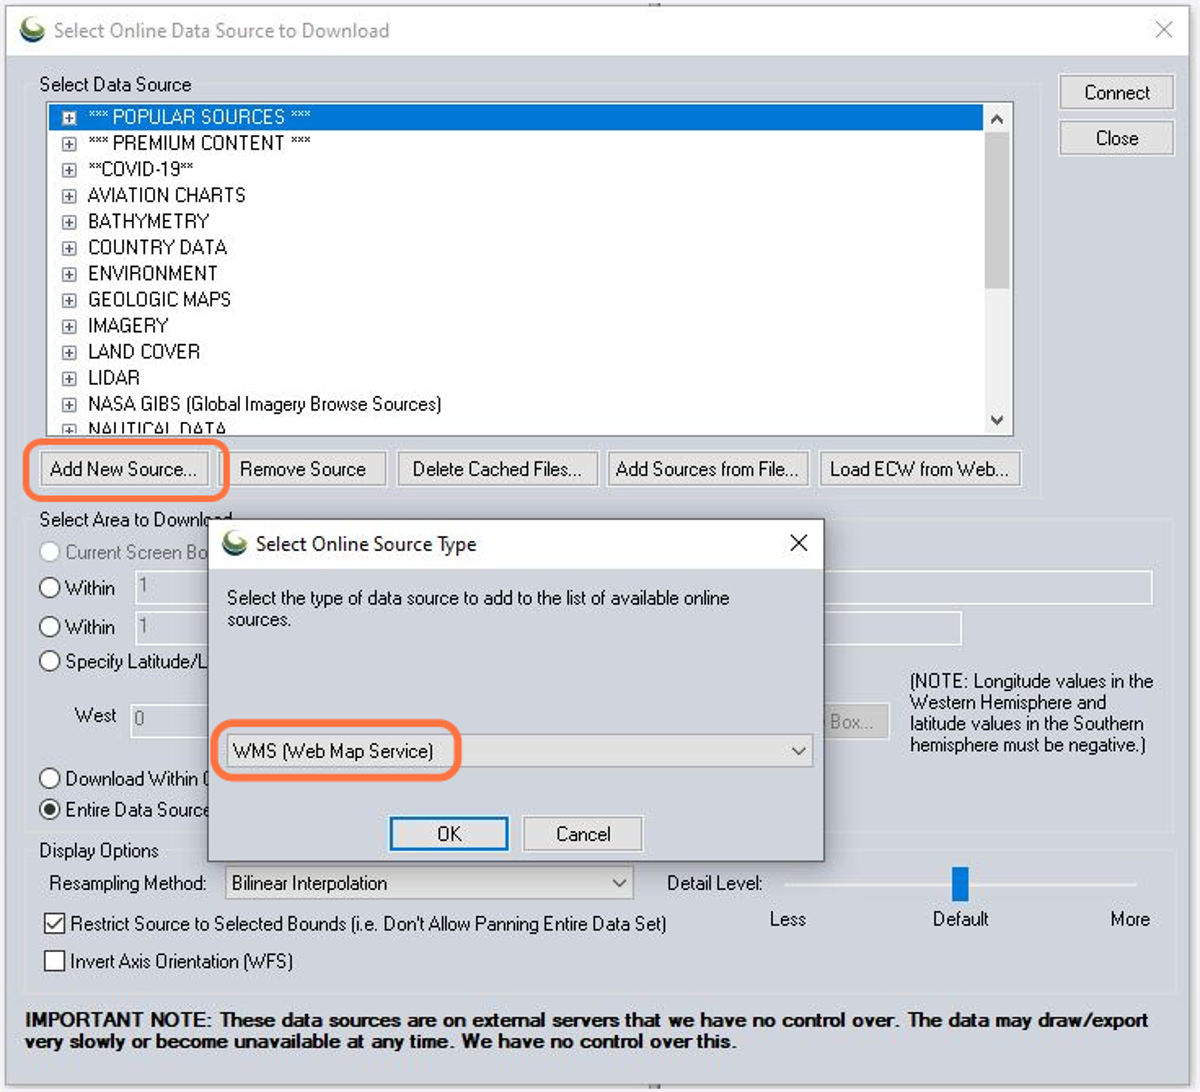
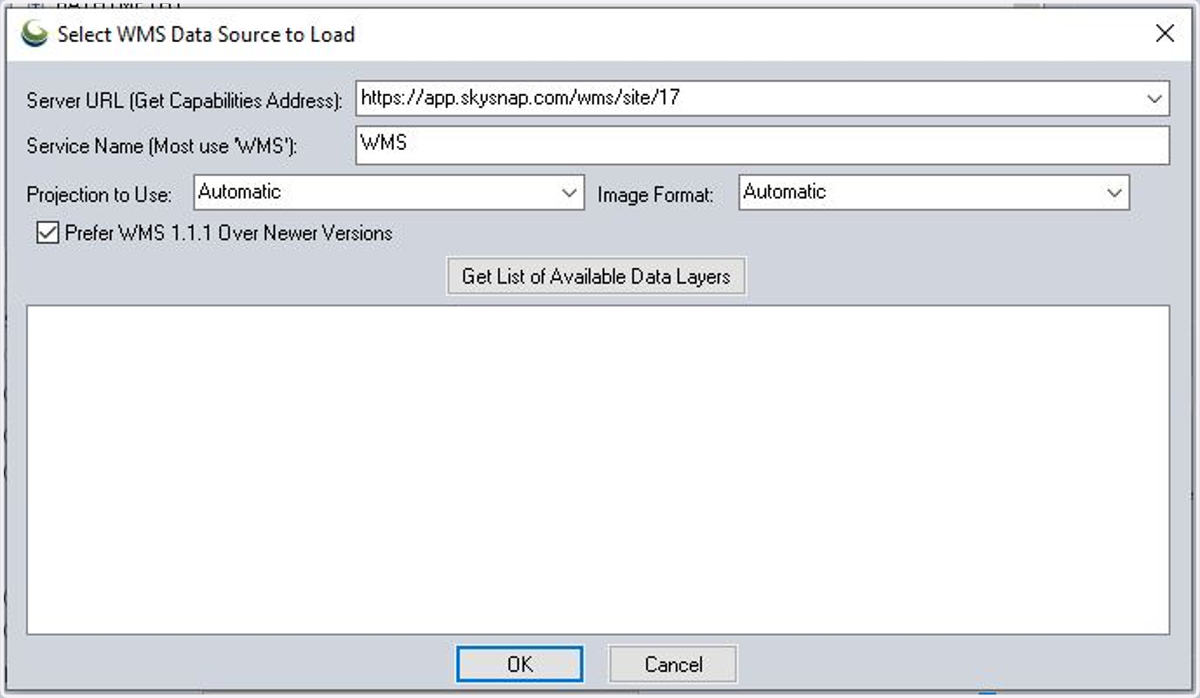
18. Define the details of WMS connection
Enter the appropriate link (create it as indicated at the beginning of the instructions, then check the option “Prefer WMS 1.1.1 Over Newer Versions”
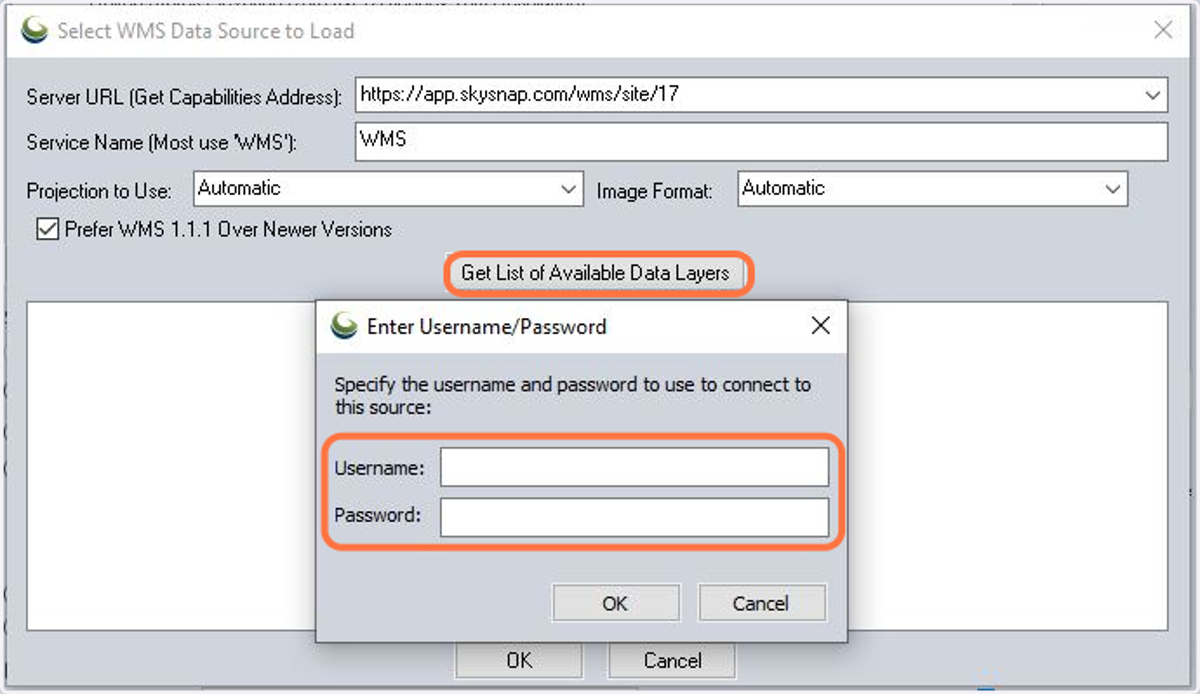
19. Confirm that you have access to WMS data by logging in
Confirm the entered parameters with the “Get List of Available Data Layers” button, a window for authentication will immediately appear. Use your SkySnap Portal login and password to confirm that you have permission to view WMS content.
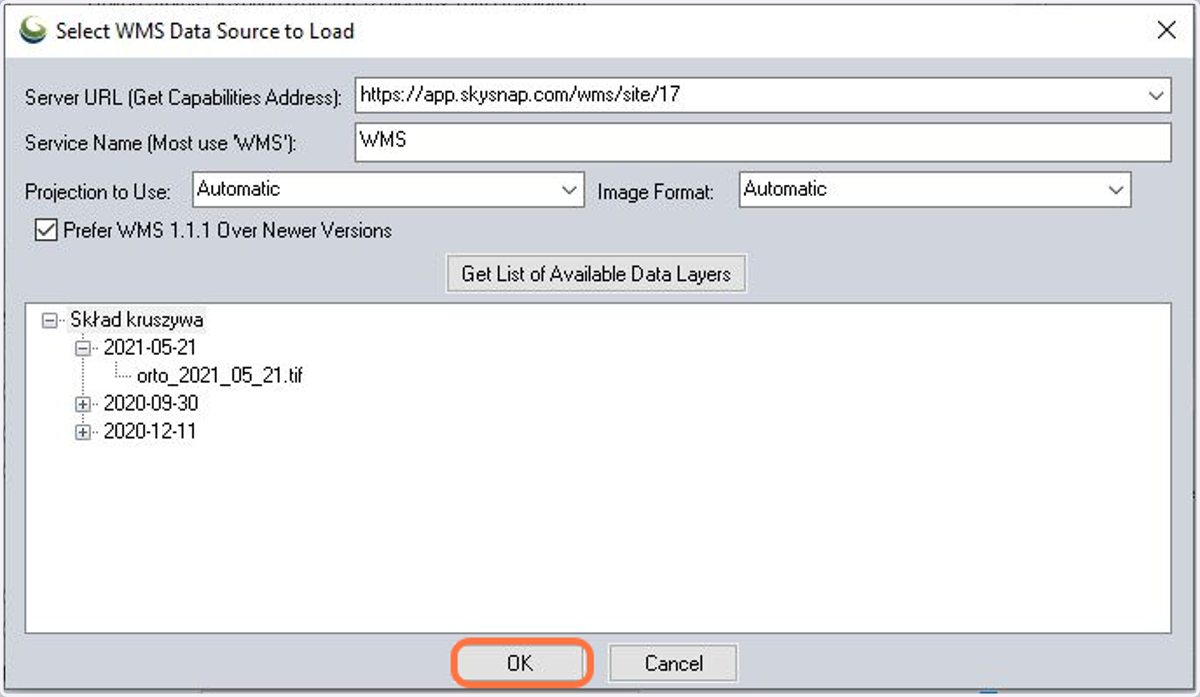
20. After proper authentication, a list of folders and layers available in a given WMS will appear, confirm with “OK” button
21. Optionally, you can create a new category in which the WMS link will be saved
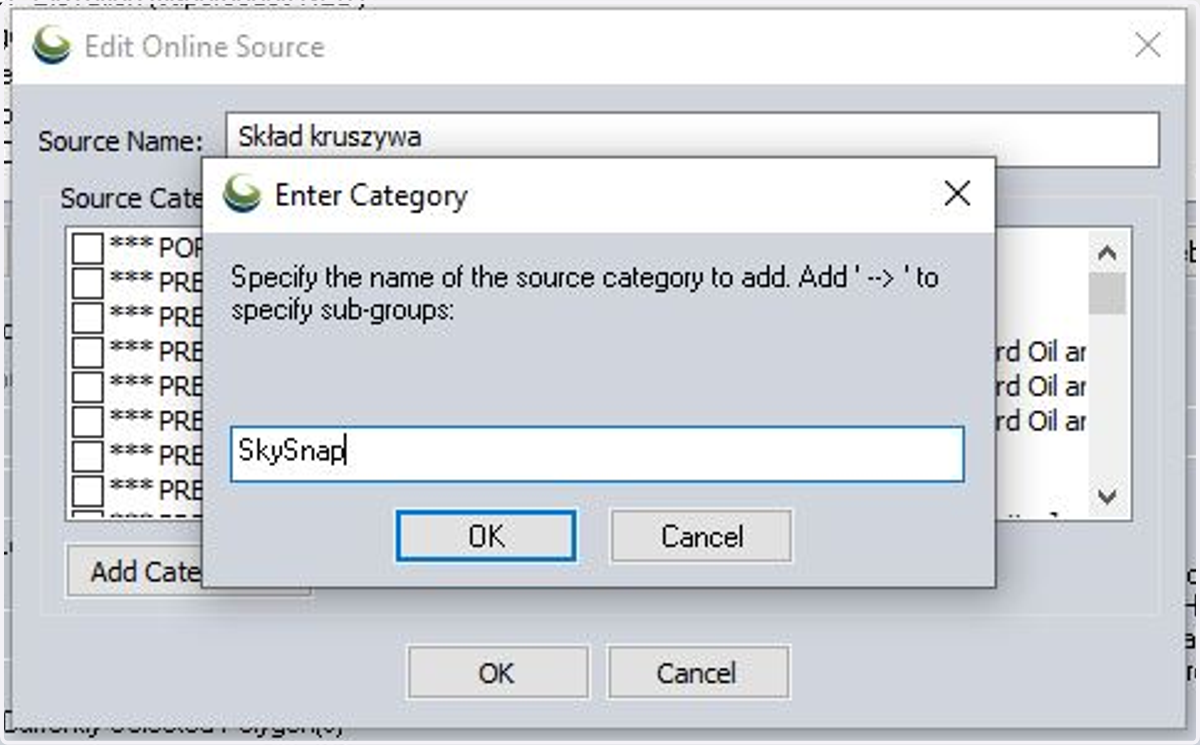
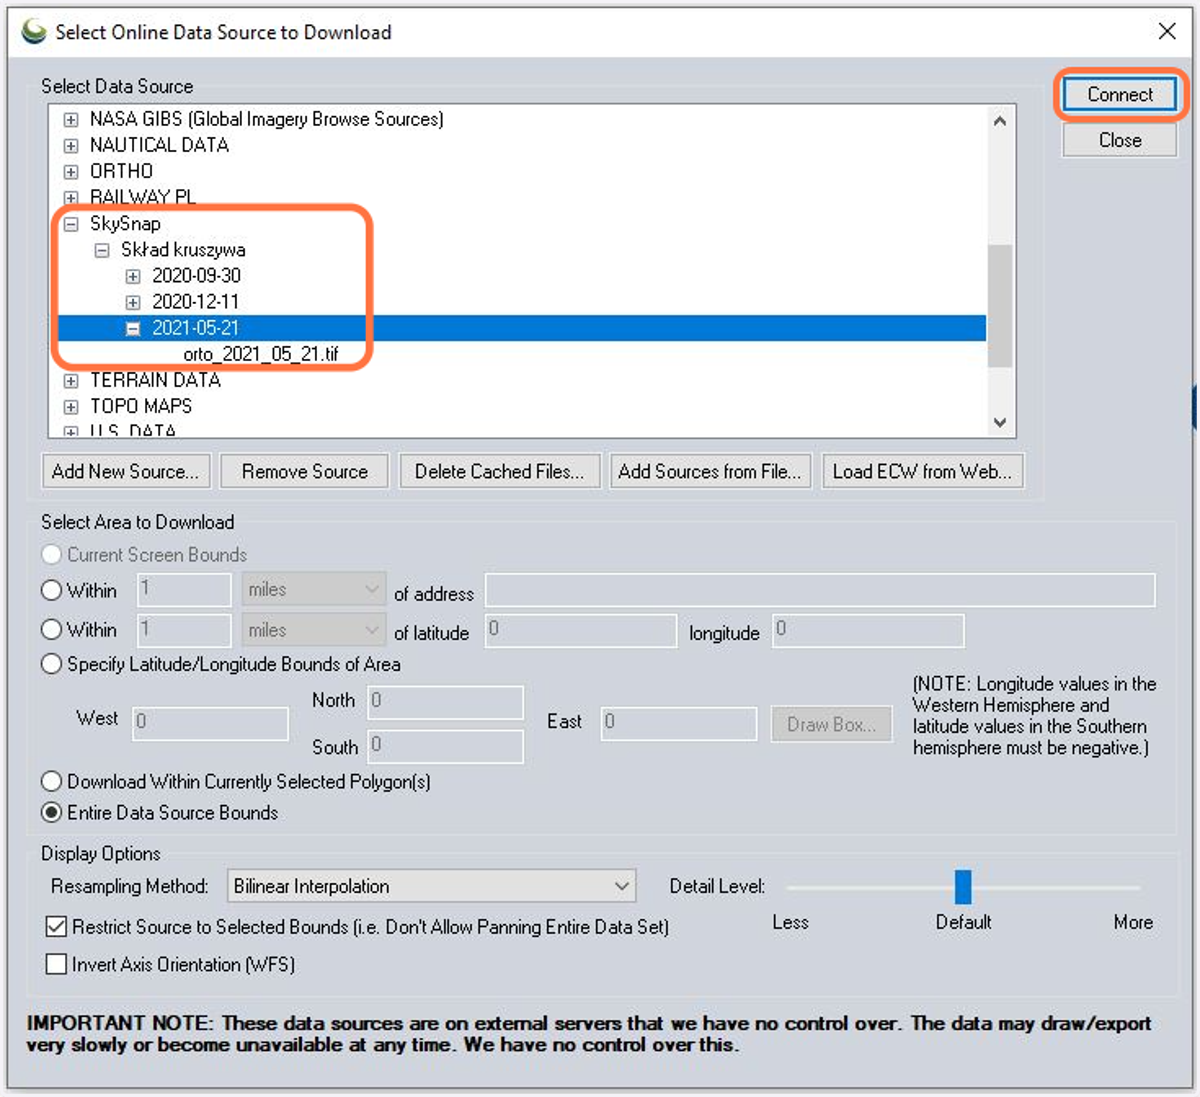
22. Add content from WMS to the map
From the main window for connecting WMS, you can select the WMS connection you have created, and then select an orthophoto from any project. Then click the “Connect” button.
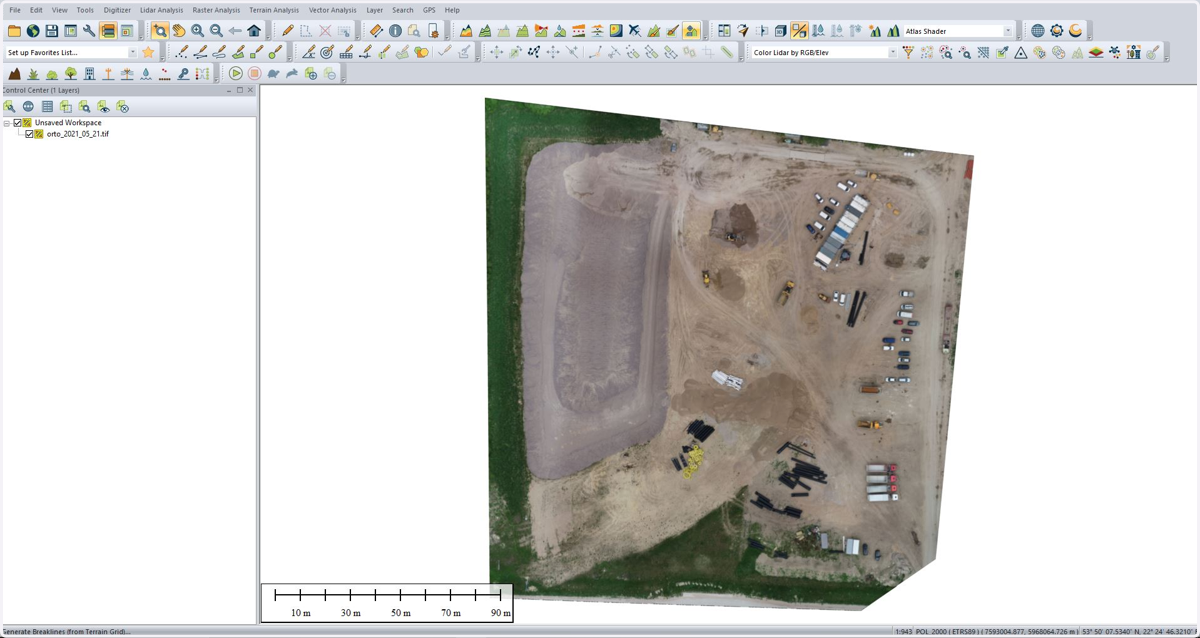
23. Data from WMS is visible on the map
ArcGIS
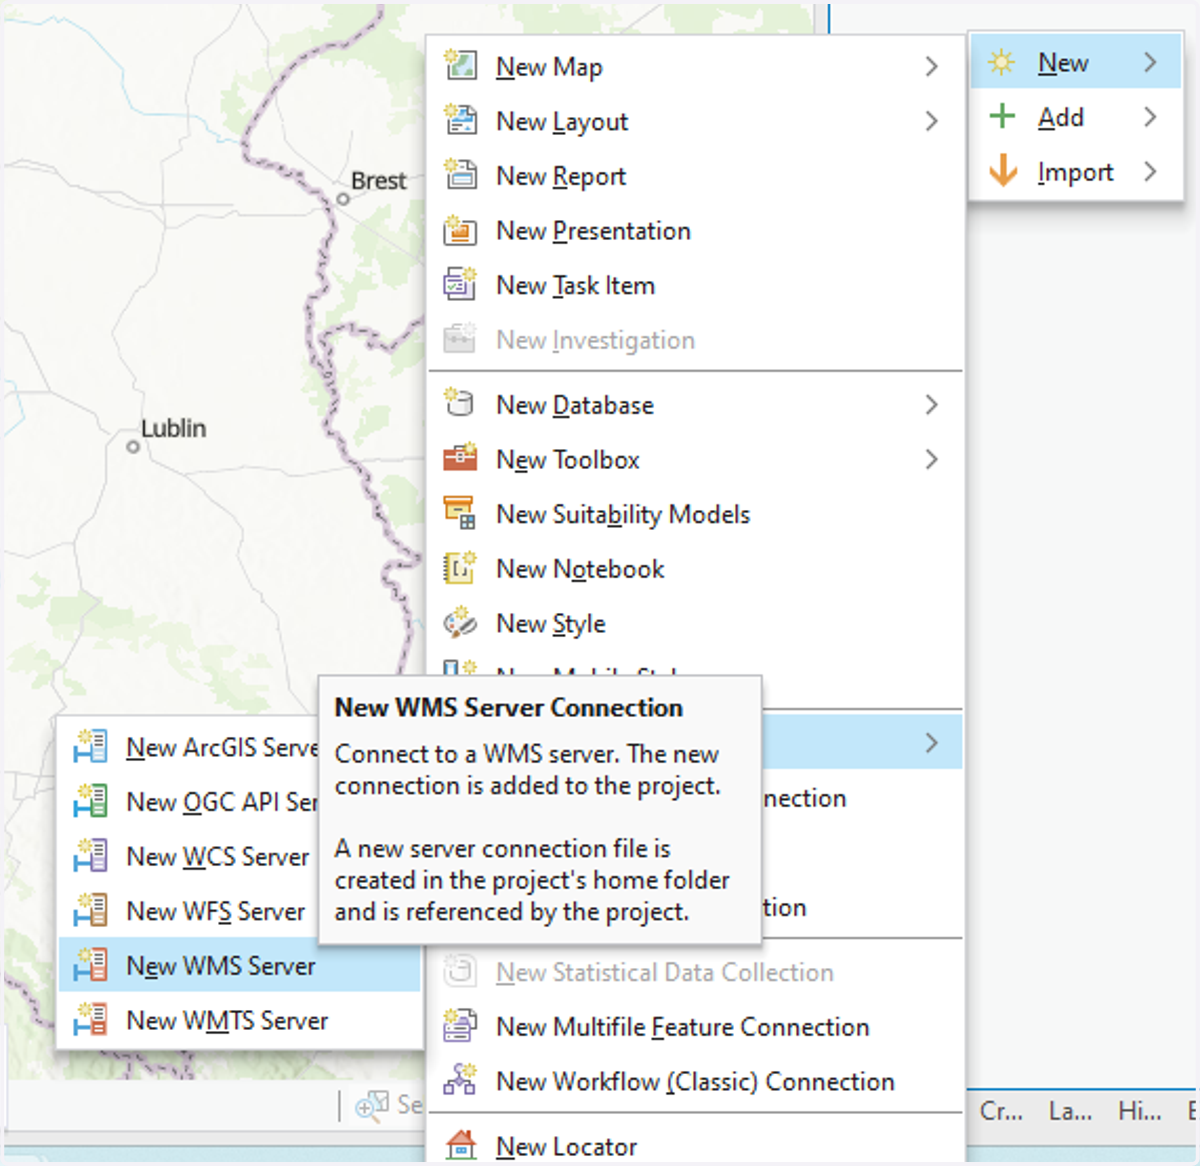
24. Create new WMS connection
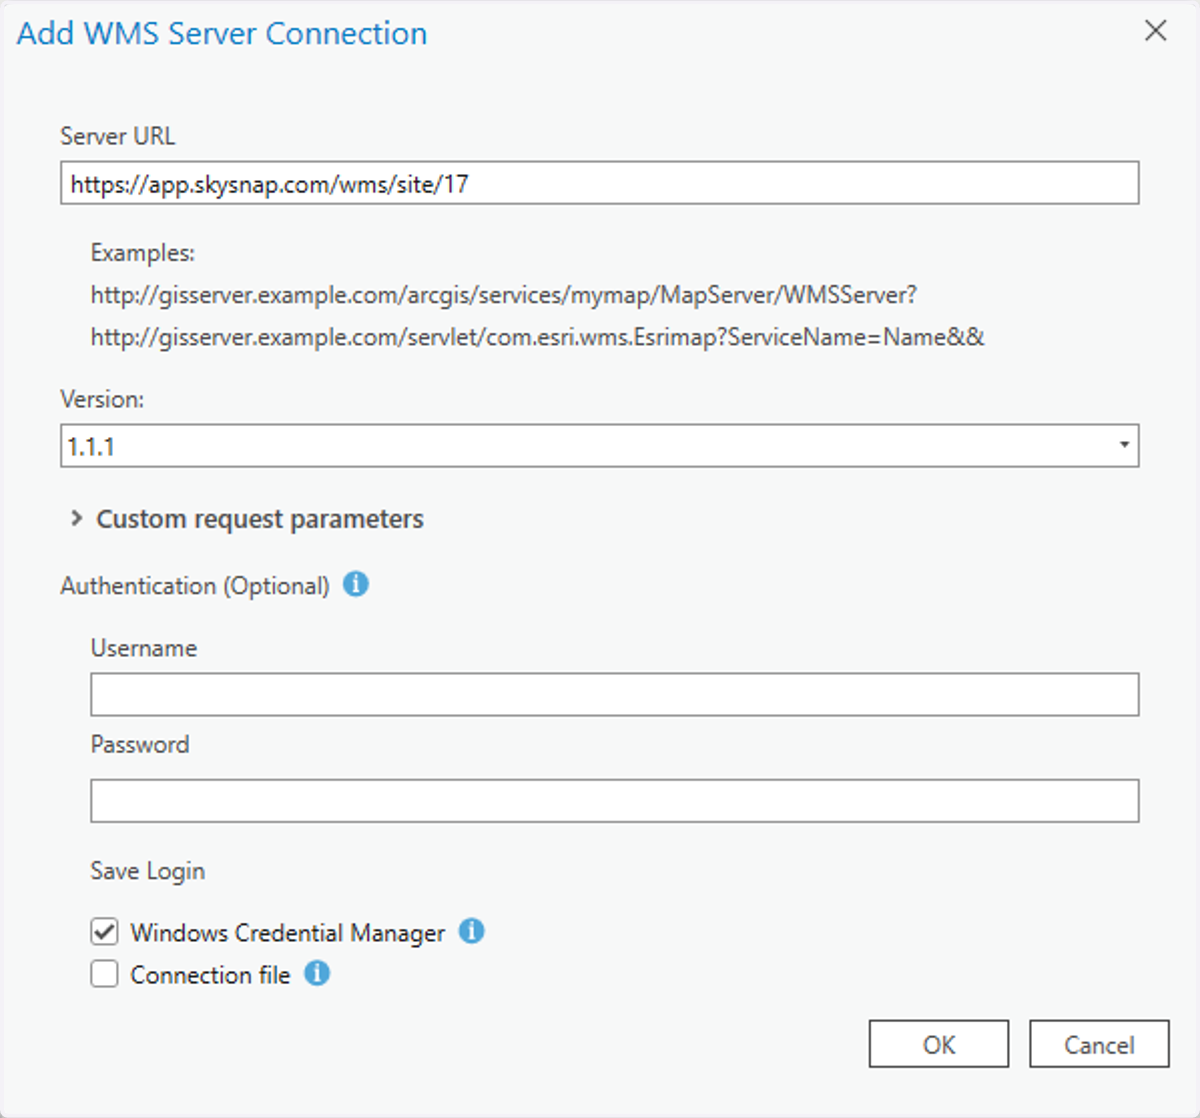
25. Define the details of WMS connection
Complete the link as indicated at the beginning of these instructions. Then select version 1.1.1. Enter your SkySnap Portal login information to validate that you are the user who has access to the WMS data.
26. Select proper layer from the list of WMS layers
All orthophotos from a given location are available, divided into projects.