Banner Self-Service Student Guide
Learn how to navigate the Banner Self-Service interface to access registration, your student information, and more.
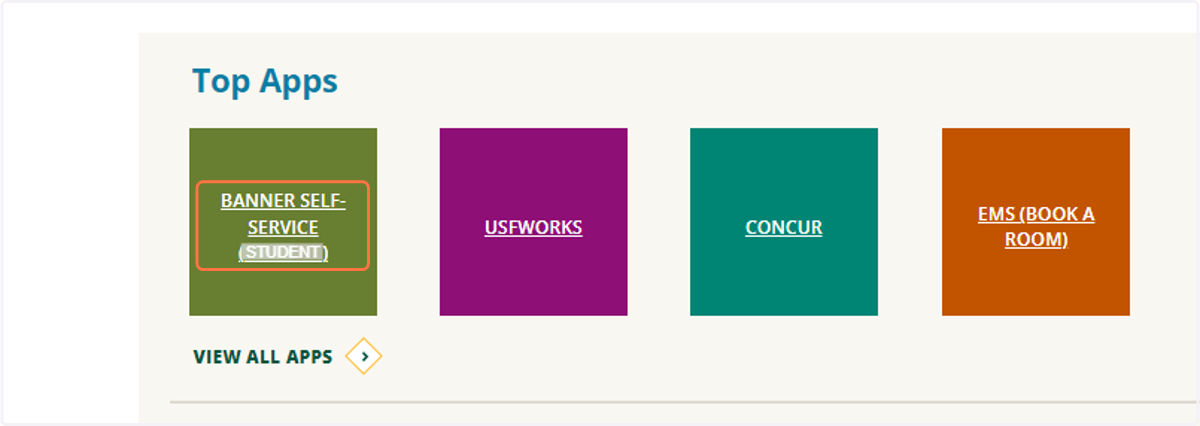
1. Login to your myUSF Dashboard
2. Click on BANNER SELF-SERVICE (STUDENT)
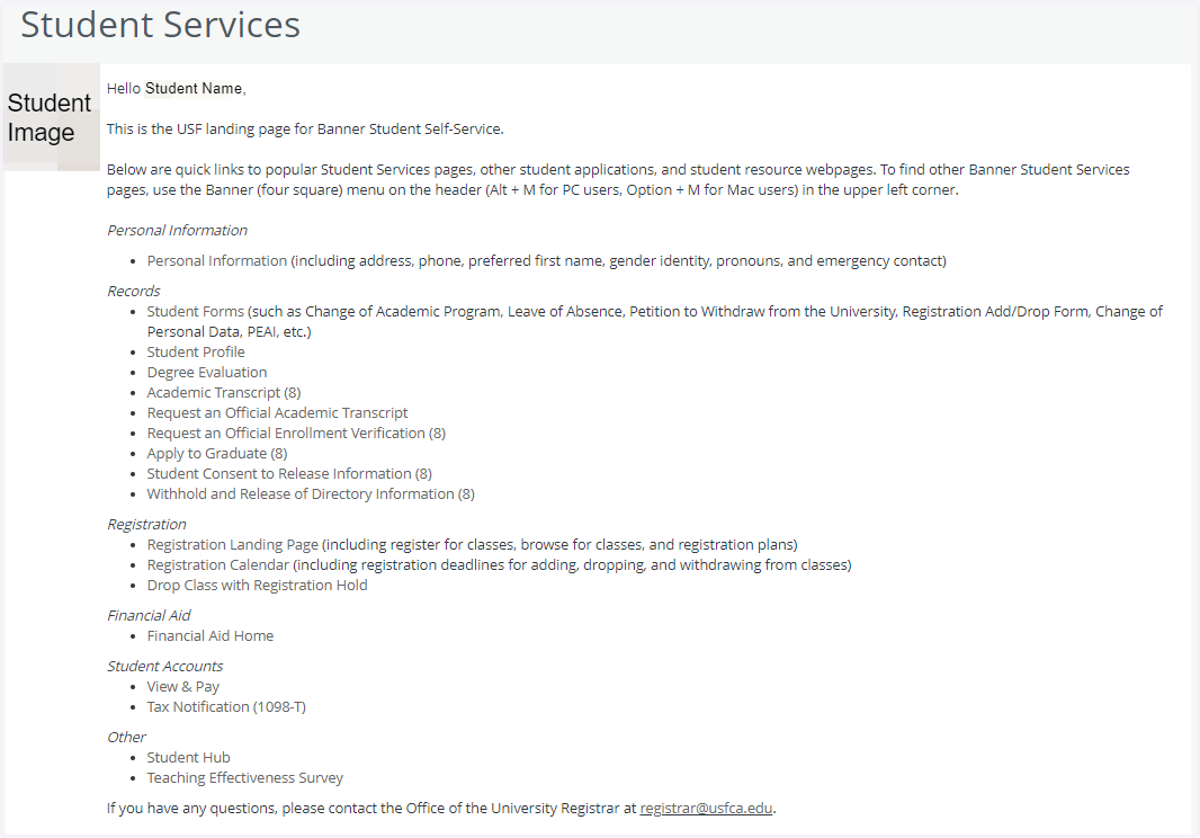
3. Student Services Landing Page
You'll be taken to the Student Services landing page, where you'll be able to access forms, your student profile, the Student Hub, your degree evaluation and academic transcript as well as register for classes, view your financial aid, and make tuition payment.
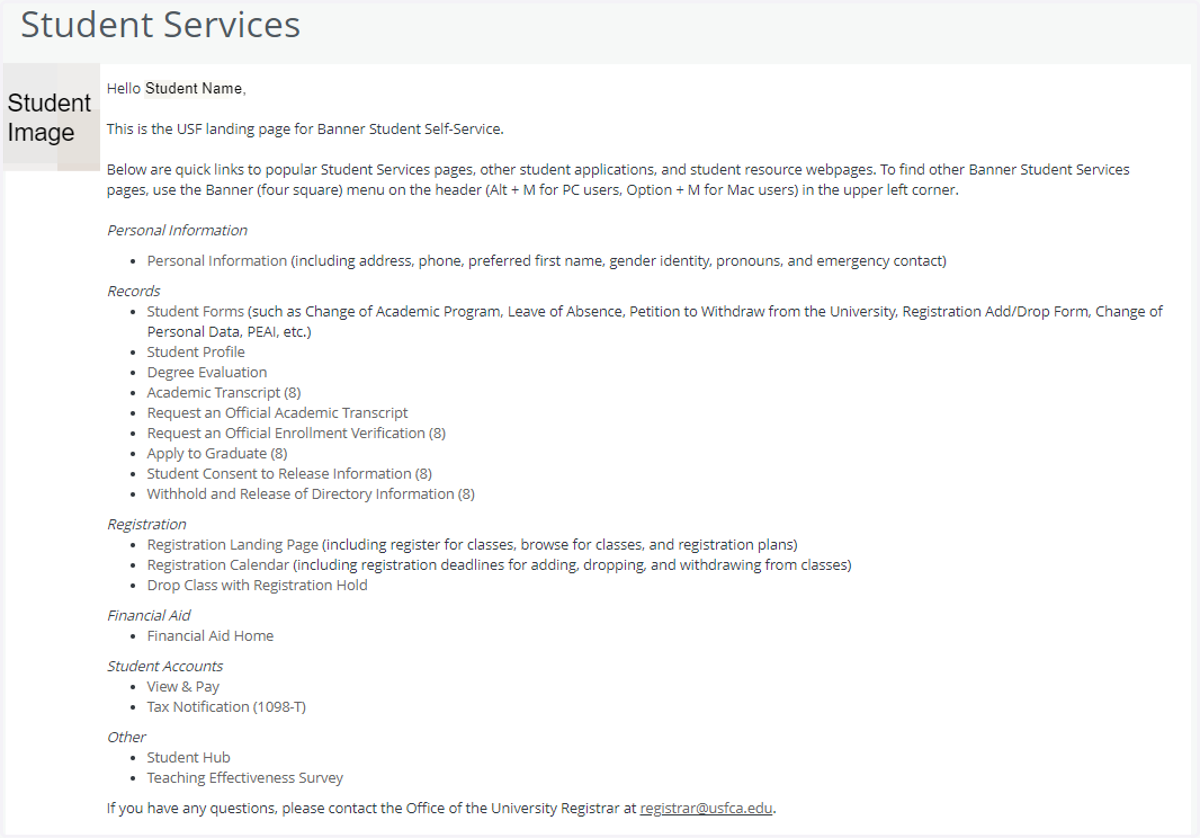
View Student Services Links
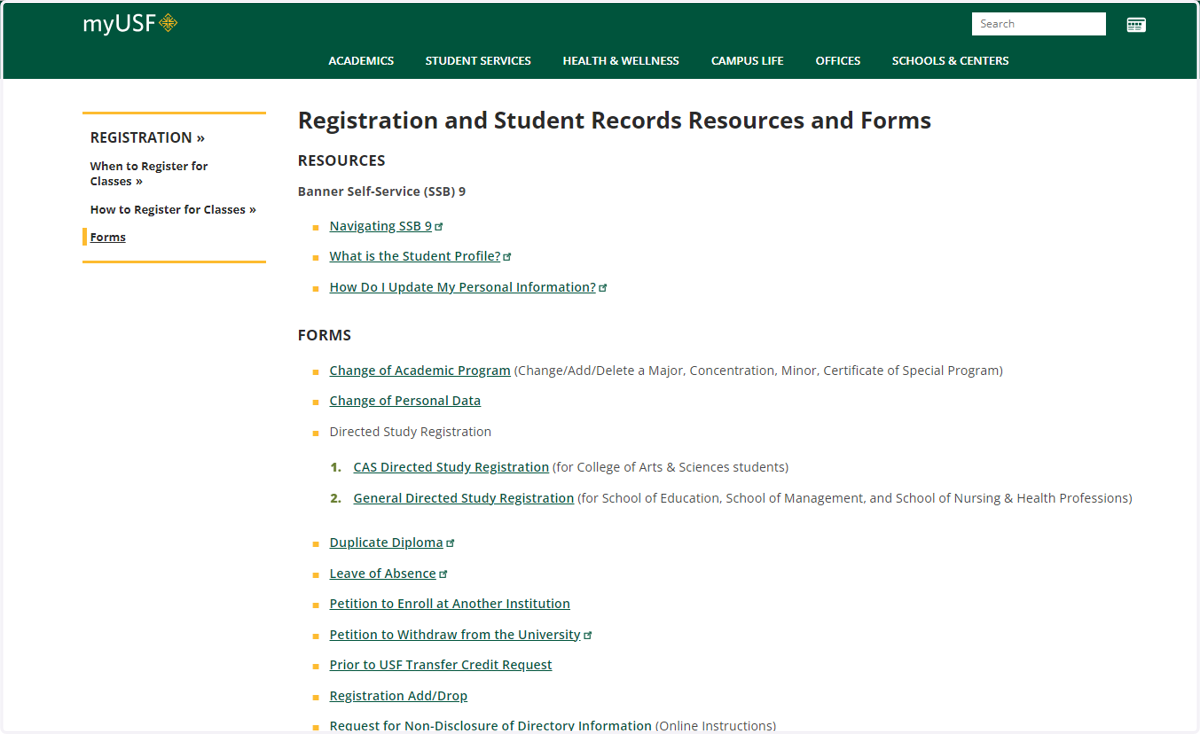
4. Student Forms
5. Financial Aid Dashboard
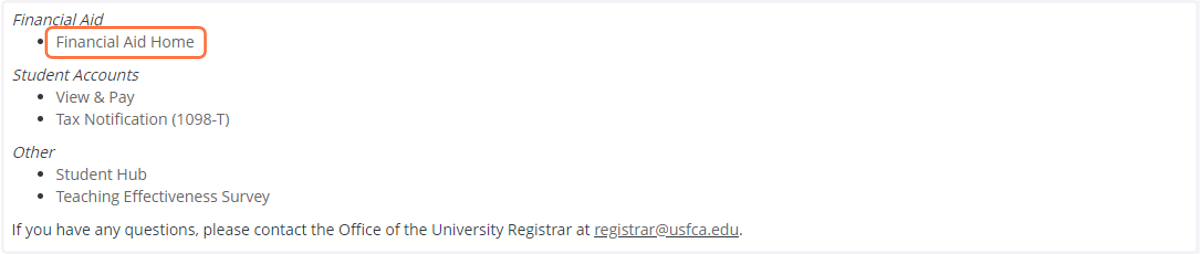
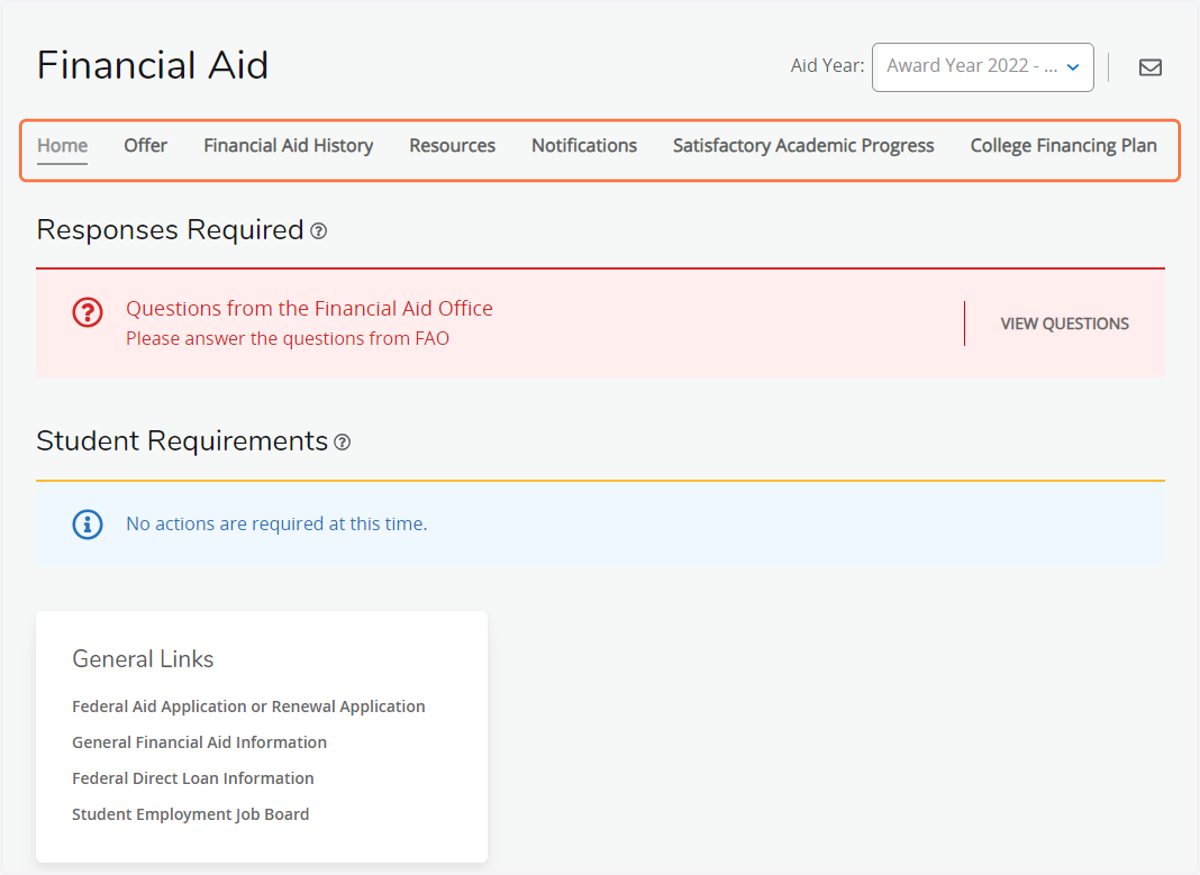
6. View Financial Aid Screen
You will be able to view your financial aid information.
7. View & Pay
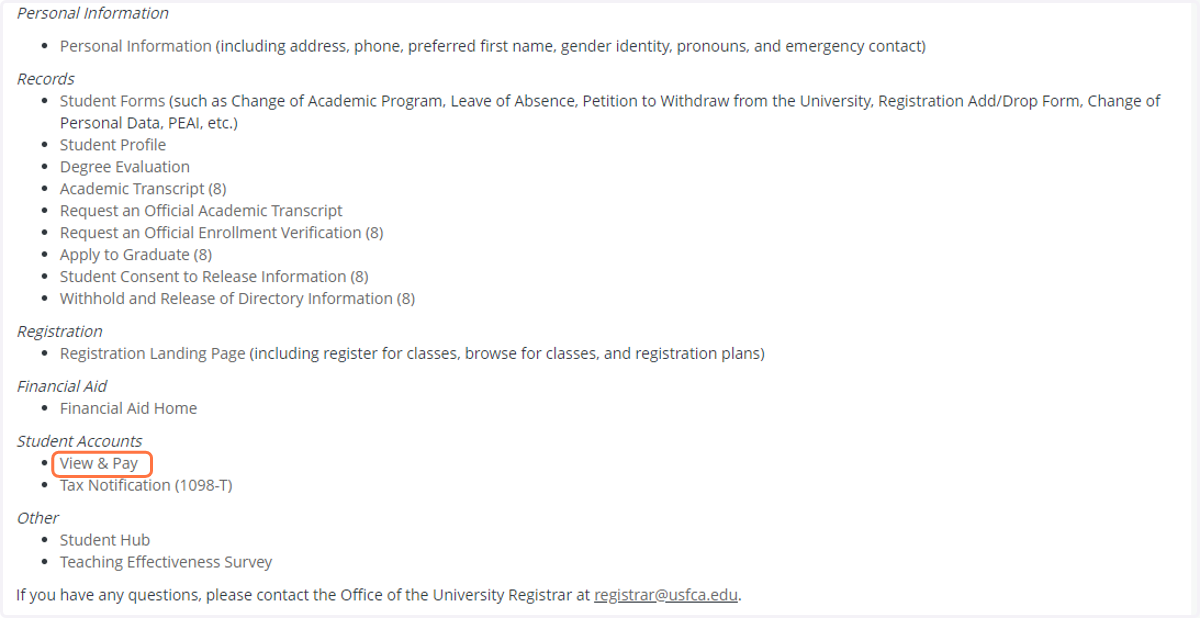
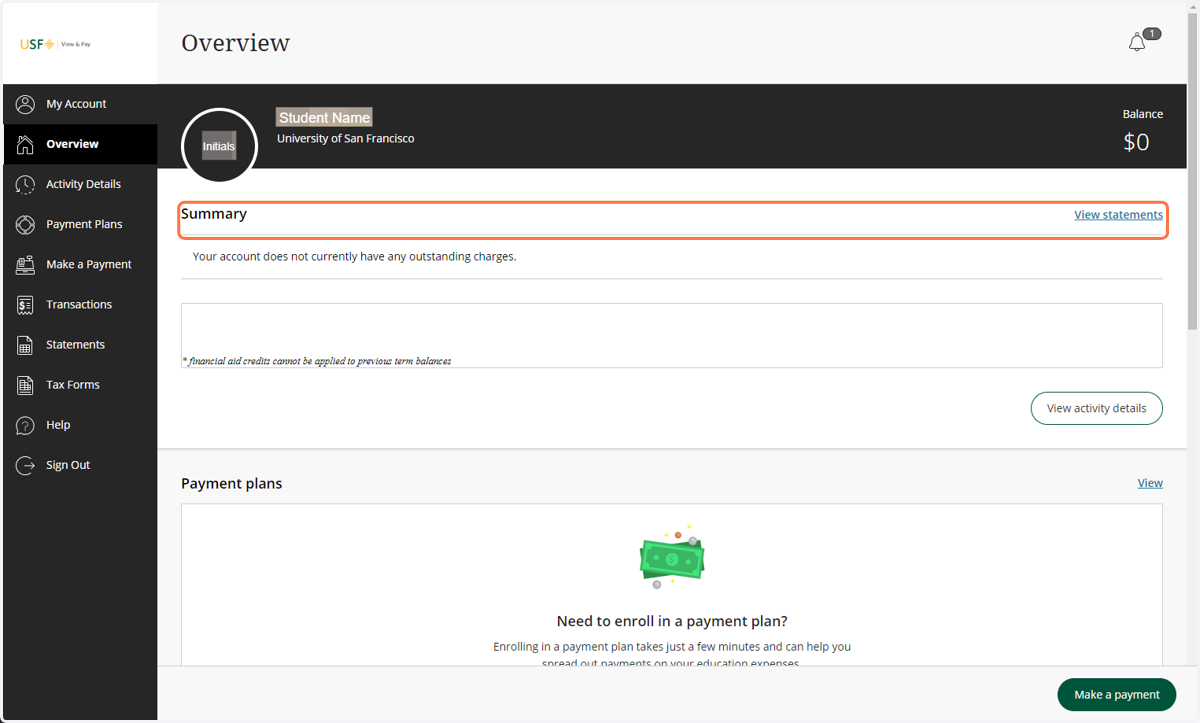
8. View View & Pay Screen
In a new tab, you will be able to see your tuition payment information as well as make payment.
9. Back to the Student Services Landing Screen
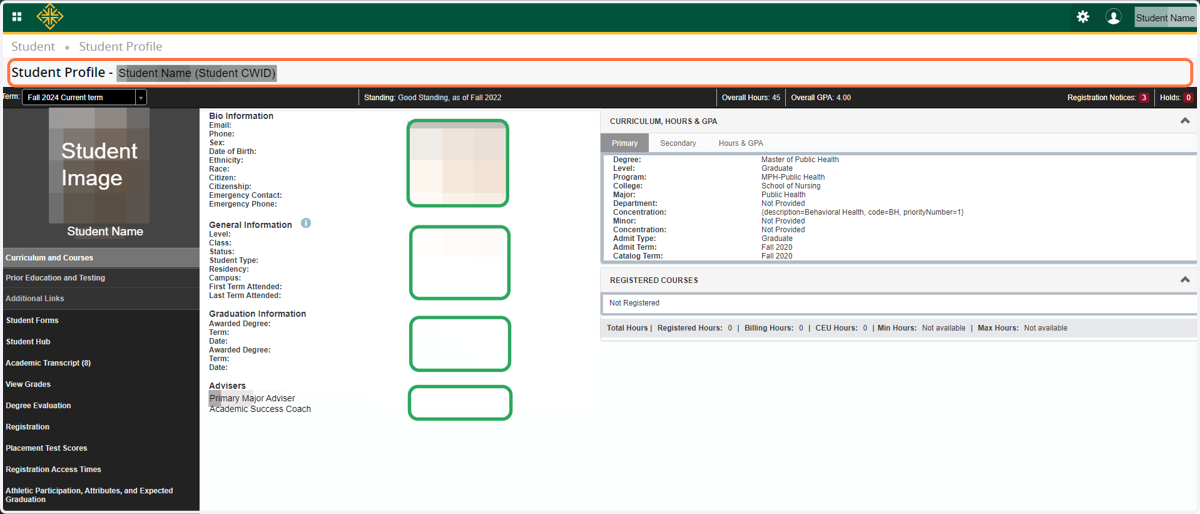
Deep Dive into the Student Profile
10. Student Profile
On the Student Profile screen, you will see your student information.
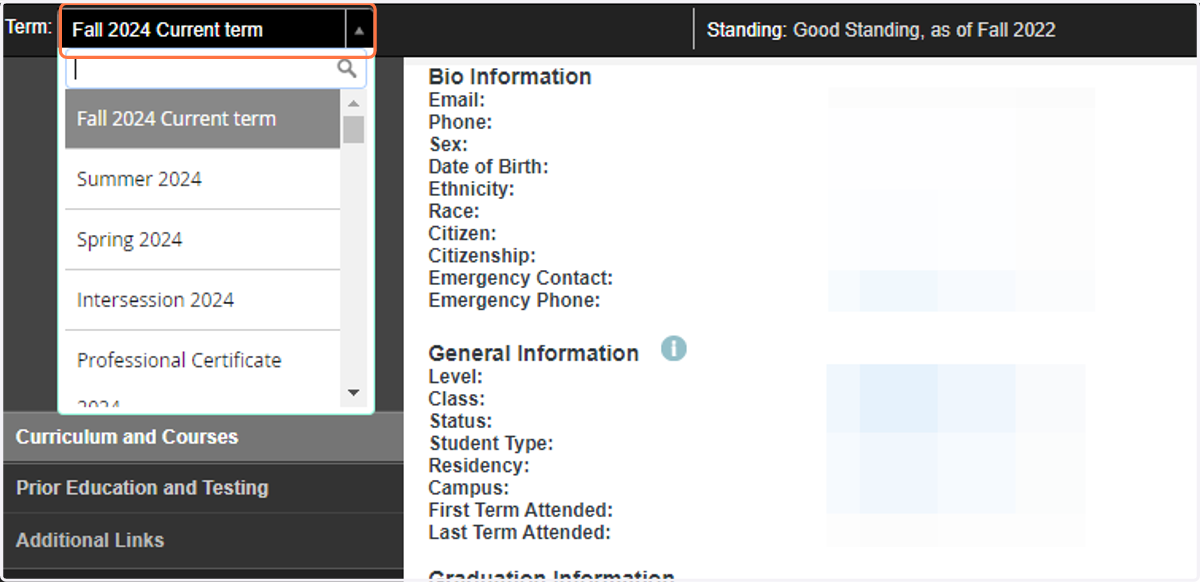
11. Term Selection
View your information based on term. Click the Term dropdown to make your selection.
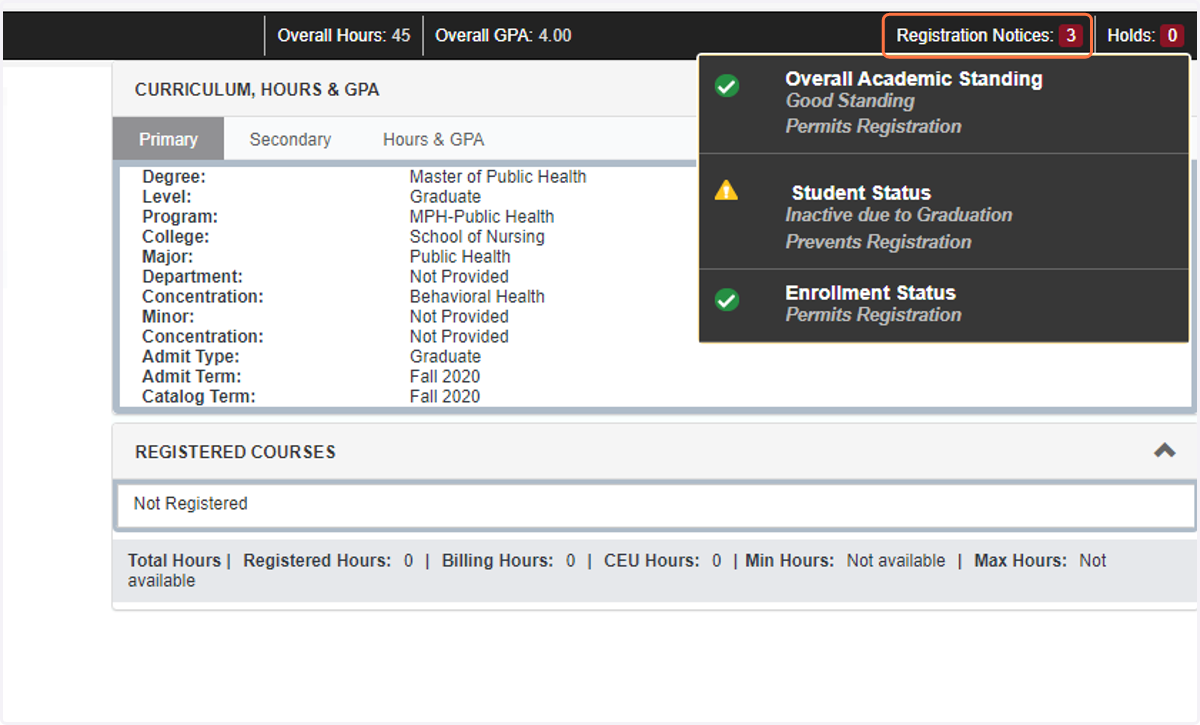
12. Registration Notices
View your academic standing, student status, and enrollment status.
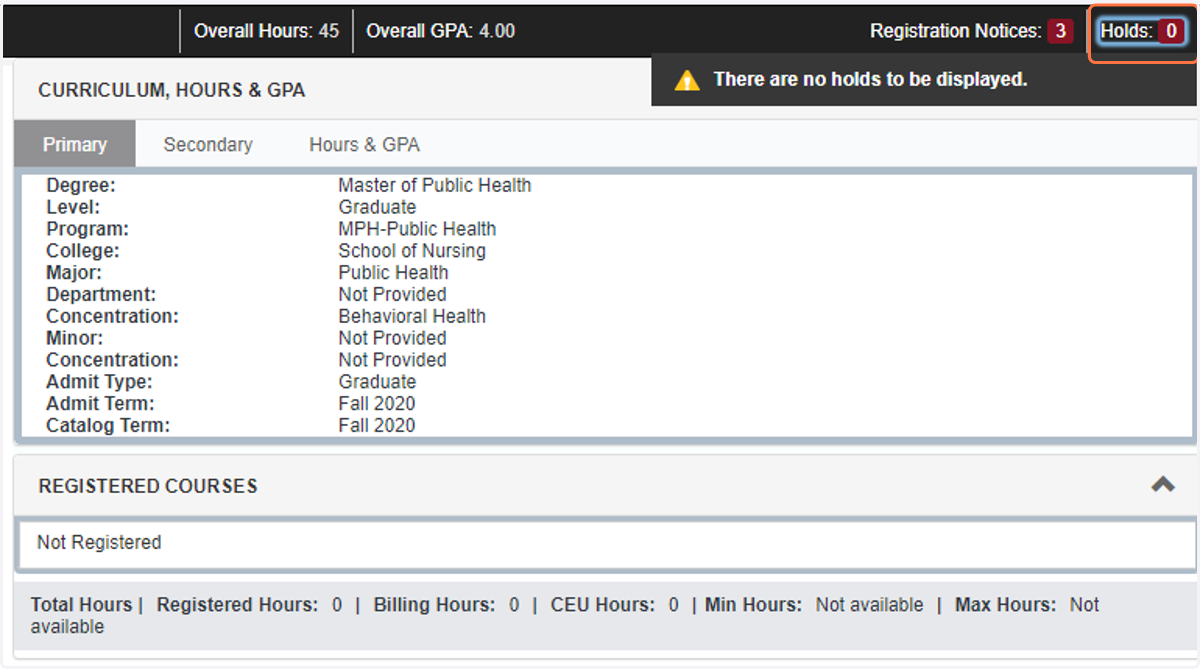
13. Holds
View holds placed on your account. The screen will display what hold you have and which department to contact.
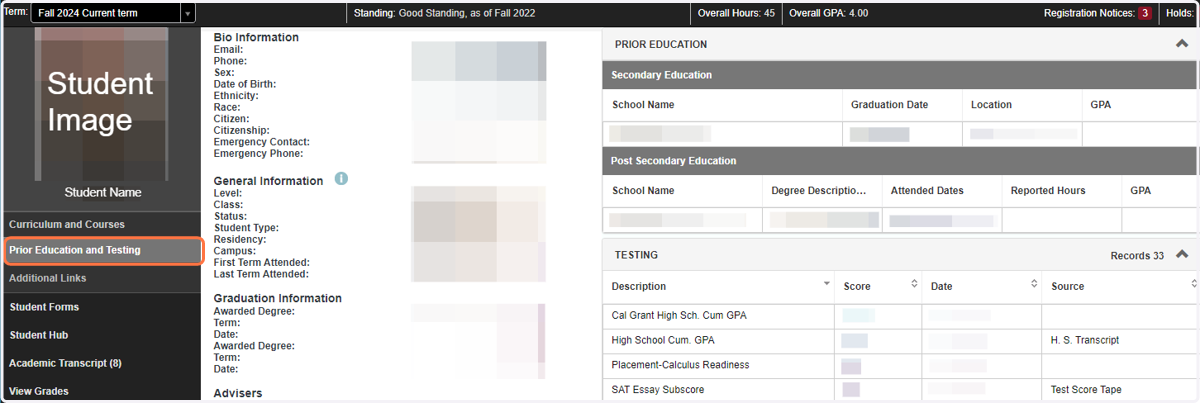
14. Prior Education and Testing
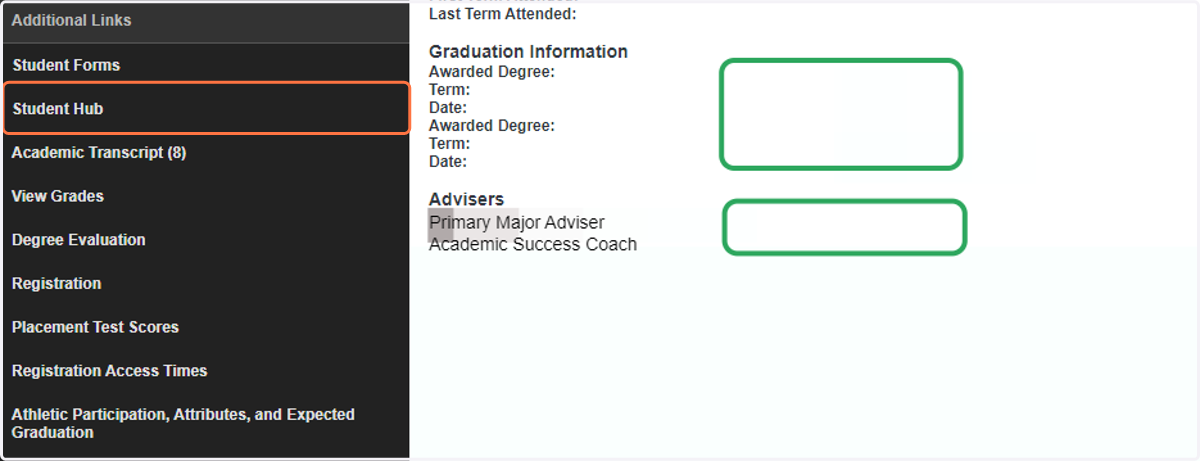
15. Student Hub
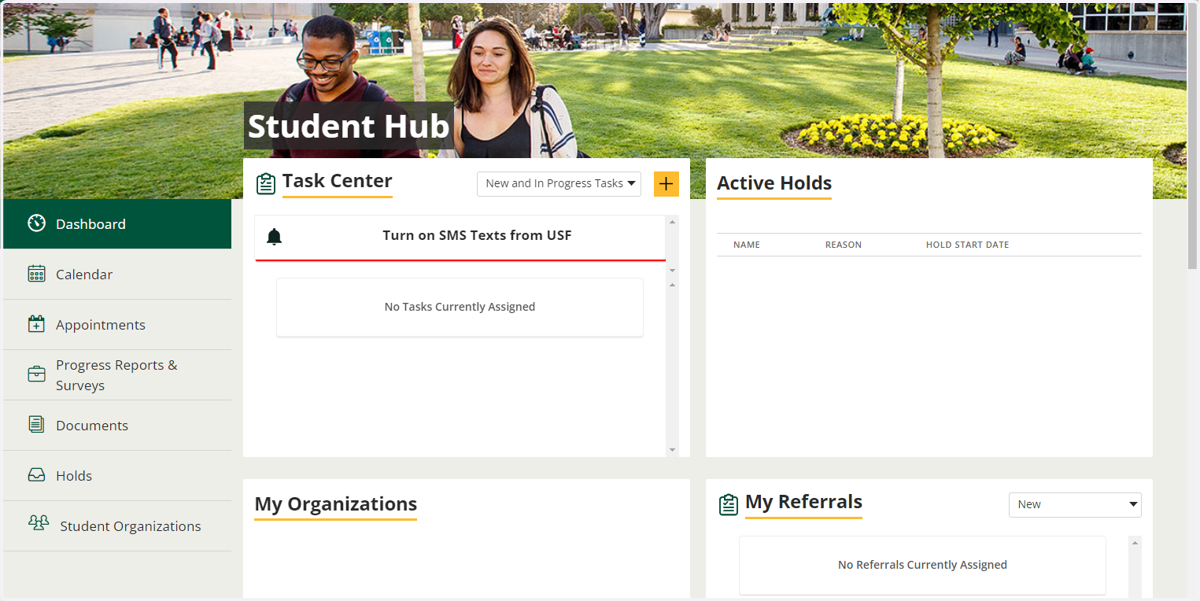
16. View Student Hub Screen
In a new tab, you can access the Student Hub to see tasks, holds, student organizations, your referrals, and who is in your success team. You can also make an appointment with CASA (to see your academic success coach) and/or the Learning, Writing, and Speaking Center.
17. Academic Transcript
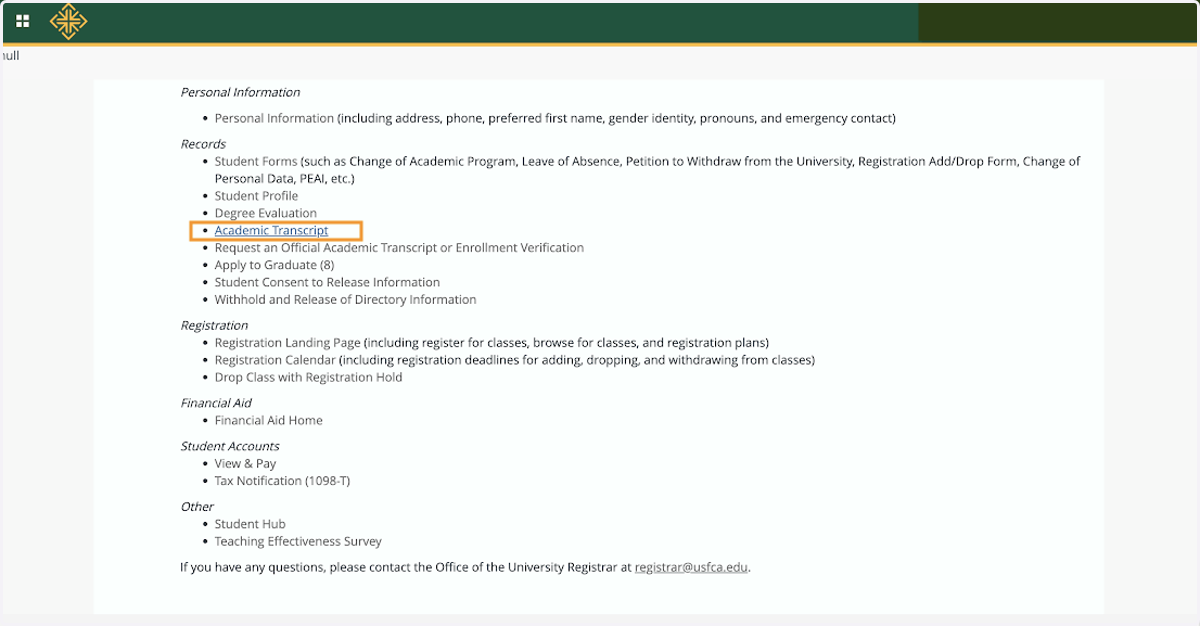
18. View Academic Transcript Screen
In this new tab, choose your "Transcript Level" as Undergraduate and "Transcript Type" as Unofficial. Click "Submit" to view your unofficial academic transcript.
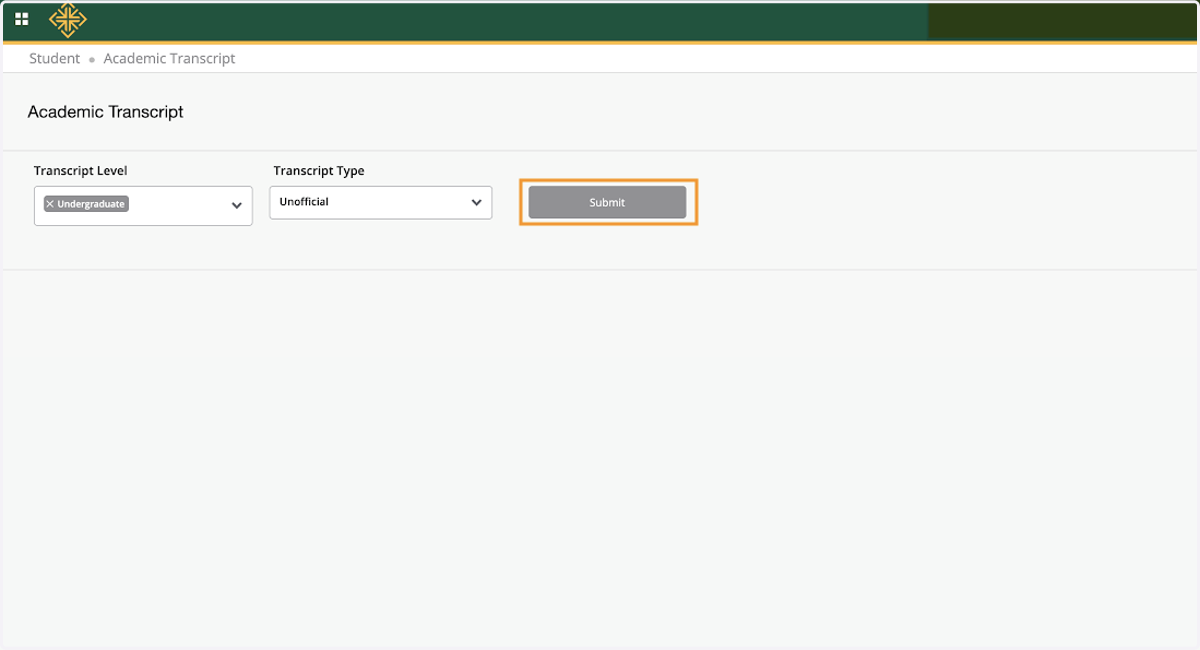
19. Click on View Grades
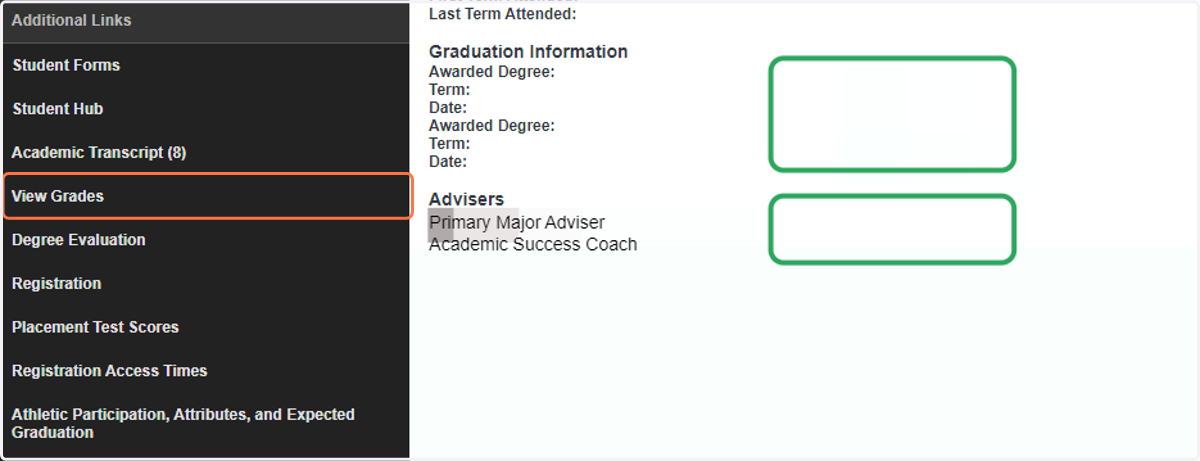
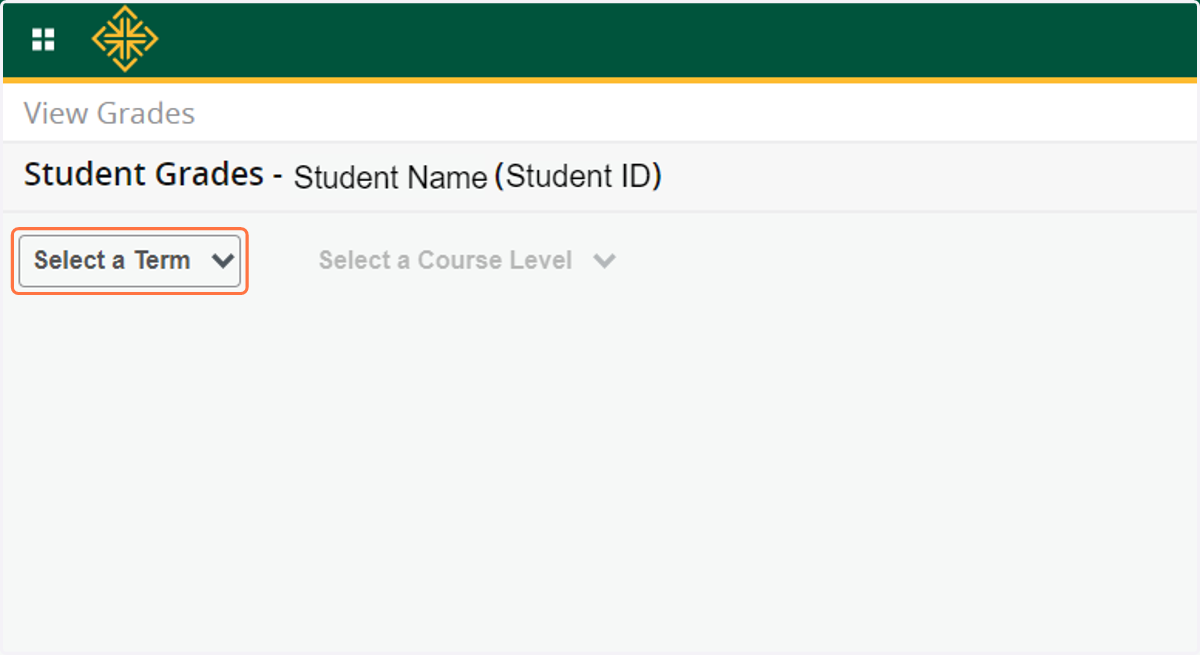
20. View Grades Screen
In a new tab, you can select the term and course level (all, undergraduate, or graduate) of the grades you wish to view.
21. Degree Evaluation
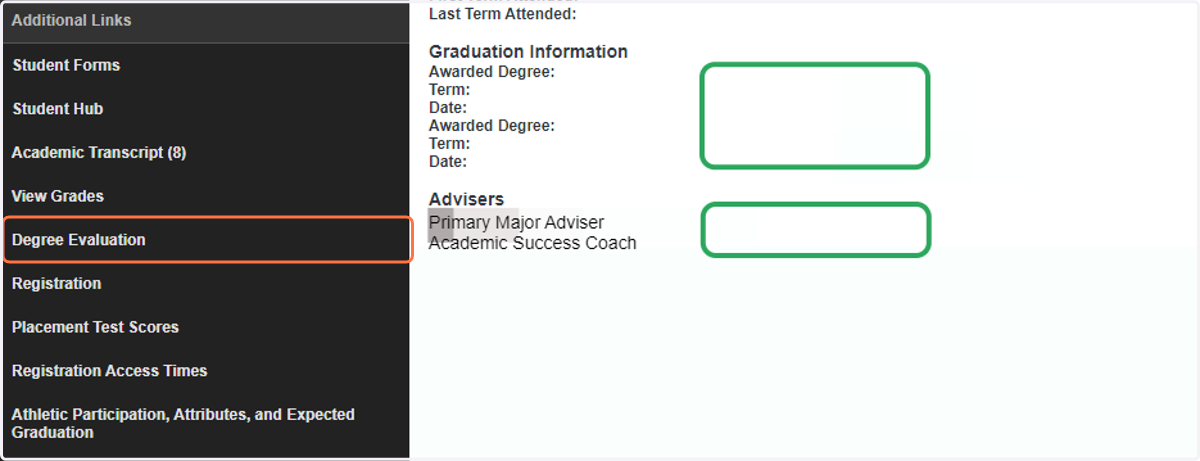
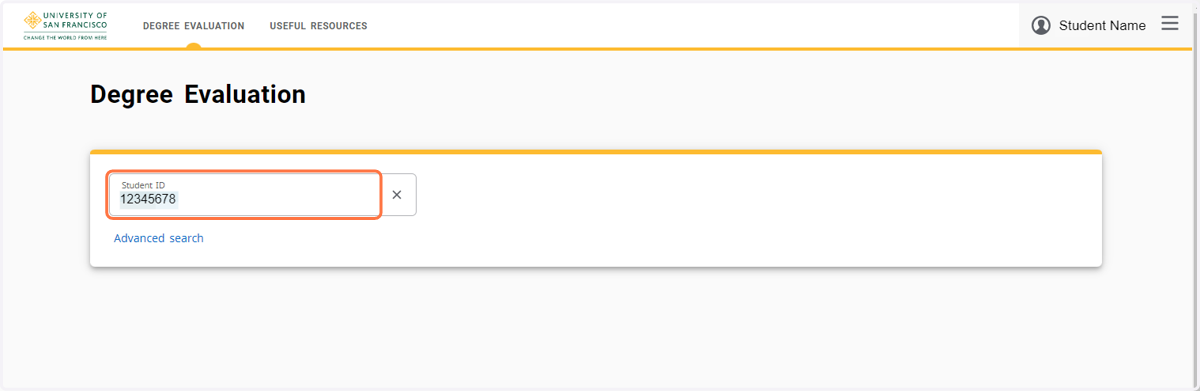
22. View Degree Evaluation Screen
In a new tab, you will see an entire evaluation of your degree, covering your overall degree requirements, your core requirements, major requirements, etc.
23. Registration
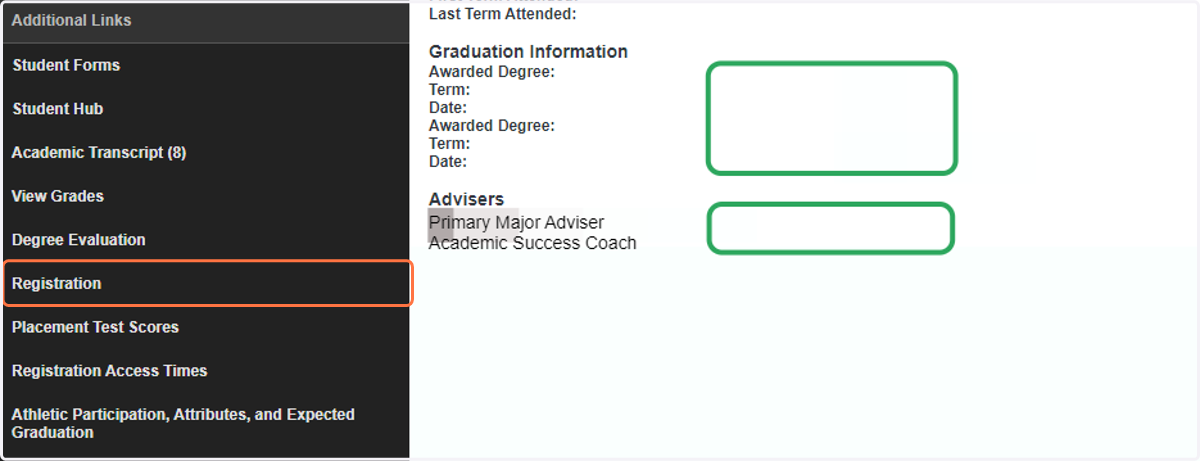
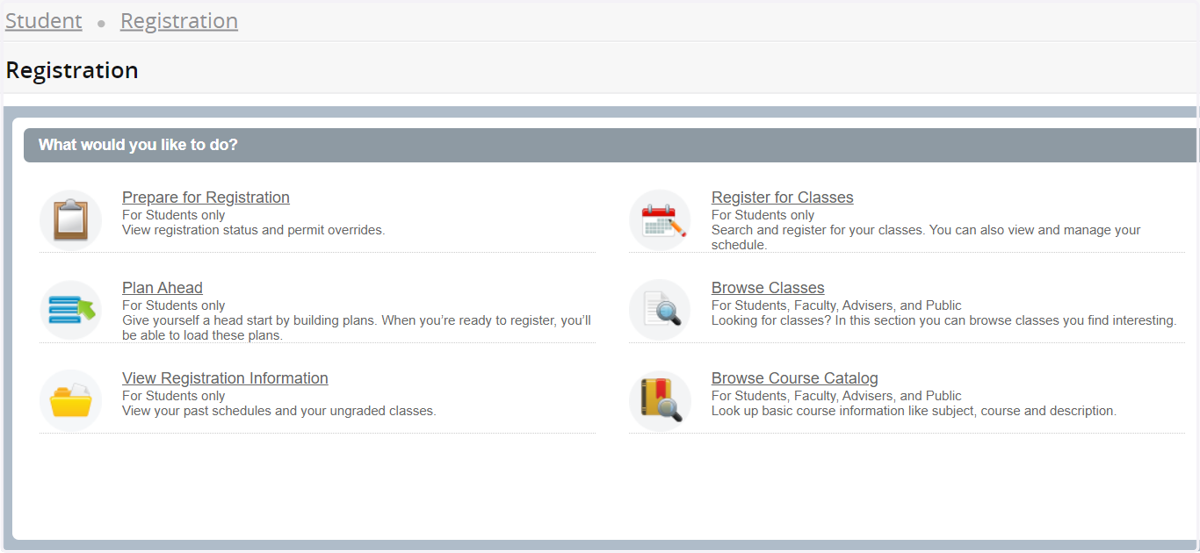
24. View Registration Screen
In a new tab, you will have access to view your registration status, build schedule plans, view past schedules and classes, register for classes, browse classes by section, and browse the general course catalog.
*Note: To view the schedule for the upcoming semester before your registration time, you can go to "Plan Ahead" or "Browse Course Catalog".
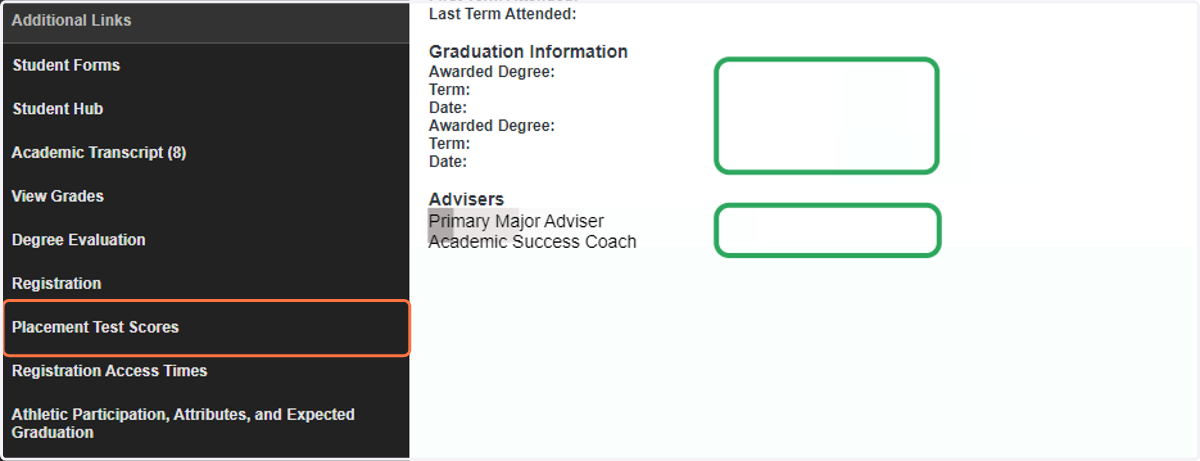
25. Placement Test Scores
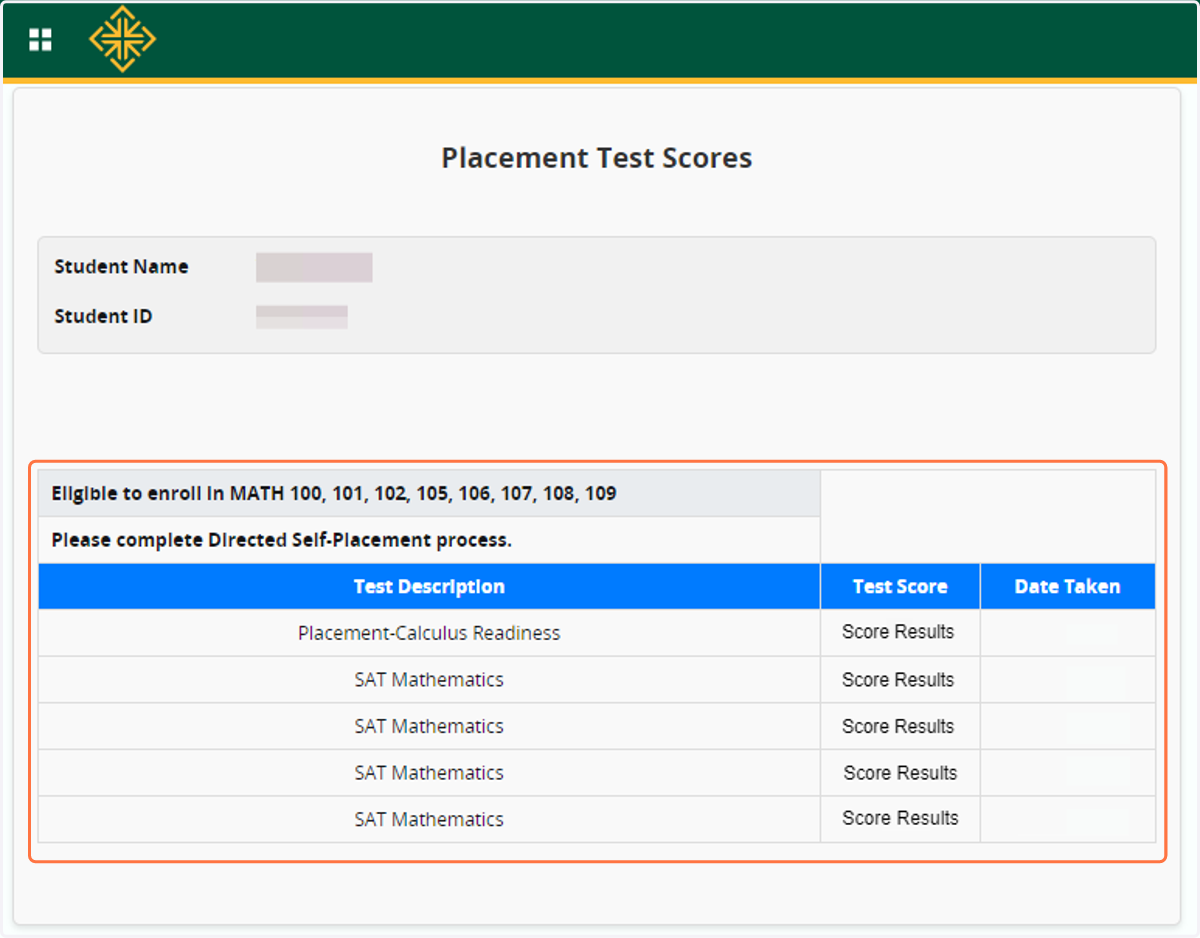
26. View Placement Test Scores Screen
All your placement test scores will appear on this screen. This includes any USF placement tests, SAT scores, ACT scores, etc.
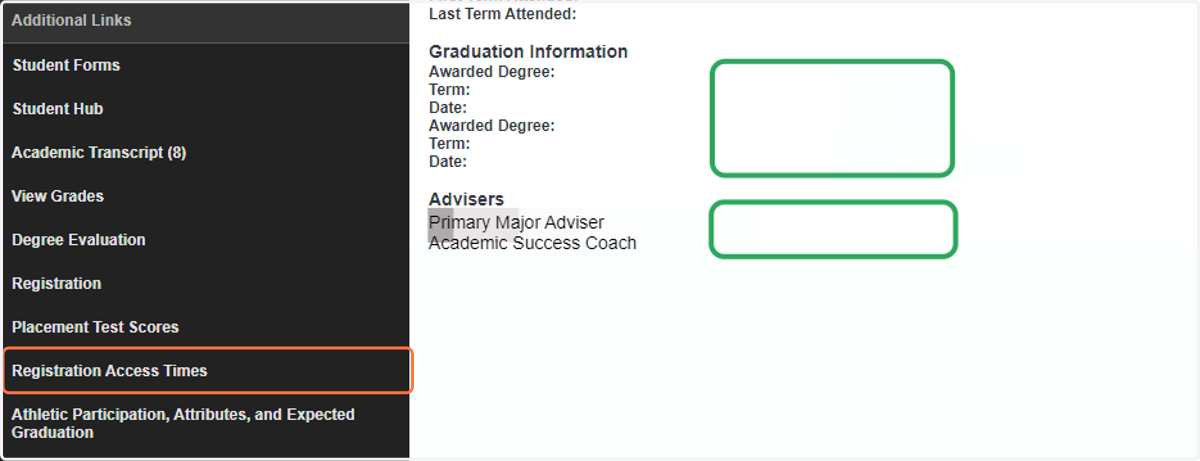
27. Registration Access Times
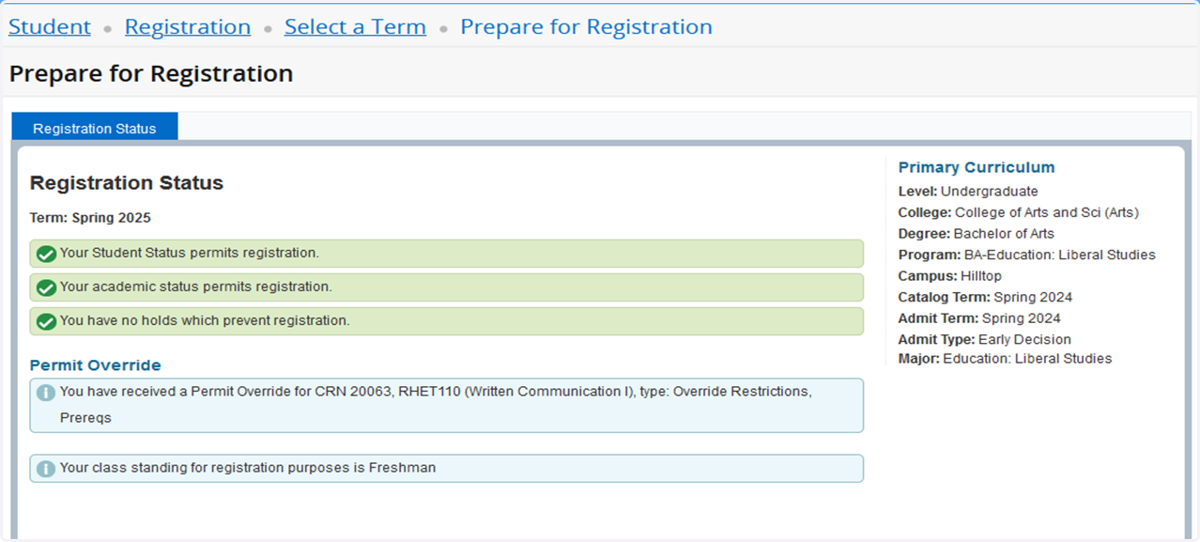
28. View Registration Access Times
In a new tab, you can view your registration status (e.g., permission to register, what date and time you can register, etc.) and any permission overrides you may have for certain courses.
29. Athletic Participation, Attributes, and Expected Graduation
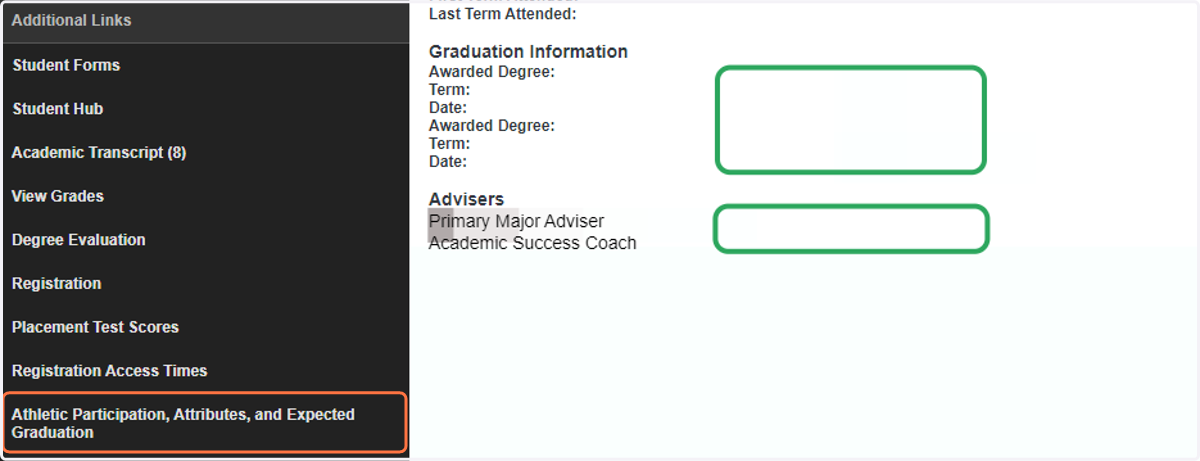
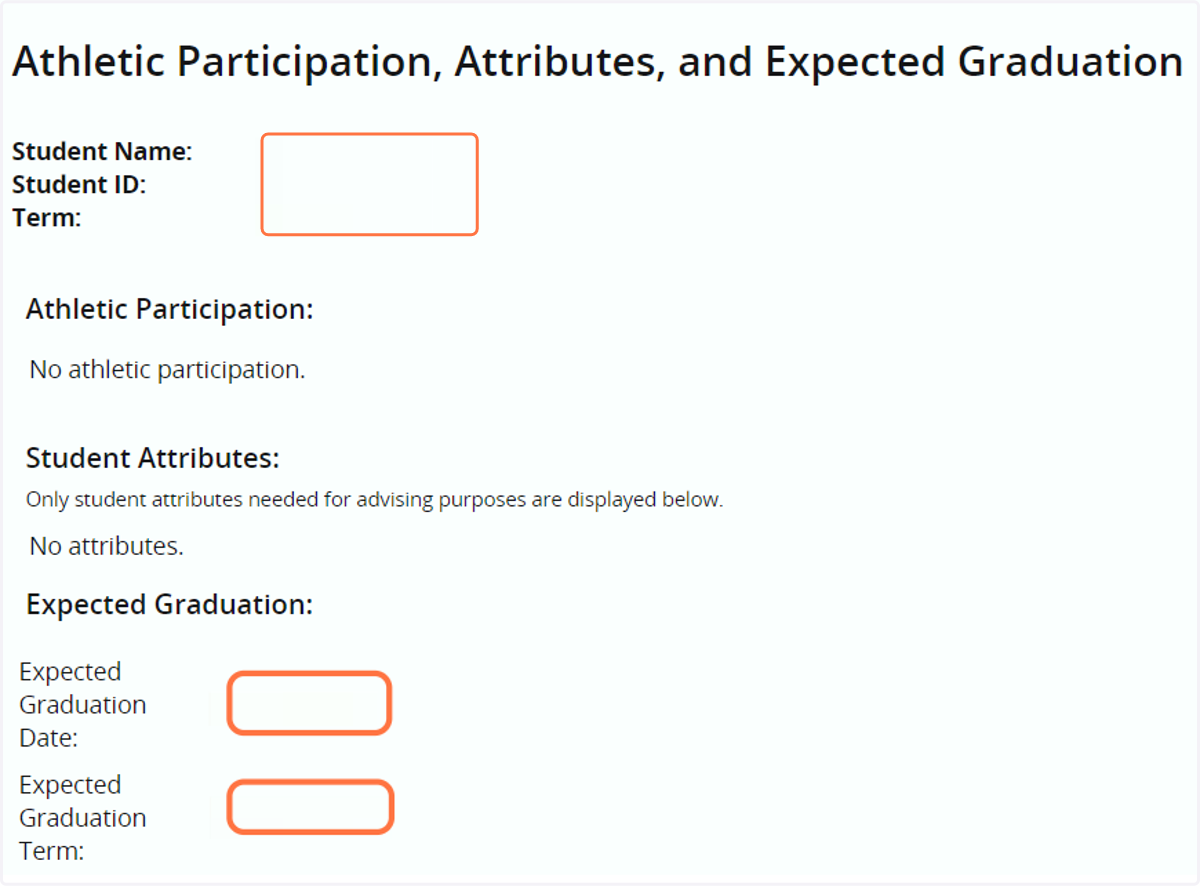
30. View Athletic Participation, Attributes, and Expected Graduation
In a new tab, you can view group attributes you are assigned to as well as your expected graduation date and term.
Updating Your Student Information
Need to update your student information? See below for how to do so.
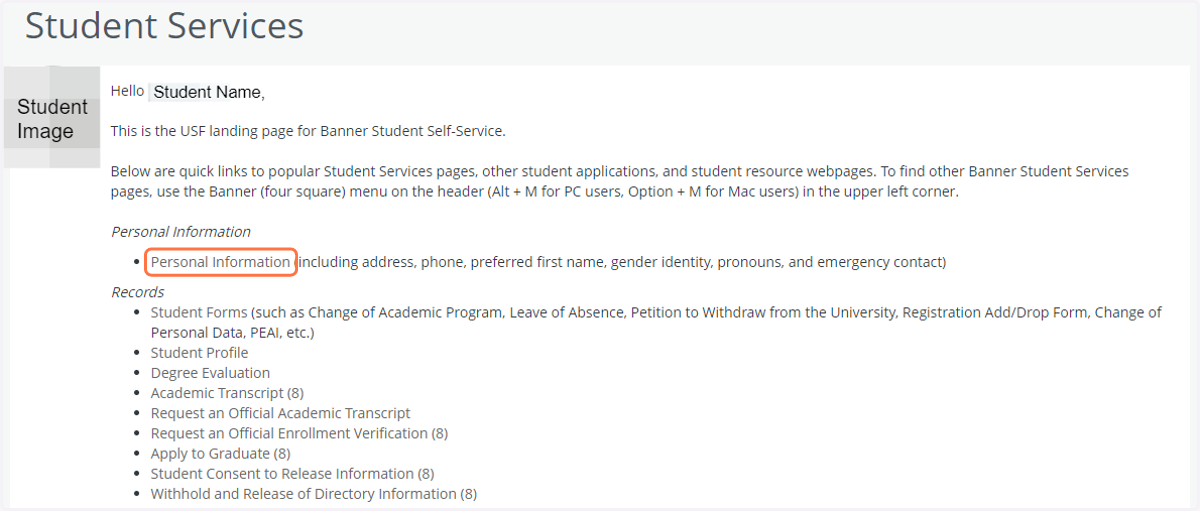
31. Back on the Student Services Landing Page
Select Personal Information.
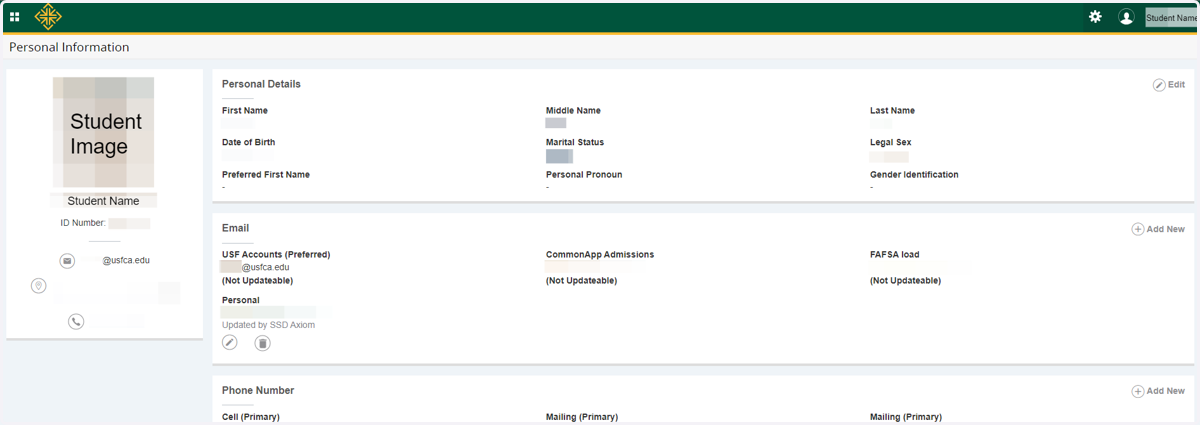
32. Review Personal Information Screen
Update your information as necessary.
Granting/Revoking Release of Information
You can choose to grant an individual access to your student information. You can also revoke this access at any time.
Note: USF complies with a U.S. federal law called FERPA, which allows colleges and universities to be more restrictive about the types of directory information that are not released. As such, USF also does not release student and/or parental address information to third parties. Read more about student privacy rights.
33. Back to the Student Services Landing Page
Select Student Consent to Release Information (8).
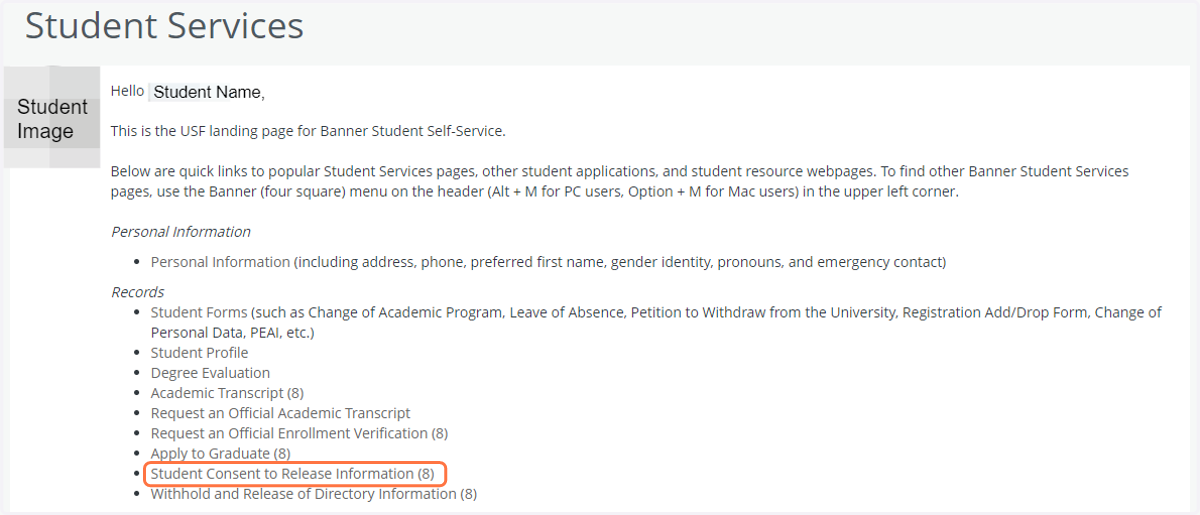
34. Consent to Release Information
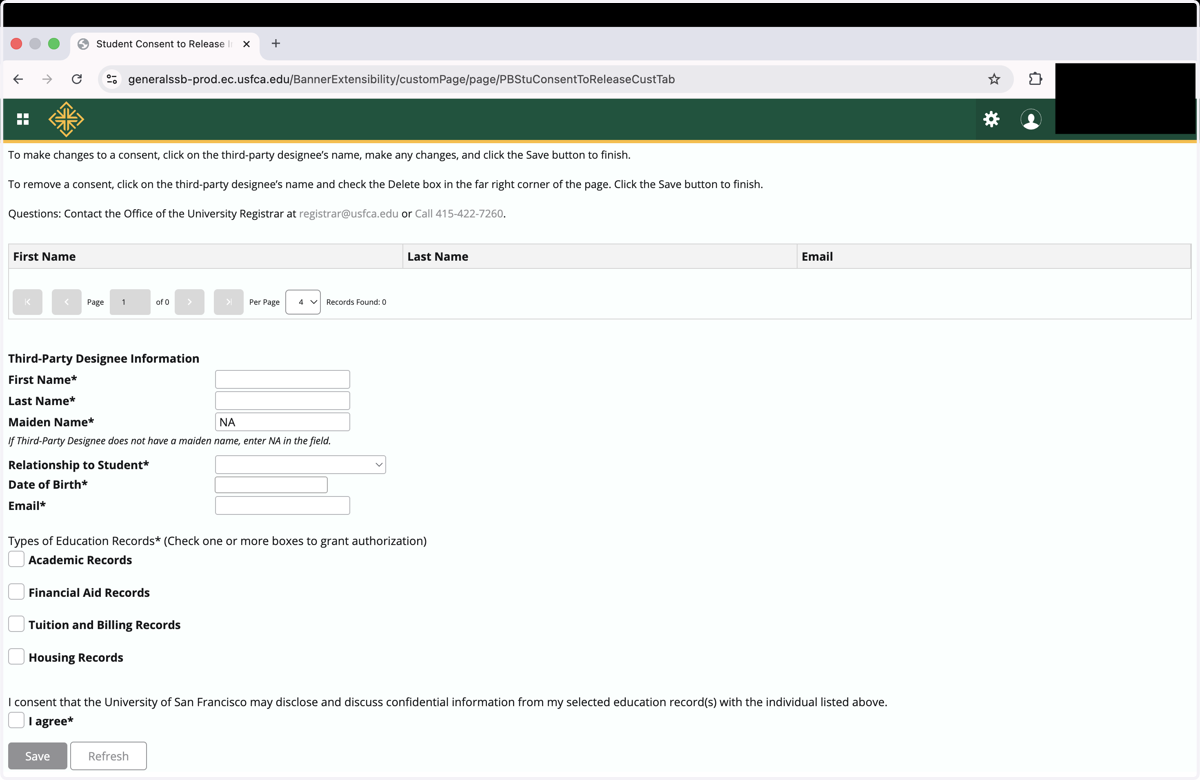
To authorize someone to access your records click "Add" under Third Party Designee Information
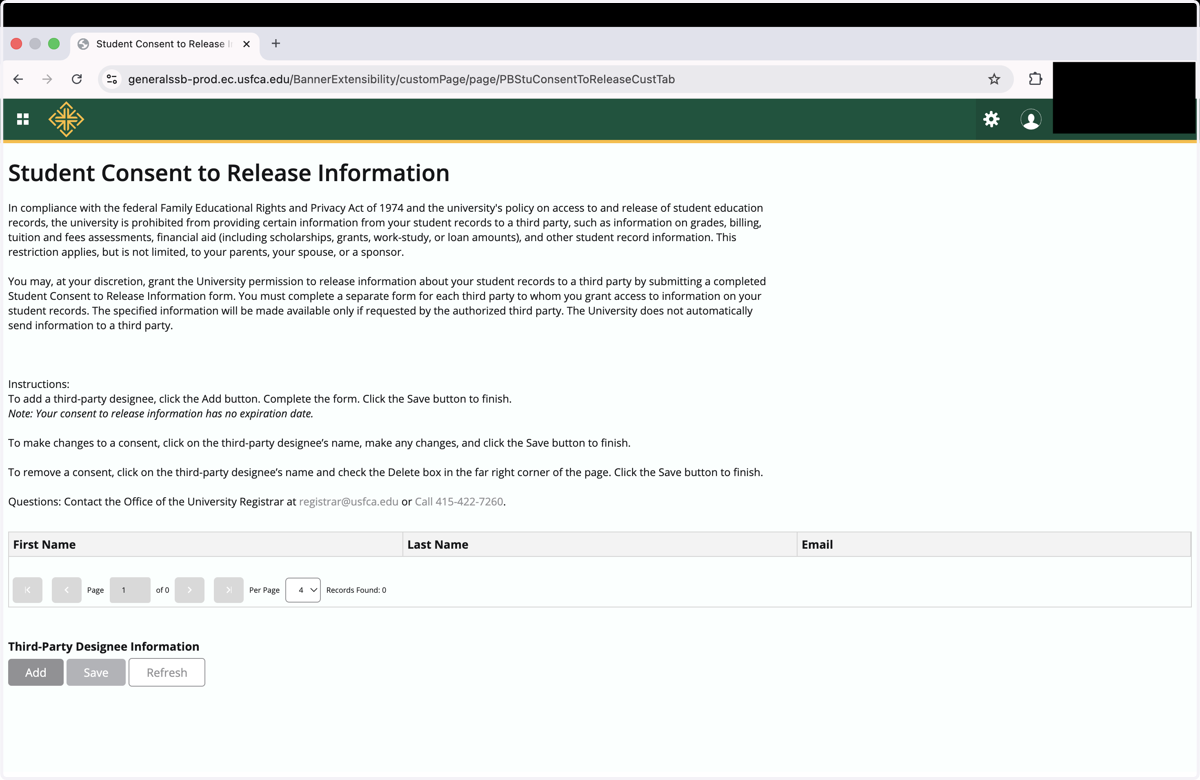
35. New Contact Screen
To add a third-party designee, click the Add button. Complete the form. Click the Save button to finish.
Note: Your consent to release information has no expiration date. To make changes to a consent, click on the third-party designee’s name, make any changes, and click the Save button to finish. To remove a consent, click on the third-party designee’s name and check the Delete box in the far right corner of the page. Click the Save button to finish.