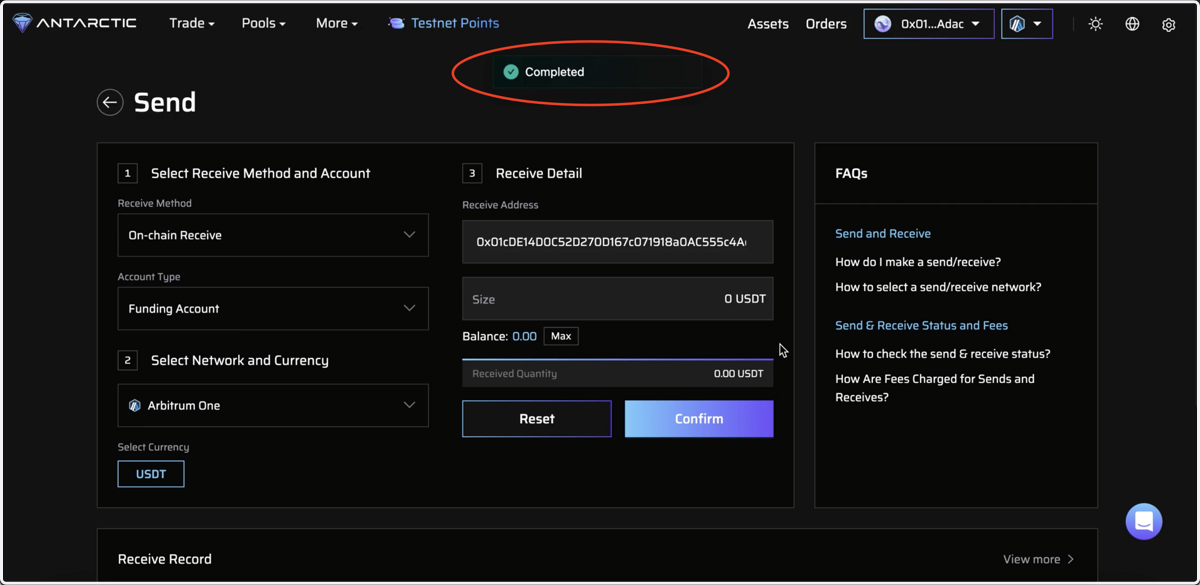
Antarctic Exchange Mainnet V1 Participation Guide
Antarctic Exchange
Antarctic Exchange (AX) is a decentralized perpetual exchange (perp DEX) offering a top-notch CEX-like trading experience, user-aligned ecosystem, and community-centric tokenomics.
AX gives traders what they need: deep liquidity, high performance, and the fairest trading environment without predatory institutional manipulation or “fee bleeding”.
Users are the cornerstone of crypto, and our goal is to make everyone a shareholder in Antarctic Exchange via our ATTX native token. Trade like you own the exchange, because you actually do.
—-----
We are thrilled to welcome you to the Antarctic Exchange Mainnet V1!
We extend our heartfelt gratitude for your dedication and support during the testing phases. Your valuable feedback has played an instrumental role in shaping AX into what it is today. We are delighted to have you with us on this journey and look forward to creating the future of decentralized trading together.
Connect Wallet
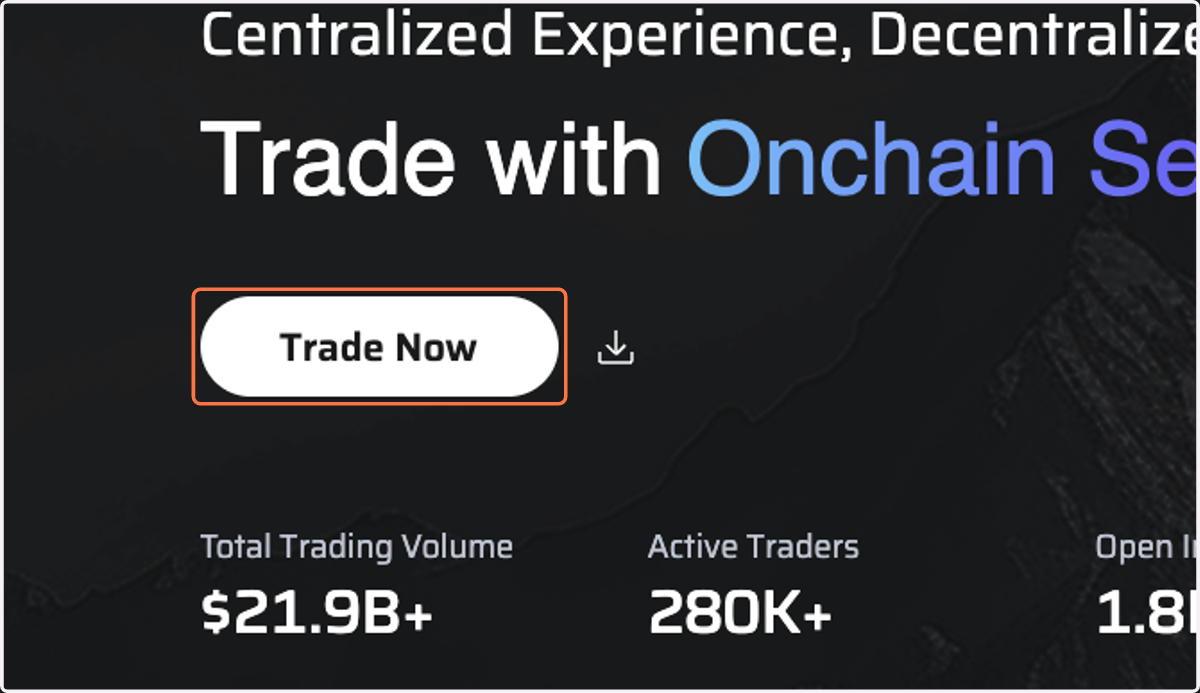
1. Access to Antarctic Exchange and Click "Trade Now"
Mainnet site: www.antarctic.exchange
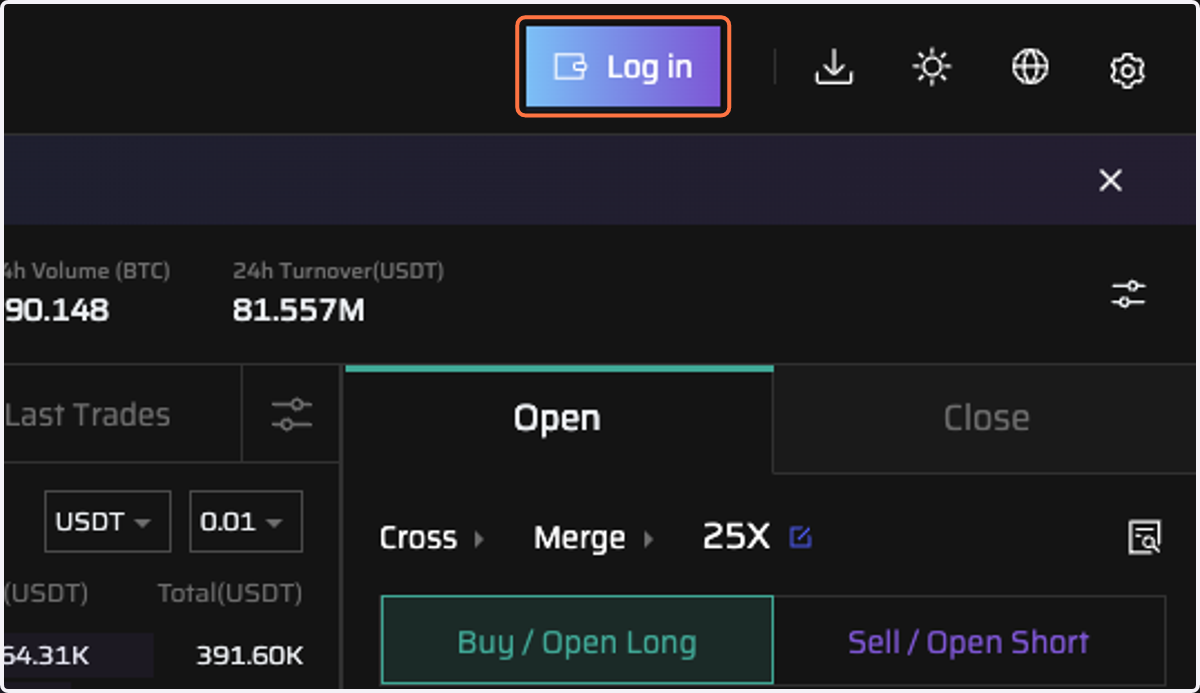
2. Click on "Log in"
3. Click on "Wallet Login"

4. Click on Connect Wallet
Antarctic supports multiple wallet login options.
Connect your wallet: Choose your preferred wallet to connect to the platform .Authorize Connection: Confirm and authorize the connection to AX.
Confirm Network: Ensure that your wallet is connected to the correct chain.
Choose your preferred wallet to connect to the platform .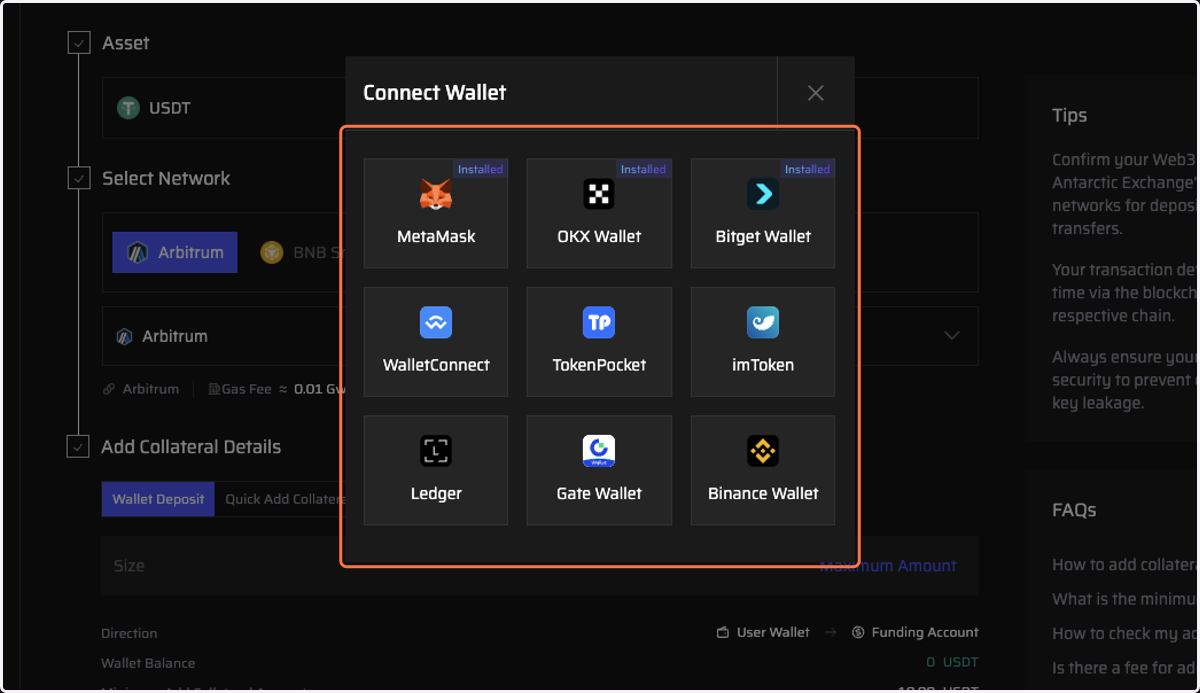
How To Deposit
5. Deposit to Funding Account
Click on "Assets" - "Add Collateral
Before making a deposit, ensure your connected Web3 wallet has sufficient USDT balance and GAS fees for the corresponding chain:Arbitrum One: Requires Arb-USDT (for deposit) and Arb-ETH (for gas).
Ethereum: Requires ETH-USDT (for deposit) and mainnet ETH (for gas).
BNB Smart Chain: Requires BSC-USDT (for deposit) and mainnet BNB (for gas).
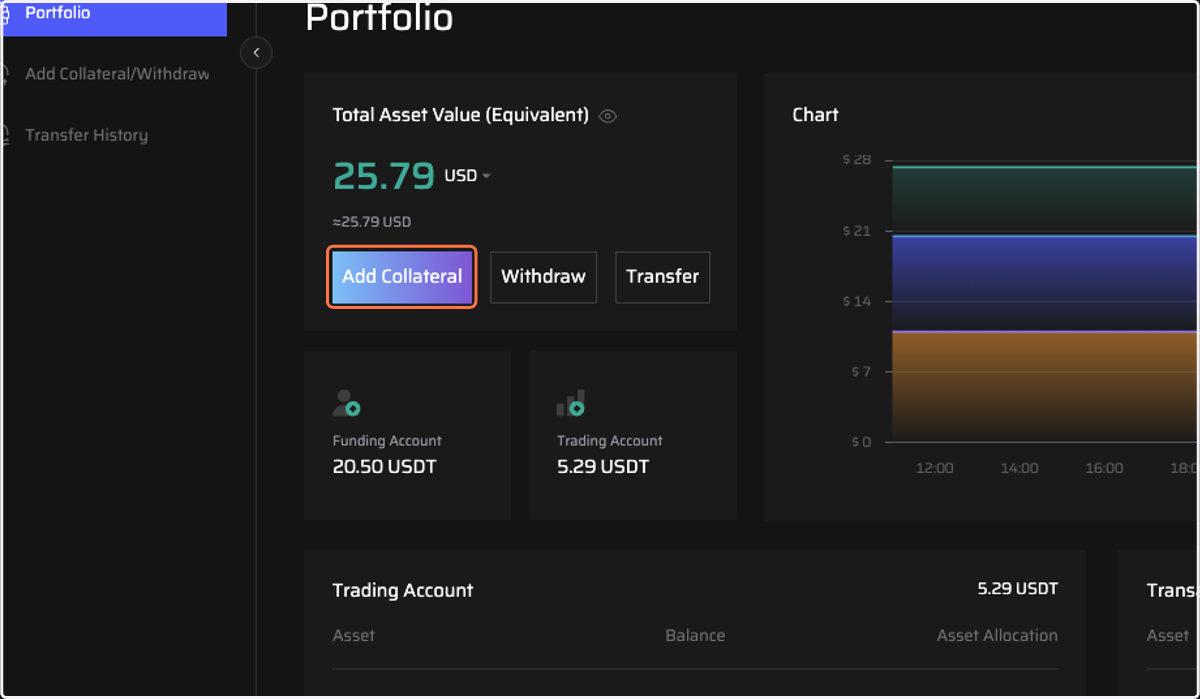
6. Choose Arbitrum network
Input the amount you want to deposit (the minimum deposit amount is 10)
Click on “Confirm” to initiate wallet signing to finalize your deposit.
⚠ Do not deposit to the contract address, or your funds will be lost permanently!
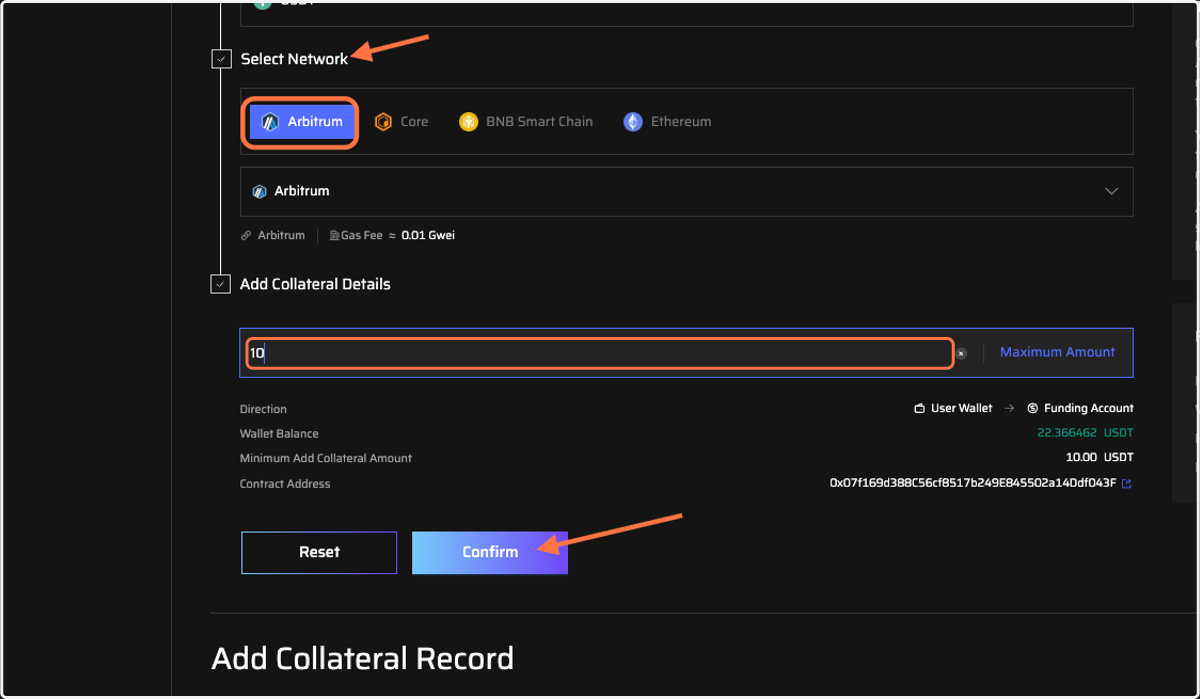
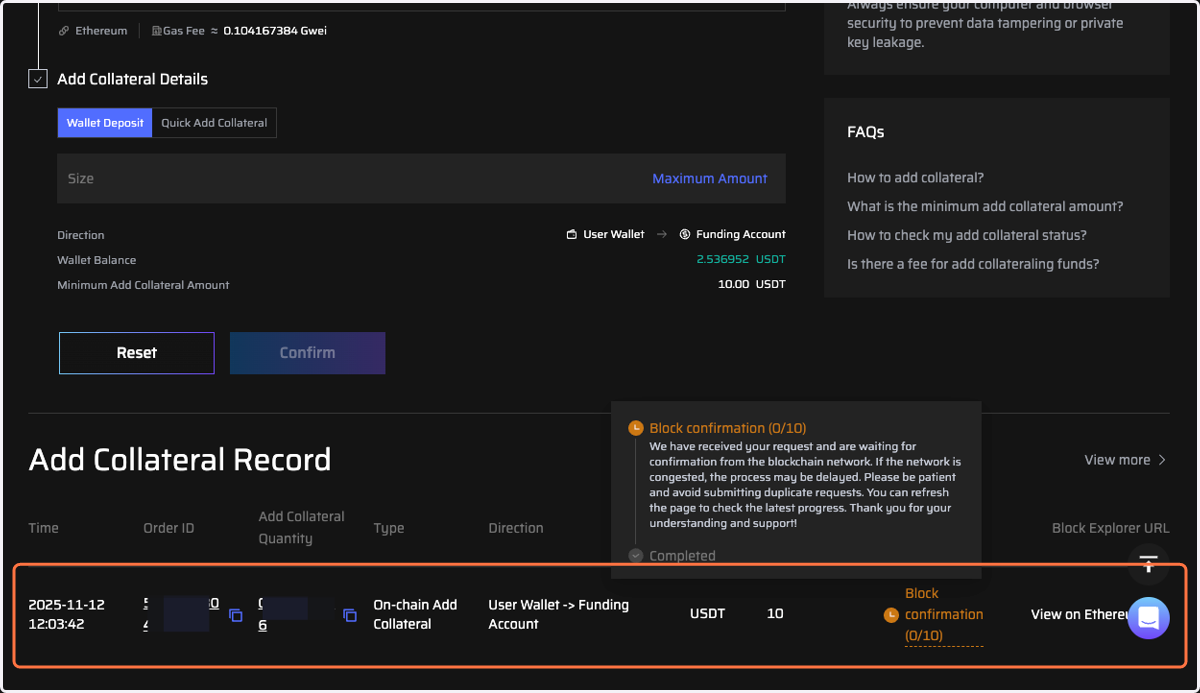
7. Check the deposit status
Your deposit details can be verified in real-time via the blockchain explorer for the respective chain.

Deposit without Gas
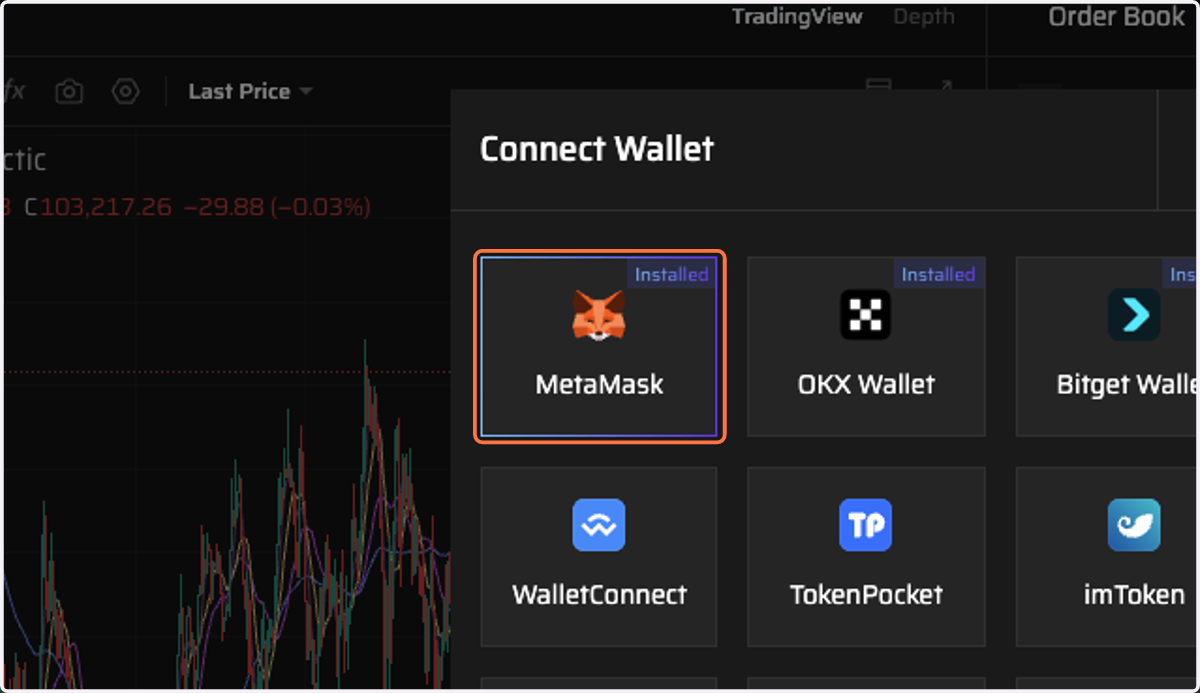
8. Click on Log in and connect to MetaMask Wallet
Take Ethereum Chain as an example
9. Click on "Assets" - "Add Collateral"
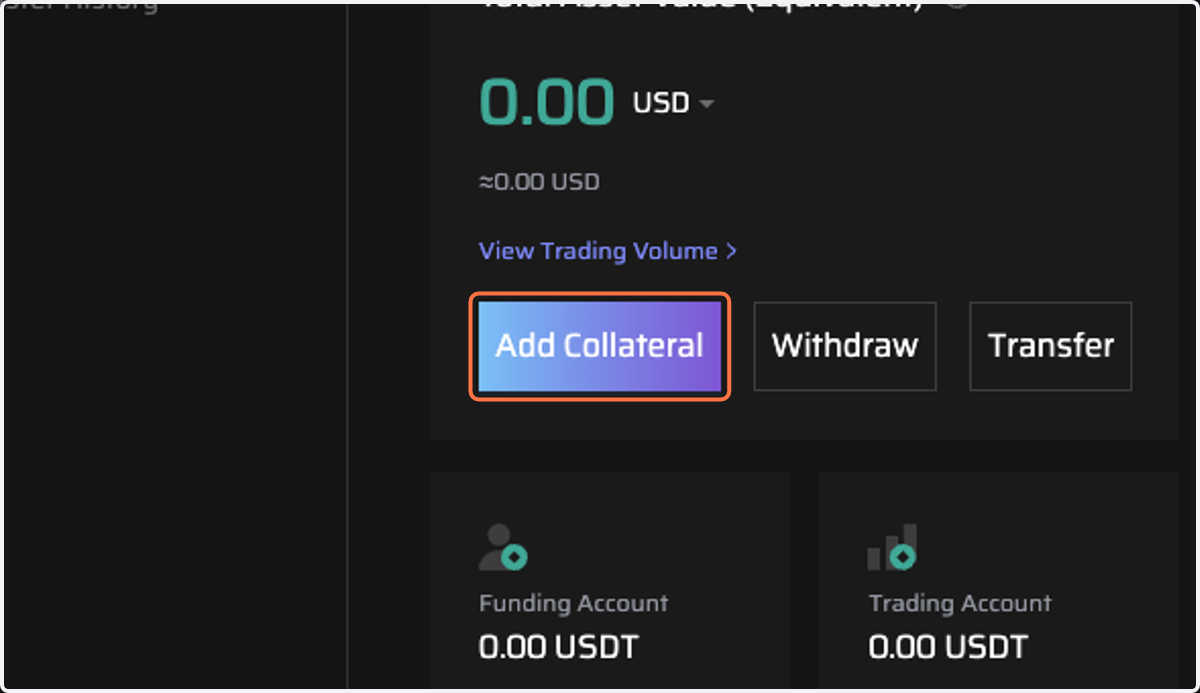
10. Type the amount you want to deposit and then click on "Confirm"
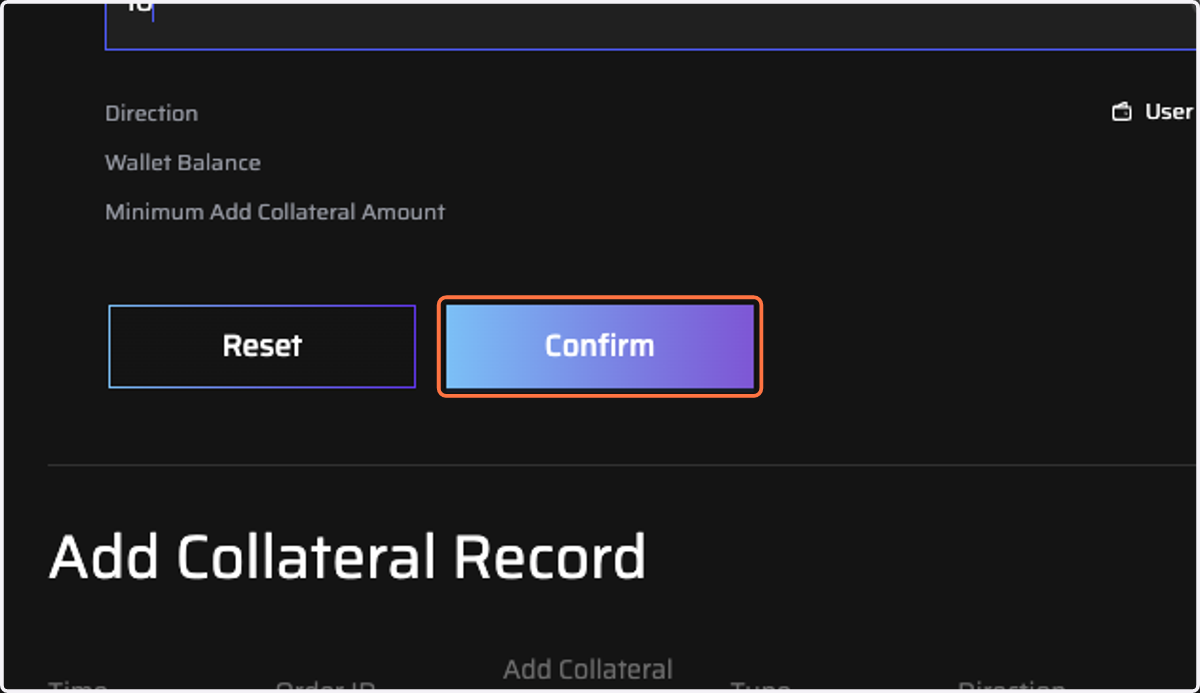
11. Confirm the status in the MetaMask wallet pop-up window.
When your MetaMask wallet has no ETH for gas fees, the system will automatically use USDT to cover the gas instead.
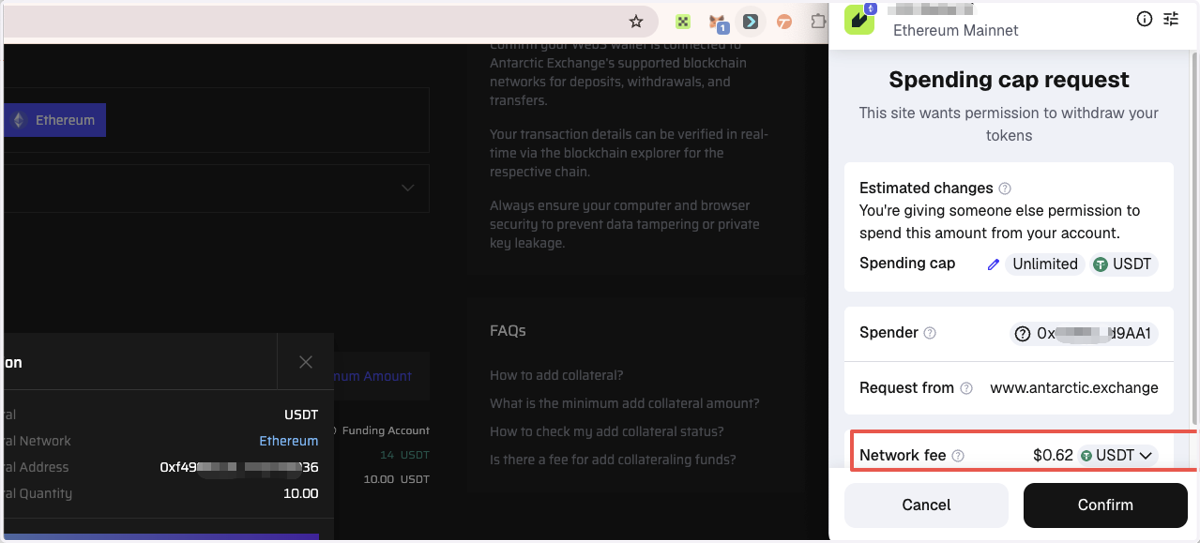
12. Click Confirm in Metamask Wallet
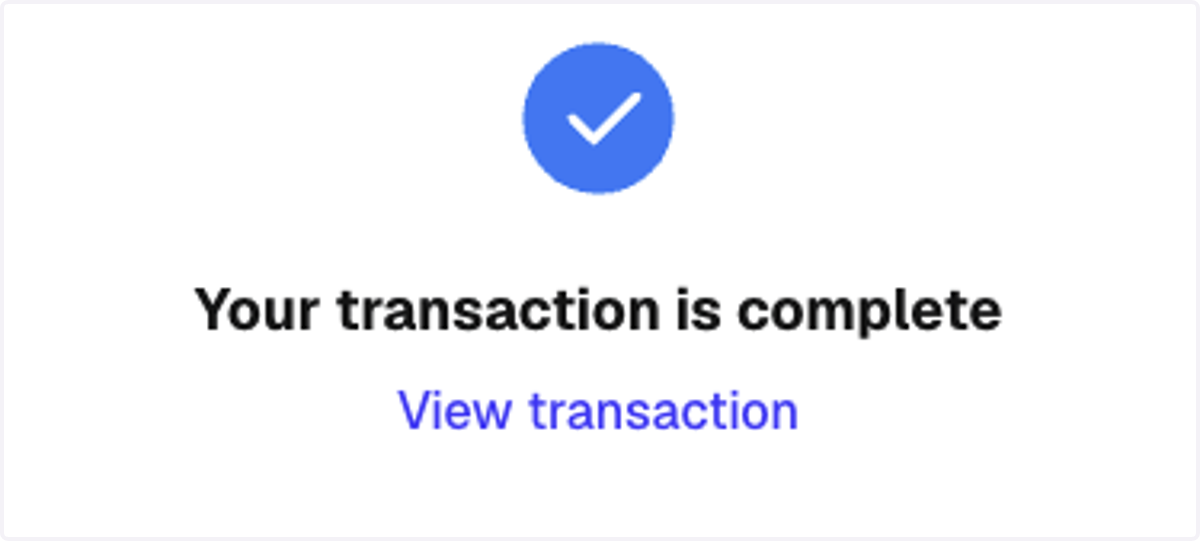
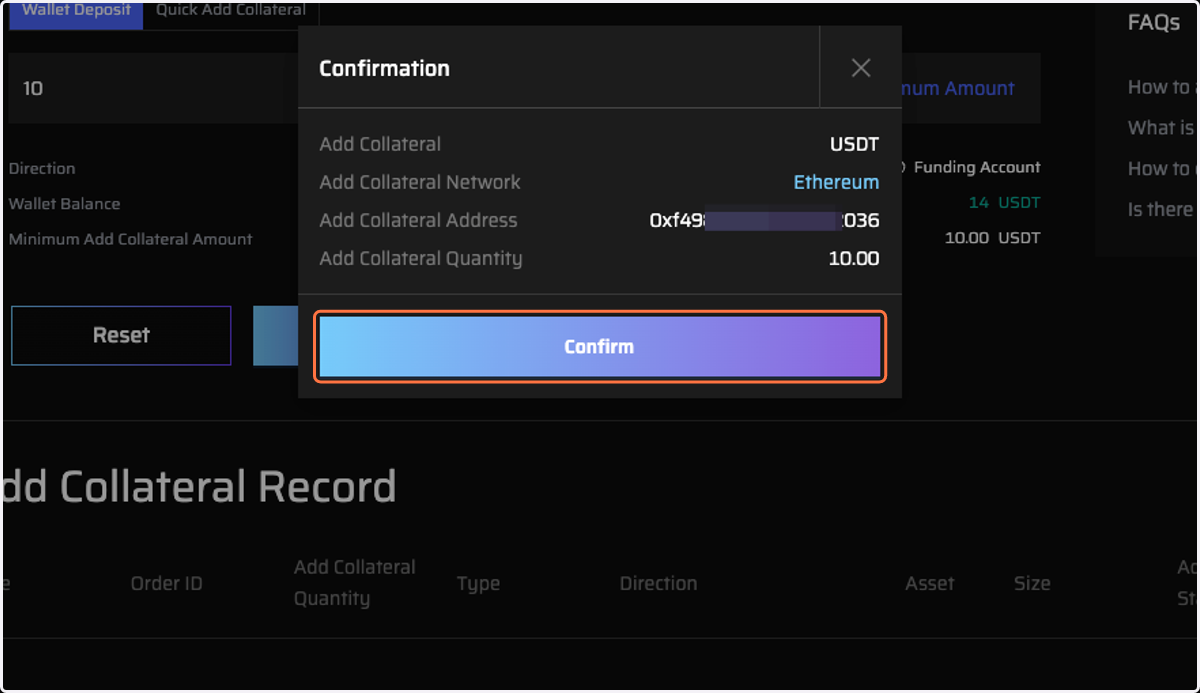
13. Click on “Confirm” on the Assets deposit page
14. Check the Deposit Status
Your deposit details can be verified in real-time via the blockchain explorer for the respective chain.
Transfer to Trading Account
15. Transfer to Trading Account
Click on "Assets" - "Transfer In"
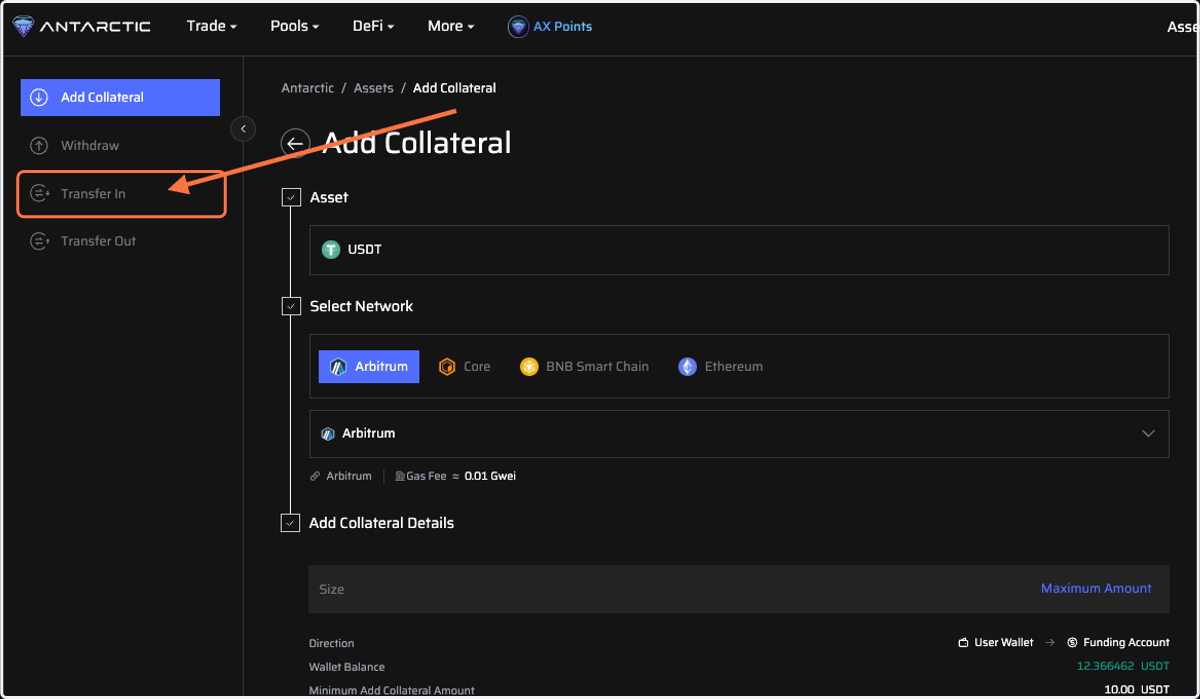
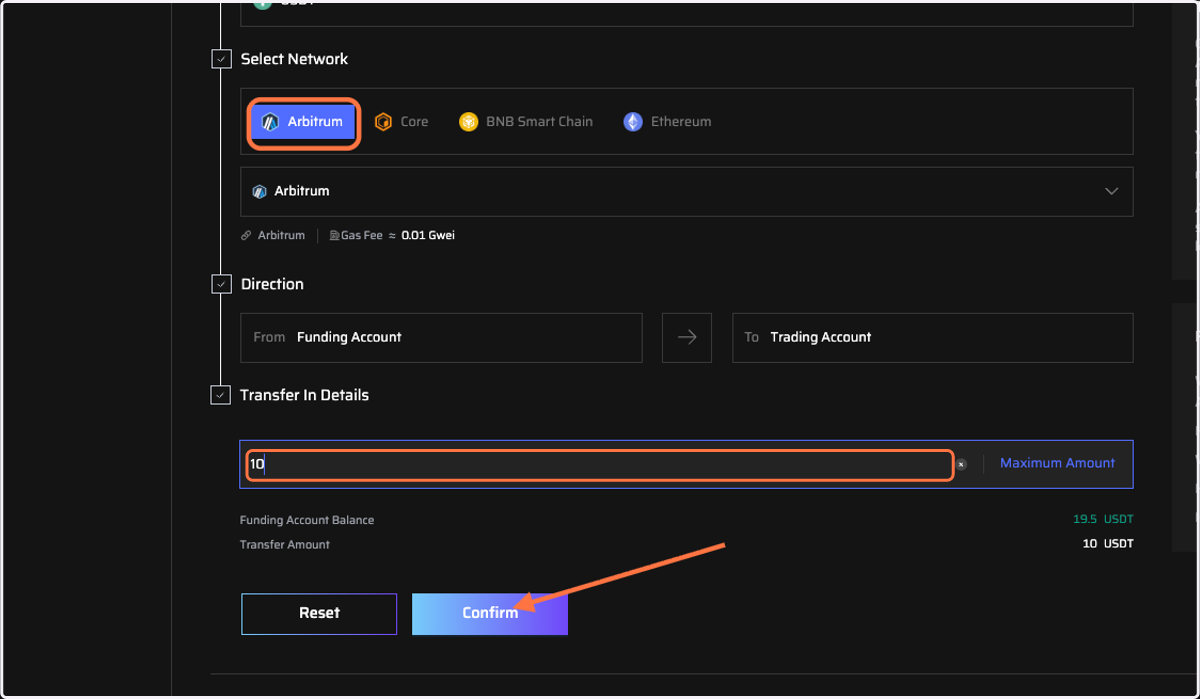
16. Choose network and type amount
Choose Arbitrum network and ensure that your wallet is connected to the correct chain.
Enter the amount you would like to transfer.
Click on “Confirm” to initiate wallet signing to finalize your transfer.
17. Check the transfer status
Your transfer details can be verified in real-time via the blockchain explorer for the respective chain.

Start Trading
18. Click on "Trade"
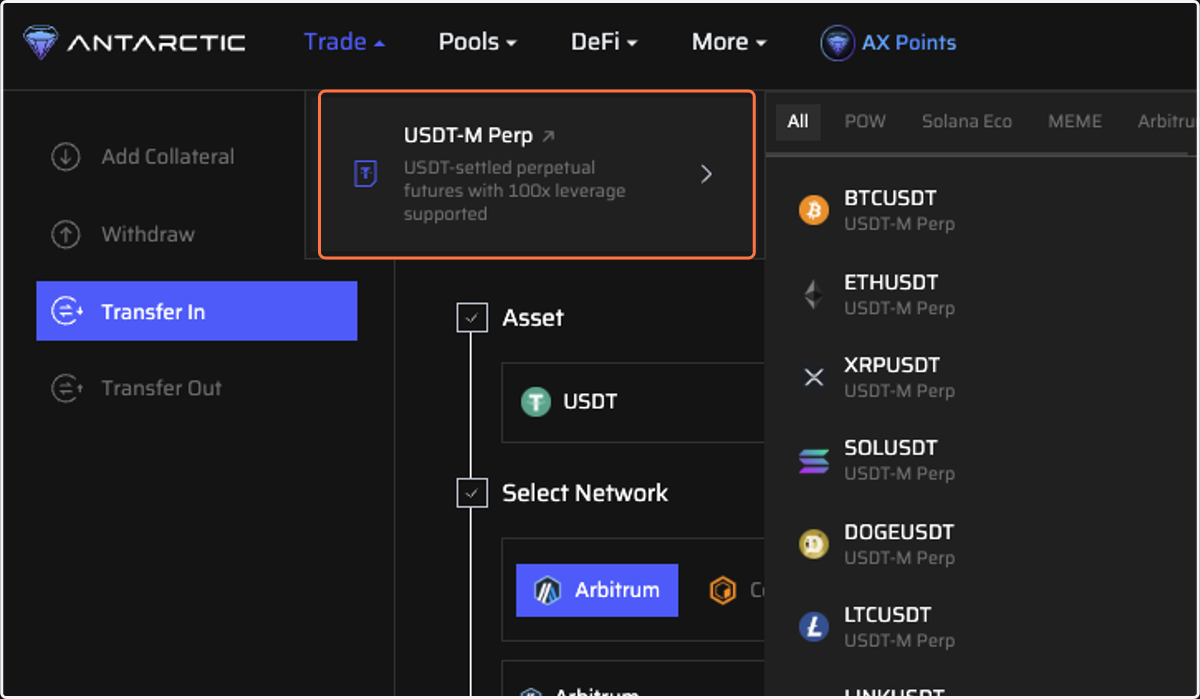
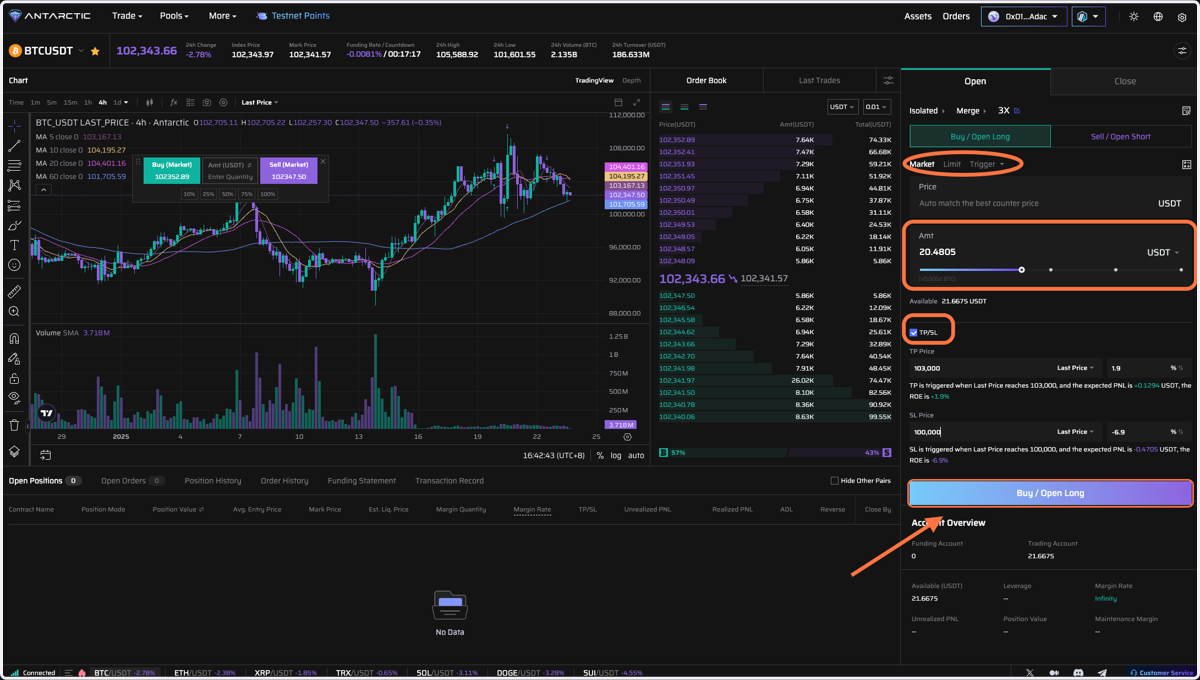
19. Quick Start-Trading
Step 1: Select your preferred trading mode (Cross, Merge, or Leverage). Step 2: Choose your preferred order type (Market, Limit, or Trigger Price).
Step 3: Select the size of your position.
Step 4: Set Take Profit (TP) and Stop Loss (SL) as desired.
Step 5: Confirm your order.
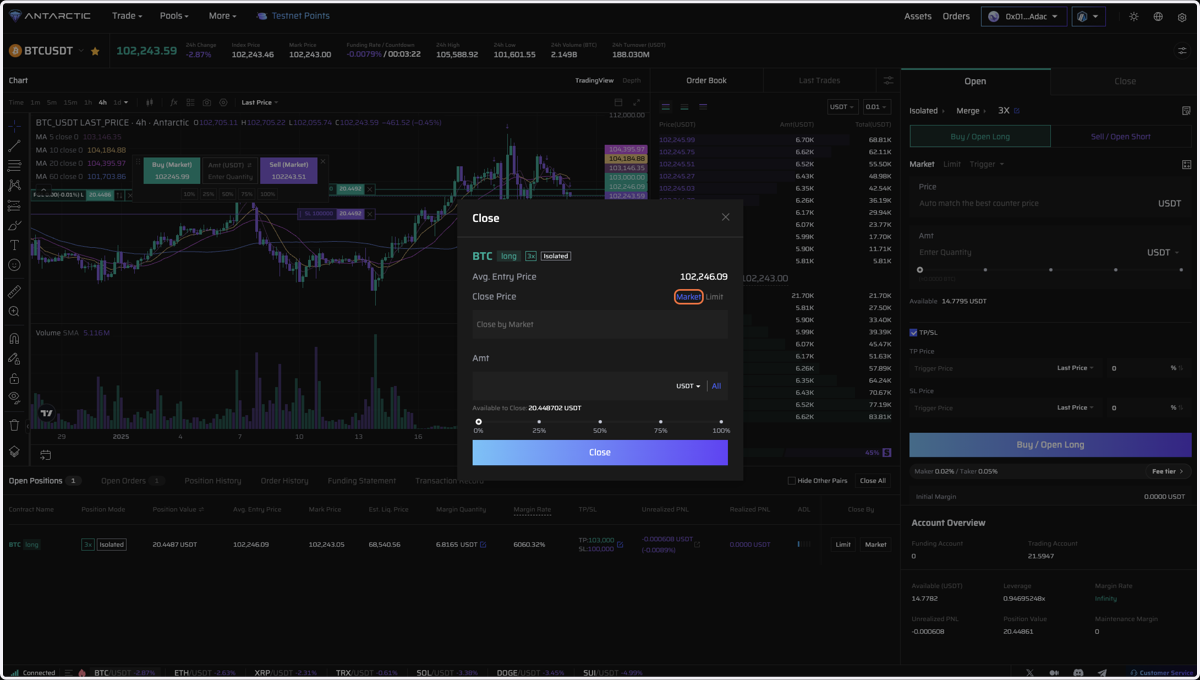
20. Close Position
Close your position by selecting Limit or Market order based on your needs.
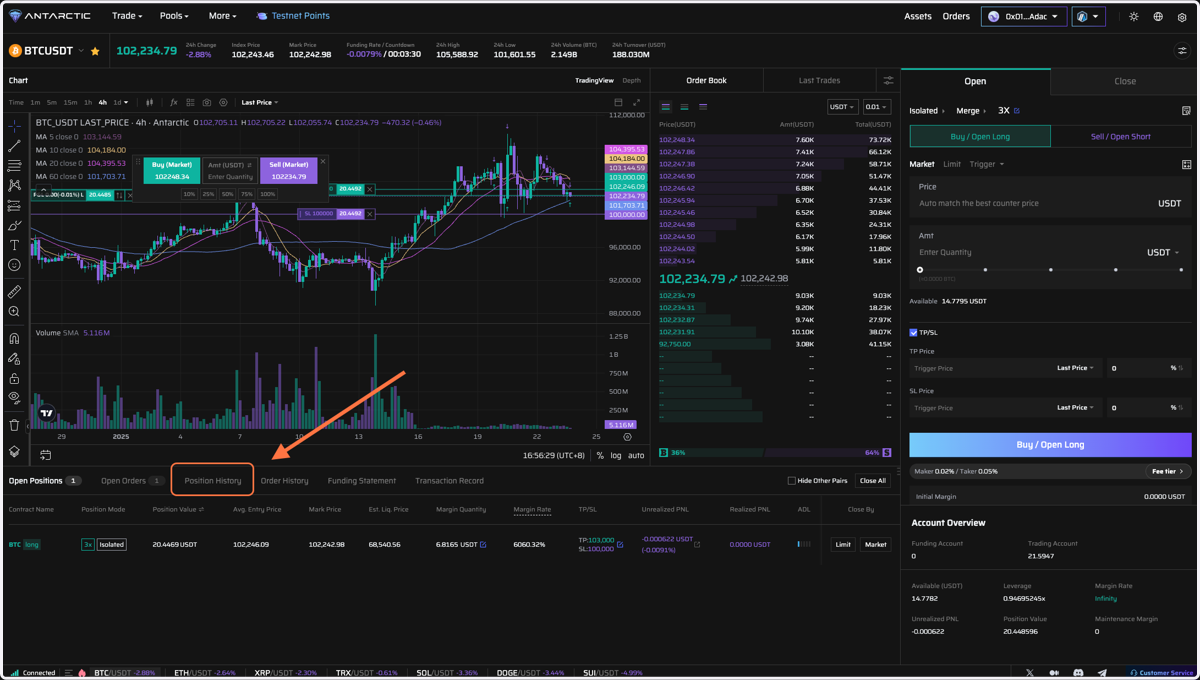
21. Click on "Position History"
Review your opening and closing records to ensure accuracy.
Add Liquidity
Antarctic Exchange supports AXLP which provides liquidity to the exchange, enabling passive MM returns and ecosystem rewards.
AXLP including AMLP (Antarctic Market Making LP) and AHLP (Antarctic Hedging LP)
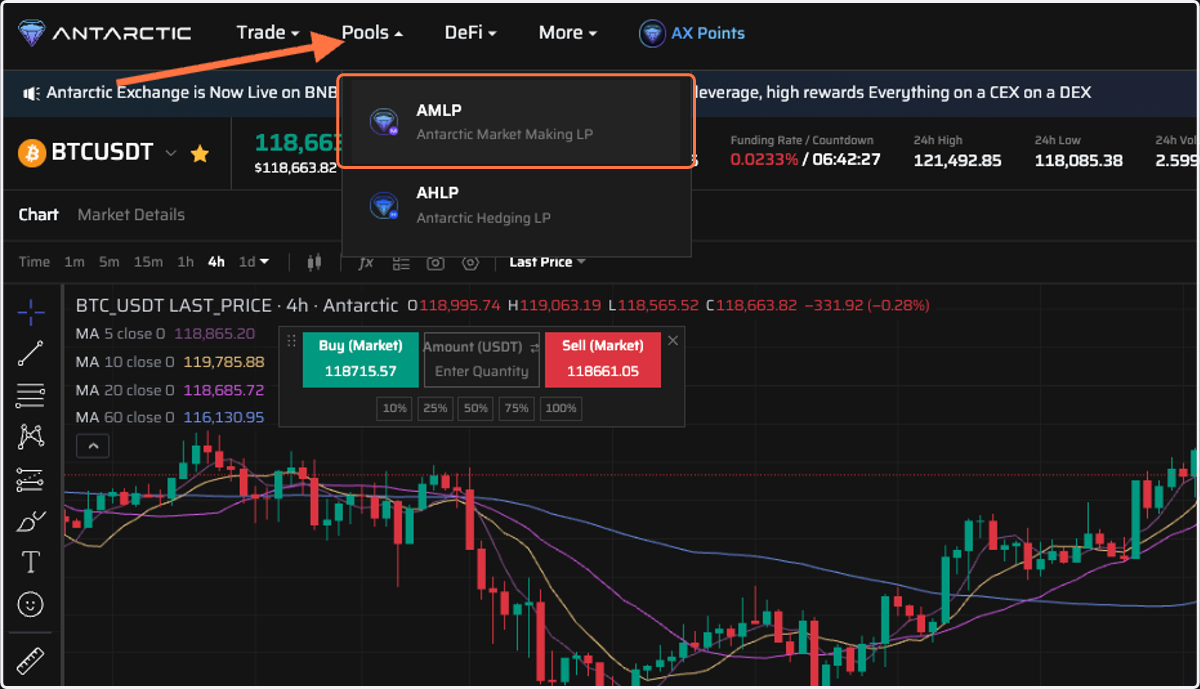
22. Click on"Pools" to select the LP you want to add
Take AMLP as
Note: Please ensure that your Web3 wallet has enough ETH on the Arbitrum One network to cover gas fees when adding AMPL to ensure that your transaction proceeds smoothly.
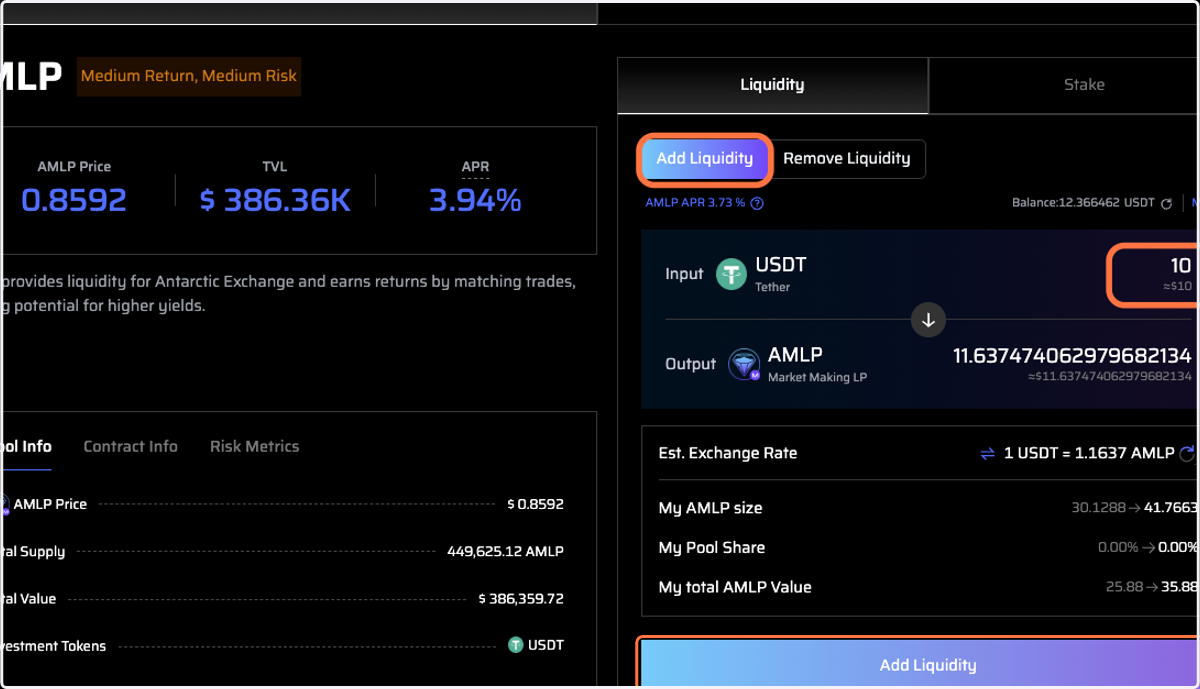
23. Select "Add Liquidity"
Enter the amount of funds you would like to provide for liquidity (eg.10 USDT).
Check the estimated exchange rate and the expected number of AMLP tokens you will receive, etc.
Click the "Add Liquidity" button, and confirm the transaction on-chain by signing it.
24. Check Order Status
Click "My Orders" - "Liquidity"
Check the current liquidity orders status

25. Add AMLP to your Web3 Wallet
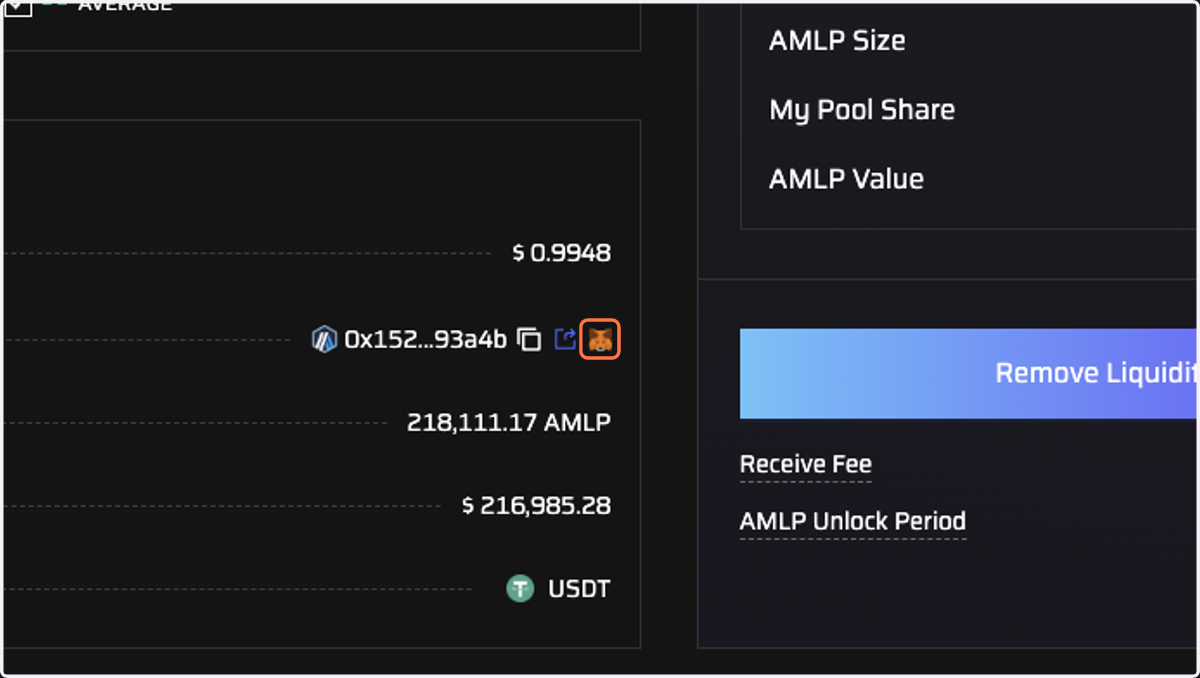
Method 1: Add directly
Click the Web3 Wallet button, and you will be automatically redirected to the Web3 wallet connected to your AX.
Click “Confirm” to add AMLP to your wallet.
26. Add AMLP Manually
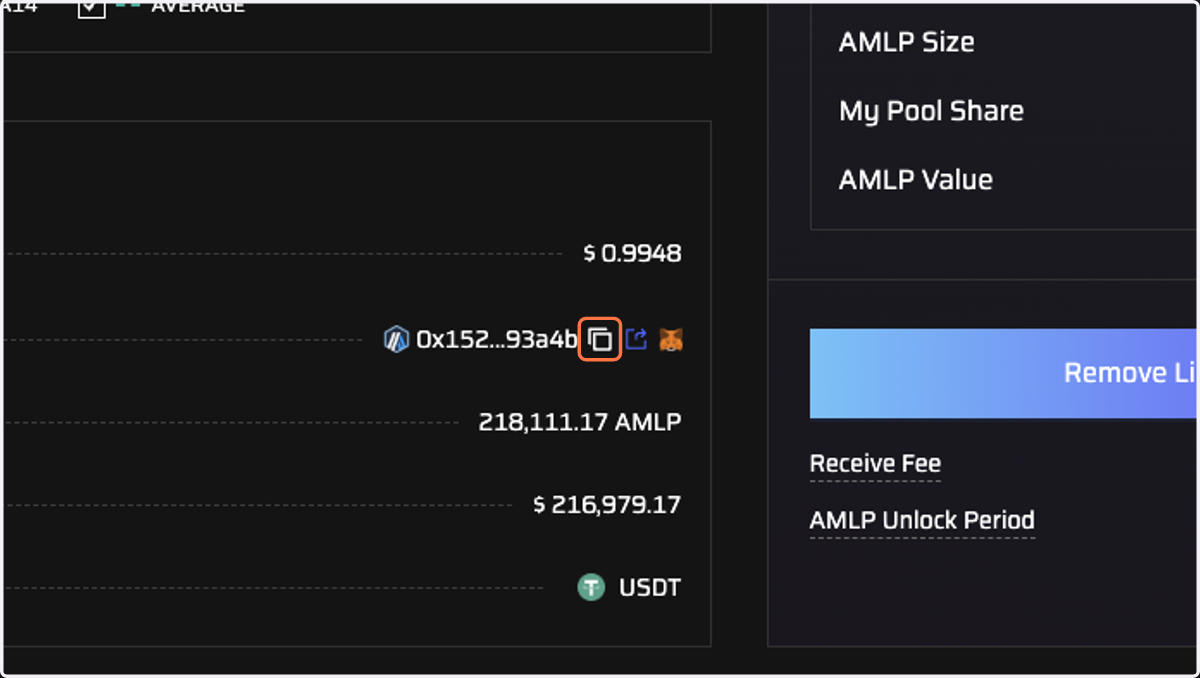
Method 2: Add manually
Copy the AMLP contract address.
Open your Web3 wallet, and click on “Add Custom Crypto”.
Paste the following AMLP contract address 0x152f5E6142db867f905a68617dBb6408D7993a4b in the provided field to complete the addition.
27. Stake Liquidity
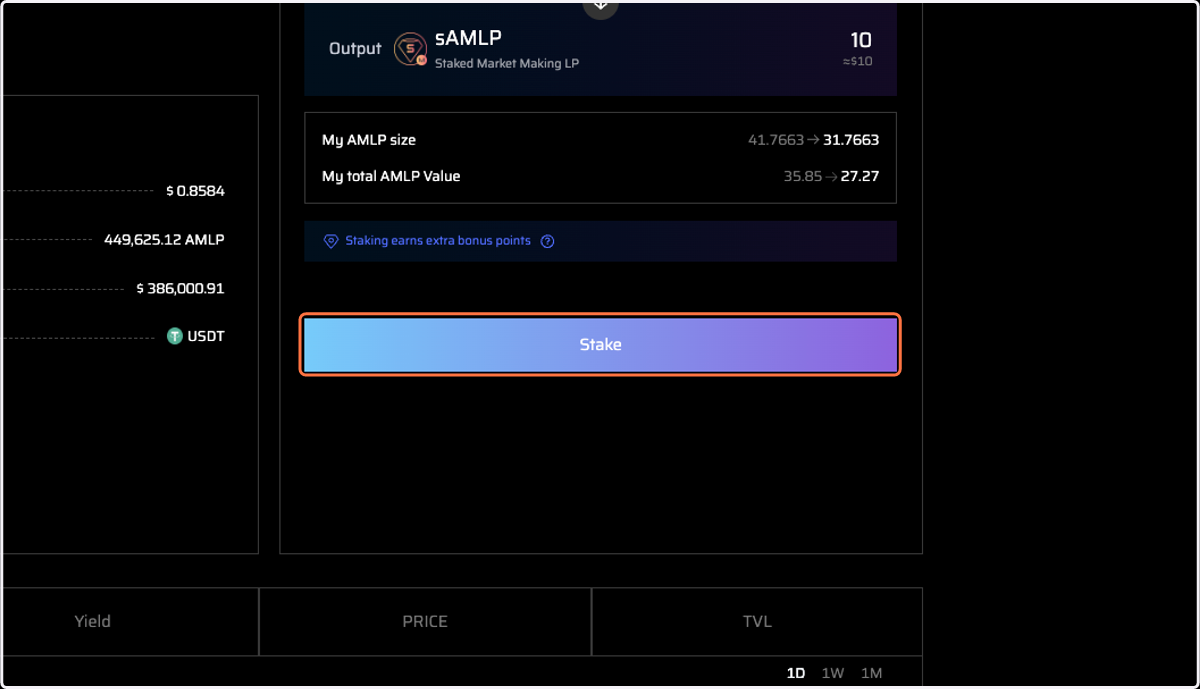
Click "Stake"
Input the AMLP amount you want to stake
Check the sAMLP(Staked Market Making LP) you will get
Click the "Stake" to confirm your order
Withdraw Liquidity
28. Withdraw Liquidity
Click on the "Remove Liquidity" tab.
Enter the desired amount of AMLP tokens to redeem.
Click on the "Remove Liquidity" button, then sign the transaction on-chain to confirm.
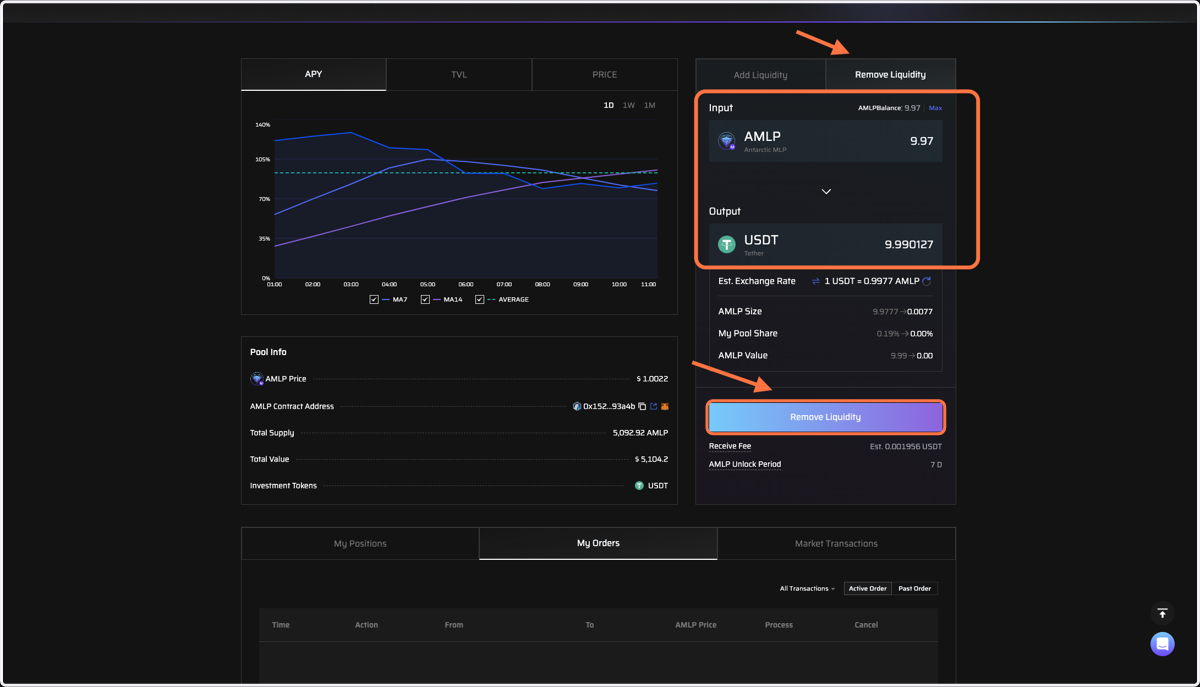
29. Remove Liquidity
Click on the "Remove Liquidity" tab.
Enter the desired amount of AMLP tokens to redeem.
Click on the "Remove Liquidity" button, then sign the transaction on-chain to confirm.
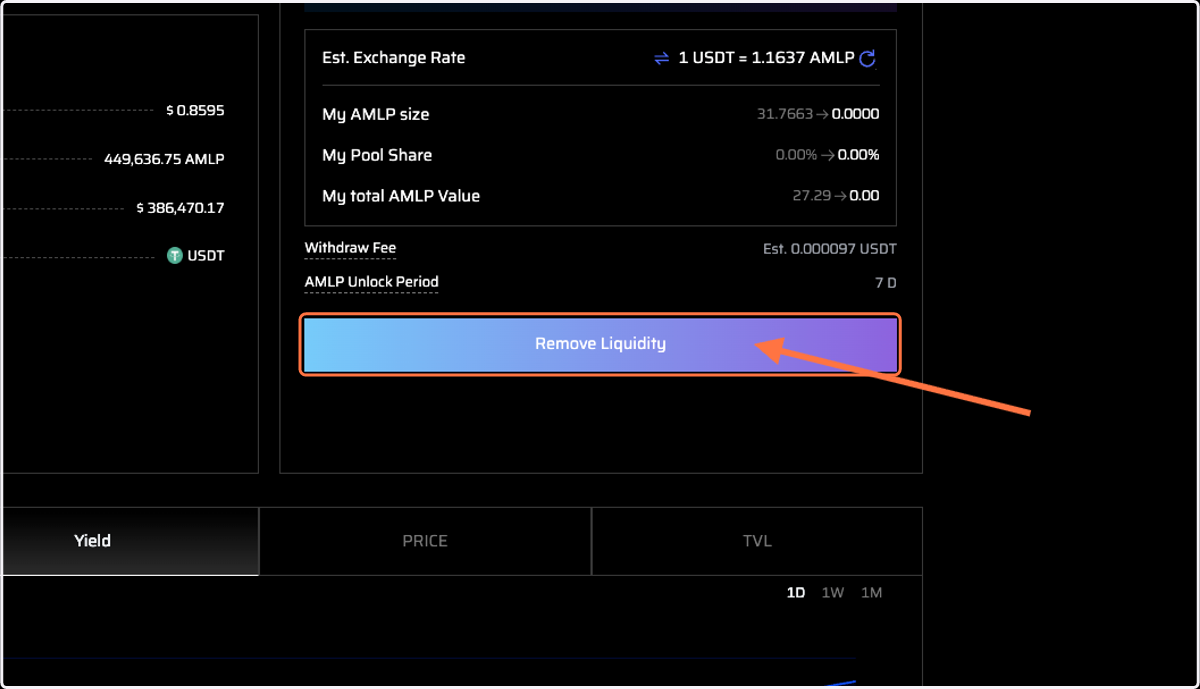
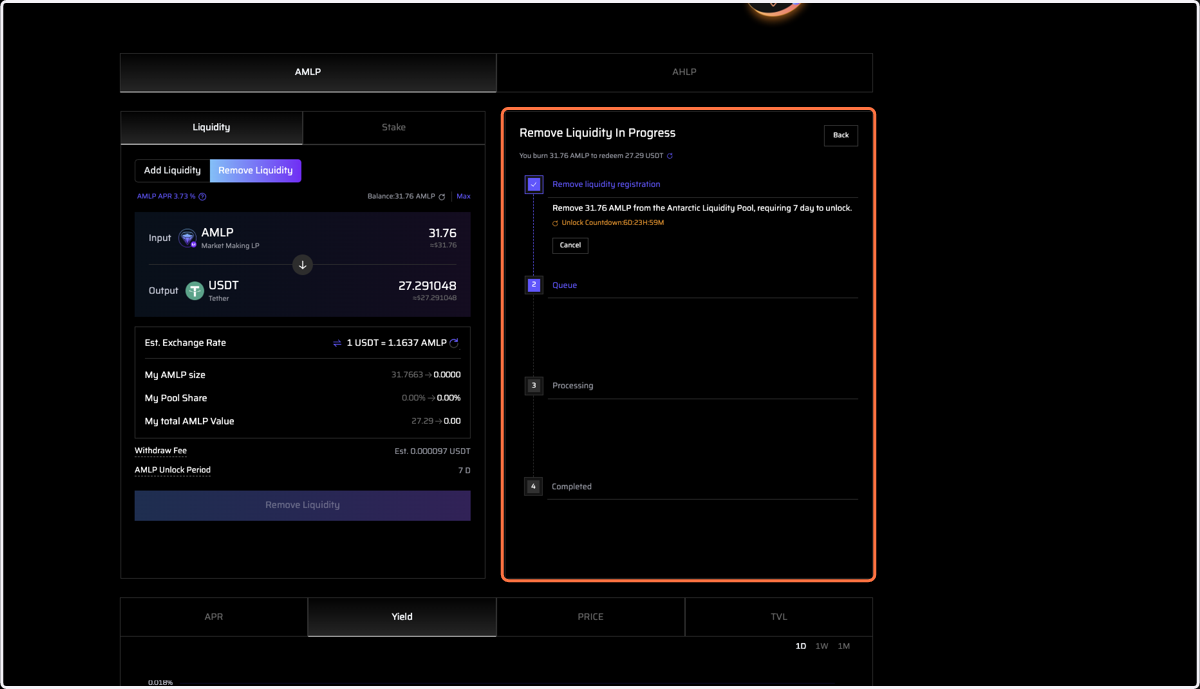
30. Verify Liquidity Removal Status
The removing process is initiated and requires 7 days to process. (This is to prevent frequent deposits and withdrawals from impacting the liquidity pool (LP), especially during market volatility, which can cause losses for existing users. To ensure fairness and reduce adverse effects on other users, a time lock mechanism is implemented for withdrawing from the LP. This helps maintain LP stability and protects the interests of the majority of users).
After 7 days, claim the withdrawn funds (within 24 hours).
Check that the AMLP tokens have been correctly deducted and have been returned to your wallet balance.
Withdrawing Funds
31. Click "Withdraw"
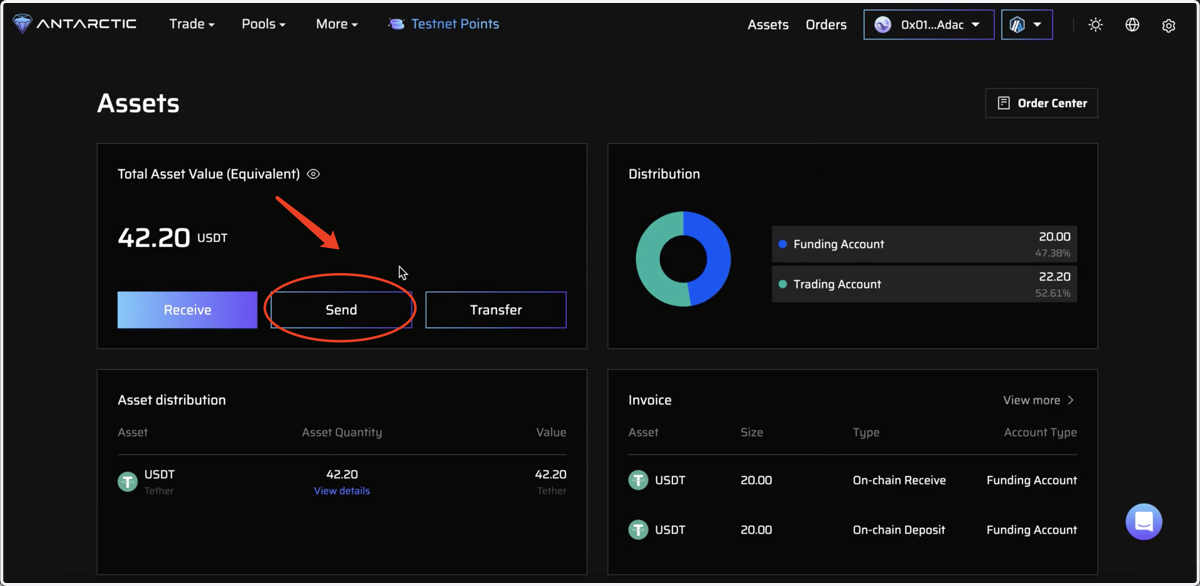
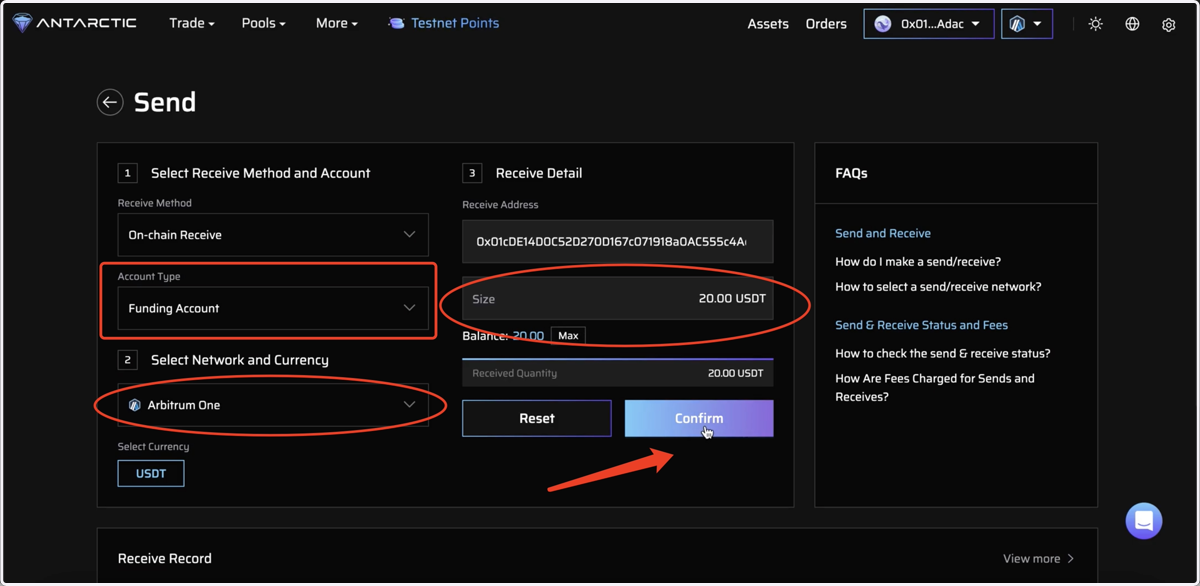
32. Withdrawal Guide
Step 1: Ensure that the withdrawal amount is transferred from your Trading Account to your Funding Account. Step 2: Confirm the blockchain network you would like to use for your withdrawal. Step 3: Click "Confirm" to complete the process.
33. Check Your Withdrawal Status
Wait for your withdrawal to finish processing on the blockchain. You can check the status of your transaction in your Transaction History.