Navigating Research Surveys and Configuring WhatsApp Manager - Meta for Developers
Research Survey - Dashboard - Meta for Developers
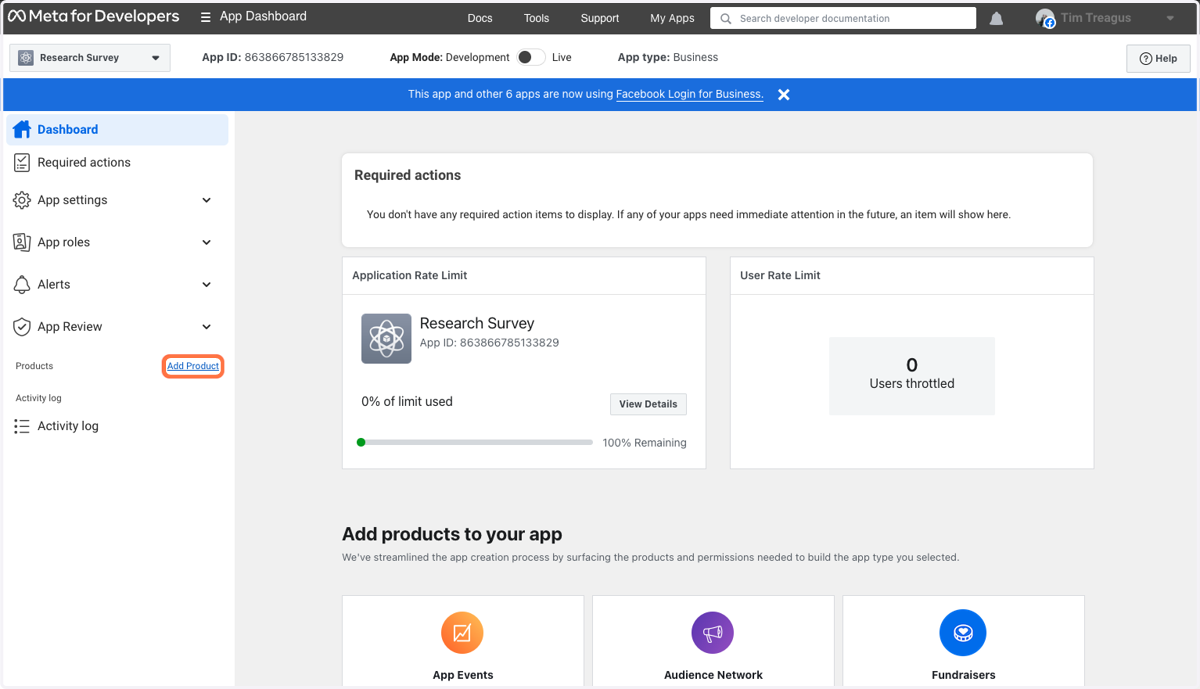
1. Click on Add Product
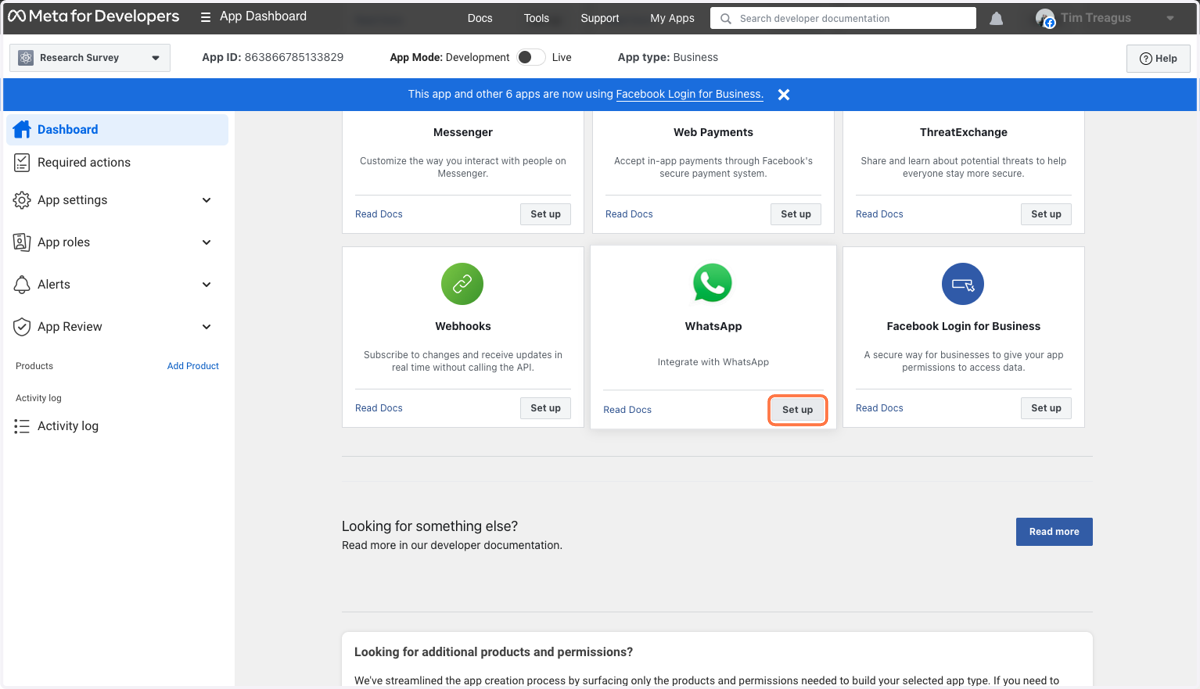
2. Scroll down to WhatsApp and click “Set Up”
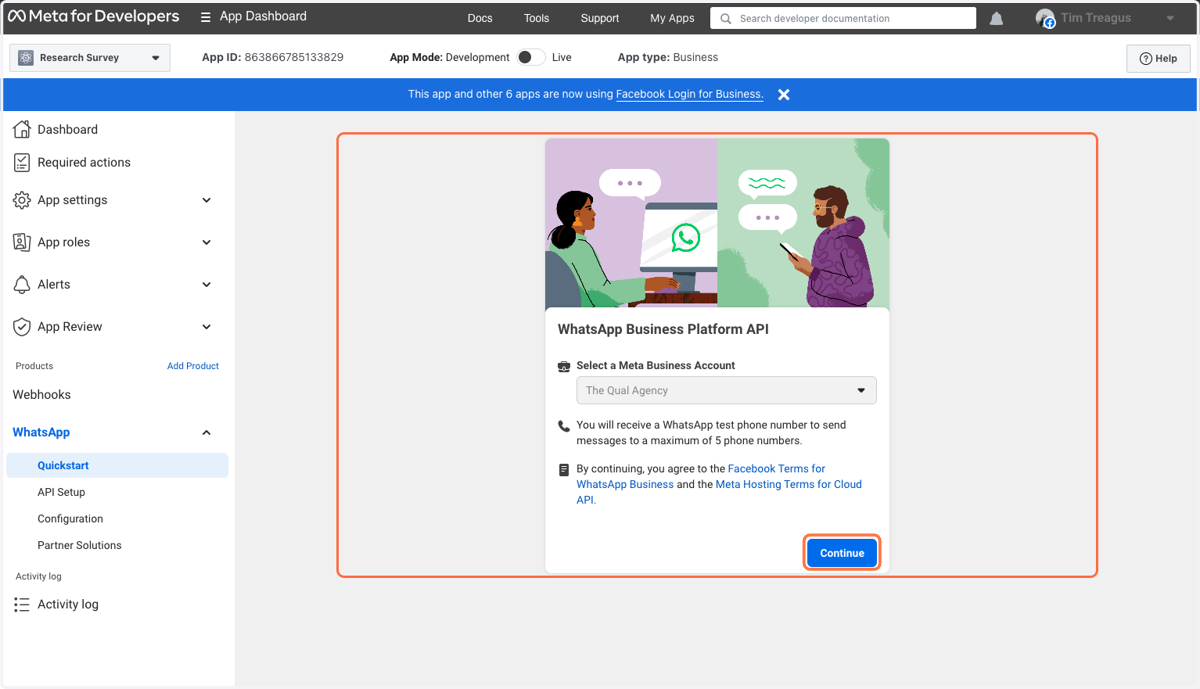
3. Click on Continue
Add a Phone number
4. Go to API Setup
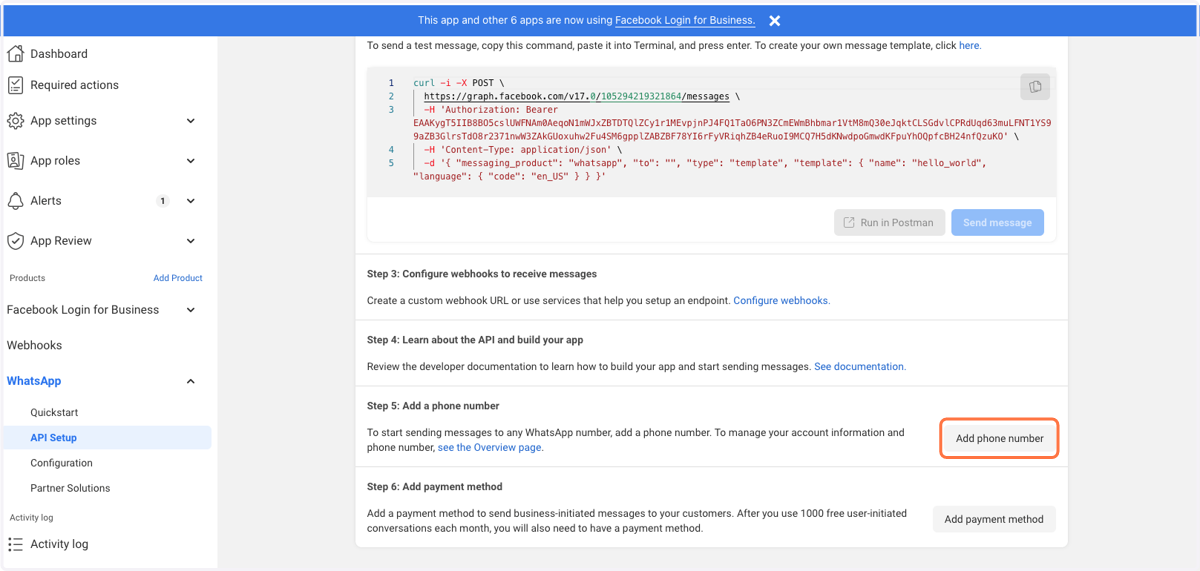
5. Add phone number in Step 5
Add profile display name prescribed by Meta. Make sure it’s associated with you business’s actual name. If it is not associated, Meta is likely to reject. For Research bots, we typically advise [business_name] + Research as your Display Name. See Display Name Guidelines article for more details.
Choose category and business Description
Add number: Select country code and add number to receive OTP via SMS or phone call
Might need to refresh the page if number isn’t showing up
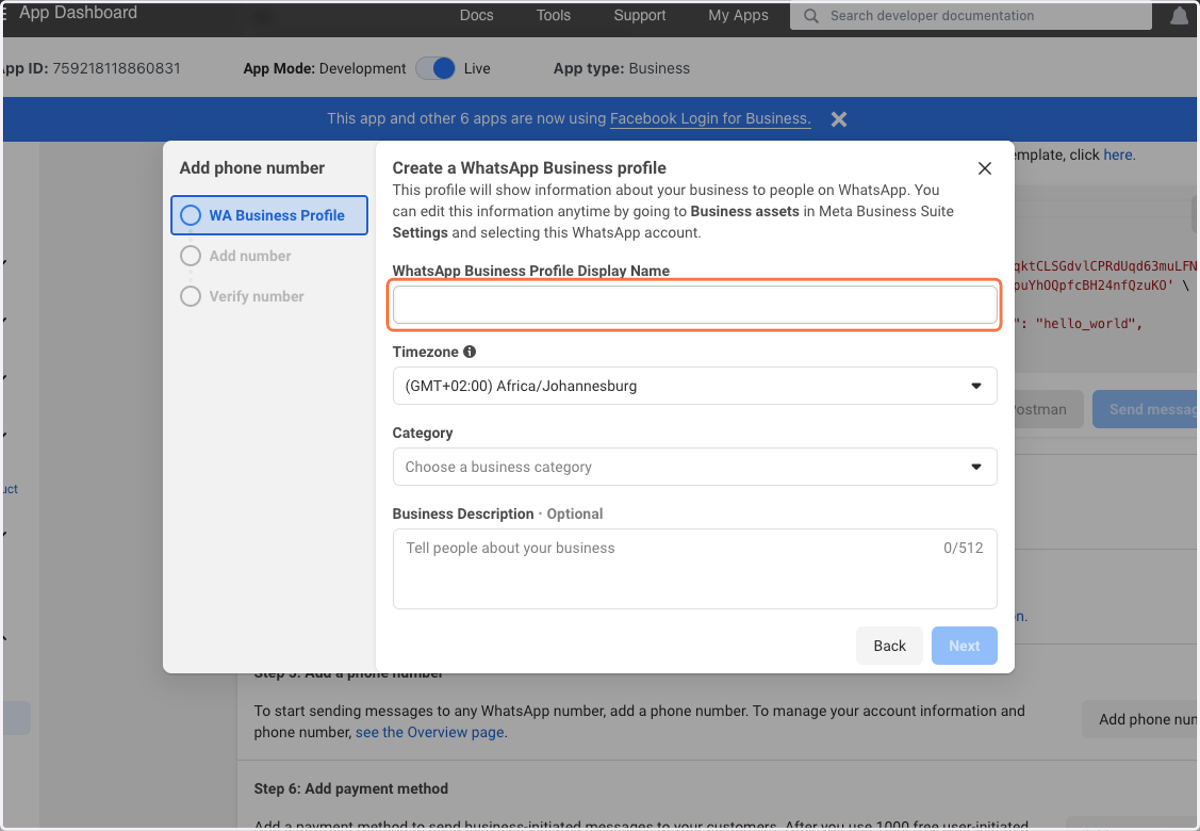
Add configuration keys - Callback URL and Verify token
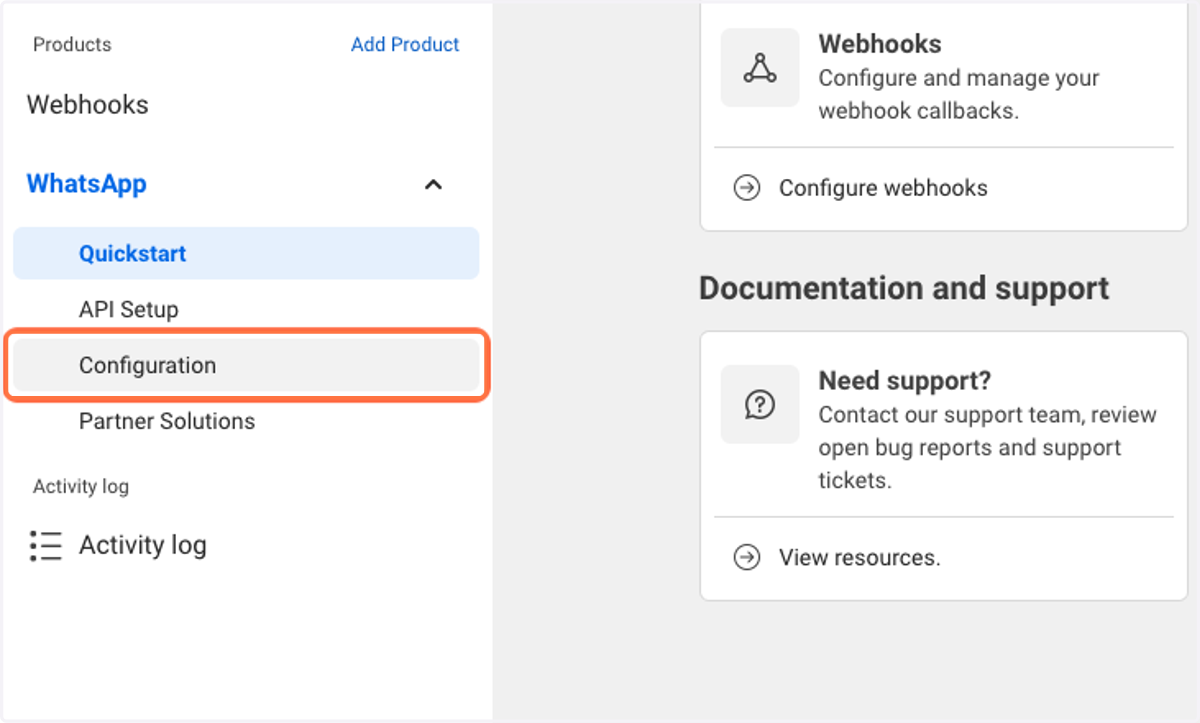
6. Click on Configuration
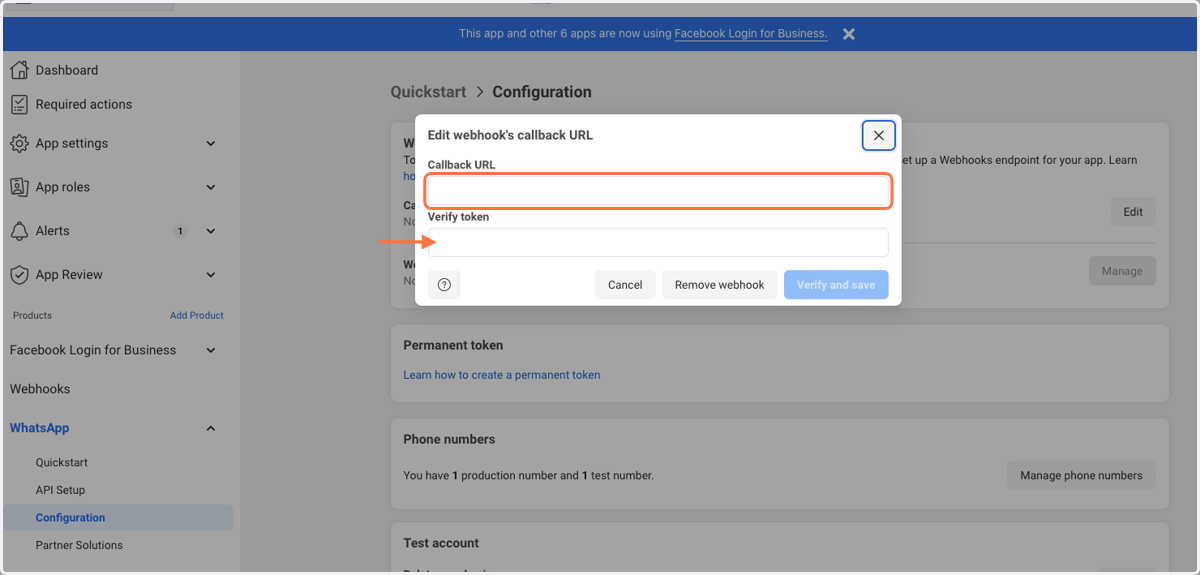
7. Click on Edit
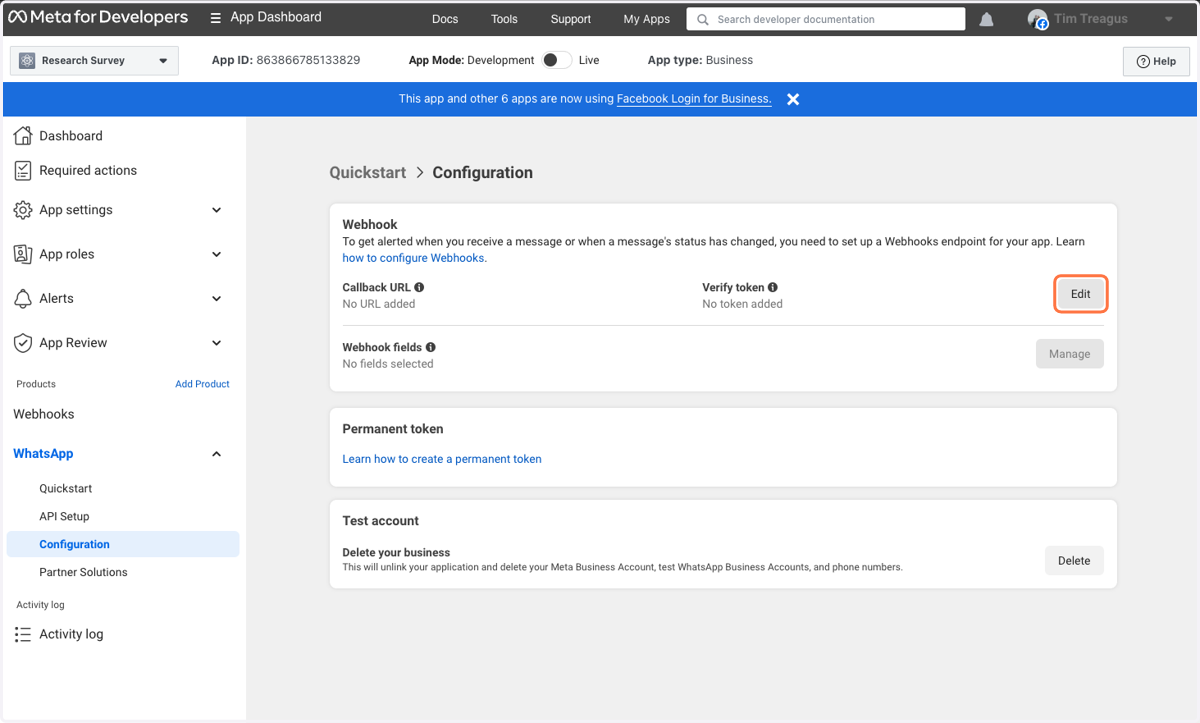
8. Add "Callback URL" and "Verify token" and press "Verify and Save"
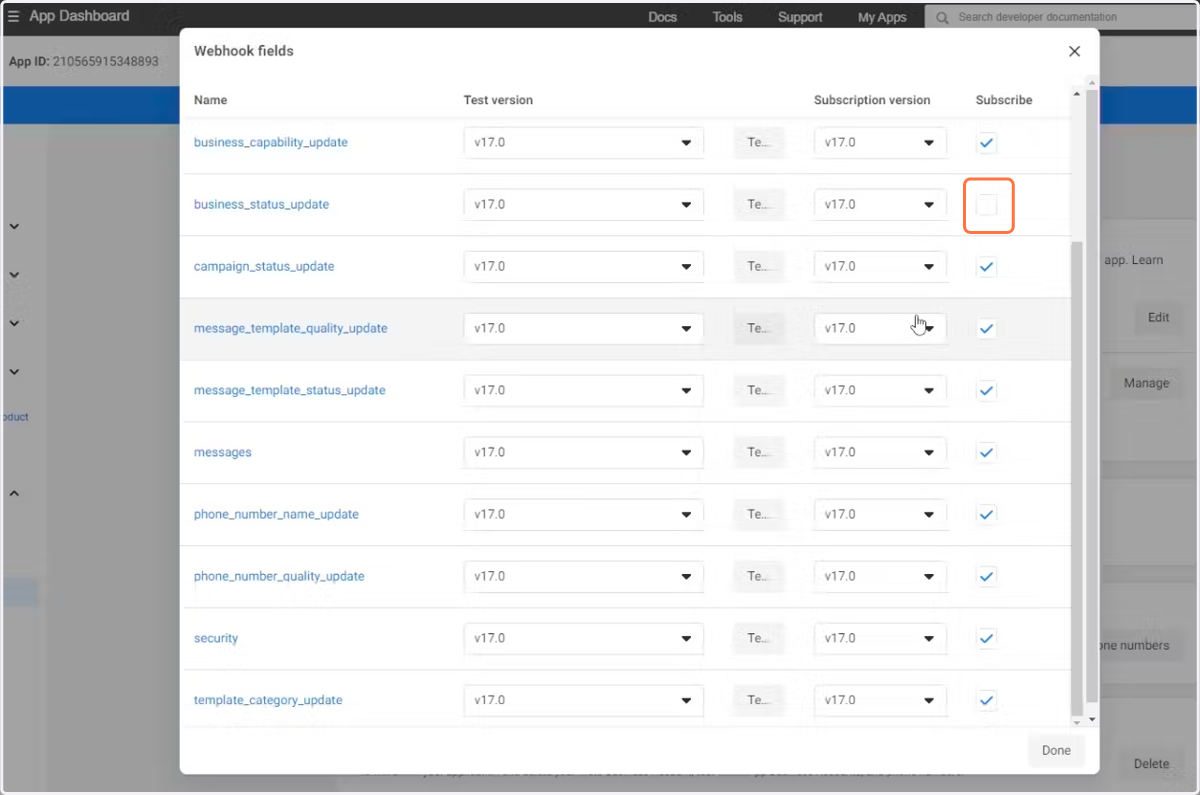
9. In the “Webhook fields” section directly below, press the “Manage” button 1. Click ALL TICKBOXES in Subscribe. This allows us to track and retrieve the data so make sure to tick every one!
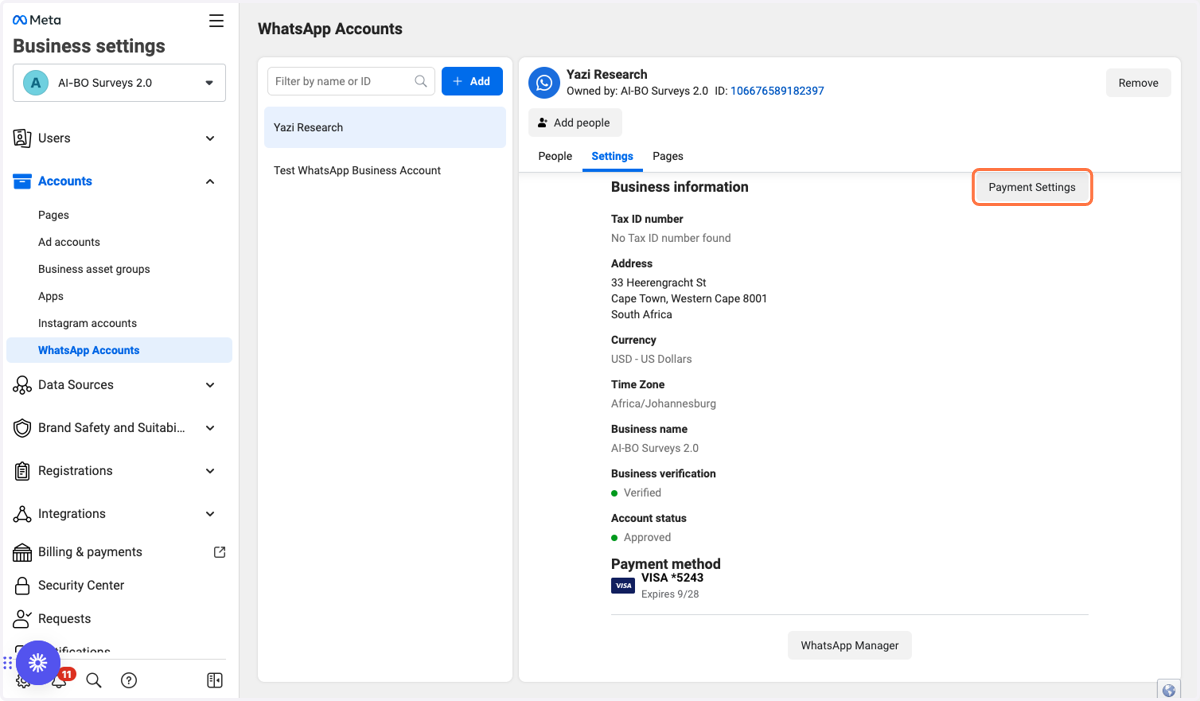
Setup payment in Business manager (GO TO BUSINESS MANAGER)
10. Click on Payment Settings
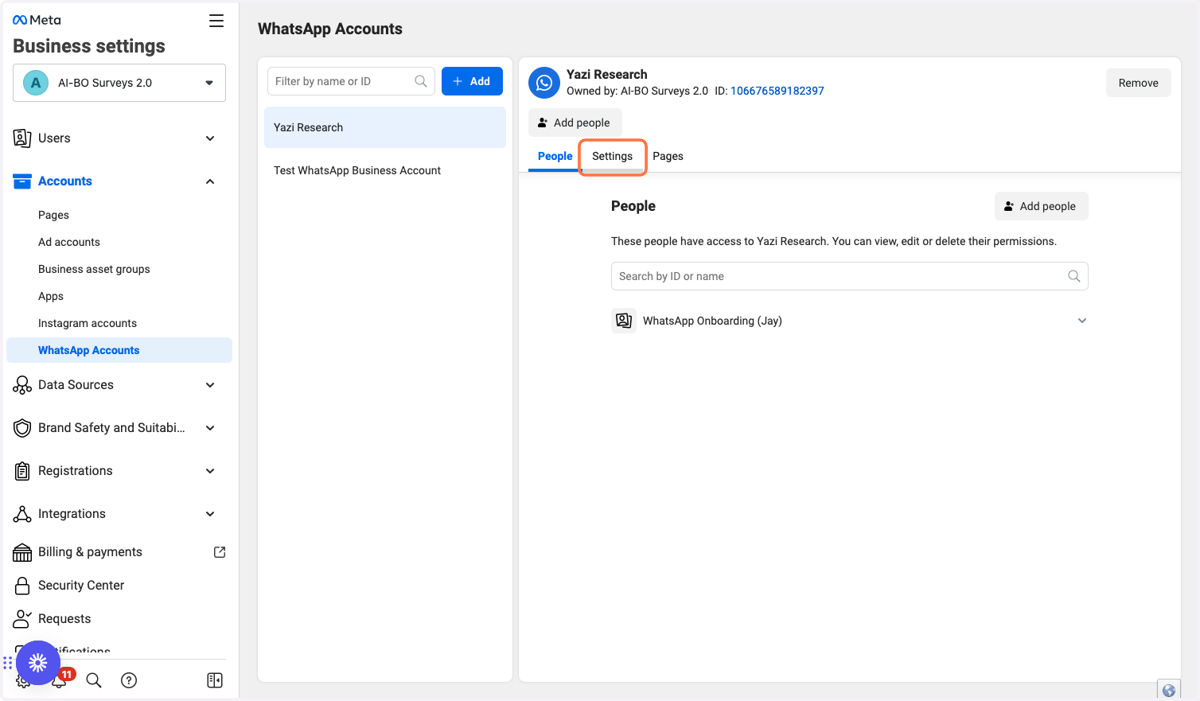
11. Click on Settings
12. Click on WhatsApp Manager and enter card details there
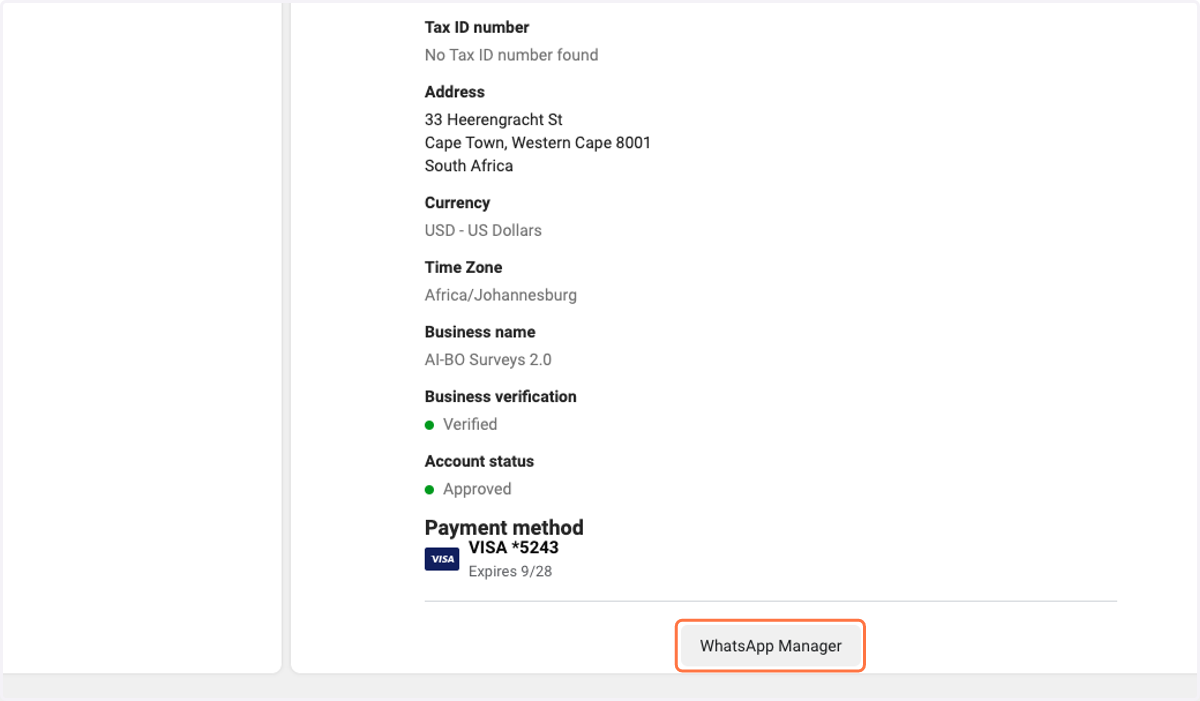
System User in Business Manager
13. Click on Toggle group…
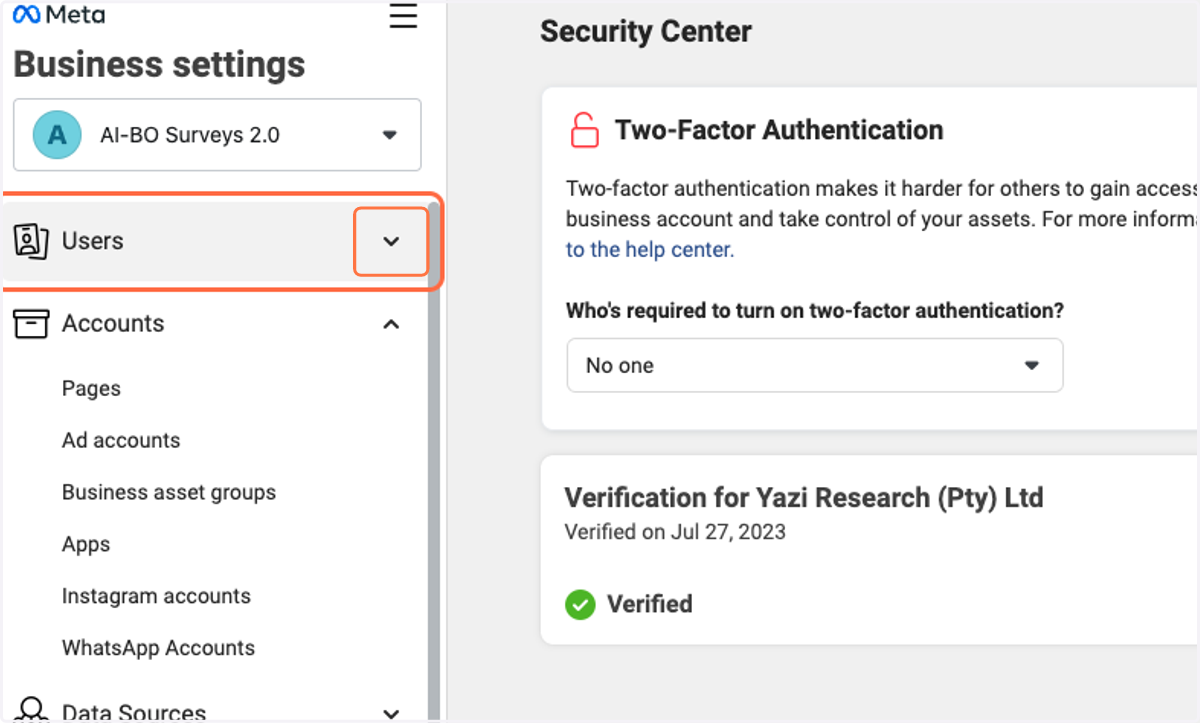
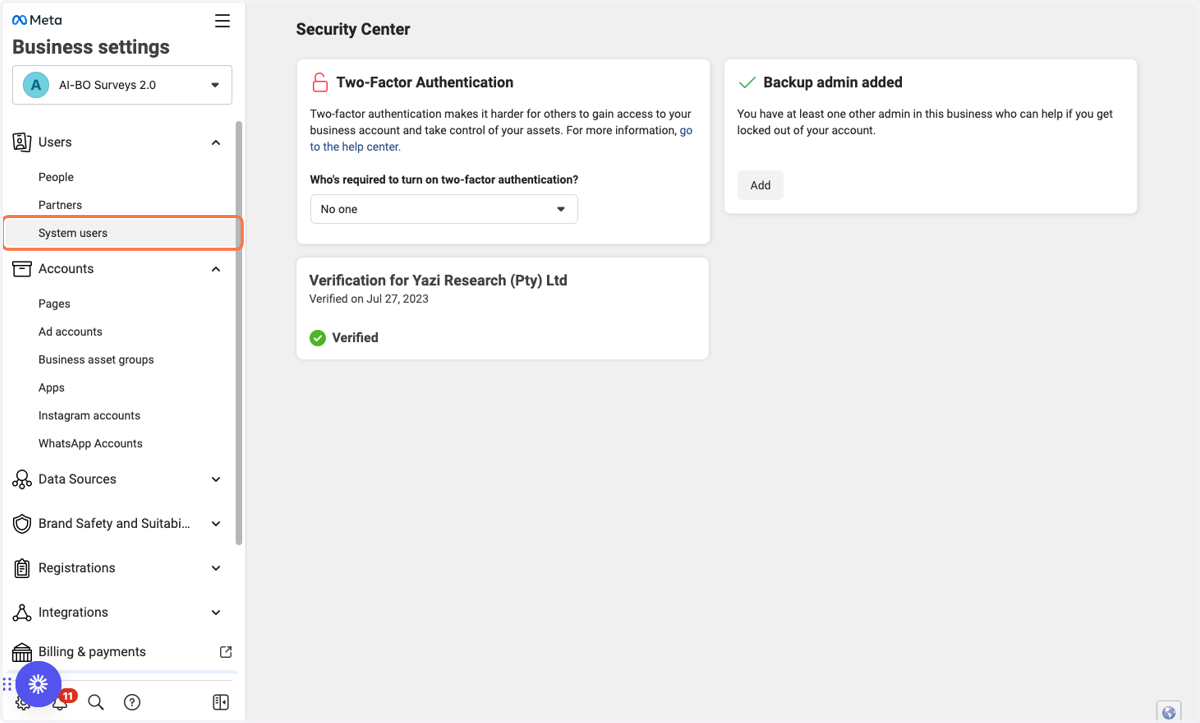
14. Click on System users
15. Click on Add assets
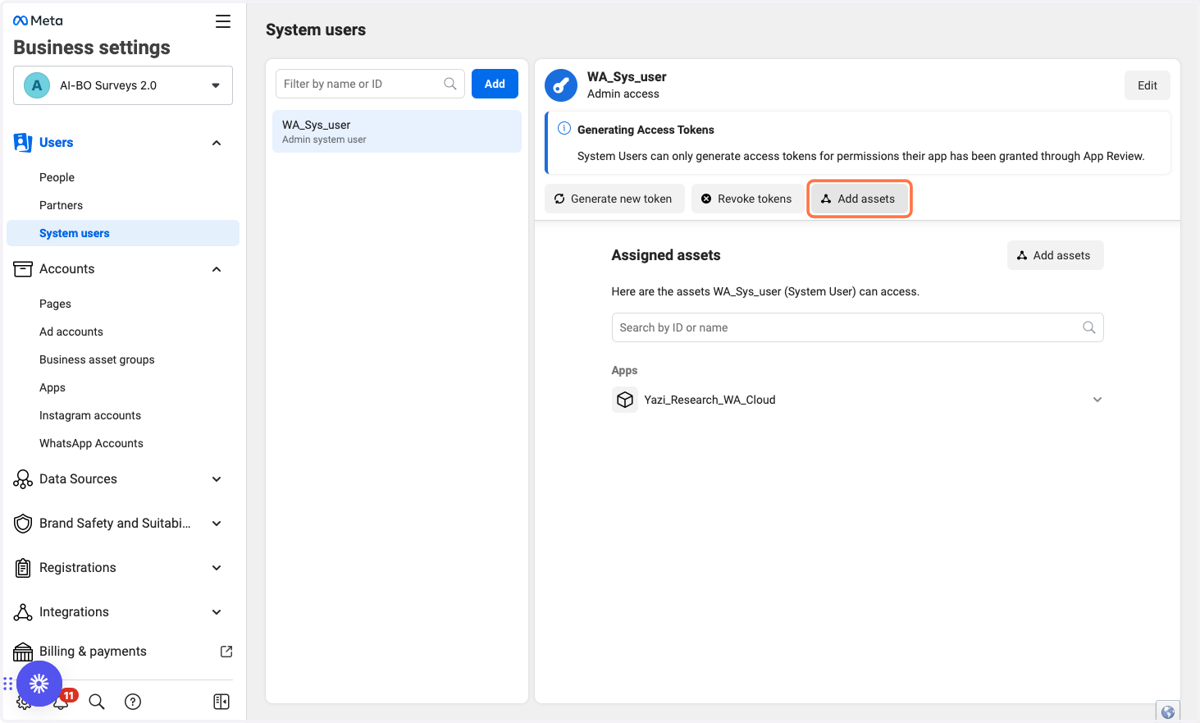
16. Click on Apps
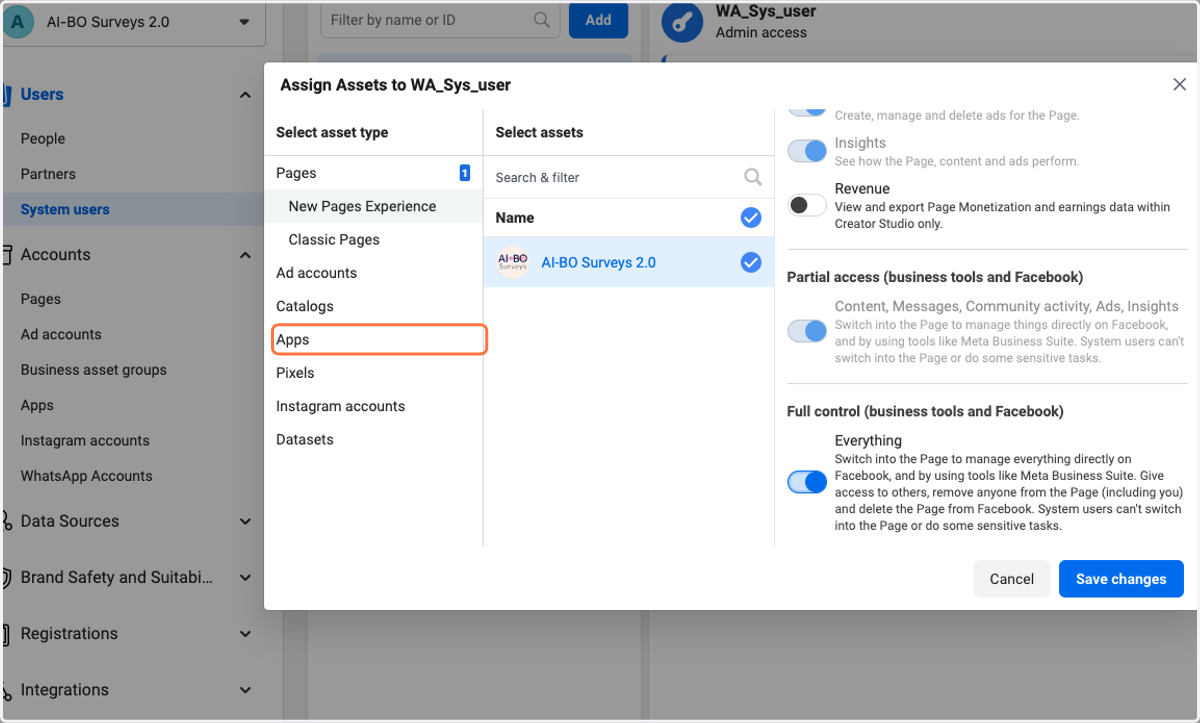
17. Check Manage app and Save changes
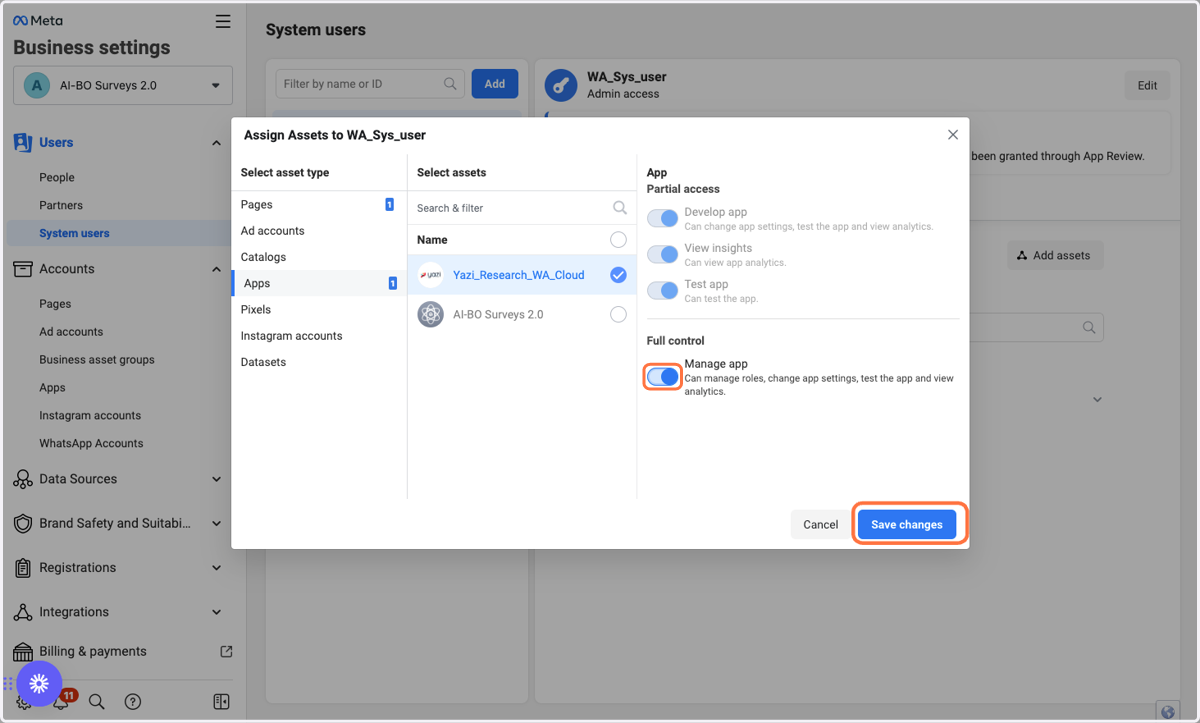
18. Click on Generate new token
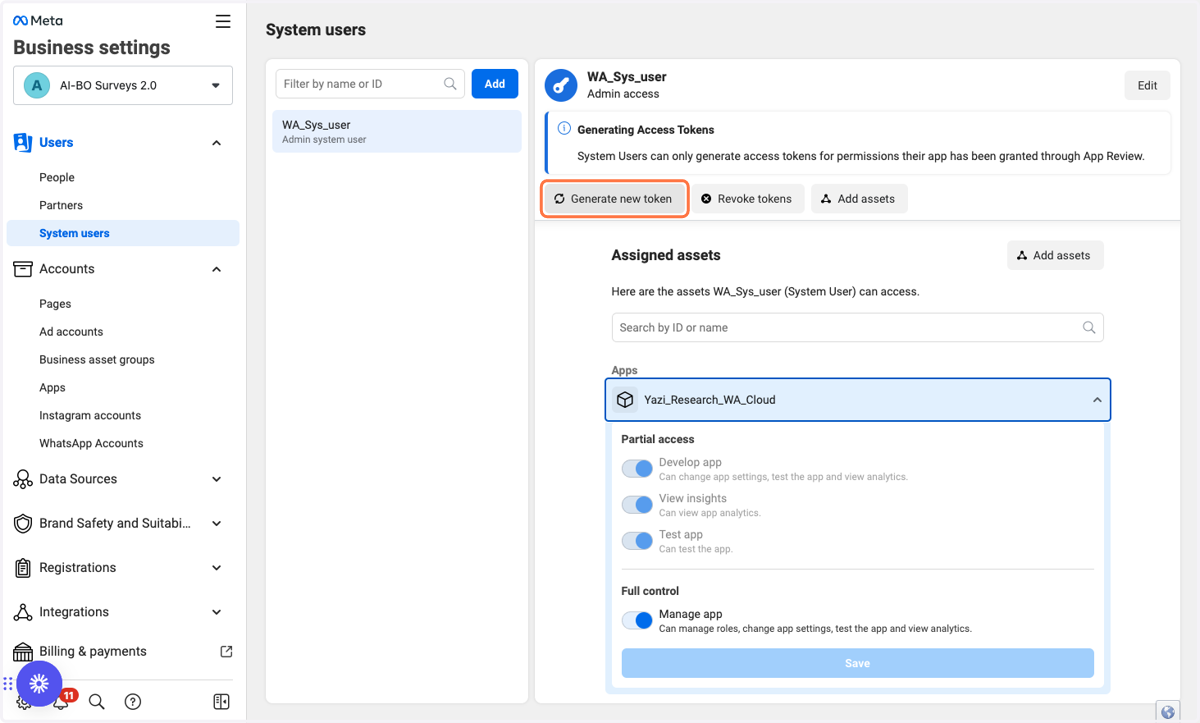
19. Click on Select an app and select your recently created app and press "Generate token"
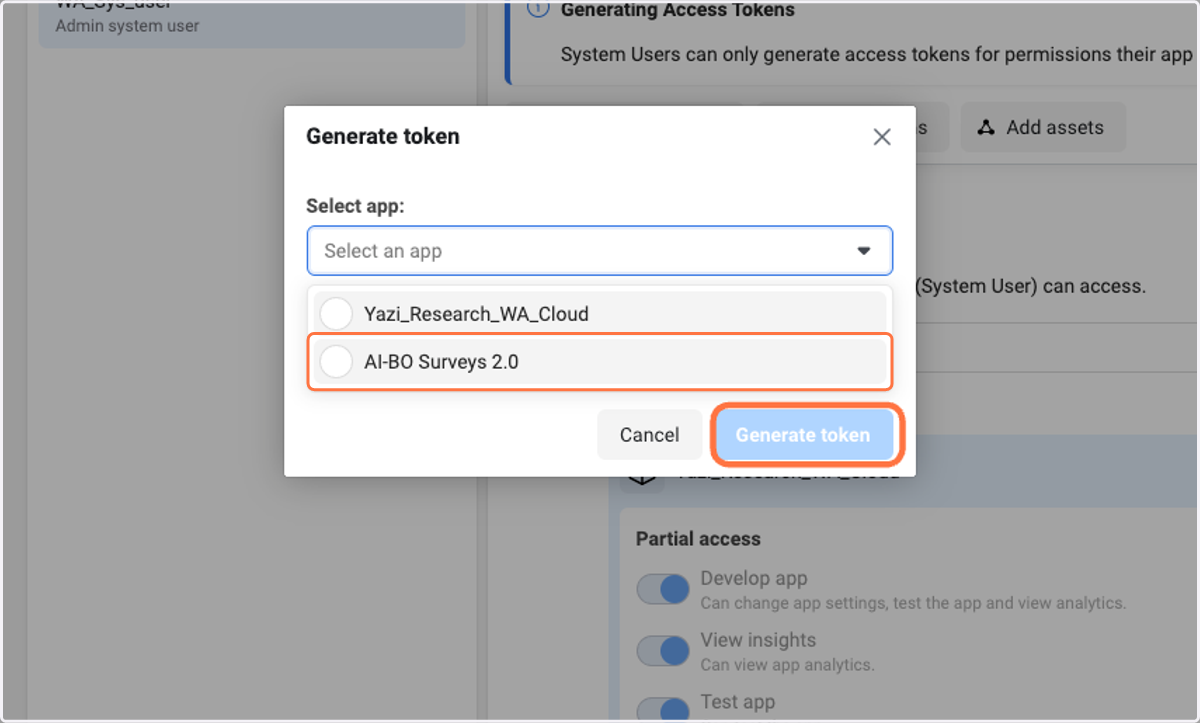
20. Select “Never” for token expiration
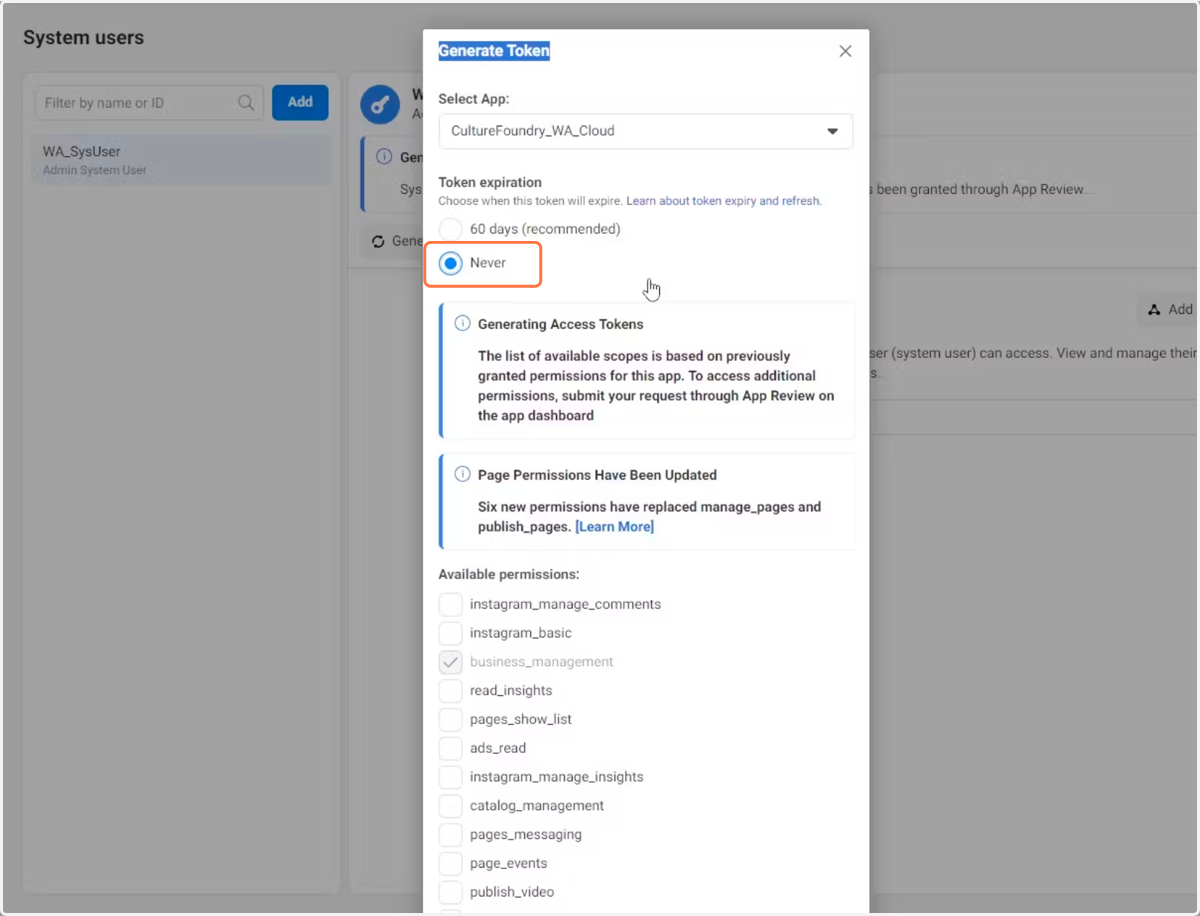
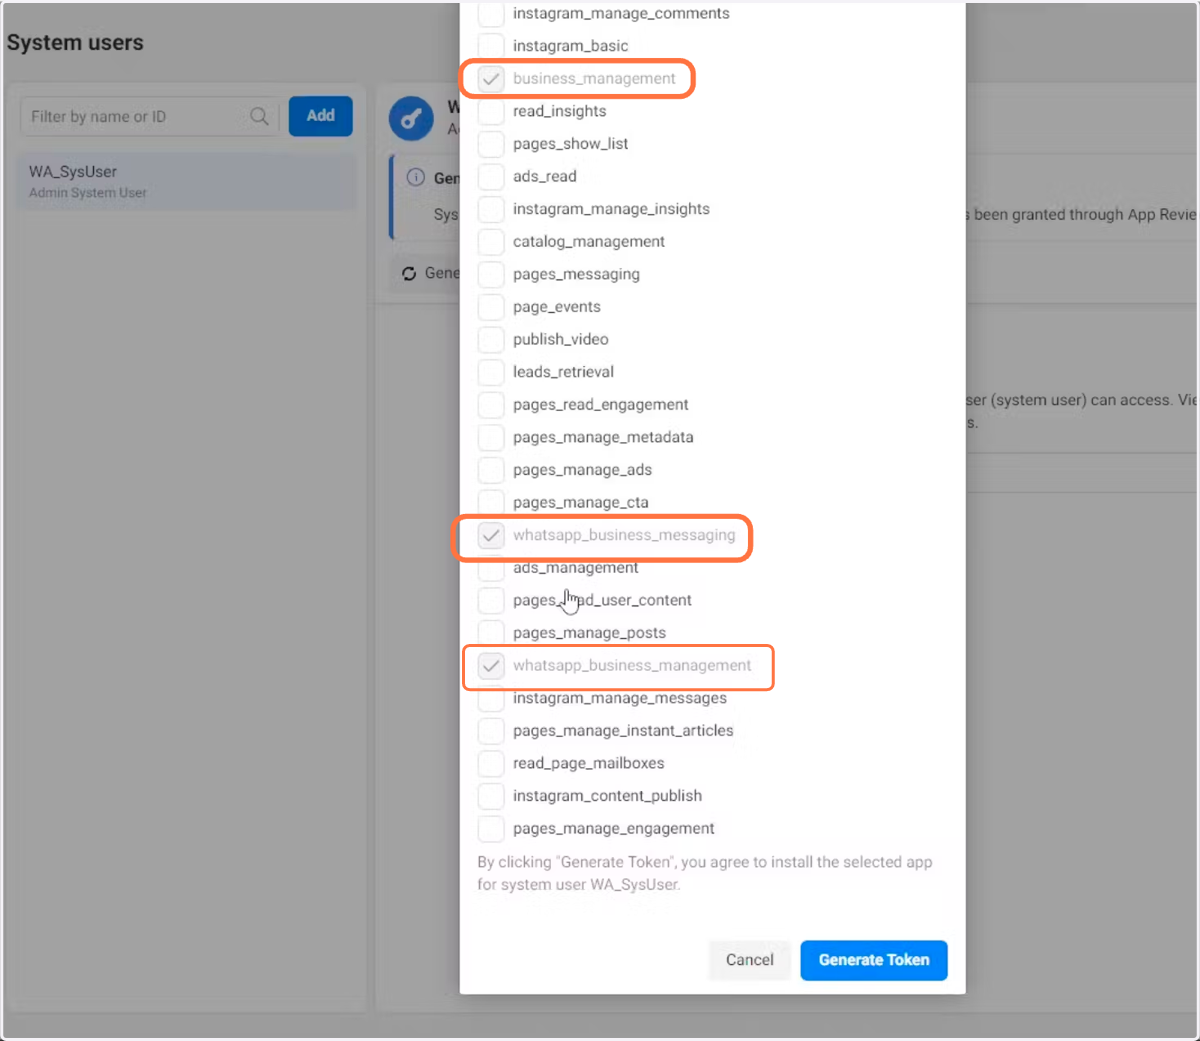
21. Tick the following boxes 1. Business Management 2. WhatsApp business messaging 3. WhatsApp Business management When you've done this, Click Generate Token button
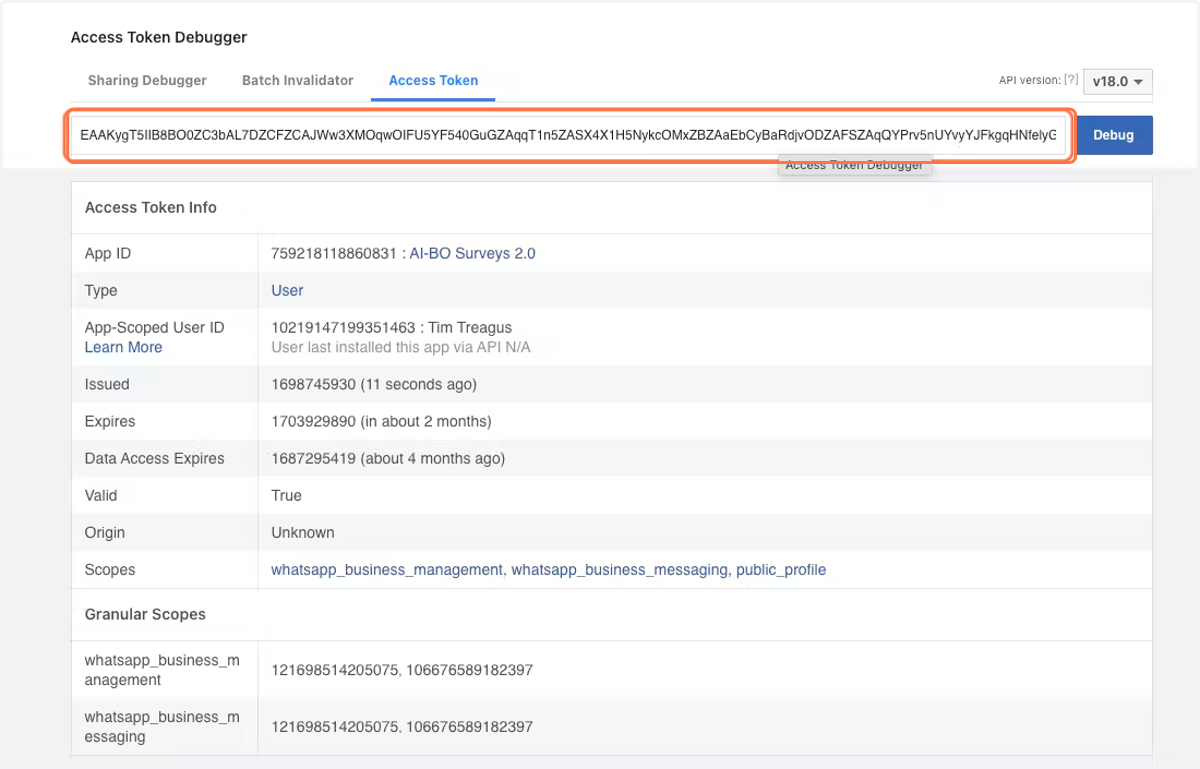
Access Token Debugger
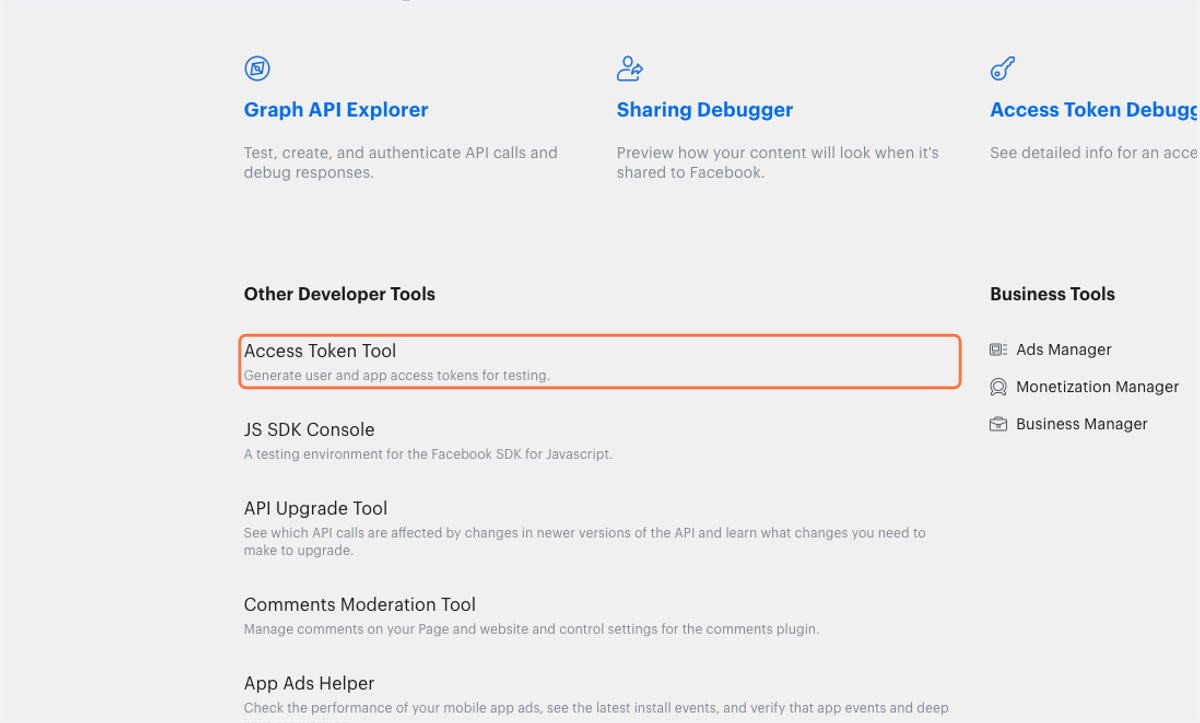
Go to Access token page in Tools in the Facebook Developers portal https://developers.facebook.com/tools/accesstoken/
22. Click on Access Token Tool
23. Click "Debug" on the app you want to get the user token from
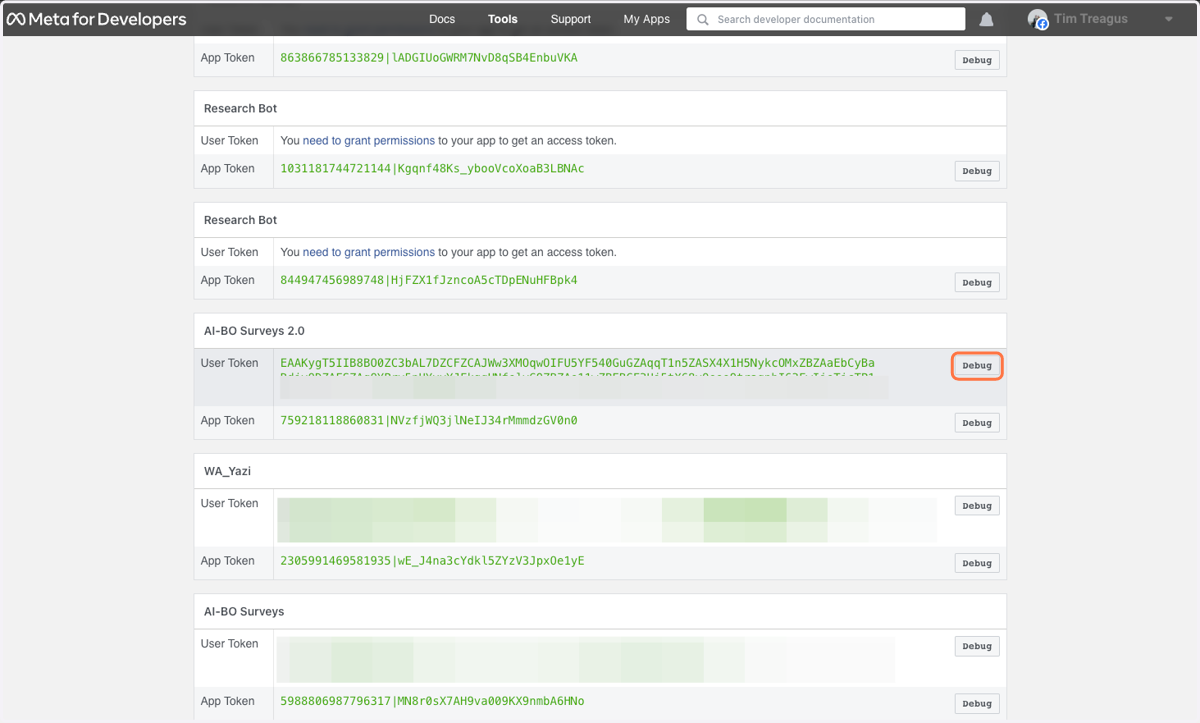
24. Copy the Debug code
Also see all the information about the token
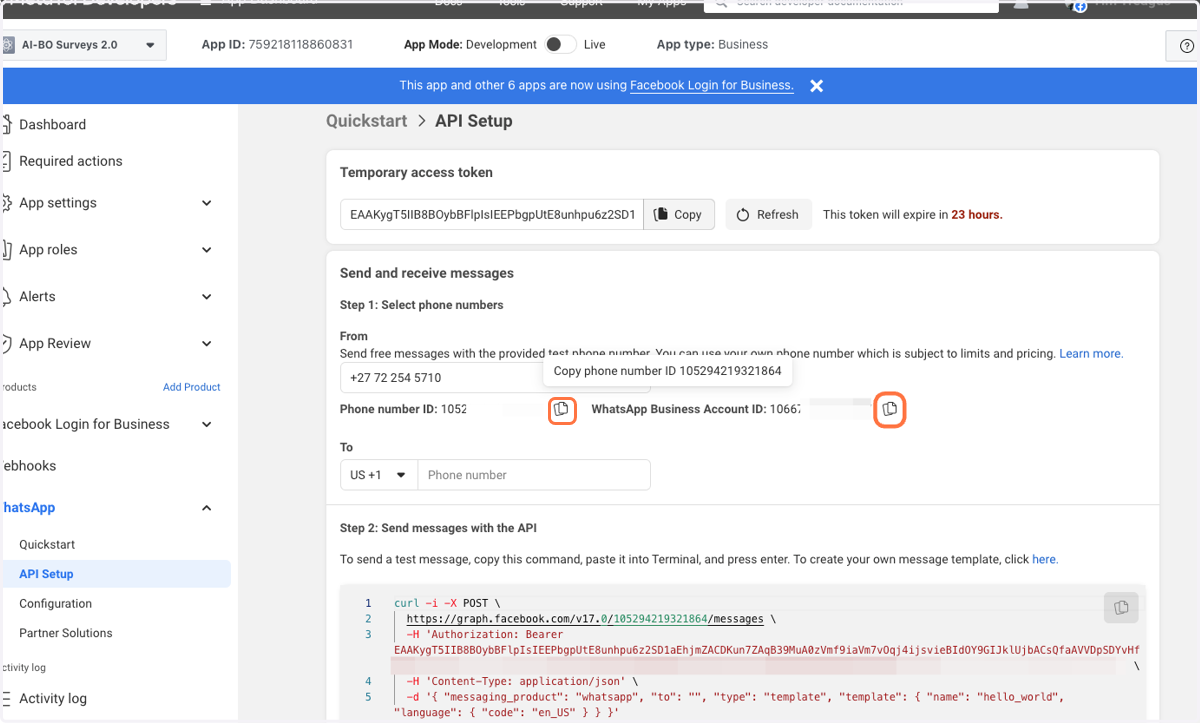
Copy Phone number ID and WhatsApp Business Account ID
Go back to your app and click "API setup"
25. Click on Copy for: 1. Phone number ID 2. WhatsApp Business Account ID
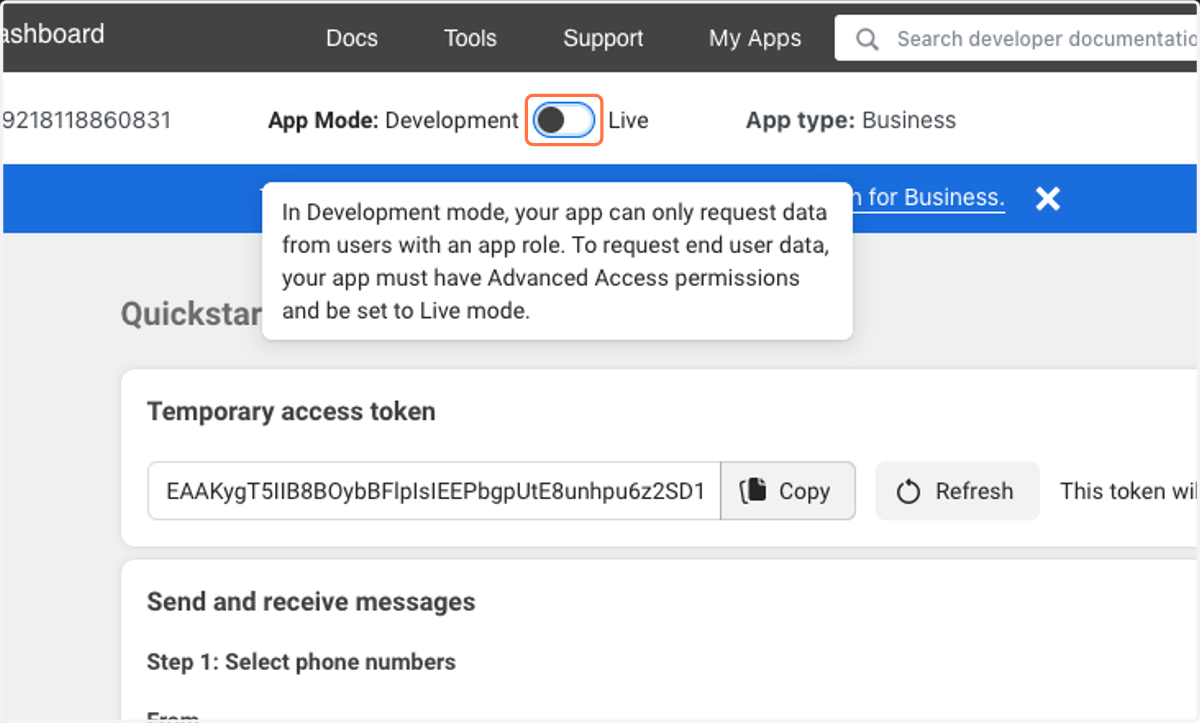
26. Toggle the app to “Live”. As this is approved, you will normally be upgraded to be able to send 1,000 Template messages per day (1,000 outbound notification messages per 24 hours)
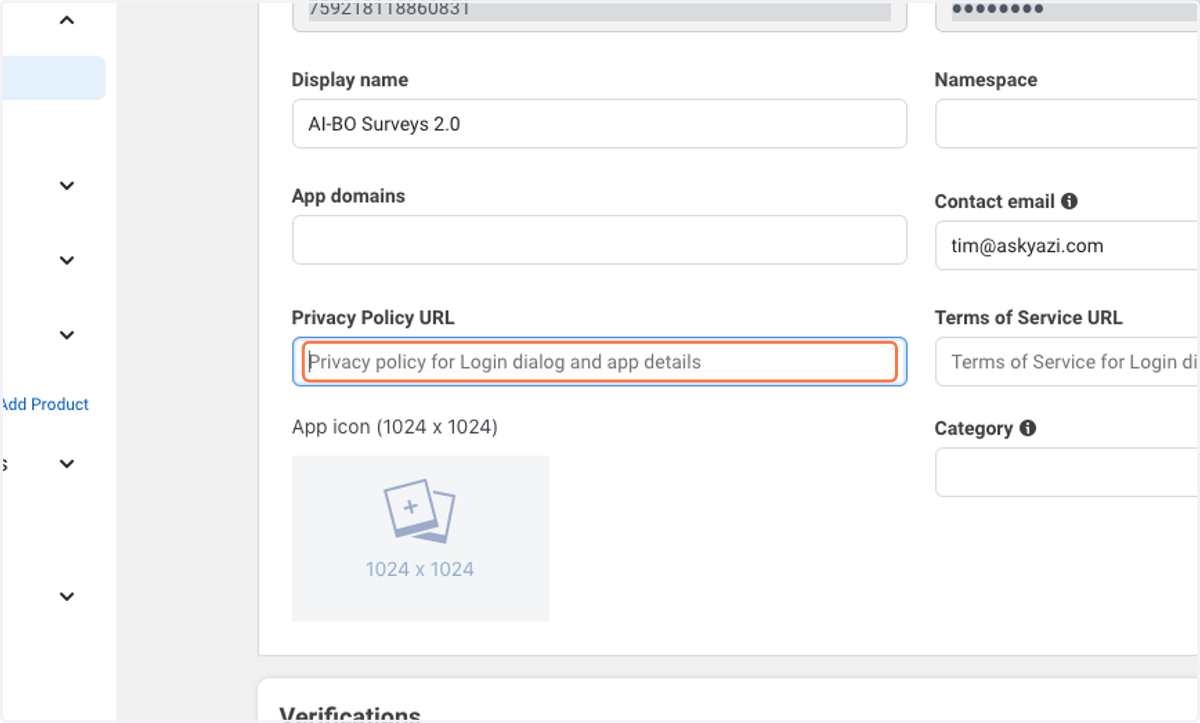
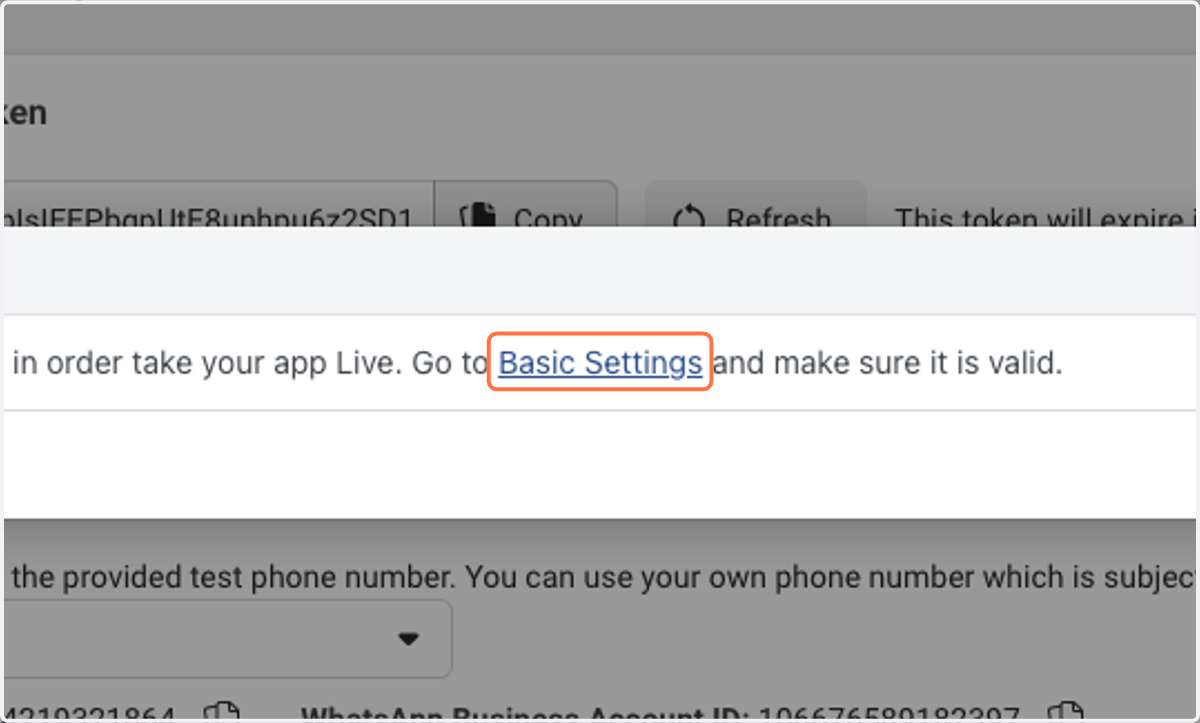
27. Note: You may need to add your Privacy policy in Basic Settings to be able to do this.
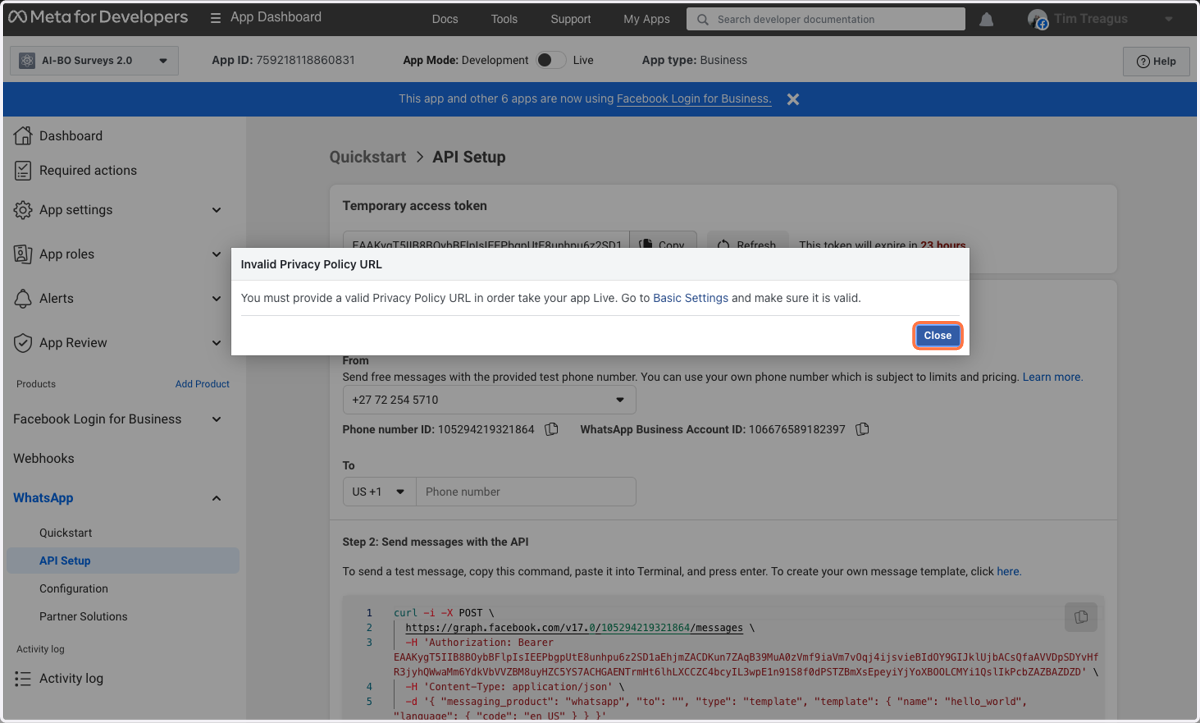
28. Click on Basic Settings
29. Click on Privacy Policy URL and add your privacy policy from your website