RevMaxGO: Apply Base Rate to All Future Dates
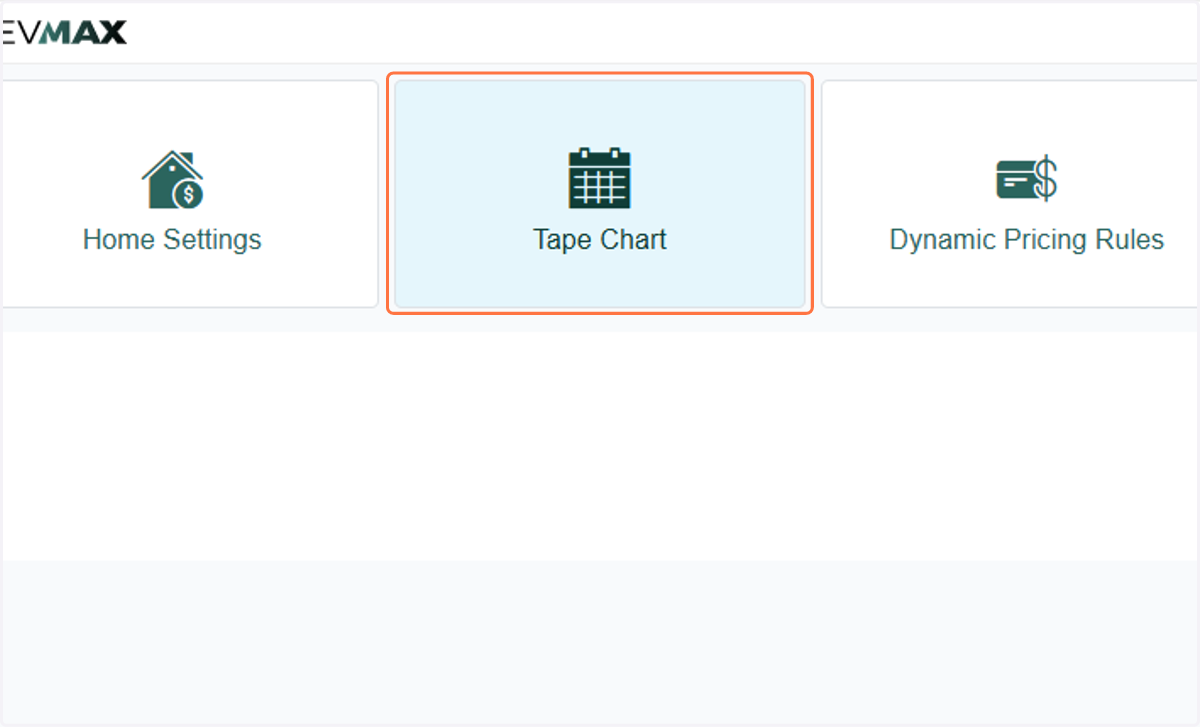
1. From your RevMax Page, click on the Tape Chart.
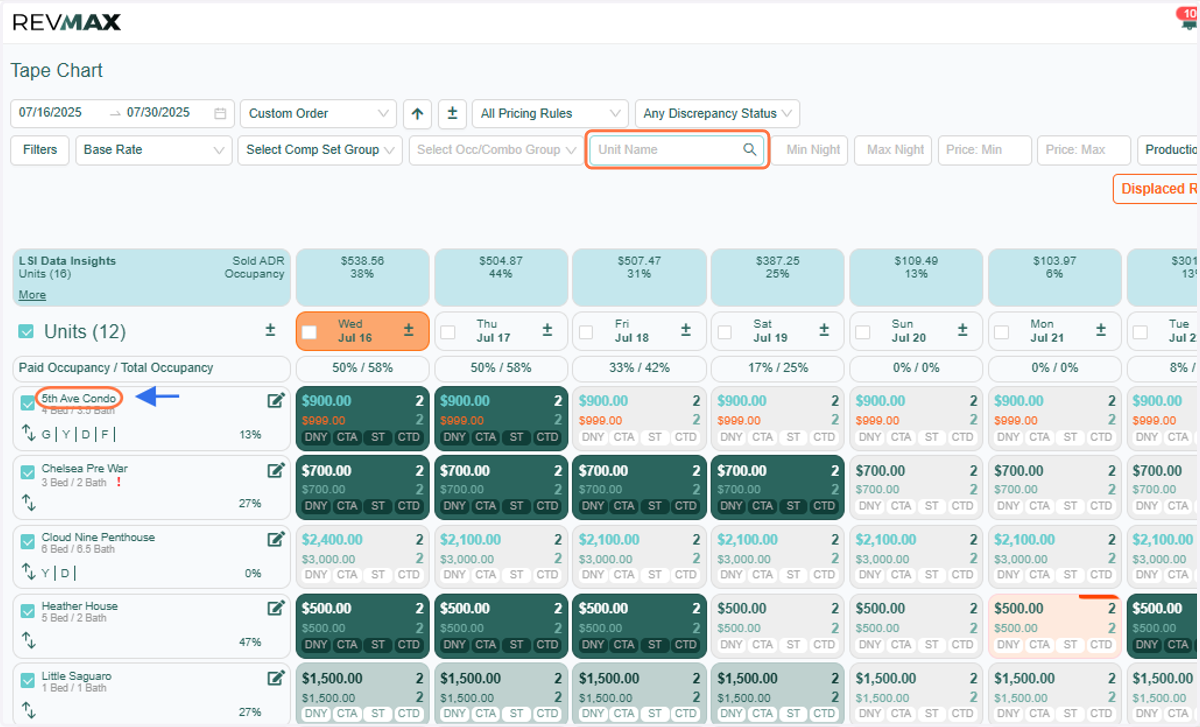
2. You can either filter to find the specific unit you want to update or click directly on the unit label within the Tape Chart to access its unit-level settings.
Important note: This action only applies to units with RevMax GO pricing enabled.
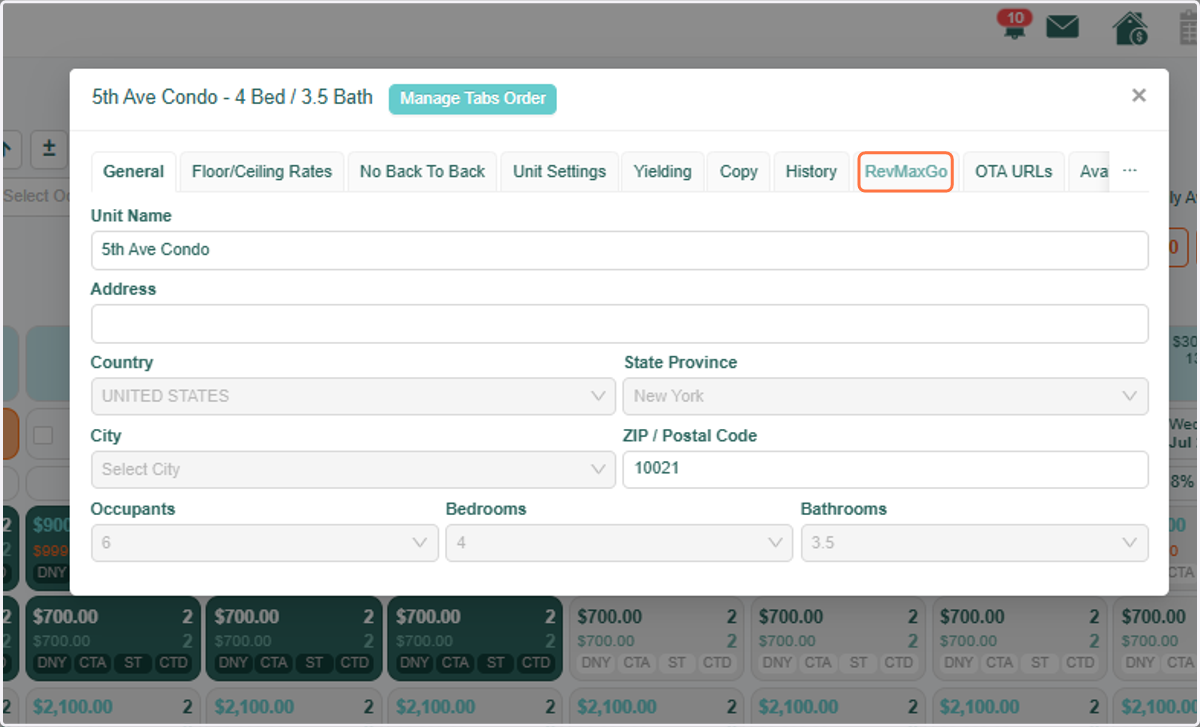
3. In the unit-level settings, click on the 'RevMaxGO' tab.
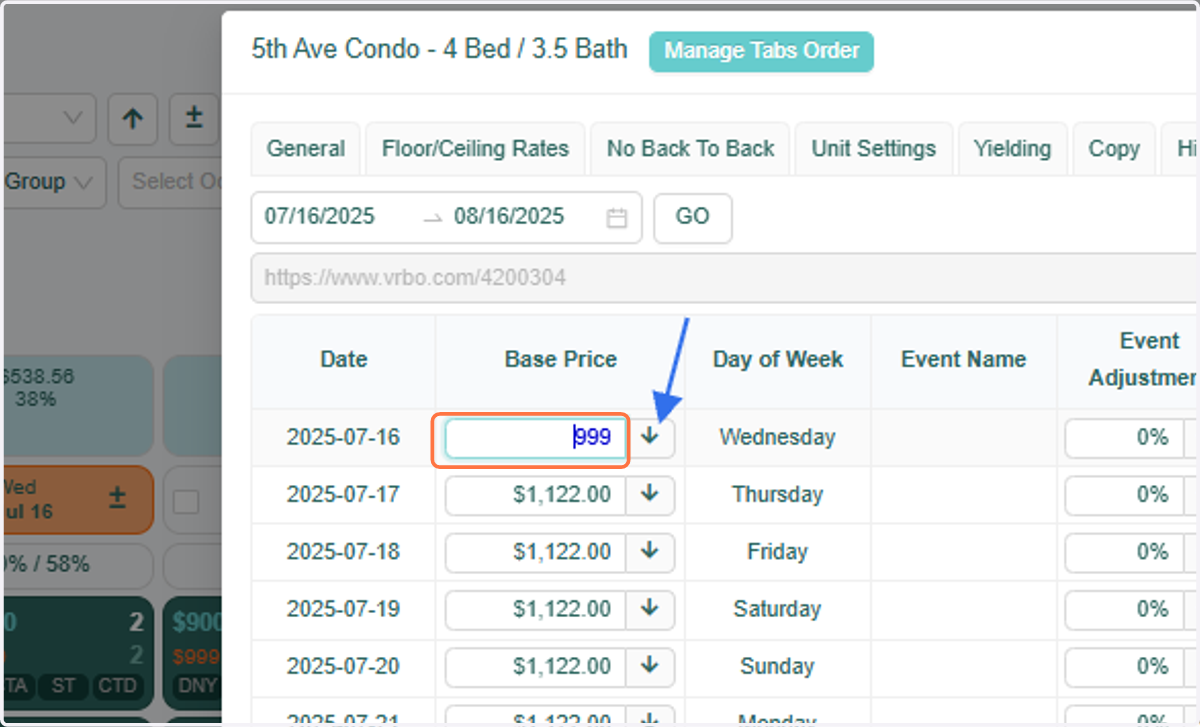
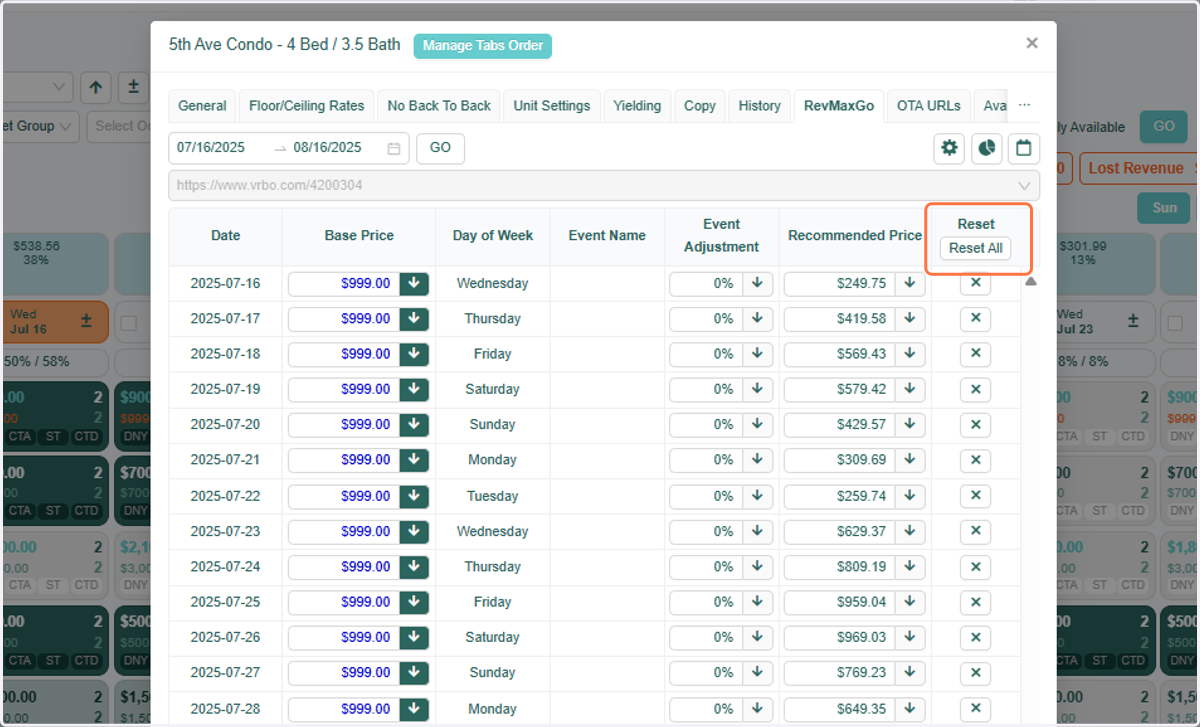
4. Once you're in the RevMaxGO rate table, enter the desired Base Rate next to the first date. When you're finished, click the 'Arrow Down' button to apply the changes.
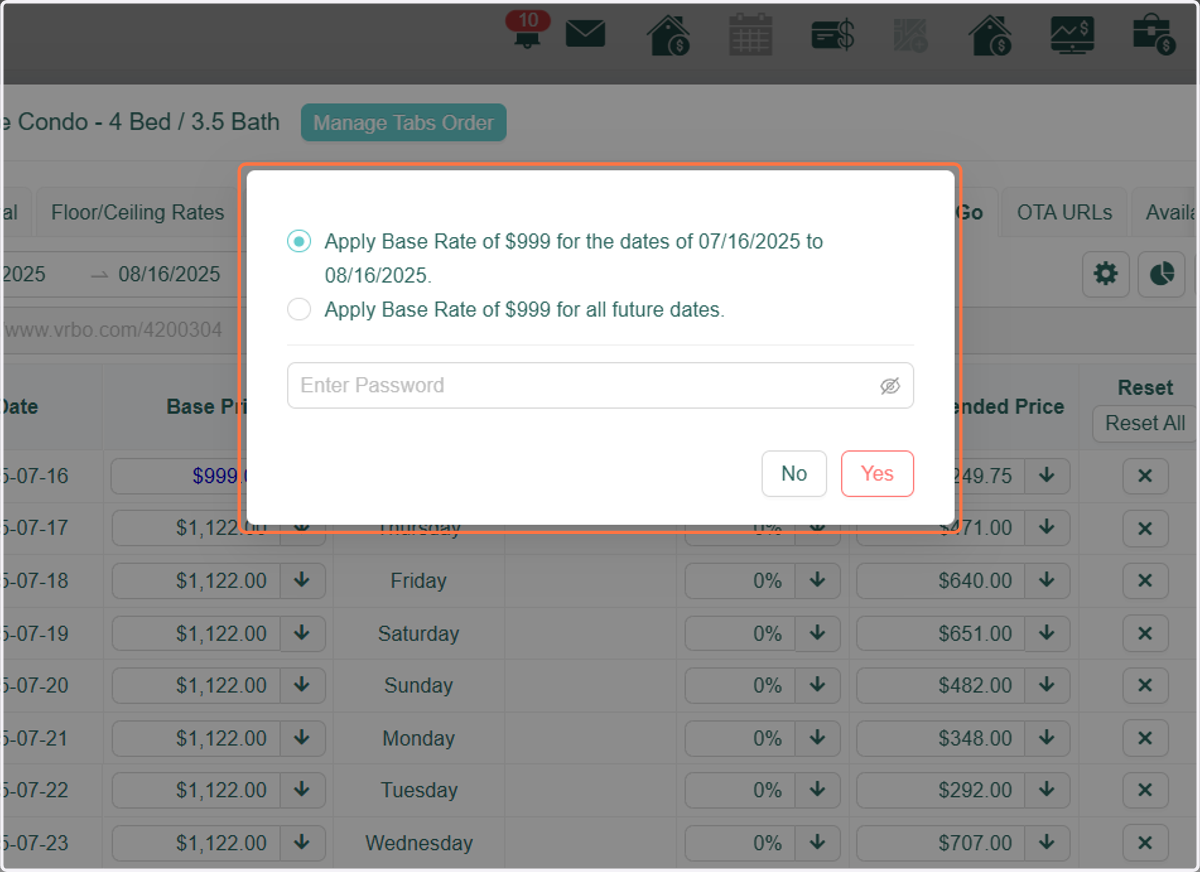
5. A pop-up window will appear with two options: - Apply the base rate adjustment to the filtered date range - Apply the base rate adjustment to all future dates.
Important Note: When selecting 'Apply Base Rate adjustment for all future dates,' please note that future dates are limited to a maximum of one year. This is because RevMaxGO only generates market-based rates up to one year in advance.
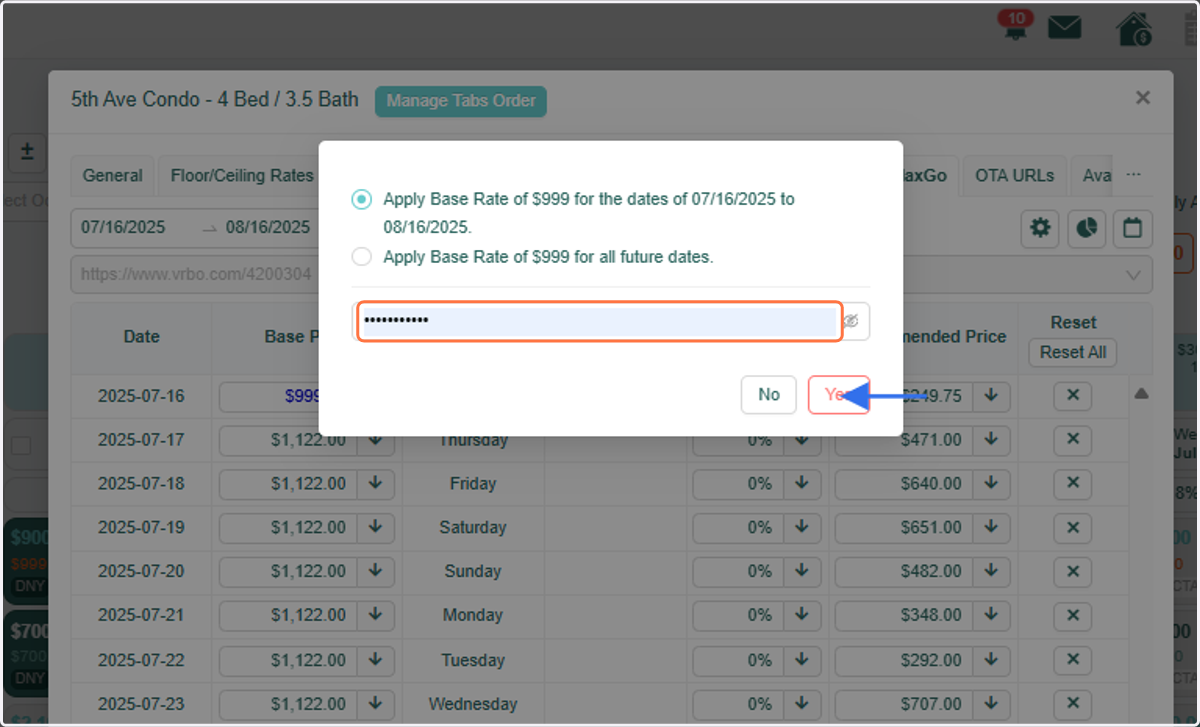
6. After selecting your preferred option, you’ll be prompted to enter your RevMax password to apply the changes. Once done, click "Yes" to save.
For Streamline Users: If you're accessing RevMax through Streamline, you may need to enter your Streamline password instead.
7. Once these steps are completed, the base rate will update and appear in a bright blue font, indicating that an adjustment or override has been applied.
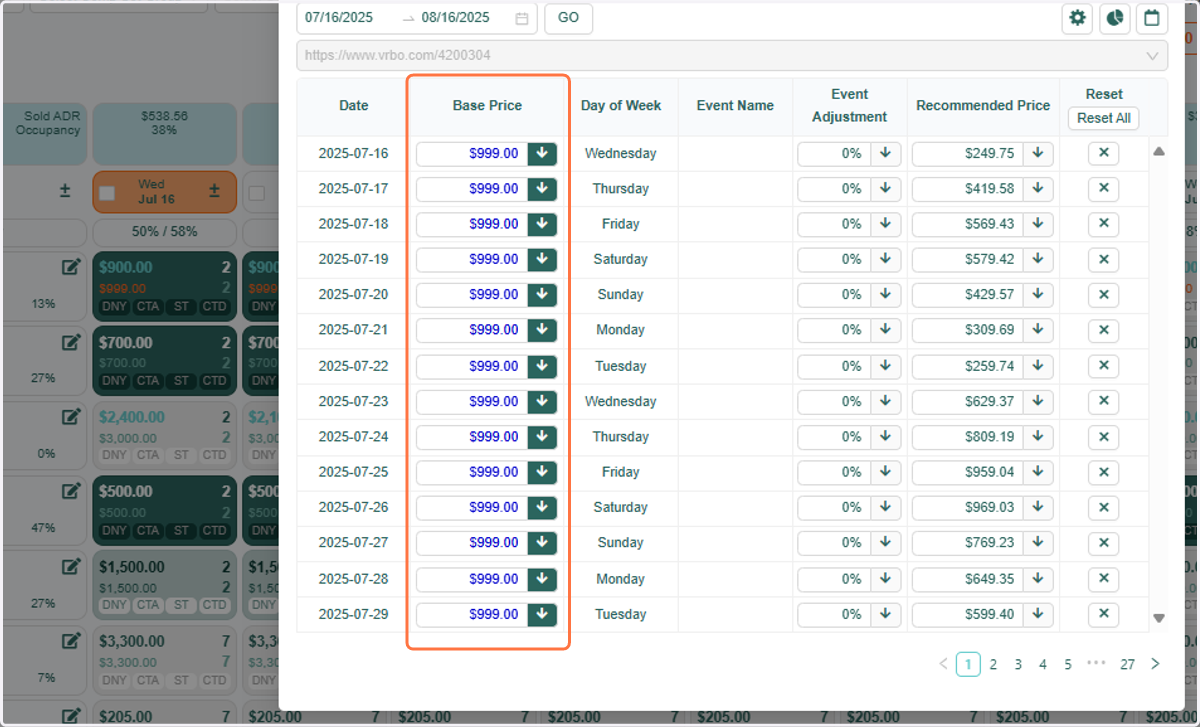
8. If you'd like to remove the adjustment, simply click the 'Reset All' button to revert the changes.
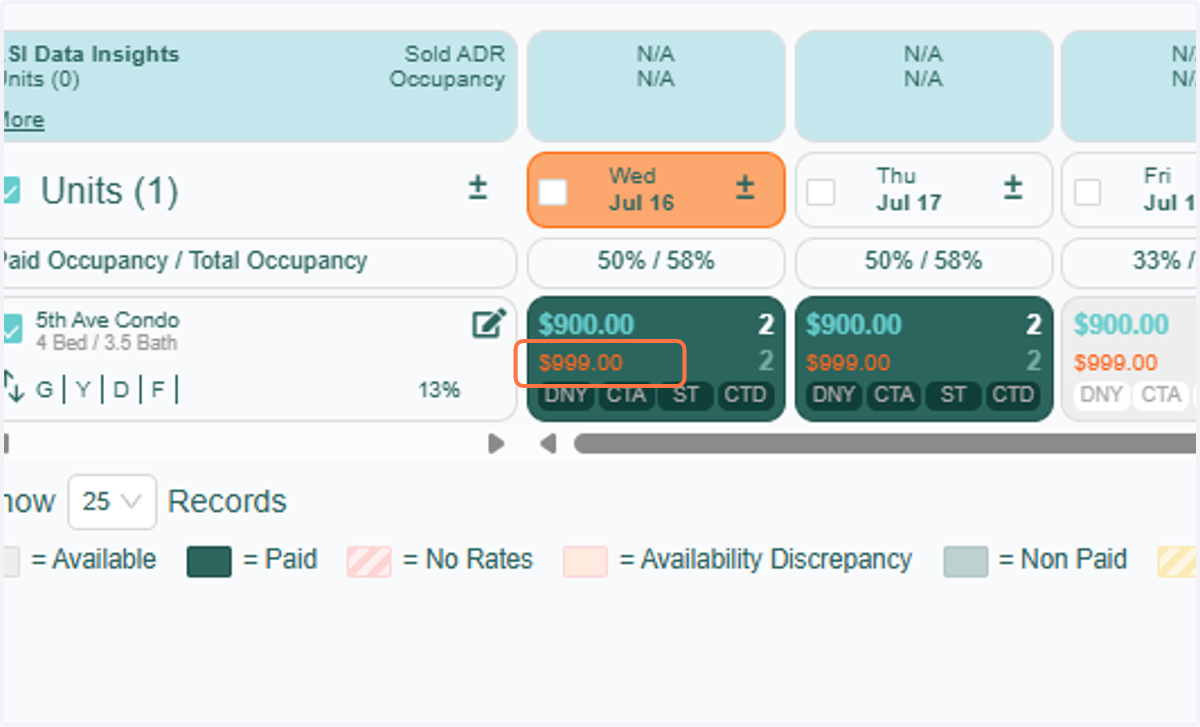
9. When viewing the unit in the tape chart, you'll notice that the base rates are overridden, reflecting the adjustments made in your RevMax GO rate table.