Add Prospect in Senior CRM
Senior CRM
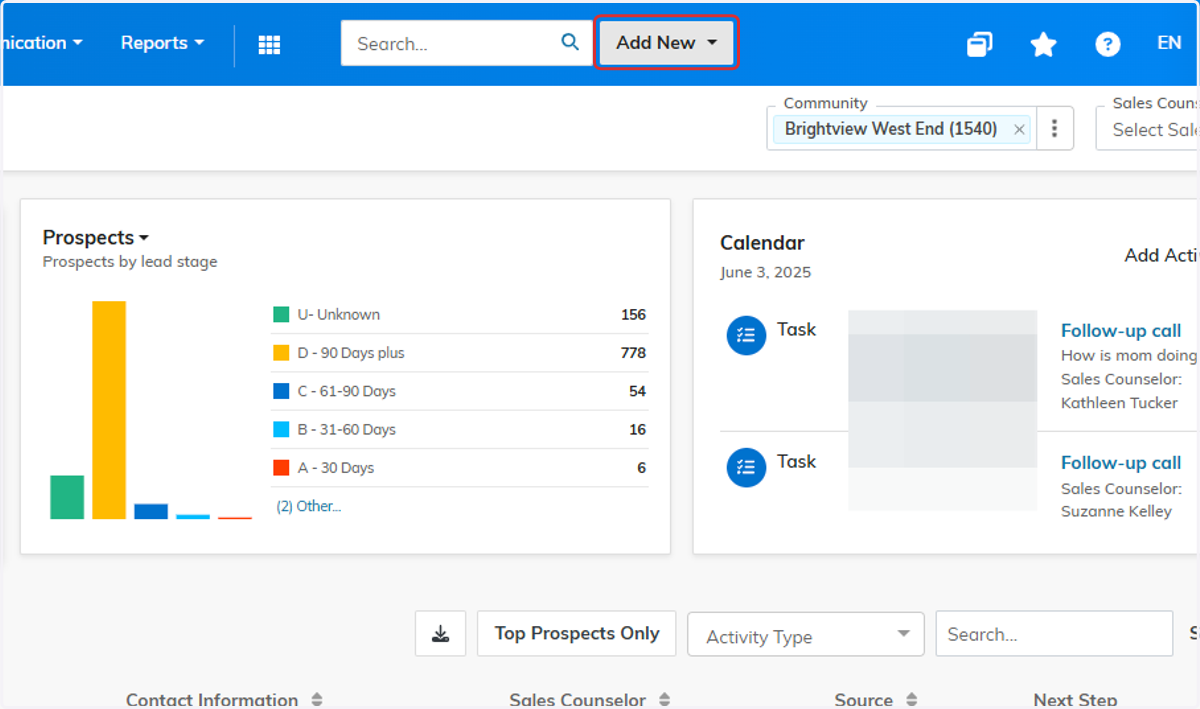
1. Click on Add New
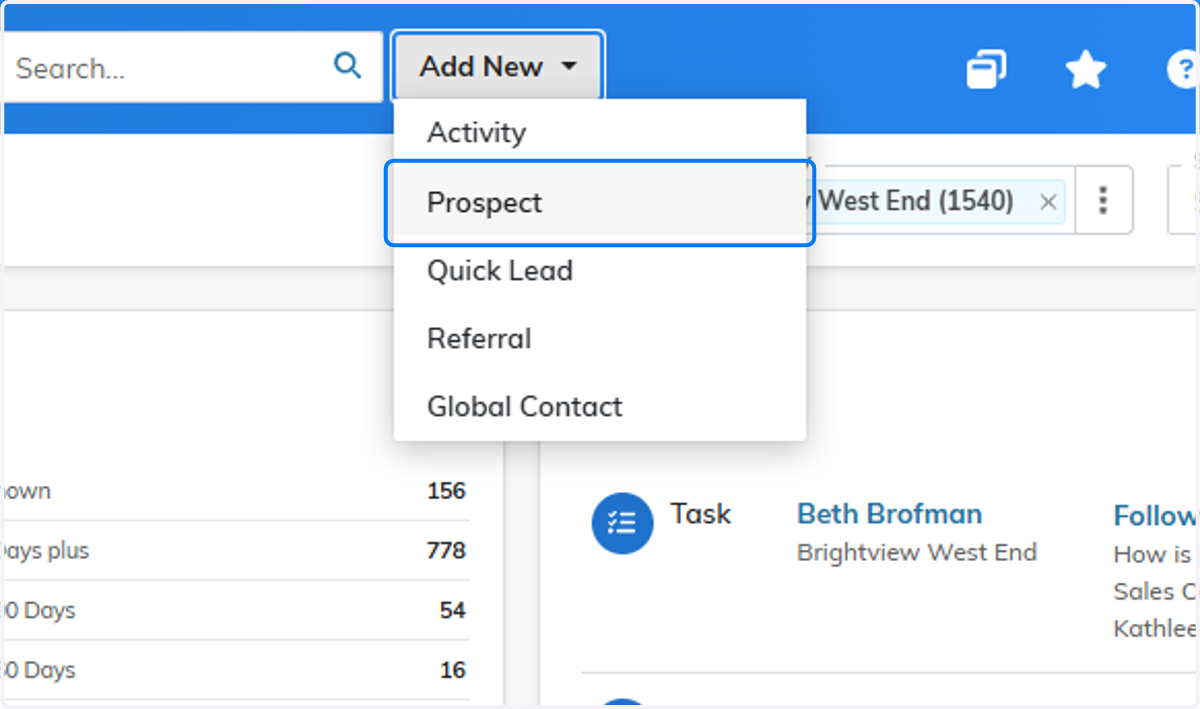
2. Click on Prospect
3. Fill out the prospect info, or if someone is calling on behalf of a prospect, you can select Someone Else

4. Enter all the required info and any additional information you have
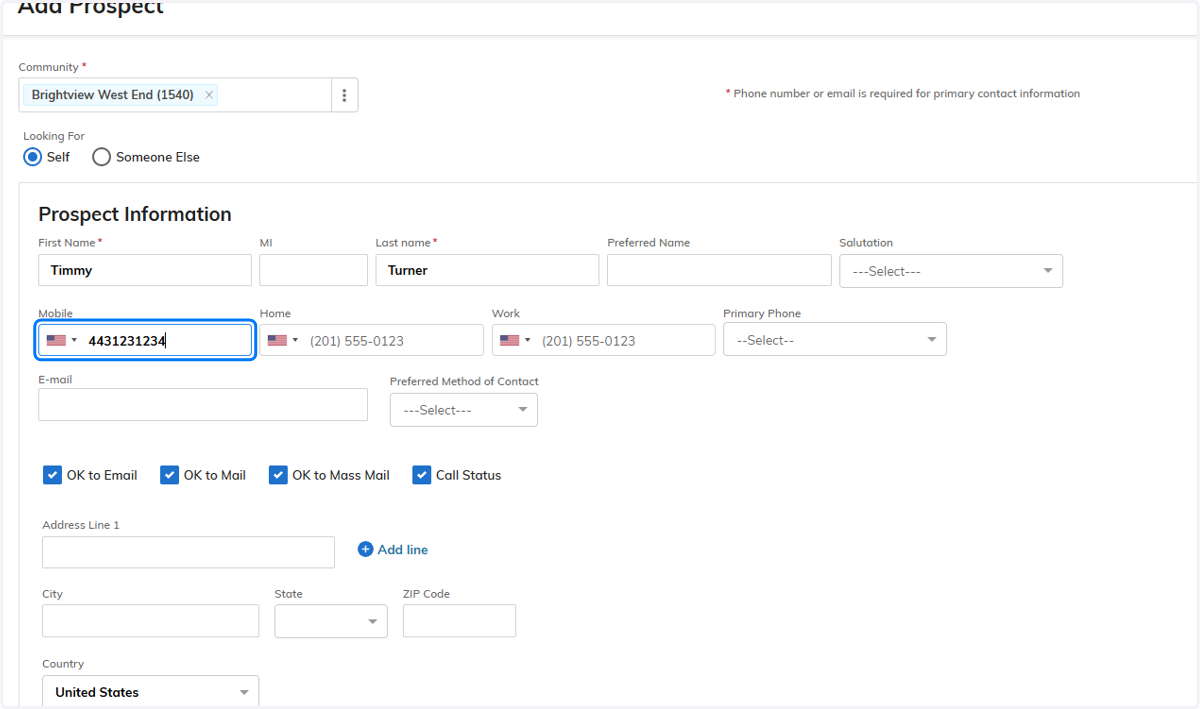
5. The system will require actual phone numbers now and will alert if it doesnt believe its a real phone number

6. After filling in all of the required information, hit save

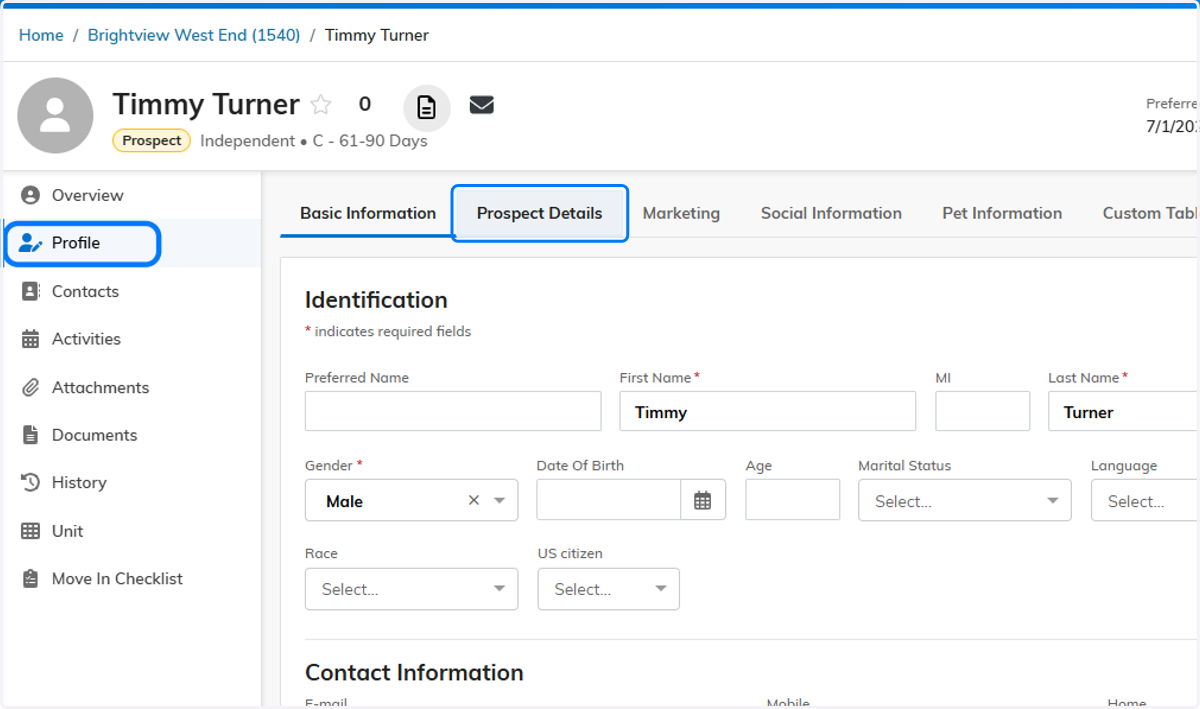
7. This will take you to the Prospects "Overview" Page, which is a summary of all of the available information we have on them

8. If any new information is gathered, you would put it under "profile" and under the correct tab
9. Click on Contacts and "Add New" if any contacts are needing to be added

10. Fill out the contact and make sure to flag if this contact will be a Payer for this prospect or not

11. If this contact will be a Co-Occupant, please also flag under Other Options

12. Make sure to fill out the appropriate roles for each contact if known as well
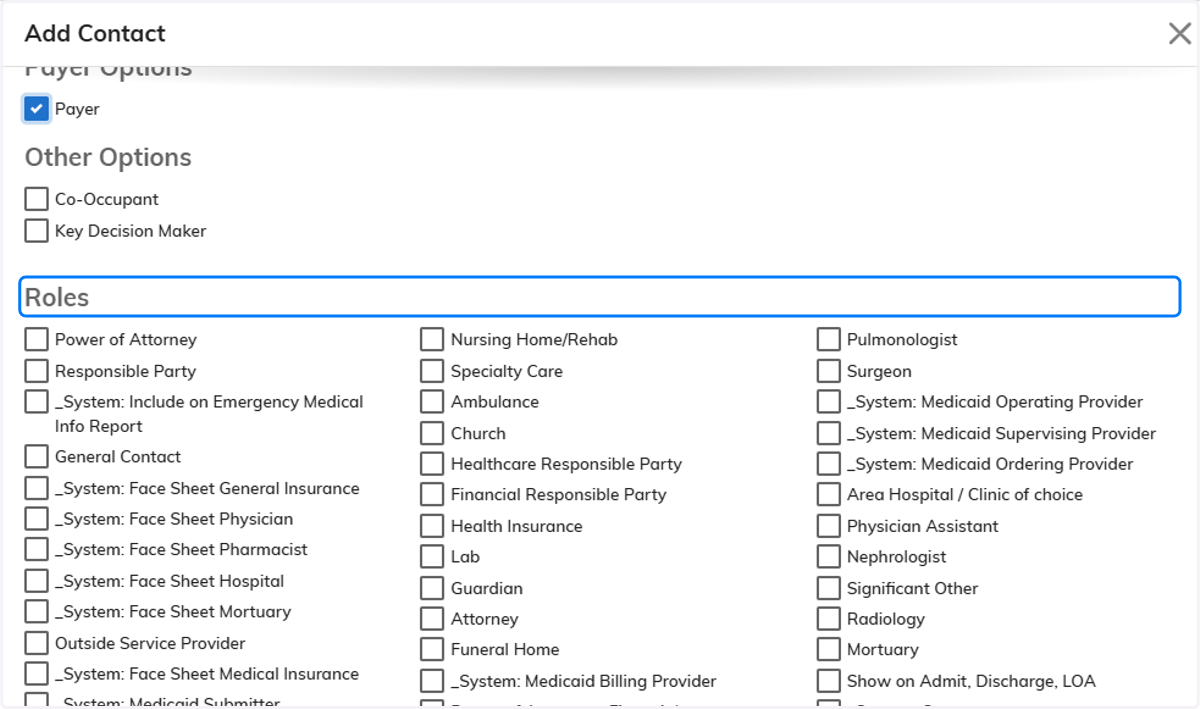
13. Click on Save when done

14. Both the prospect and contact will now show up
If this was a future resident, you could send the Invite to Rentcafe as long as the contact has a valid email address. Do not send an invite if they are just a Prospect though

15. Click on Activities and "Add New" if you need to schedule an activity or you can edit/close out an activity on this page as well

16. Attachments will show any attachments that we have for the prospect
This is usually done when the prospect has been converted to future
