Creating a Blog Article for a WordPress Client

Navigate to the Google Drive folder

  1. 1. Locate the folder where the Blog Articles are stored (or create one if you don't have one)

    Locate the folder where the Blog Articles are stored (or create one if you don't have one)
  2. 2. Click on New

    Click on New
  3. 3. Click on Google Docs

    Click on Google Docs
  4. 4. Open the Blog Article Writing Prompt document

    Open the Blog Article Writing Prompt document
  5. 5. Copy the prompt

    Copy the prompt

Navigate to ChatGPT (chat.openai.com)

  1. 6. Paste the prompt into the chat box and change the necessary template items (Keywords and avatar problem)

    Paste the prompt into the chat box and change the necessary template items (Keywords and avatar problem)
  2. 7. Hit enter or click the send button

    Hit enter or click the send button
  3. 8. Highlight and copy the outline provided

    Highlight and copy the outline provided

Return to your Google doc

  1. 9. Paste selected text into element without formatting and adjust to make it readable (ctrl+shift+v to paste without formatting)

    Paste selected text into element without formatting and adjust to make it readable (ctrl+shift+v to paste without formatting)
  2. 10. Rename the document to match the article title

    Rename the document to match the article title
  3. 11. Select the first section of the outline and cut it from the document (ctrl+x)

    Select the first section of the outline and cut it from the document (ctrl+x)

Navigate back to ChatGPT

  1. 12. Type "Write this section for me and hit shift+enter X2, then paste the first section you just cut into the chat box (ctrl+v)

    Type "Write this section for me and hit shift+enter X2, then paste the first section you just cut into the chat box (ctrl+v)
  2. 13. Highlight the section ChatGPT just wrote and copy it (ctrl+c)

    Highlight the section ChatGPT just wrote and copy it (ctrl+c)

Return to your Article Doc

  1. 14. Paste selected text without formatting into the document under the title (ctrl+shift+v)

    Paste selected text without formatting into the document under the title (ctrl+shift+v)
  2. 15. Apply headings where appropriate to improve SEO

    Apply headings where appropriate to improve SEO
  3. 16. Repeat steps 12-15 for each of the sections in the outline until the article is complete

    Repeat steps 12-15 for each of the sections in the outline until the article is complete

Navigate to Canva (Canva.com)

  1. 17. Login and click on Create a design from the main dashboard

    Login and click on Create a design from the main dashboard
  2. 18. Click on Custom size and choose 1920 × 1080 px

    Click on Custom size and choose 1920 × 1080 px
  3. 19. Click on Elements

    Click on Elements
  4. 20. Search for a relevant Featured Image

    Search for a relevant Featured Image
  5. 21. Click on Photos

    Click on Photos
  6. 22. Click on the image that best matches the articles content to add it to the canvas, then resize it to fill the area

    Click on the image that best matches the articles content to add it to the canvas, then resize it to fill the area
  7. 23. Click on Share

    Click on Share
  8. 24. Click on Download

    Click on Download
  9. 25. Click on Download

    Click on Download
  10. 26. If you see this error follow steps 26 - 32 (or skip to step 33)

    If you see this error follow steps 26 - 32 (or skip to step 33)
  11. 27. Click on Text

    Click on Text
  12. 28. Click on Heading

    Click on Heading
  13. 29. Click on Transparency

    Click on Transparency
  14. 30. Set transparency to 0

    Set transparency to 0
  15. 31. Click on Share

    Click on Share
  16. 32. Click on Download

    Click on Download
  17. 33. Click on Download

    Click on Download
  18. 34. If you want to create a social media post to promote the article with the same image you can select Resize & Magic Switch to change the canvas size and automatically adjust the image or design

    If you want to create a social media post to promote the article with the same image you can select Resize & Magic Switch to change the canvas size and automatically adjust the image or design

Navigate to the WordPress Dashboard

  1. 35. Click on the Posts tab in the left side menu

    Click on the Posts tab in the left side menu
  2. 36. Click on Add New Post at the top left of the screen

    Click on Add New Post at the top left of the screen
  3. 37. Close the Welcome dialogue if necessary

    Close the Welcome dialogue if necessary
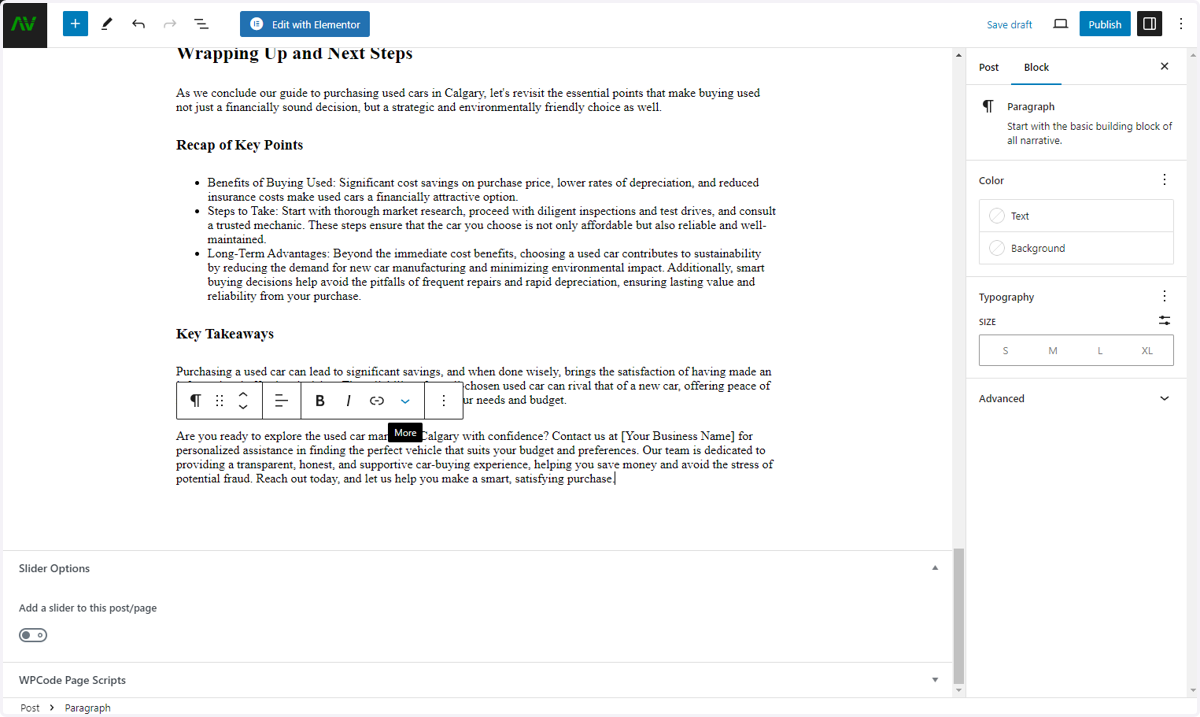
  4. 38. Copy the title of the article from the Google Doc

    Copy the title of the article from the Google Doc
  5. 39. Paste the title into the corresponding input

    Paste the title into the corresponding input
  6. 40. Return to your Google doc and highlight the remaining text and copy it to your clipboard (ctrl+c)

    Return to your Google doc and highlight the remaining text and copy it to your clipboard (ctrl+c)
  7. 41. Paste it into the corresponding input (ctrl+v)

    Paste it into the corresponding input (ctrl+v)
  8. 42. Click on the Post tab in the right hand toolbar

    Click on the Post tab in the right hand toolbar
  9. 43. Add relevant tags and keywords for SEO

    Add relevant tags and keywords for SEO
  10. 44. Select the relevant Categories for the post topic

    Select the relevant Categories for the post topic
  11. 45. Click on the Publish button at the top right of the screen

    Click on the Publish button at the top right of the screen
  12. 46. Confirm your settings and click the Publish button again

    Confirm your settings and click the Publish button again
  13. 47. Click on View Post to preview your article, be sure to correct any errors you see while doing a final review

    Click on View Post to preview your article, be sure to correct any errors you see while doing a final review

Return to your Google Drive folder

  1. 48. Move the Article doc into the Distributed folder

    Move the Article doc into the Distributed folder