Setting Up the Special Offer Banner in Theme 2
Go to the site you would like to update the special on
1. Find the banner at the top of the page, then click on it to access the settings for updates.
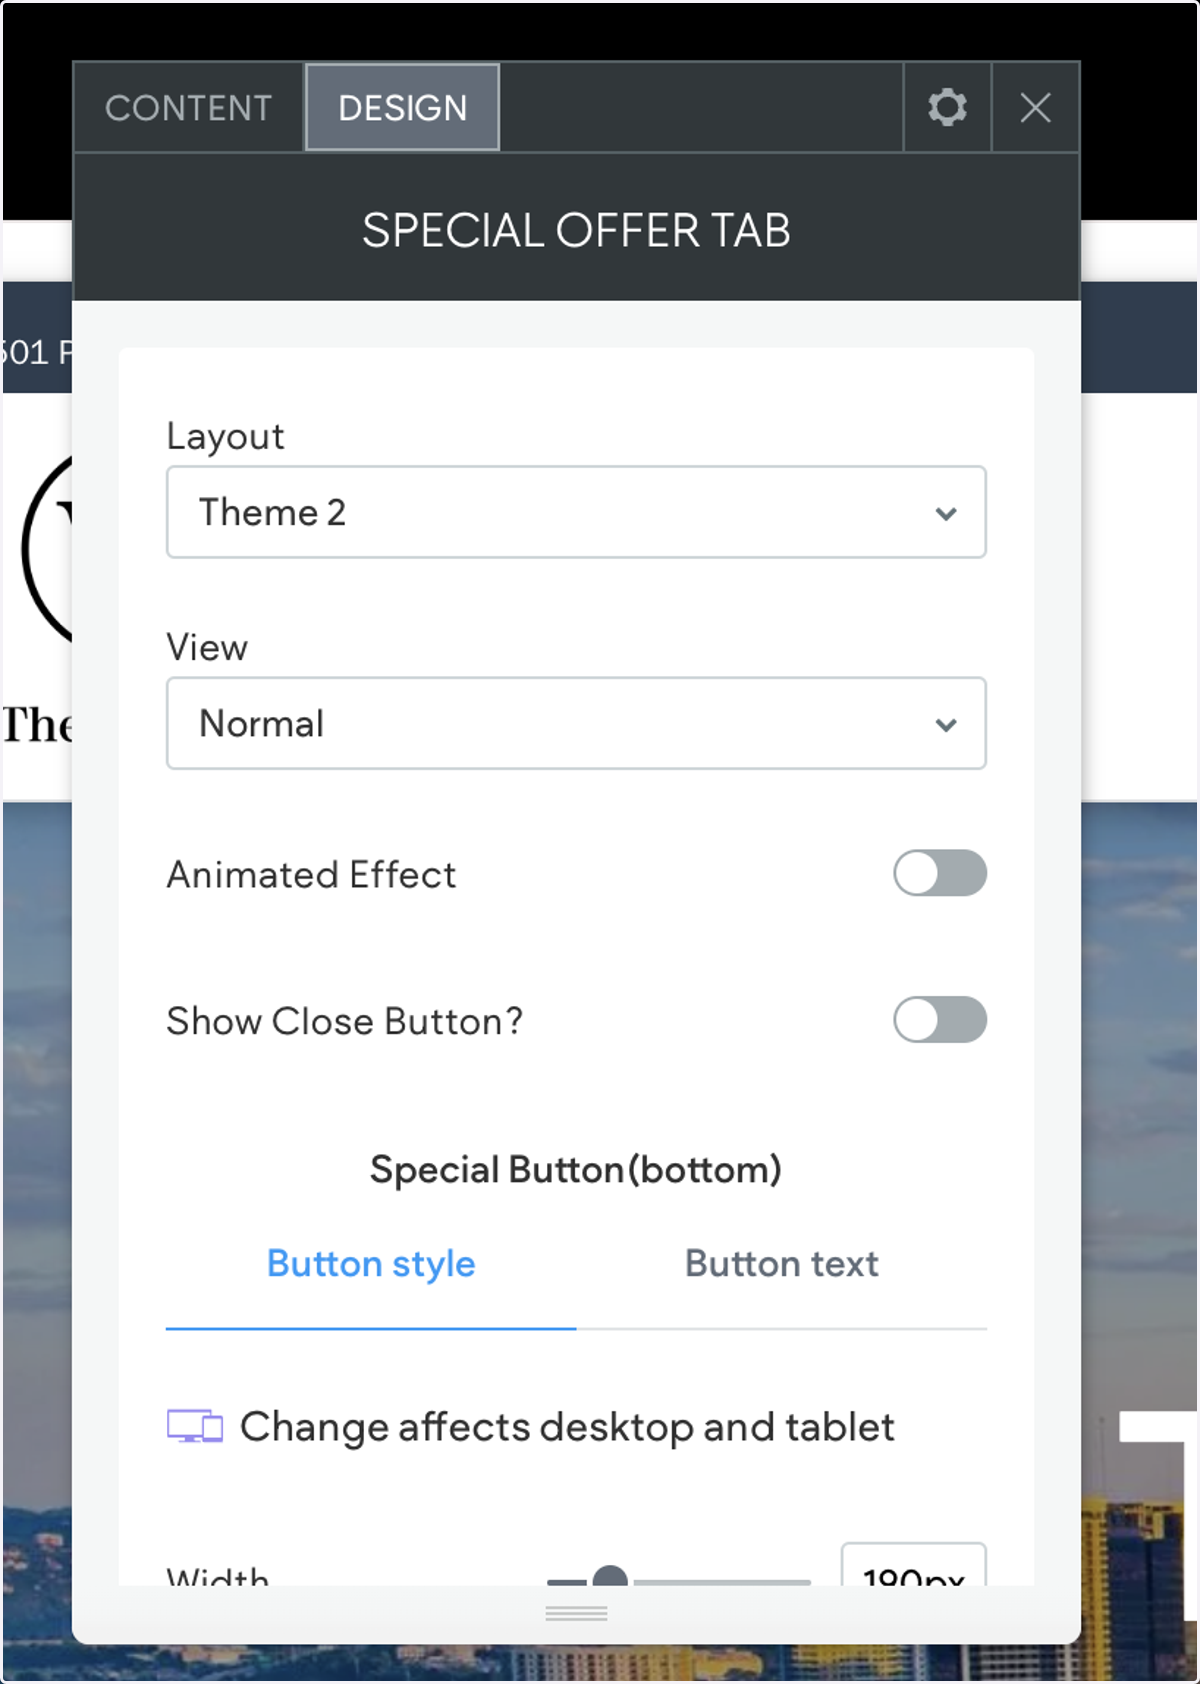
This should already be on Theme 2.
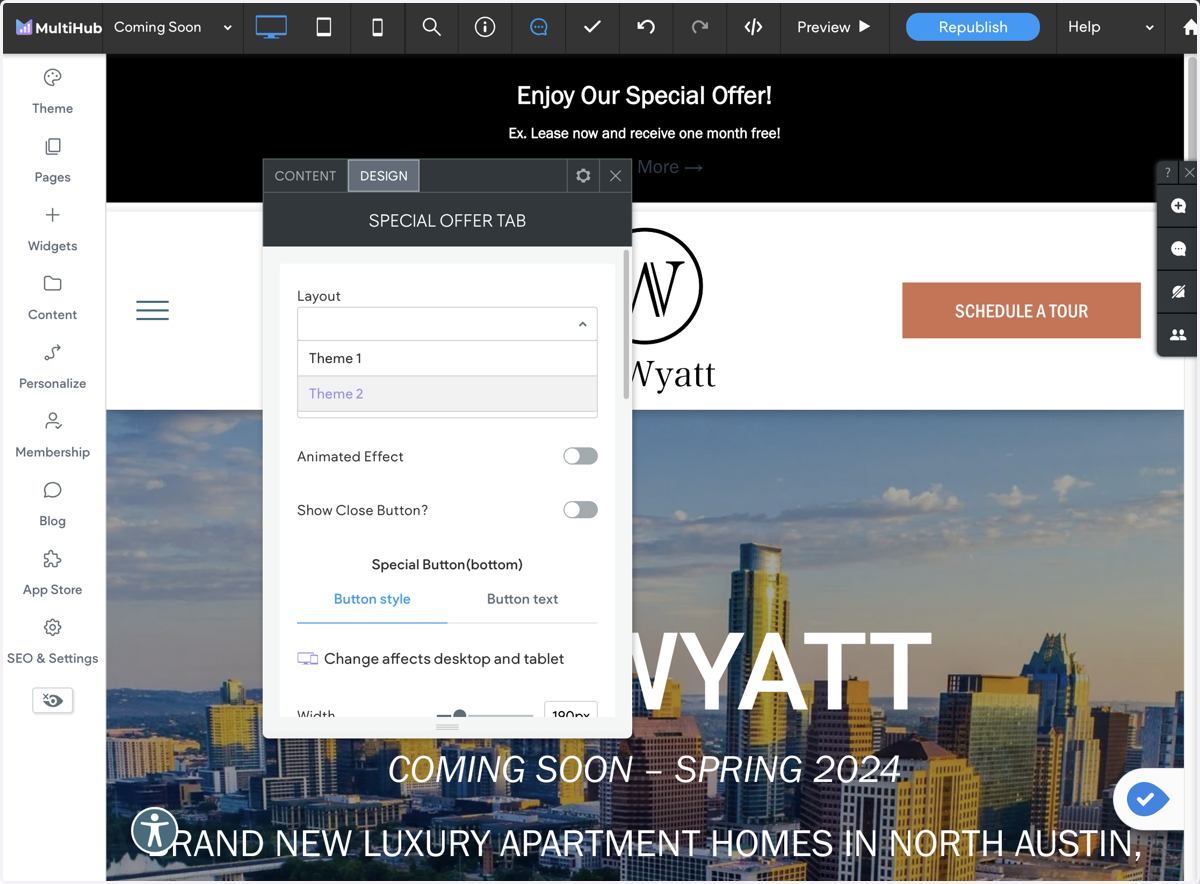
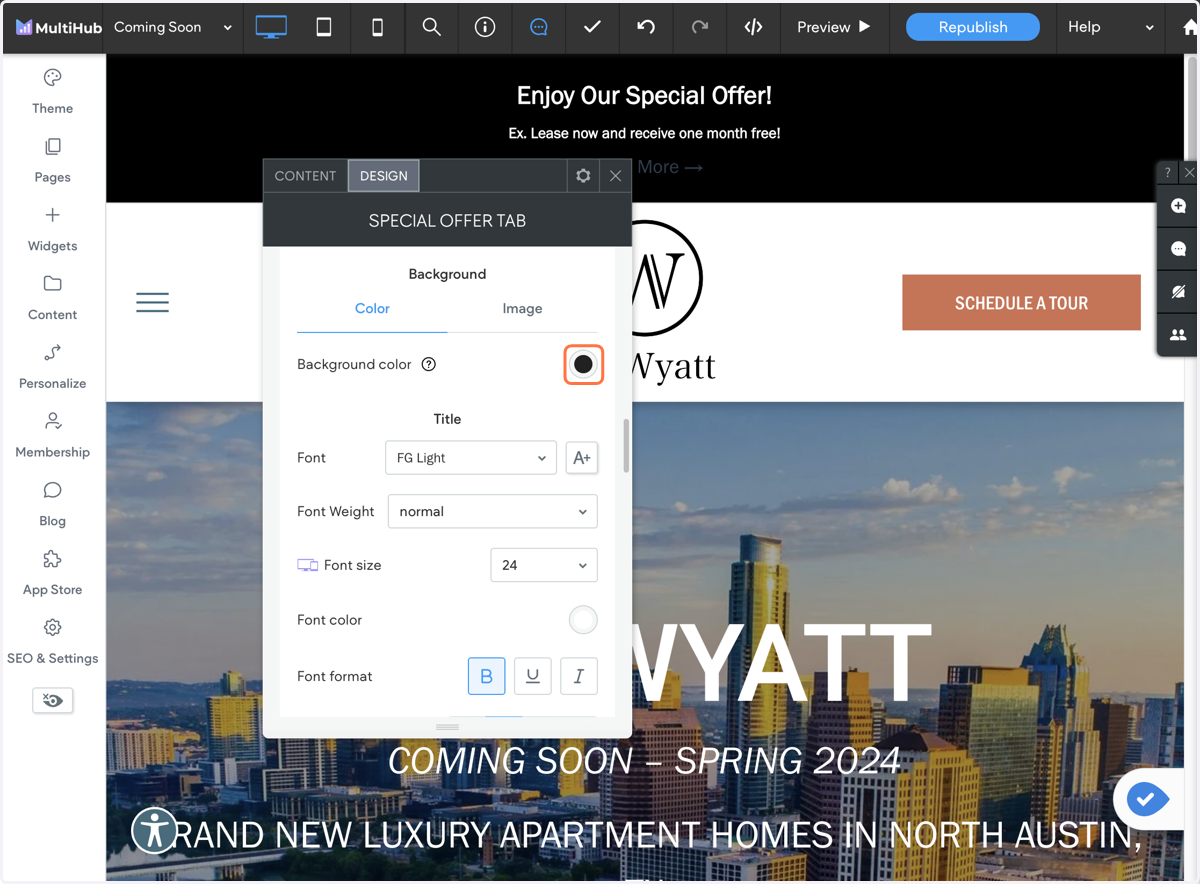
2. Go to the DESIGN tab
3. Scroll down and click on "Theme 2 Style."
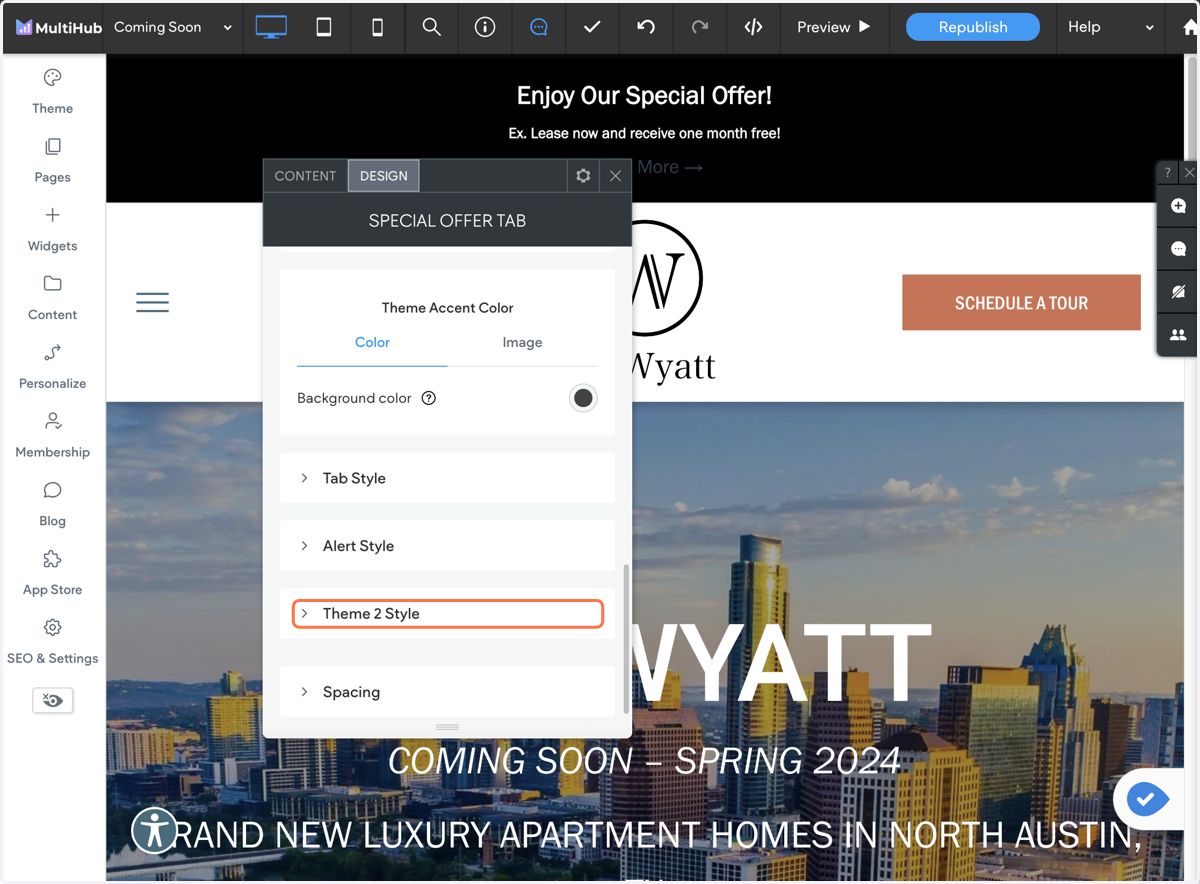
4. Under "Theme 2 Style," you can customize elements such as the widget background color and font.
5. Click on the CONTENT tab
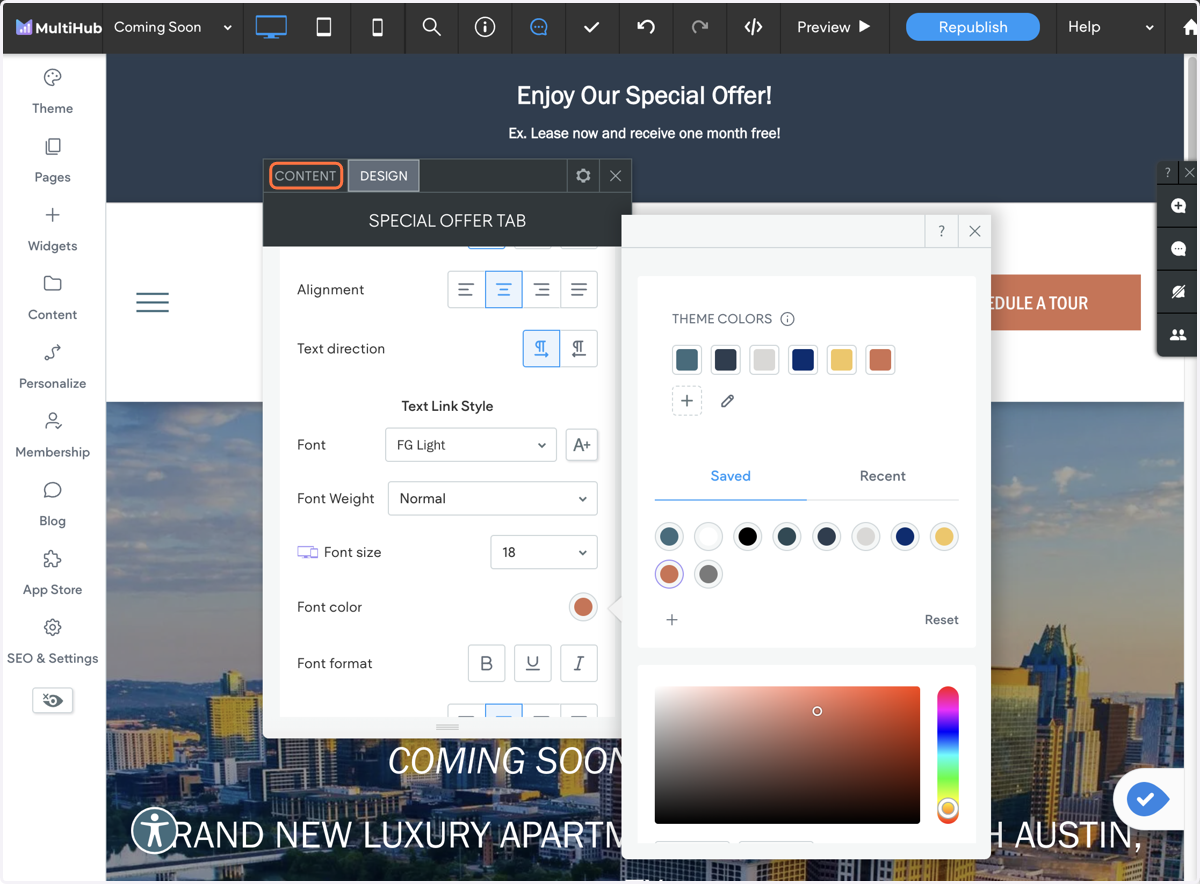
6. Under this tab, you can specify whether you want the special to appear on all pages or just the homepage.
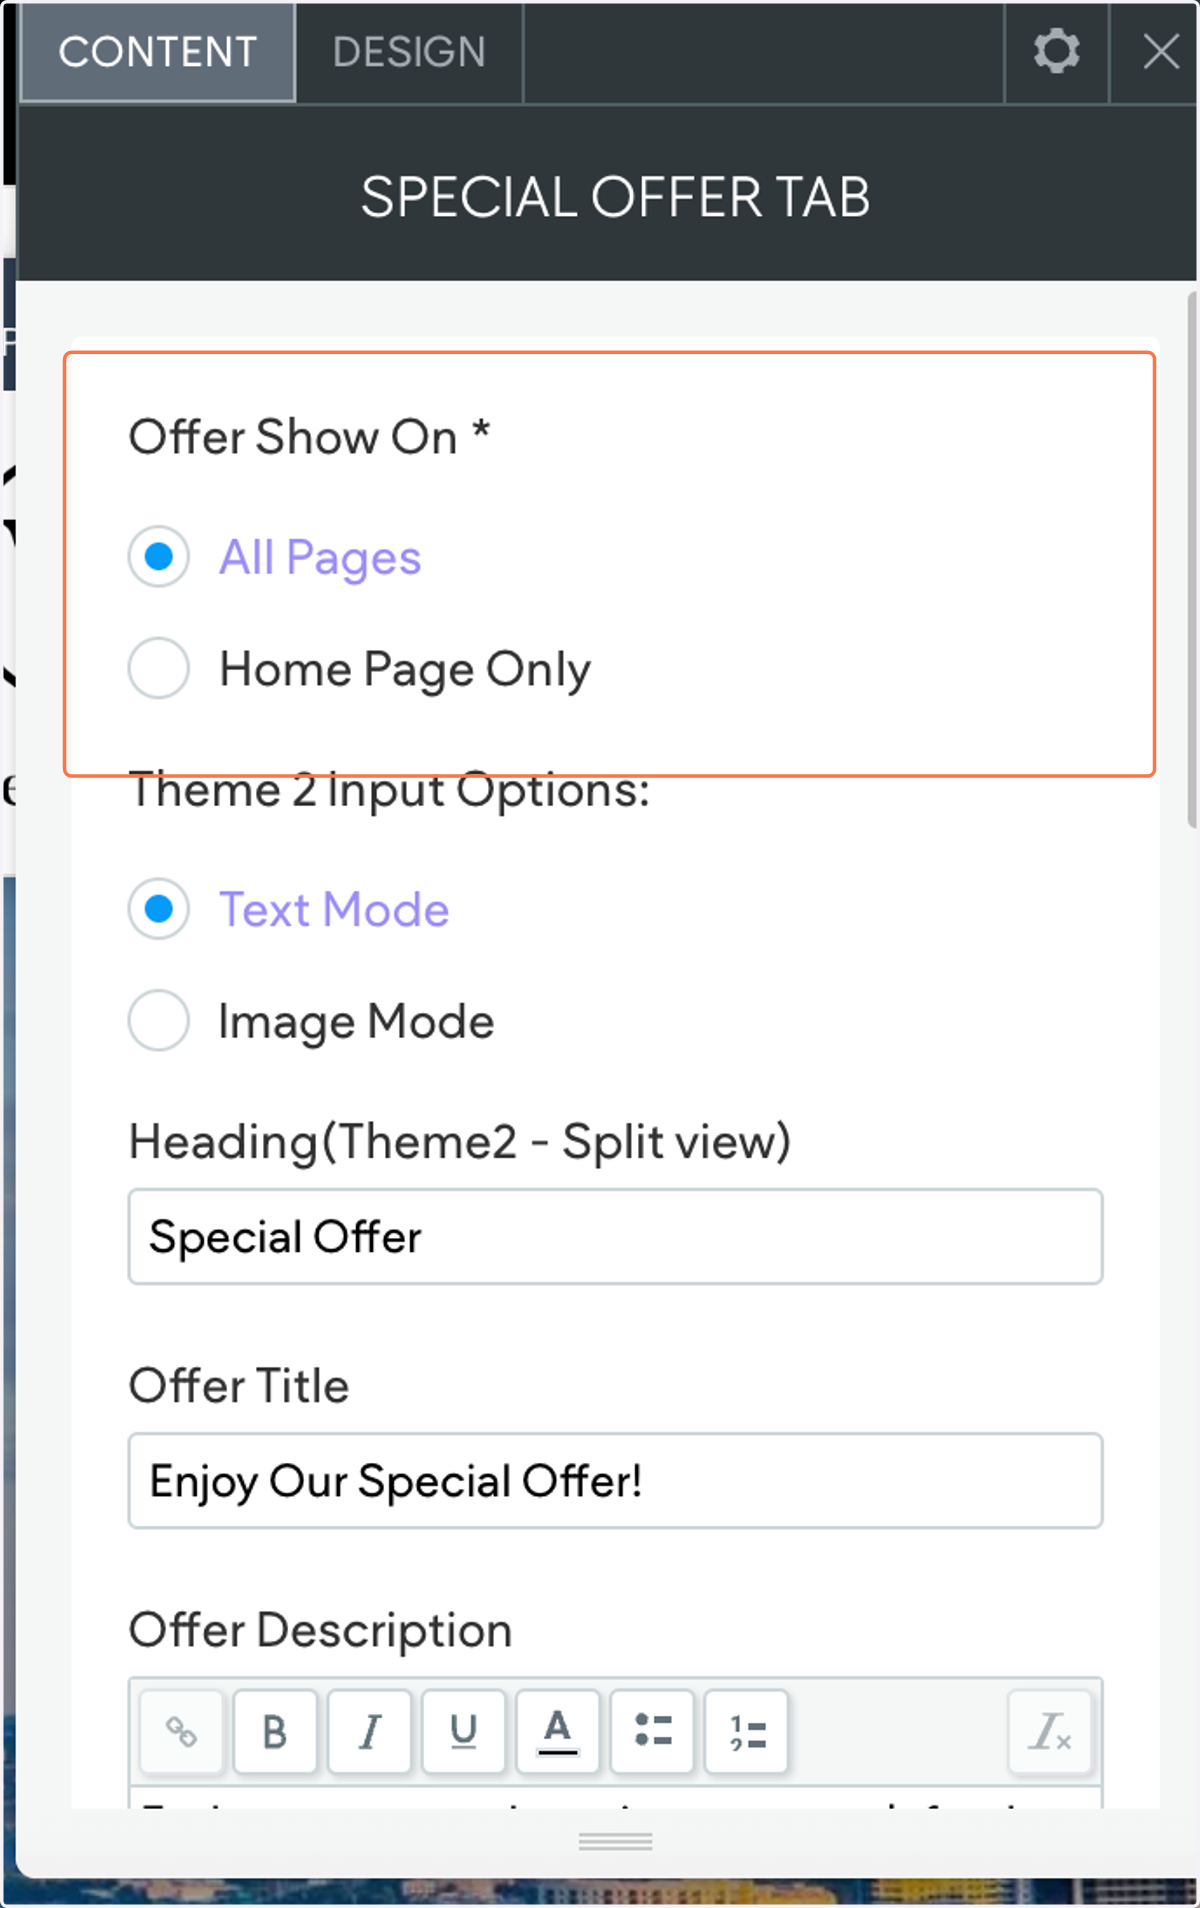
7. Scrolling down, you'll find the section where you can update the Offer Title.
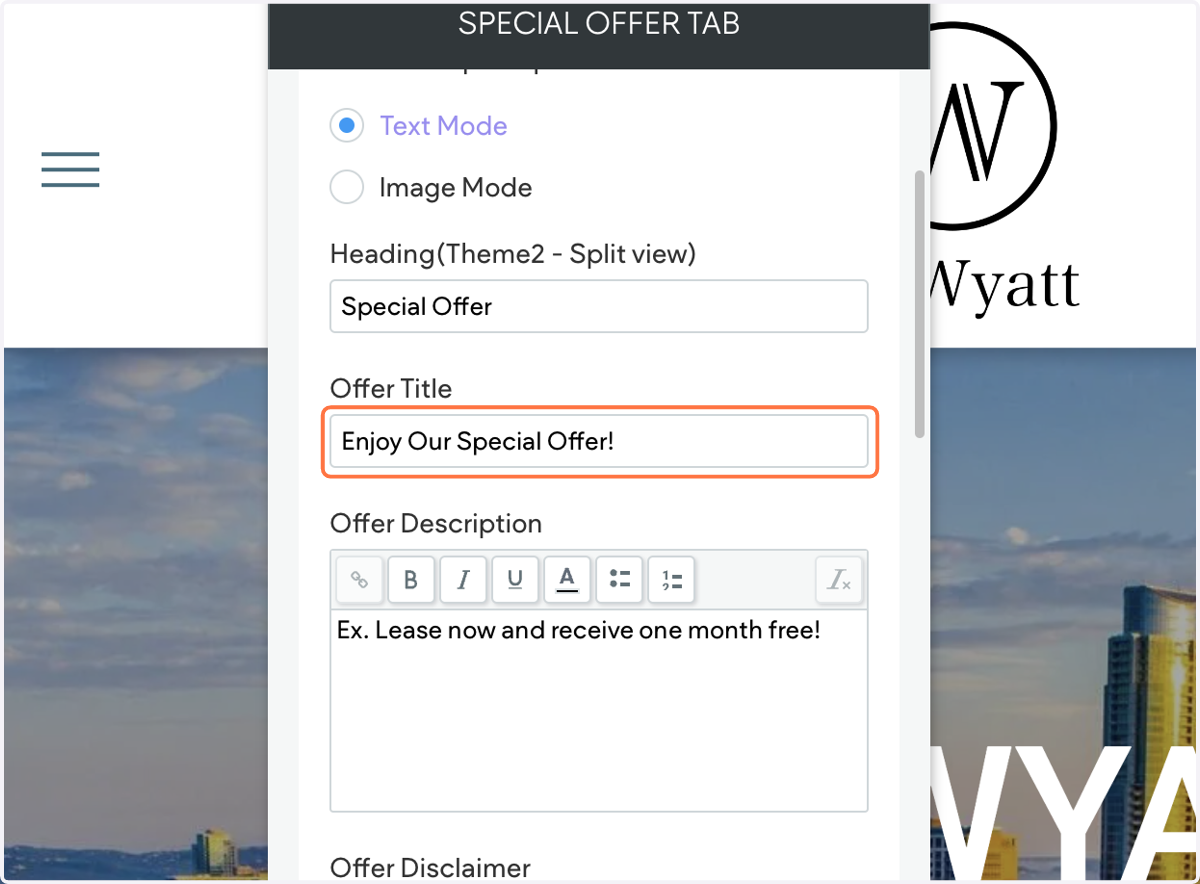
8. Update the Offer Description.
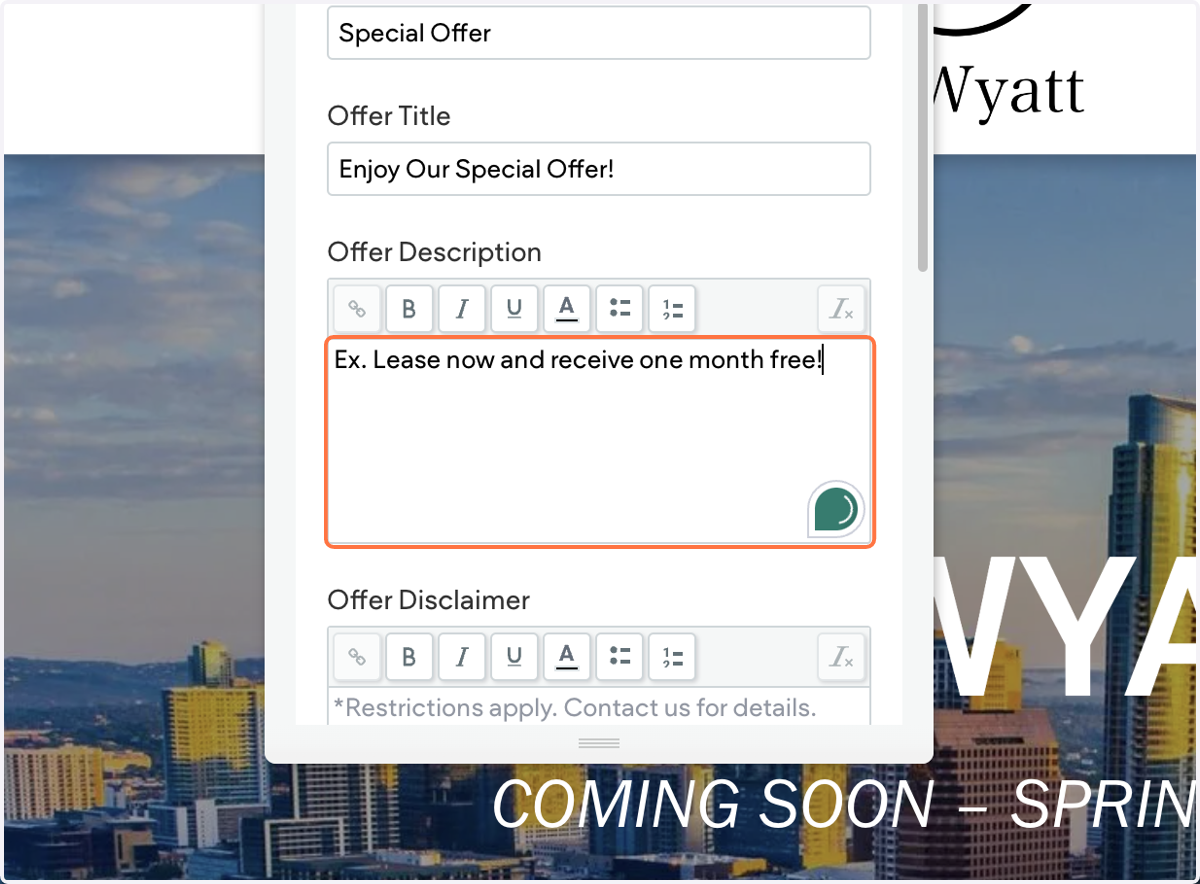
9. You can also update the offer disclaimer if necessary.
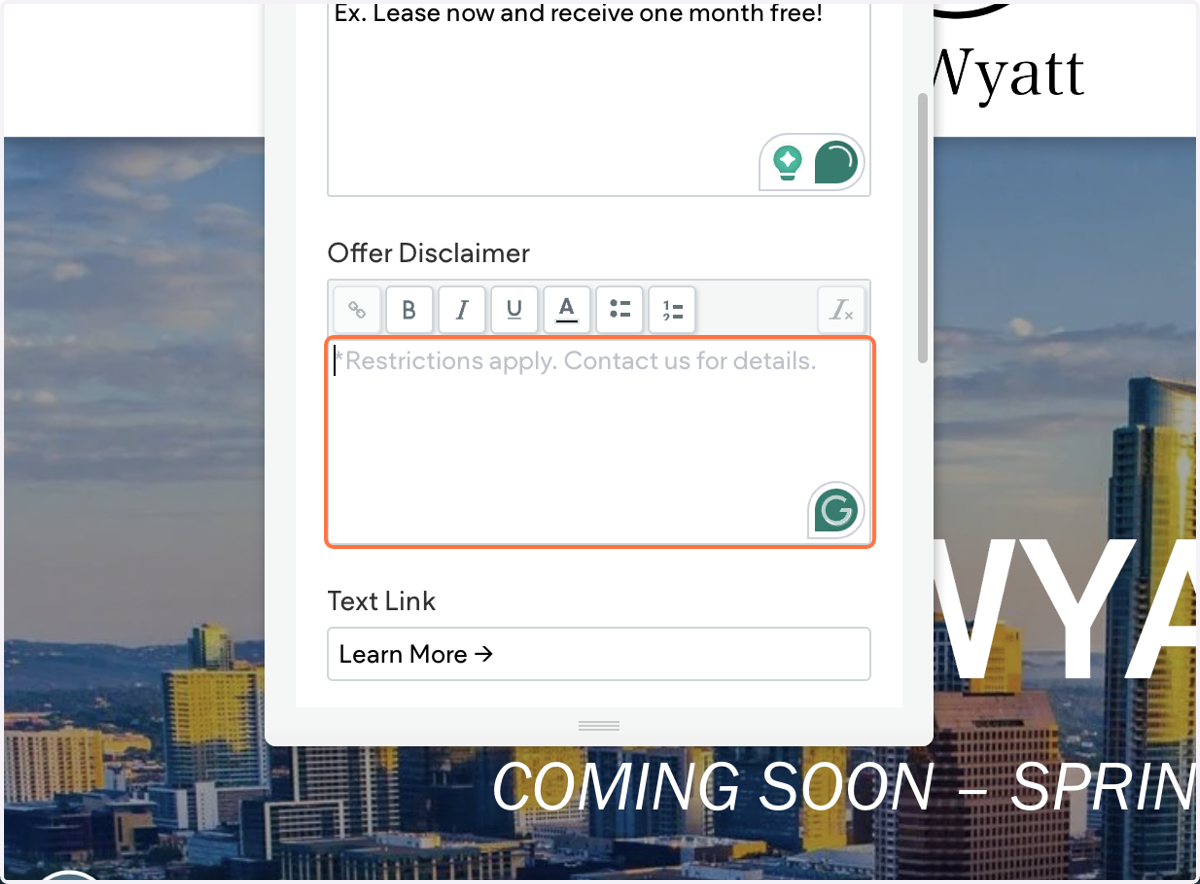
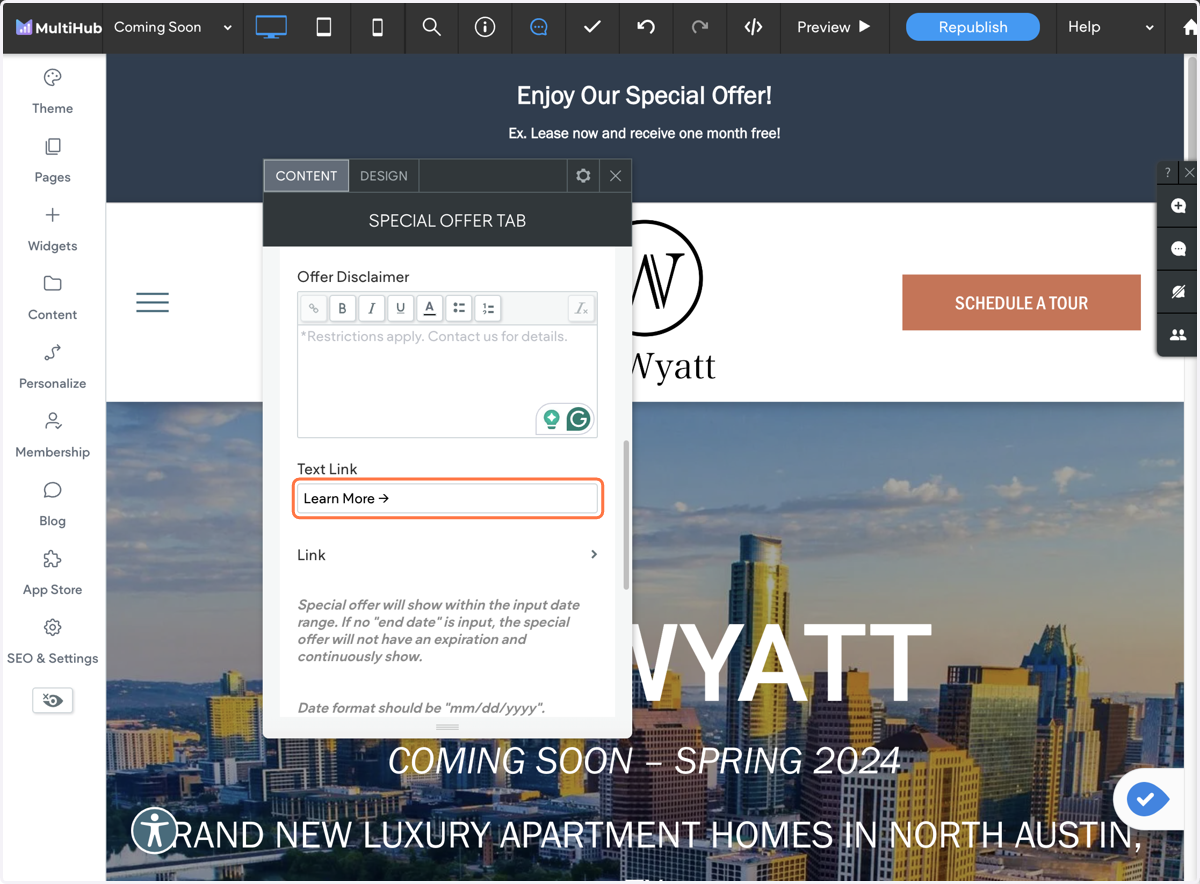
10. Under "Text Link," you can edit the CTA text.
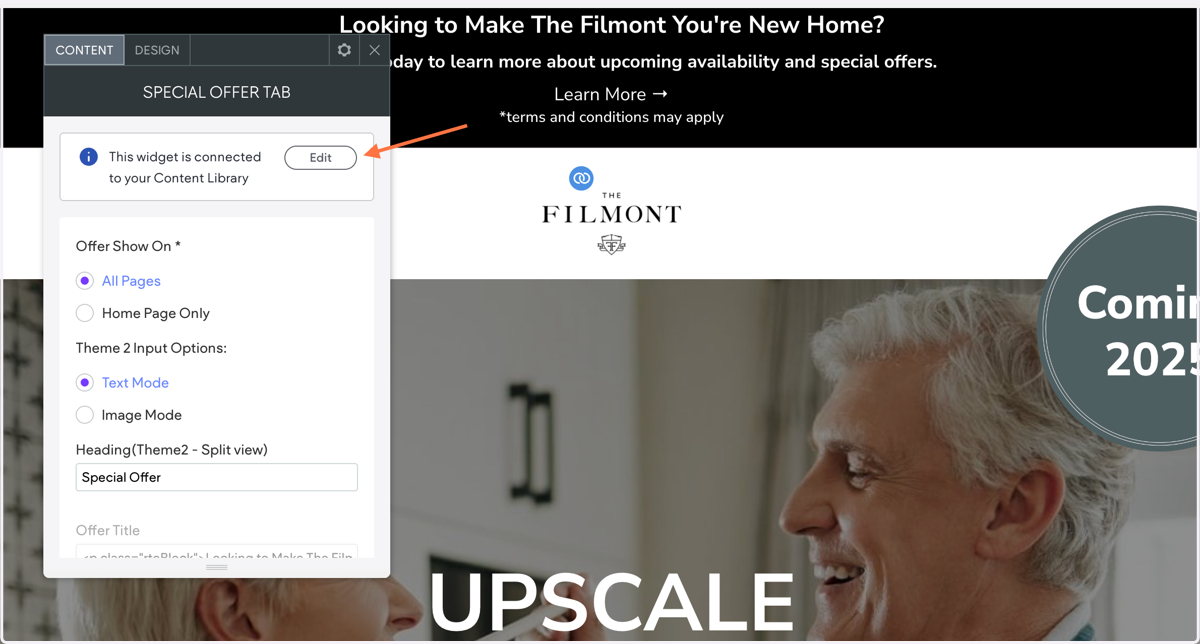
11. If the special is connected to data, you'll need to hit the edit button.
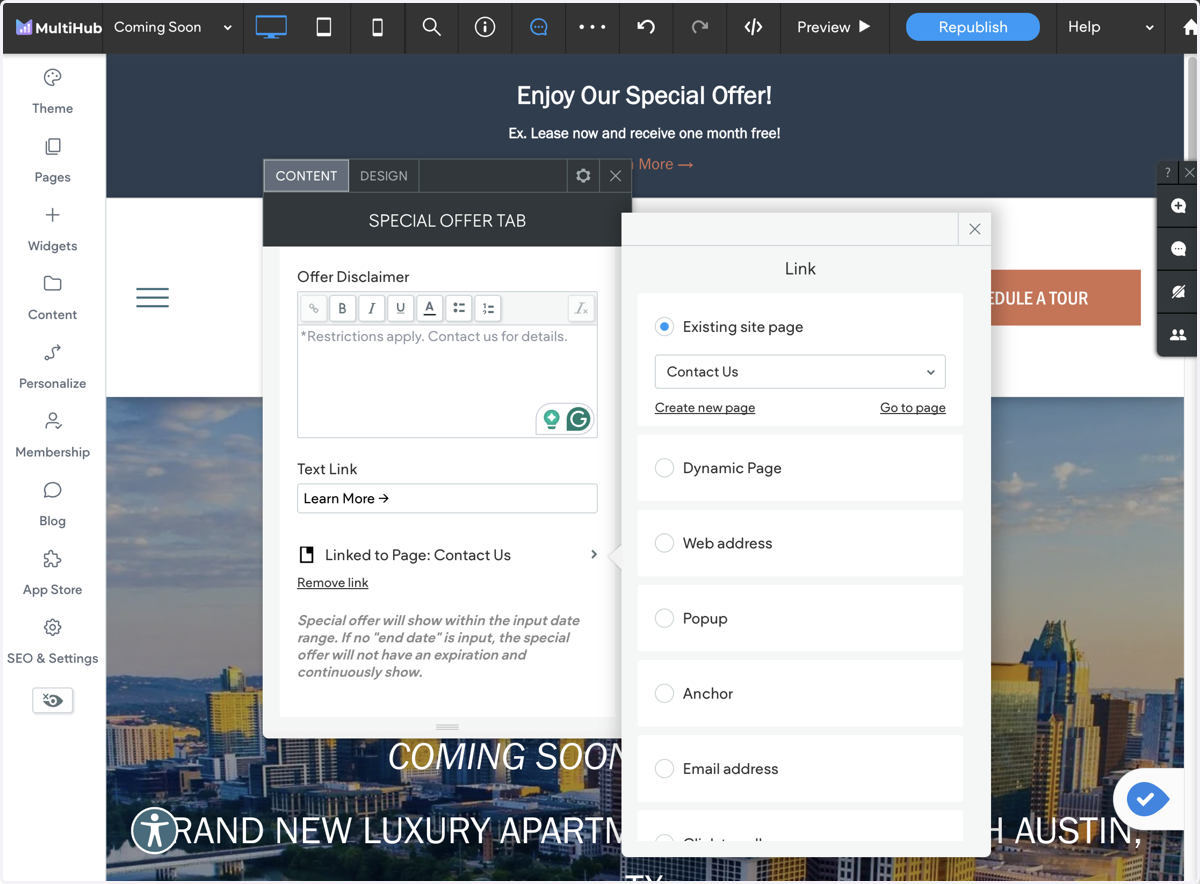
12. By clicking on "Link," you can choose the destination where the CTA will direct the user.
In the screenshot below, I'm setting it up so that when users click on "Learn More ->", it will take them to the Contact Us page. Alternatively, you can configure it to perform other actions, such as initiating a Click to Call function to encourage users to contact the property by phone instead.
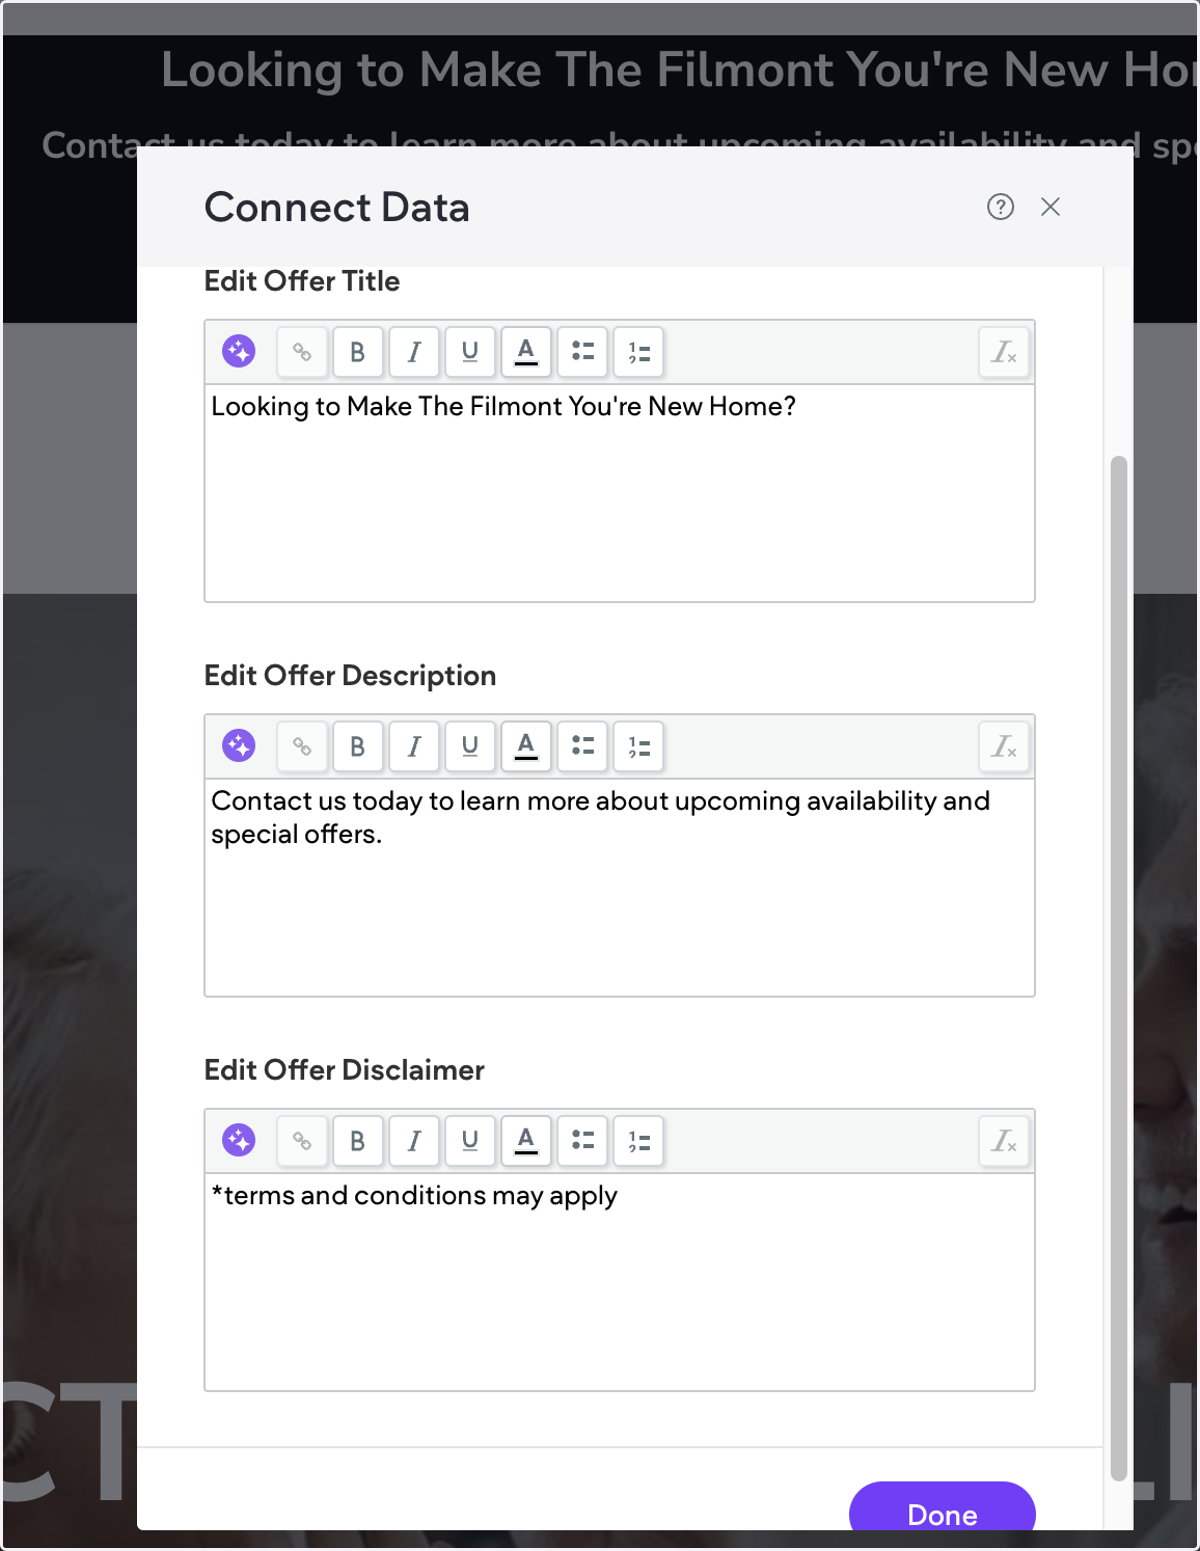
13. It'll open a window where you can edit the special title, description, and disclaimer copy.
Once you’ve made your changes, hit "Done."
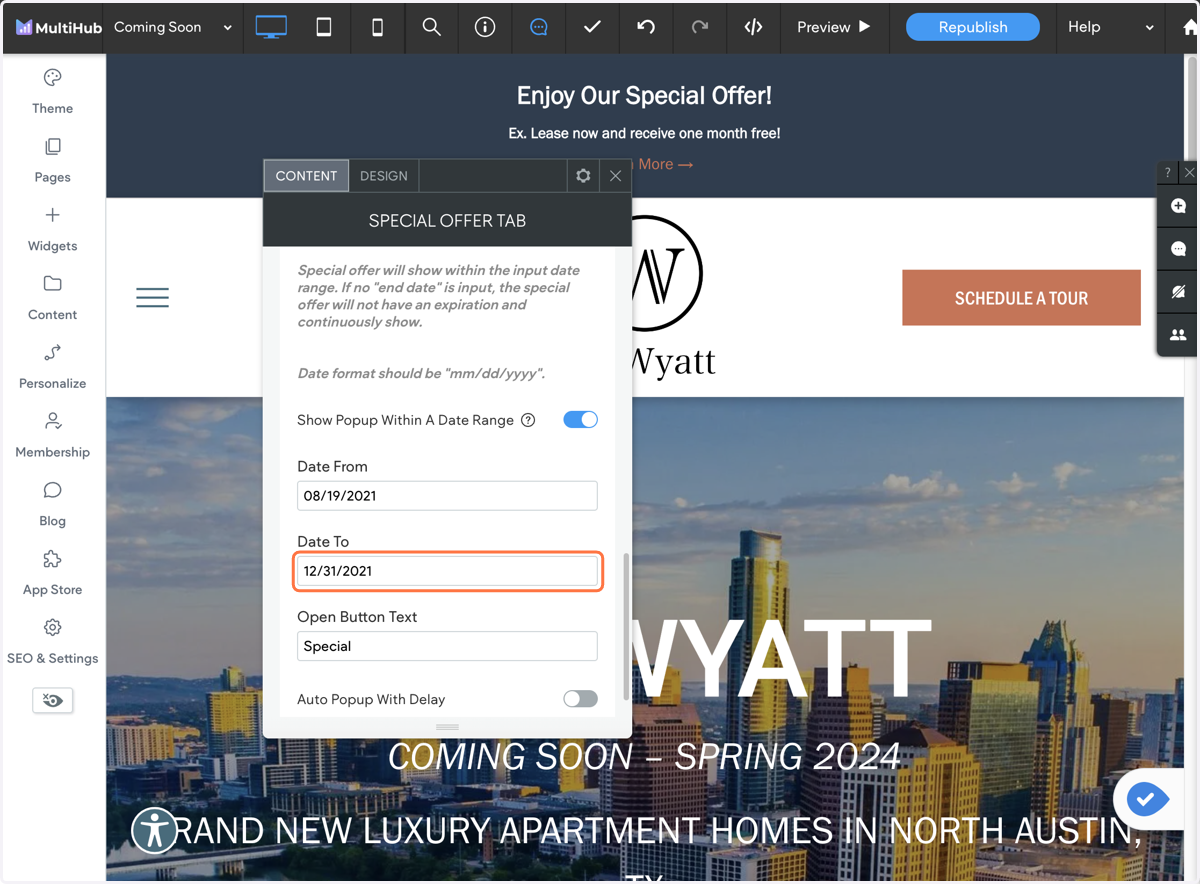
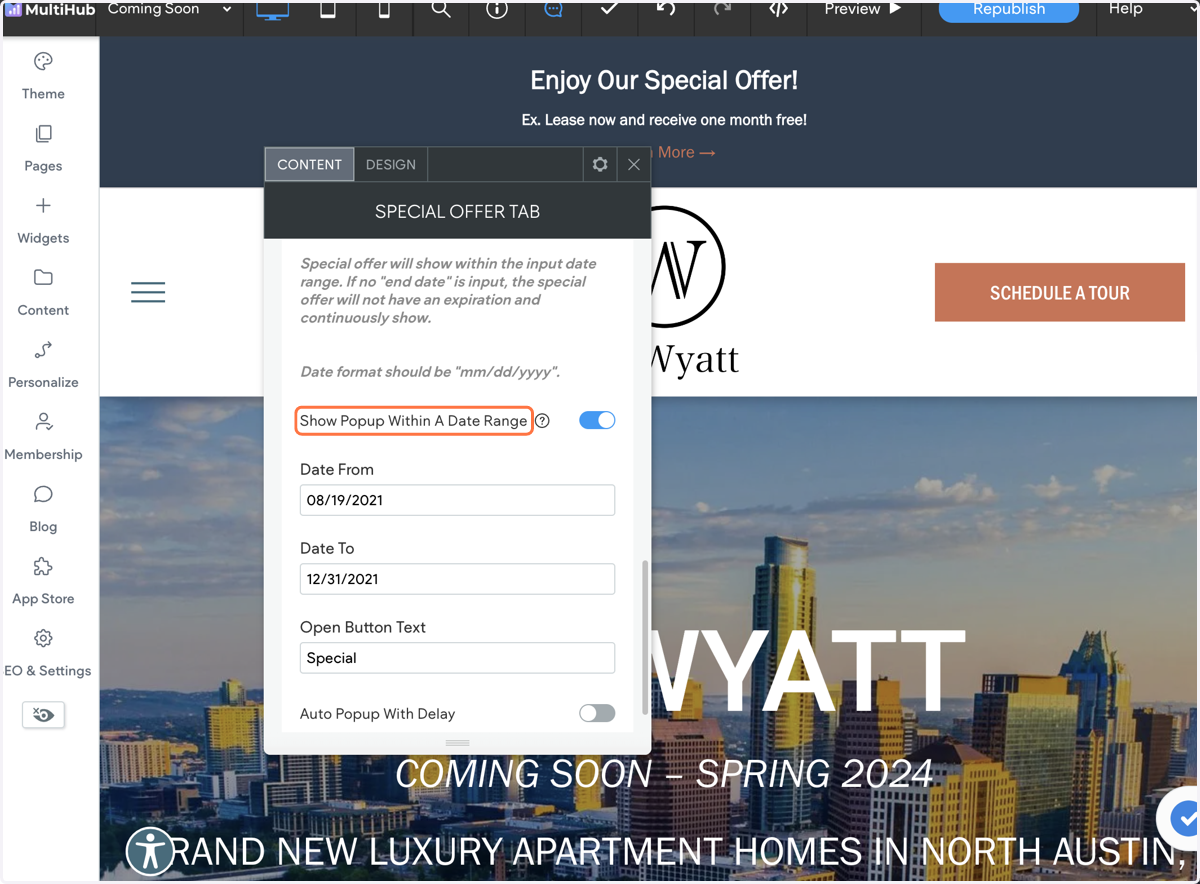
14. If you scroll down the CONTENT tab further, you'll find the option to adjust the special date range.
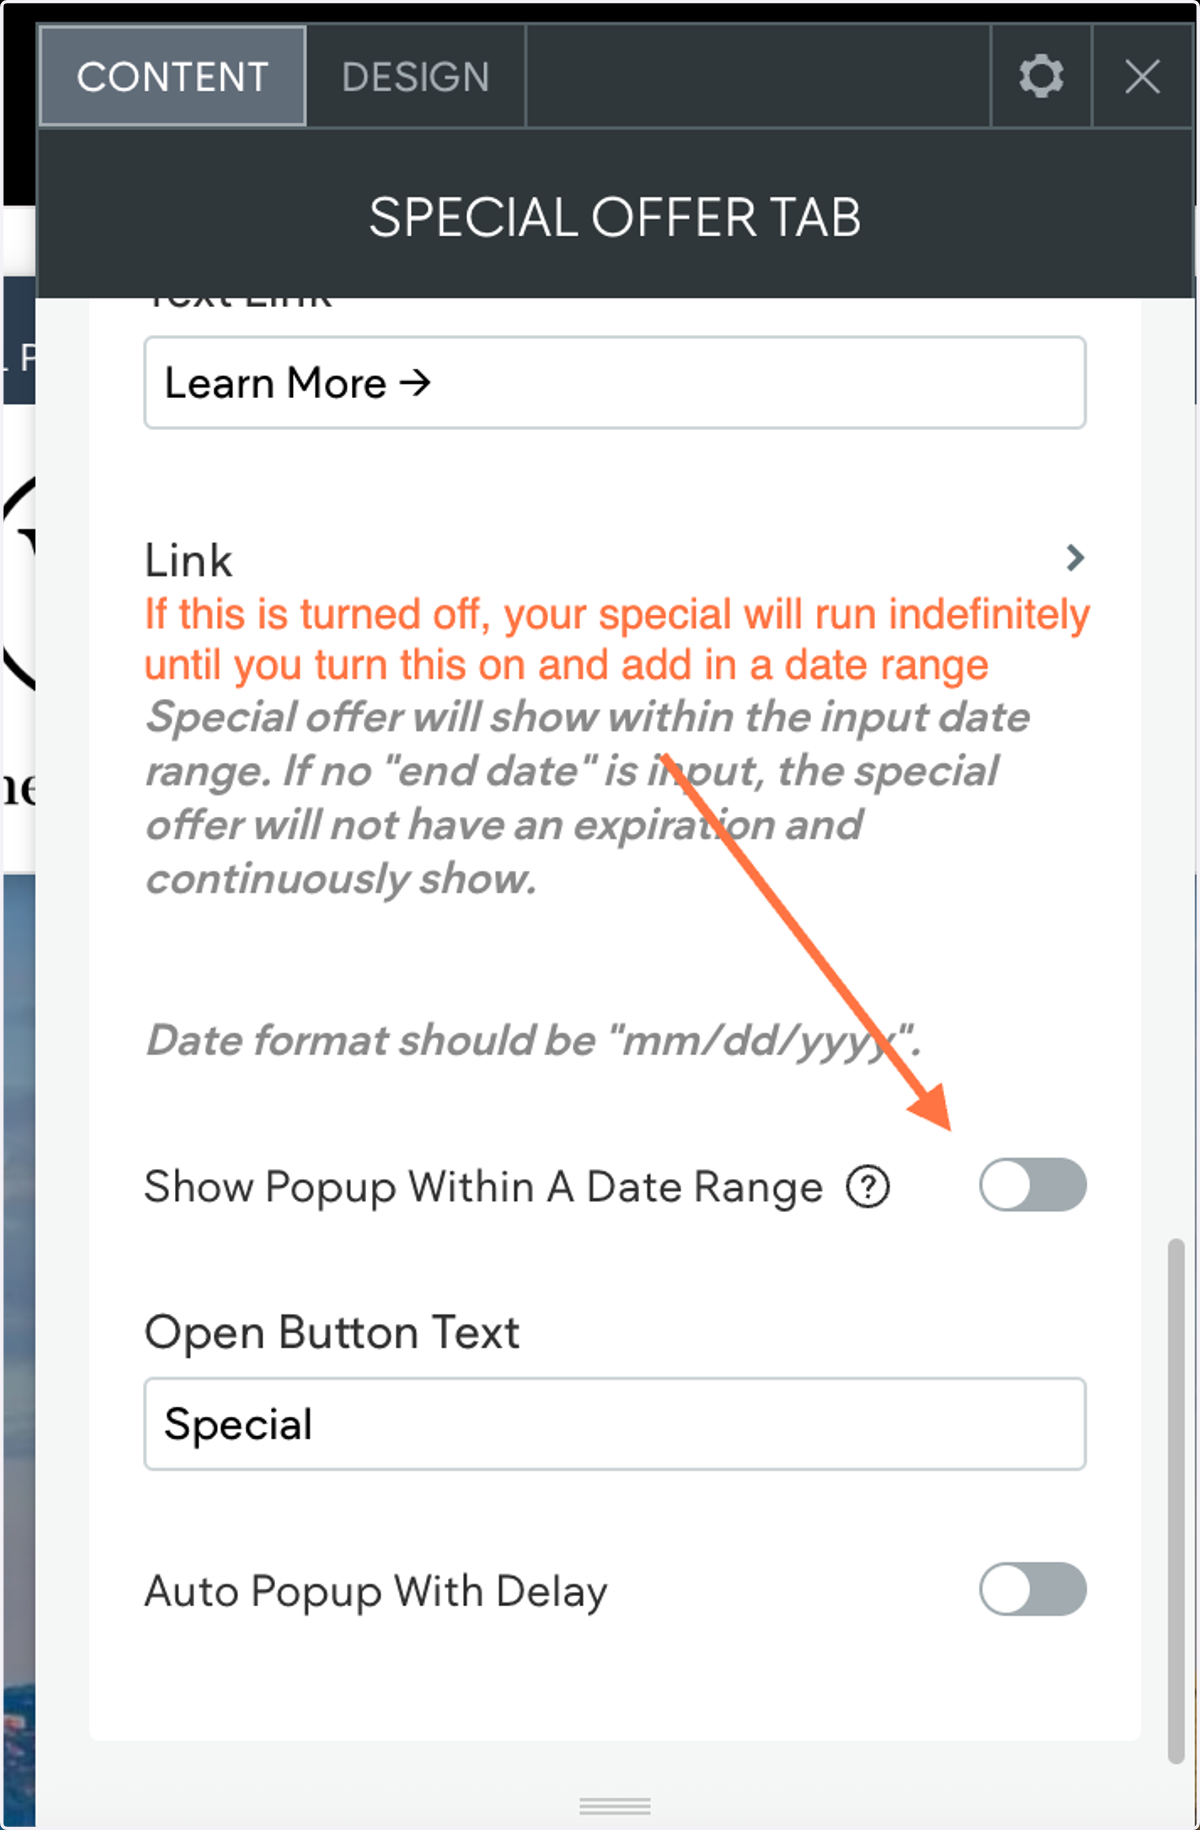
15. If you don't have an end date for a special, you can turn off the "Show Popup Within A Date Range" setting below to have it displayed on the live site indefinitely.
16. If you have a specific time range to display the special, ensure that the "Show Popup Within A Date Range" option is enabled.
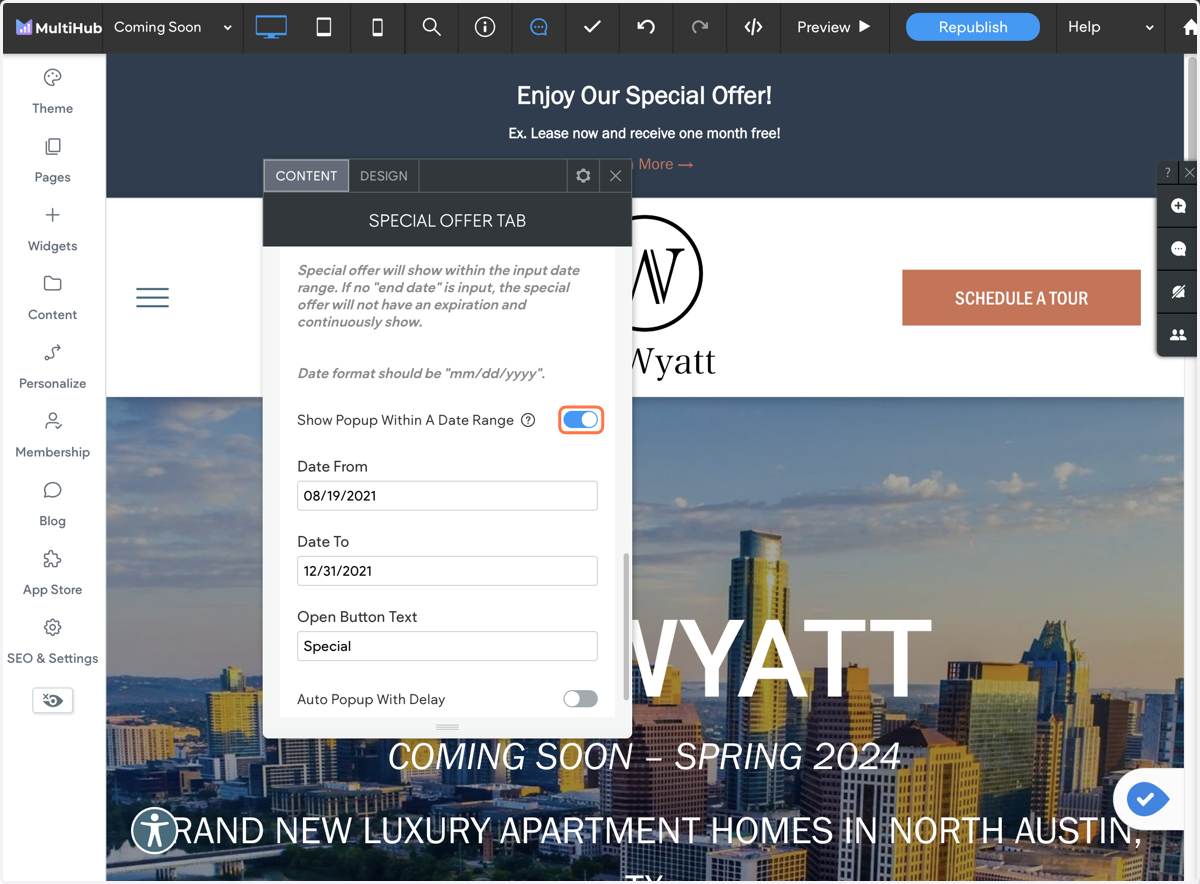
17. Enter the date you would like the special offer to start appearing.
The banner will automatically stop to appearing on the live site once it reaches the end date.
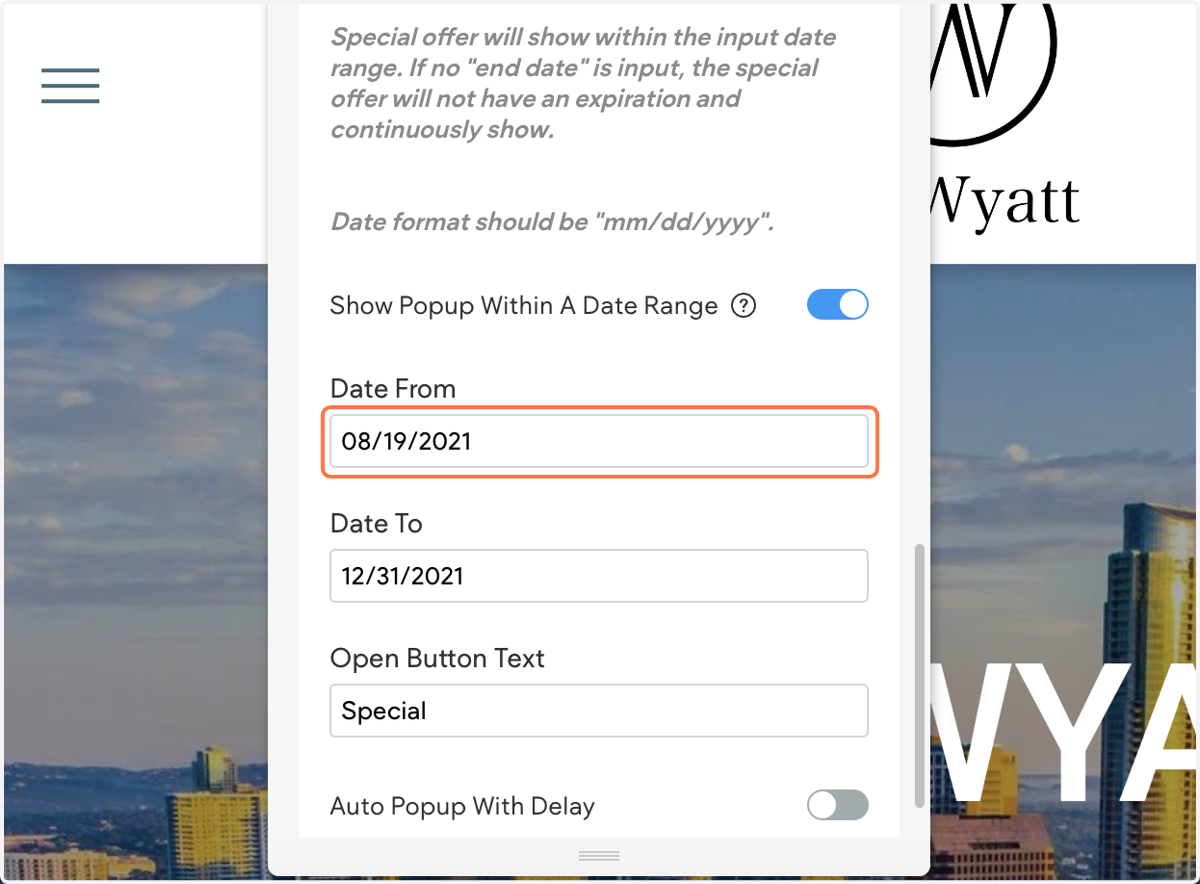
18. If you don't want the banner to be displayed on the live site at all, simply enter an end date that has already passed. The banner will always be visible in the site editor for easy access.
For example, in the screenshot below, the special will not appear on the live site because the year is set to 2021.