OCR - Incorrect Community Reassign User Guide
This user guide provides step by step how to reassign an invoice from OCR to a new Community
Procurement Portal: Brightview
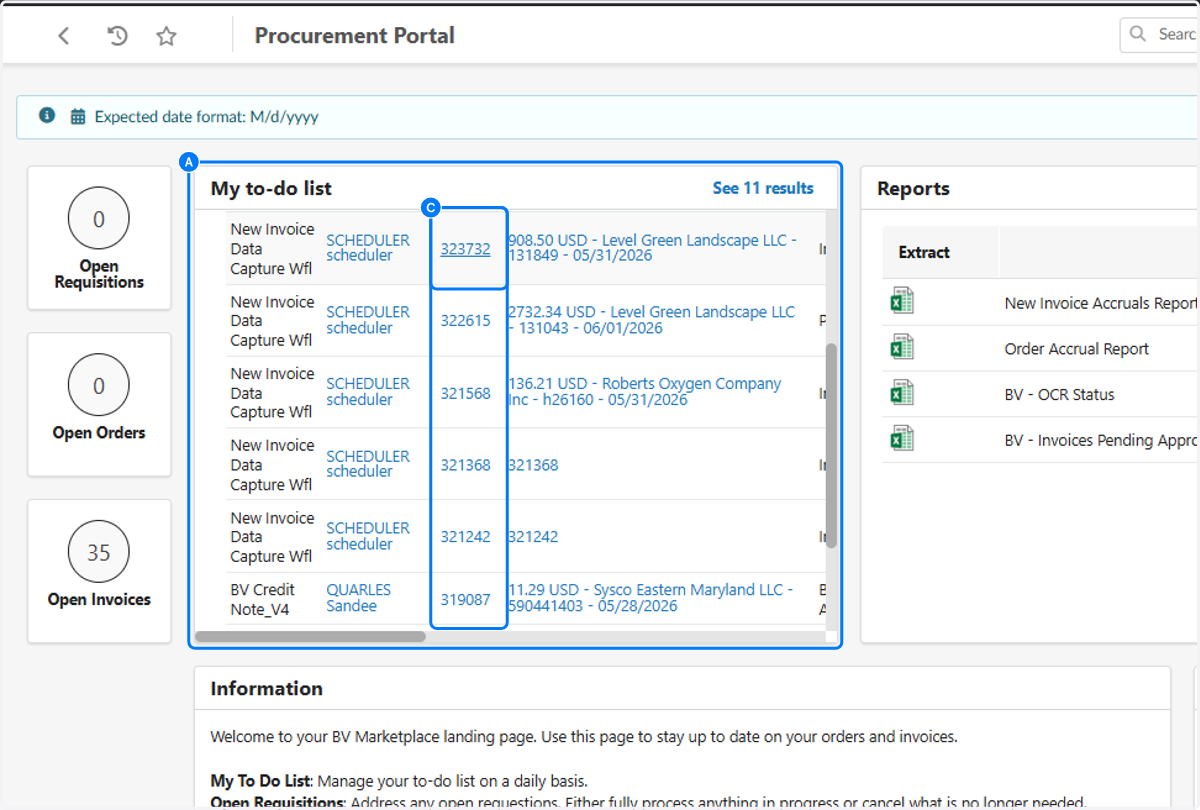
1. A. Identify your My to-do list…
1. B. Locate the invoice capture you would like to work on
1. C. Click on #
You are a BOD reviewing your OCR invoices listed in your dashboard.
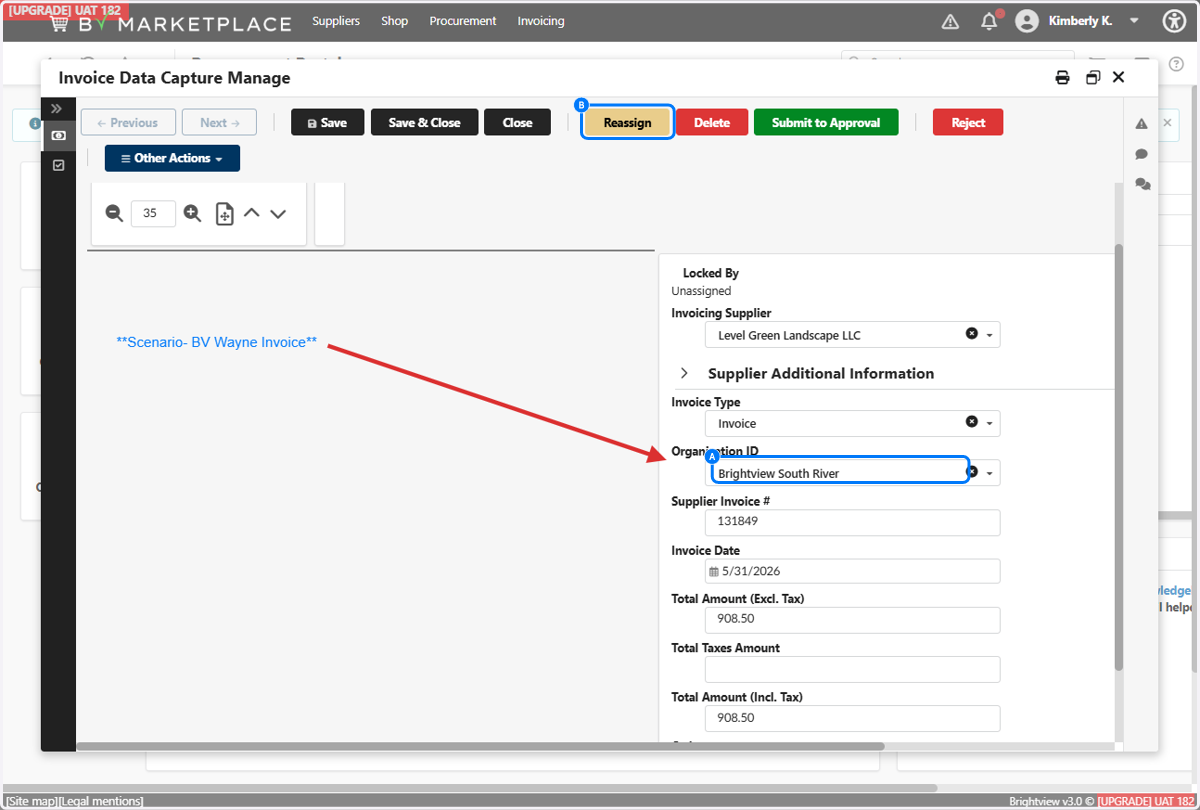
2. Maximize the screen

3. A. Observe the incorrect Organization ID. Leave the incorrect community in the Organization ID box.
3. B. Click on Reassign
In this scenario, the invoice that populates on the left hand side is for BV Wayne. The OCR incorrectly sent this invoice to BV South River. Your task is simple...Reassign to the new community!
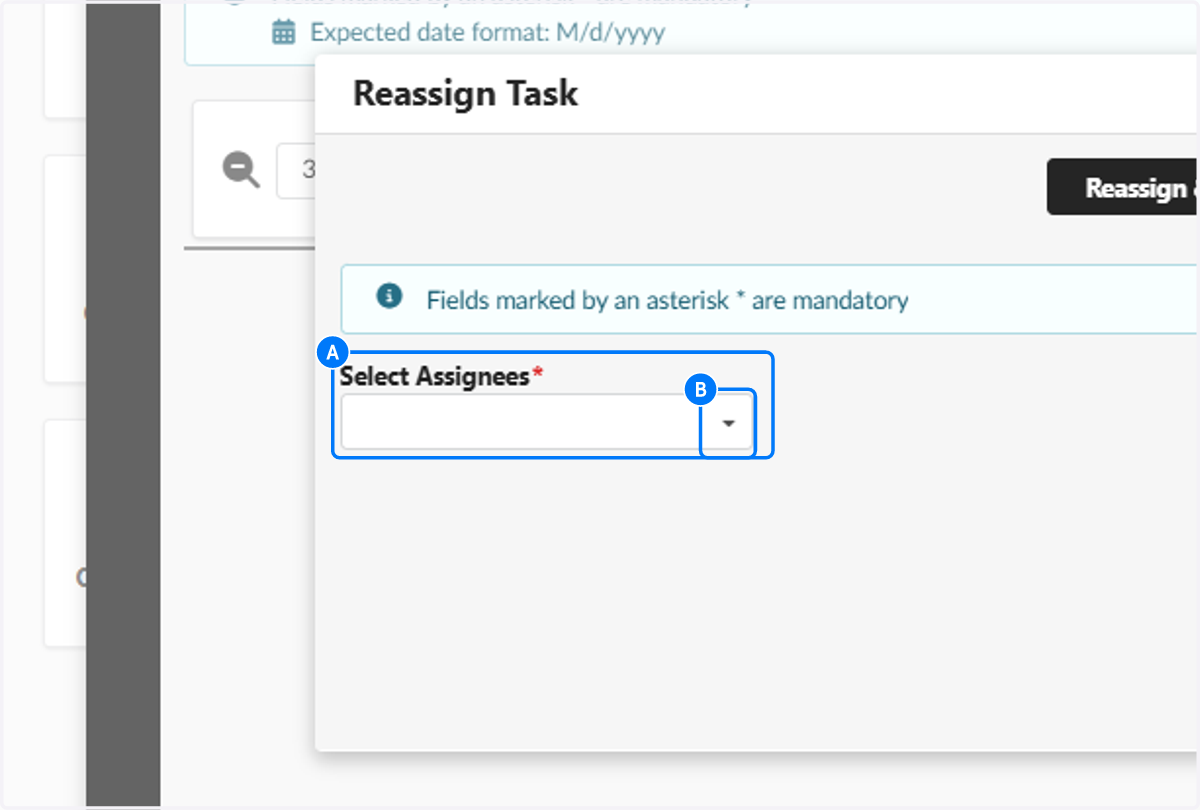
4. A. Identify the Select Assignees box
4. B. Click to expand dropdown
You may not know every community BOD by name. The expanded drop down will allow you to keyword search by community and BOD name.
5. Click on See All

6. A. Type in either the Organization box or BOD Name box to expand your search.
6. B. If searching by Organization, type community name
6. C. Click on Search
Any populated name will be BOD's only!
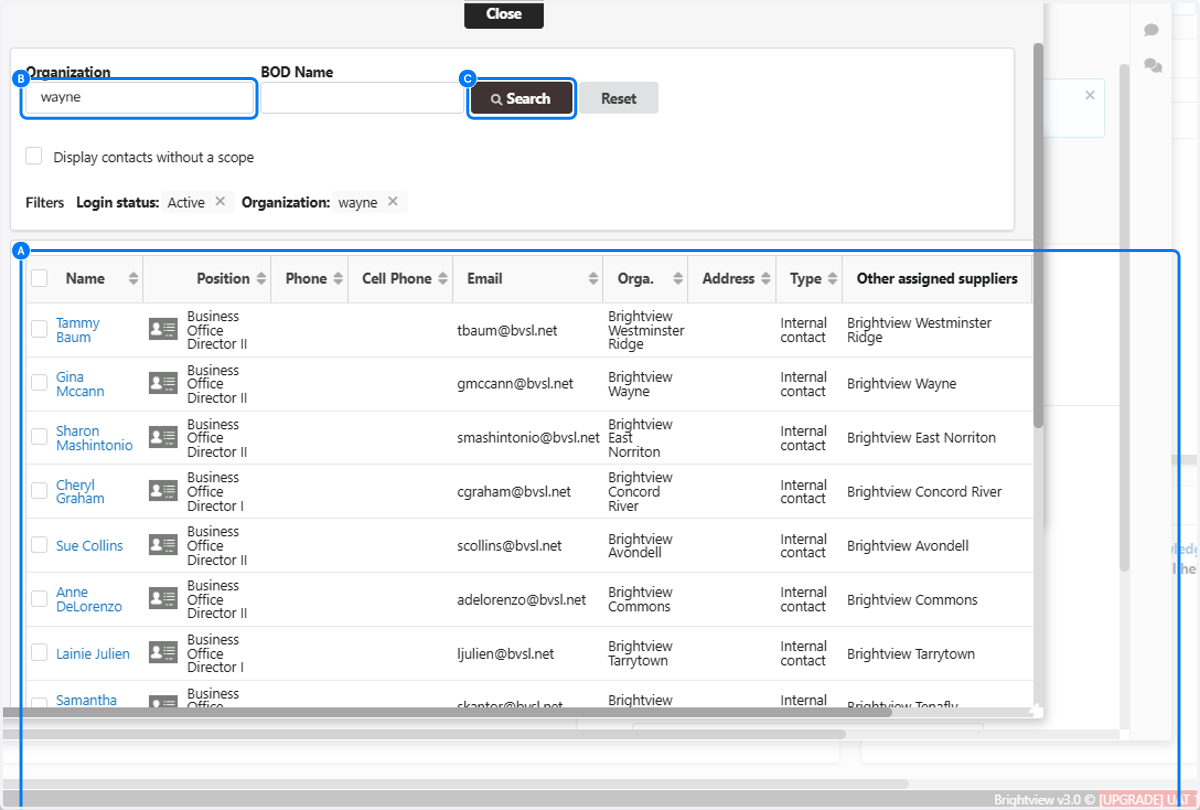
7. Identify the community your searched for populated
In this scenario, the proper community should have gone to BV Wayne.

8. Make your selection by checking this box
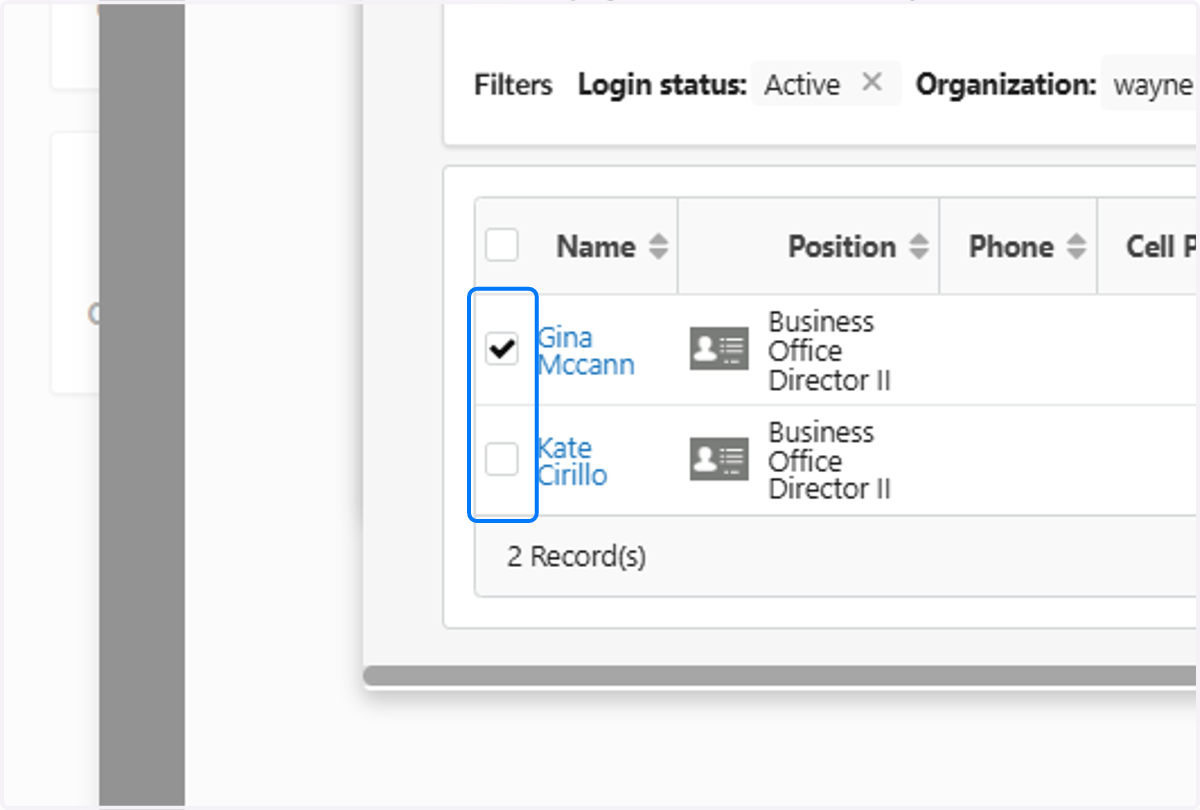
9. Click on Close

10. A. Identify the name you selected is now populated under the Select Assignees box
10. B. Click on Reassign & Close
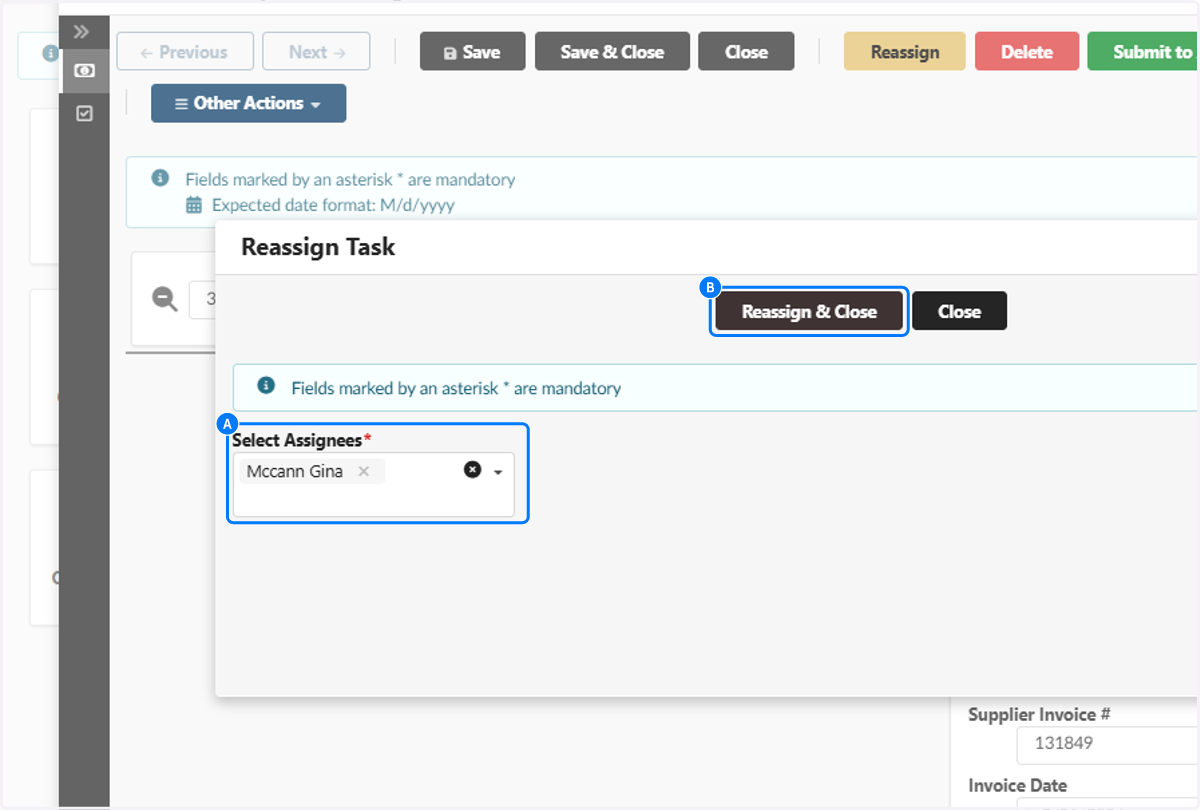
11. Click on Save & Close
You have now reassigned this invoice and it is removed from your dashboard!
