How to create an Ad-Hoc Pay Run
Tango
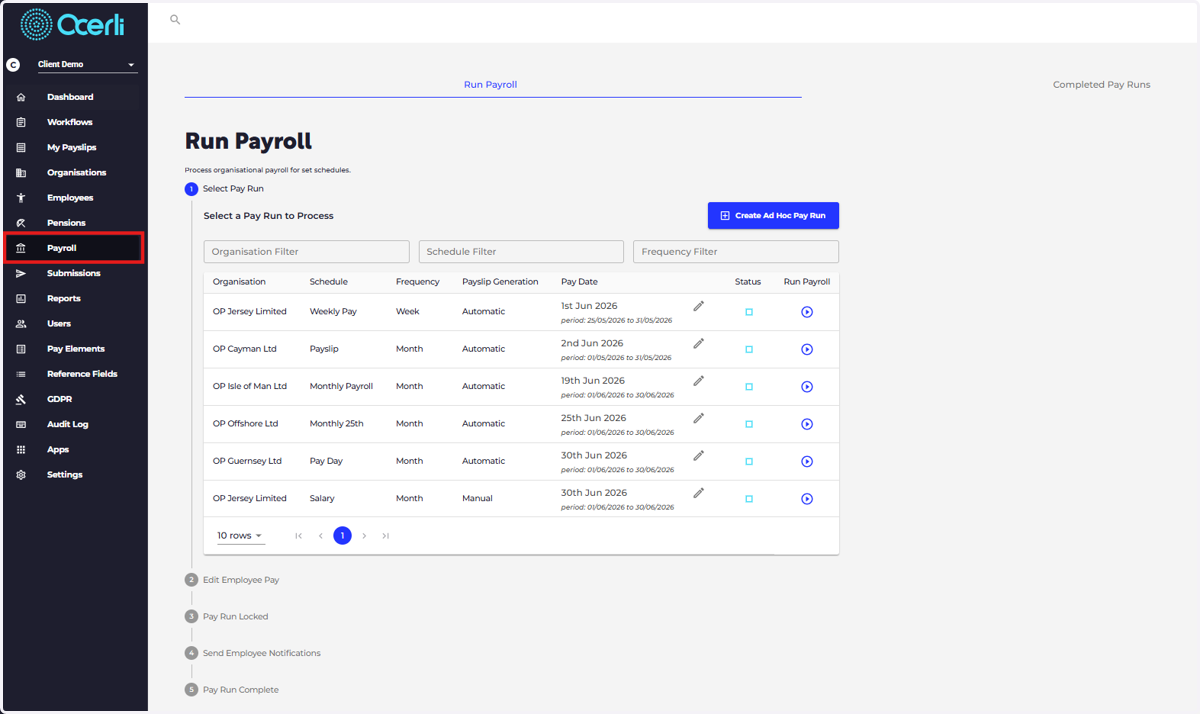
1. Click on Payroll on the main menu on the left hand side of the screen
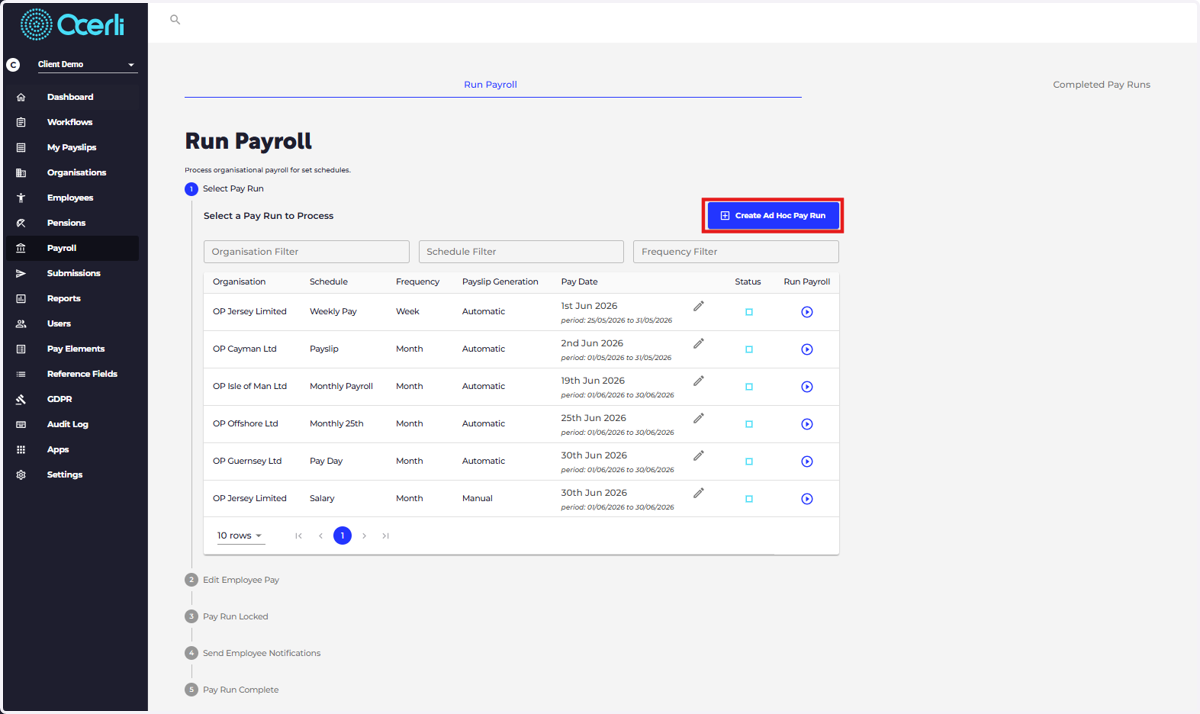
2. Please select 'CREATE AD HOC PAY RUN'
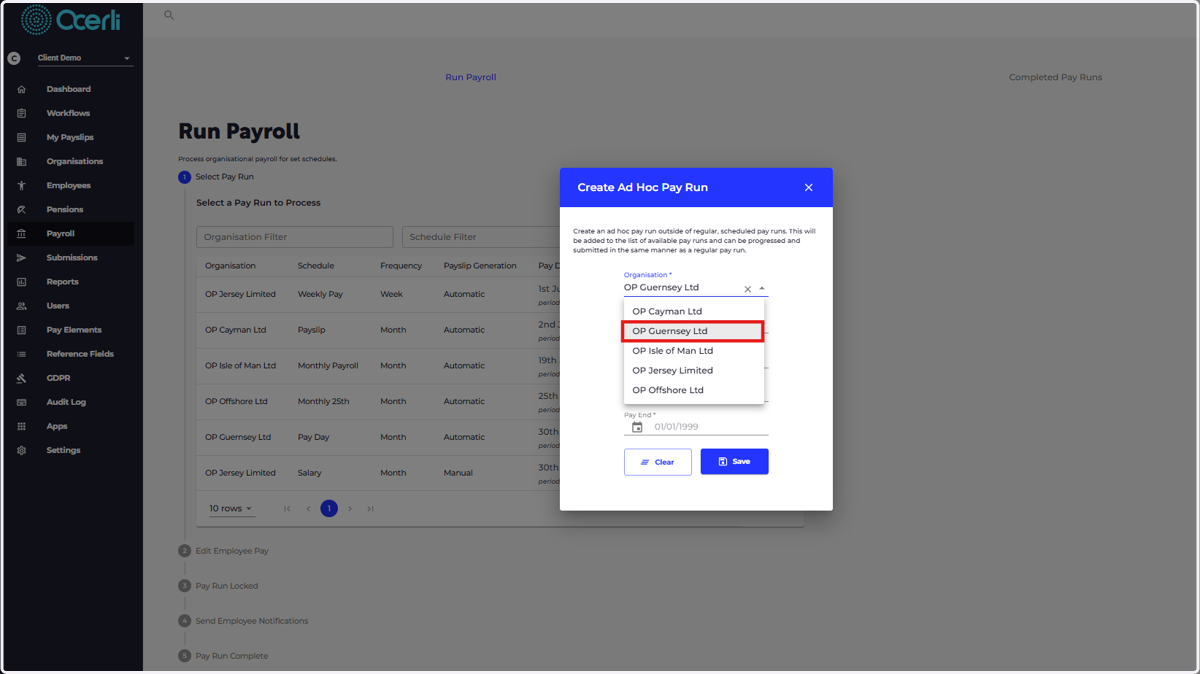
3. Select the Organisation by using the dropdown menu or by typing into the field
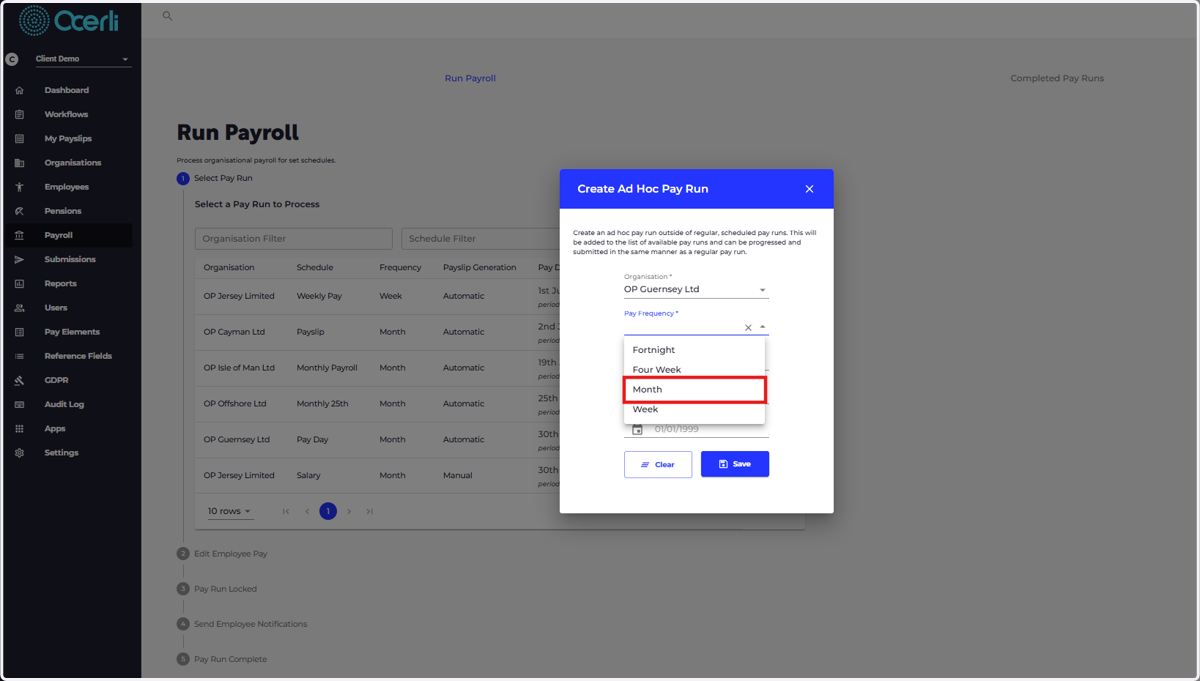
4. Select the Pay Frequency for this pay run
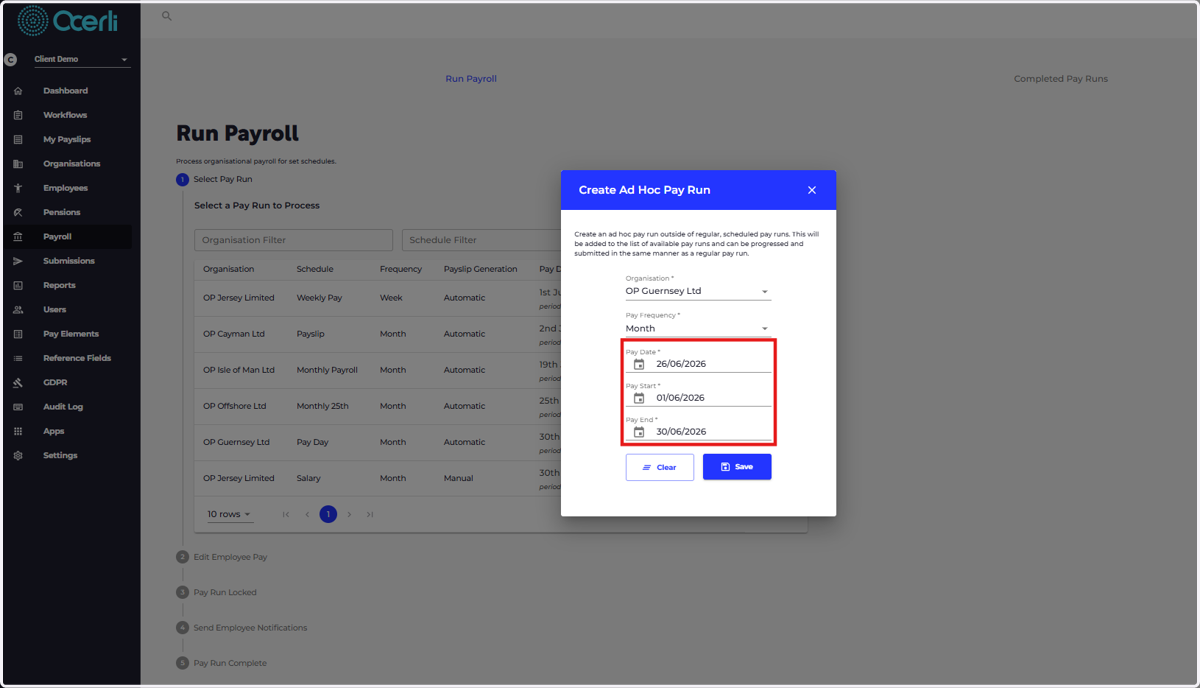
5. Type in the Pay Date for this ad hoc pay run, along with the Pay Start and Pay End Date
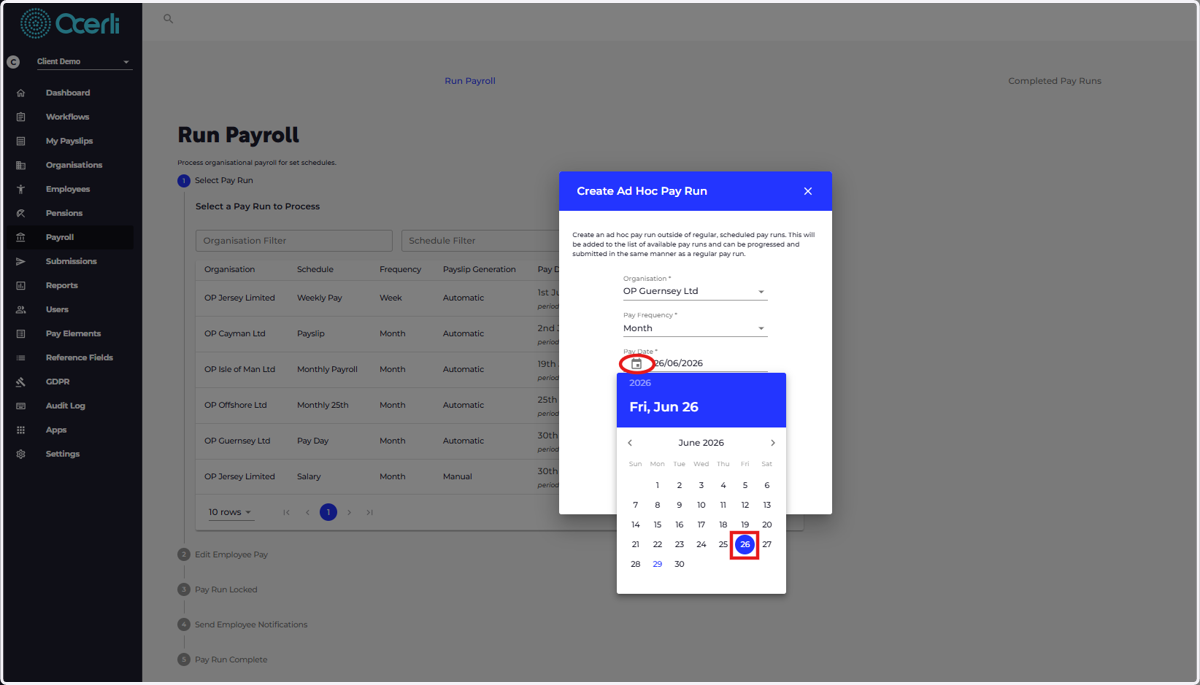
6. You can also use the calendar to choose a Pay Date and Pay Start and End Date
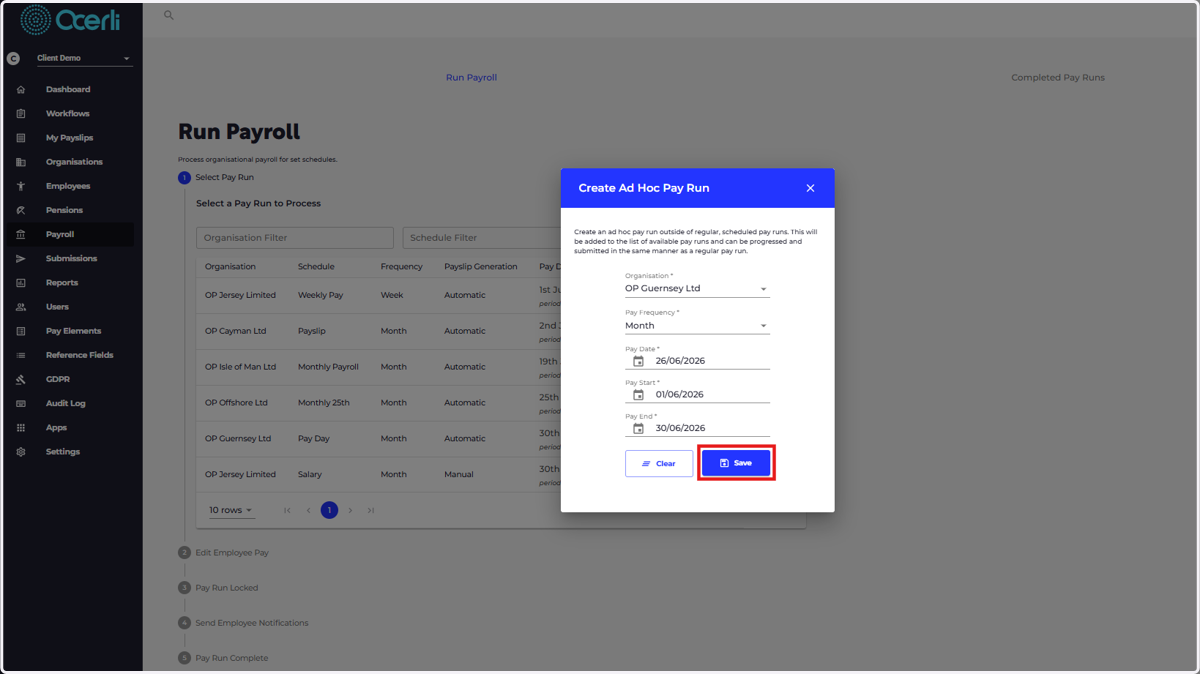
7. Once you have completed the above fields, please select 'SAVE'
At this stage the Ad Hoc Pay run is added successfully. You can then search for it and review or start the pay run at any time.
8. To review the pay run you can type in the Organisation name or simply find it within the list of pay run's
An ad-hoc pay run will have the schedule name as Ad Hoc and the Pay Frequency.
For example, in this case 'Ad Hoc Month'
You can then select the 'Run Payroll' icon
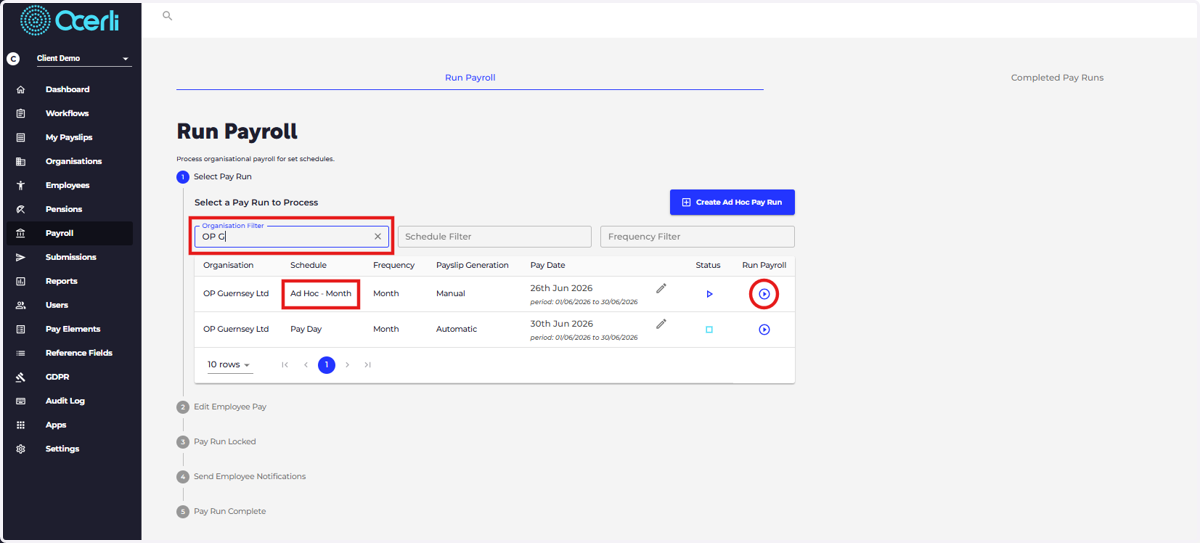
9. You can then begin your payroll
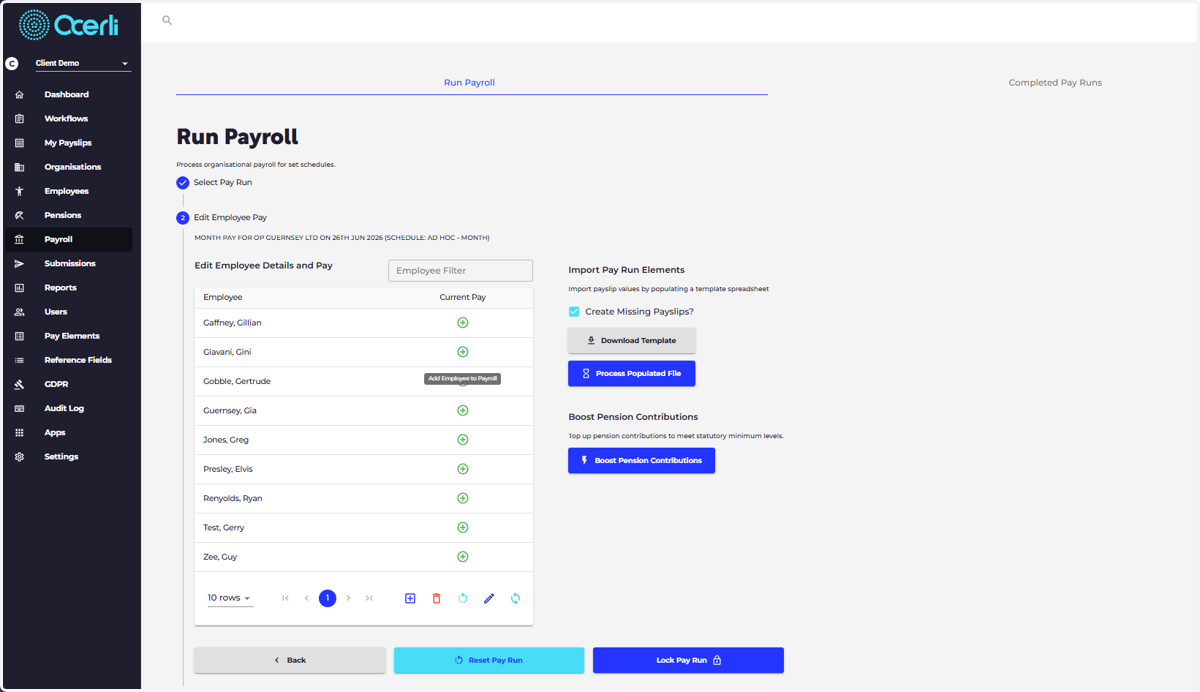
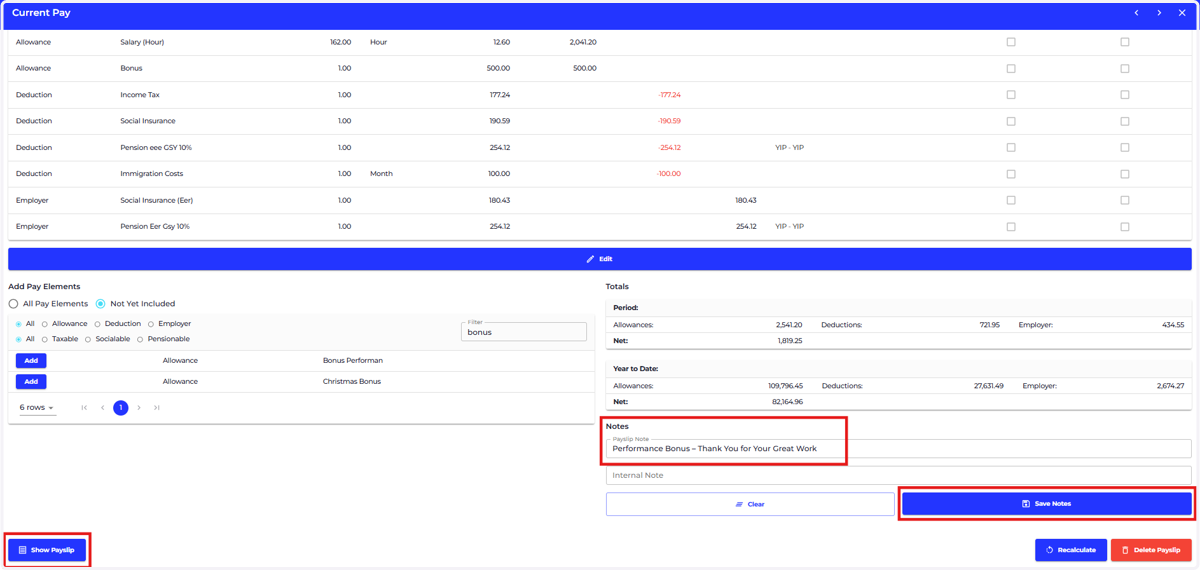
10. If you would like to add a note on the payslip for an employee, please add in the payslip note at the bottom right of the screen and press 'SAVE'.
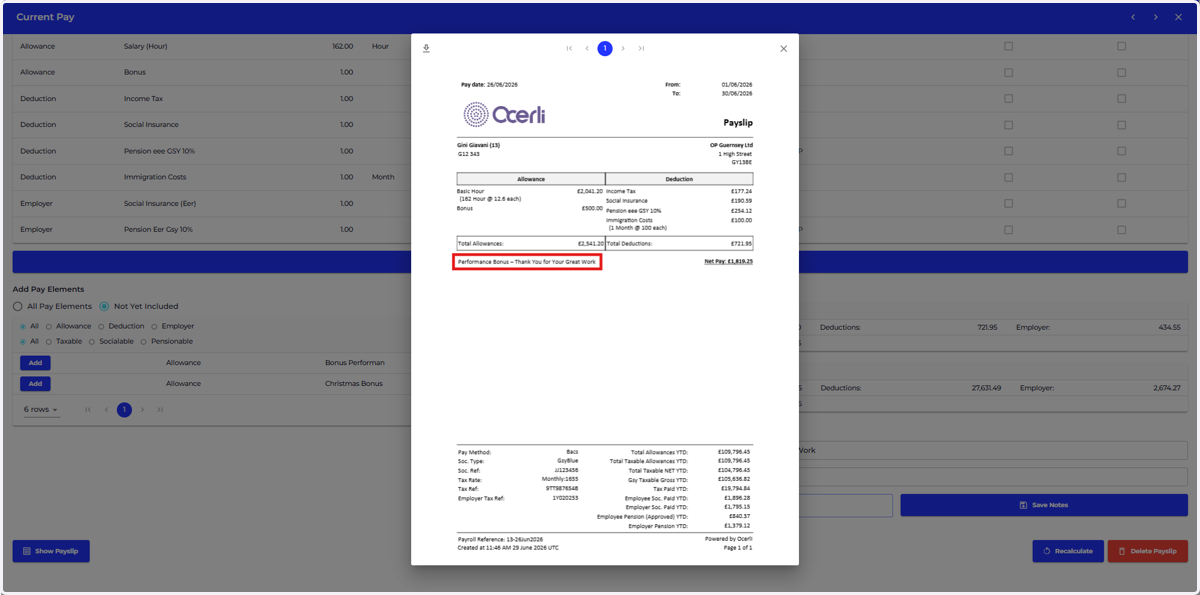
You can check to see how this looks on the payslip by selecting 'Show Payslip' at the bottom left of the screen.
11. You can review the note on the payslip, as shown below
12. If you would like your scheduled pay run to be removed from the 'Run Payroll' screen, please firstly select the Run Payroll icon next to the relevant pay run.
In this case I would like to remove the Pay Date 30th June 2026 for OP Guernsey Ltd
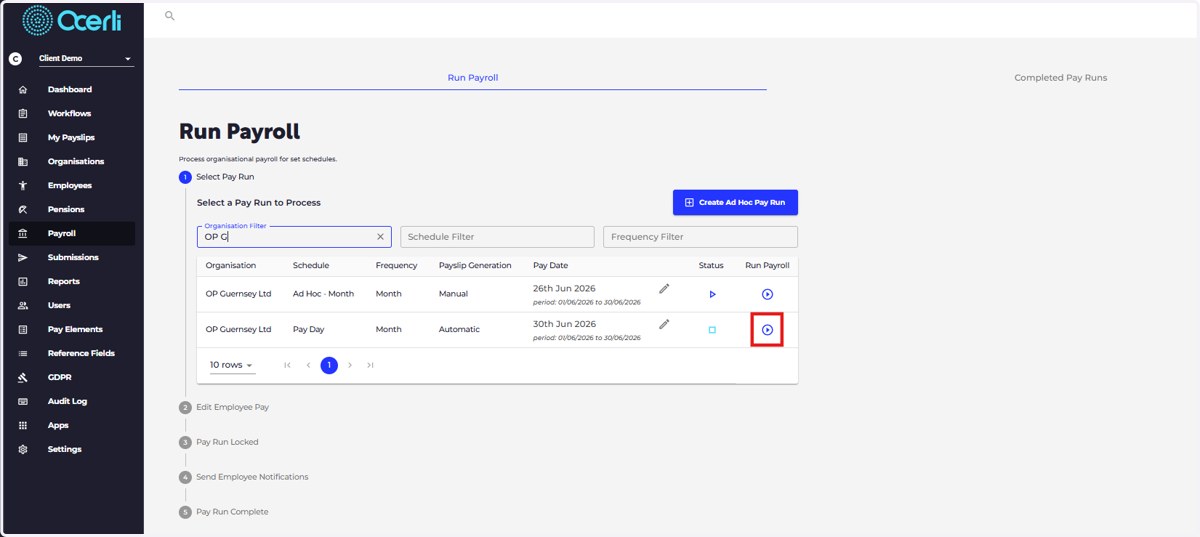
13. Select the bin icon to delete all payslips from this pay run.
This will allow for the pay schedule to roll over to the next pay date and this pay run will appear in the 'Completed Pay Runs' screen
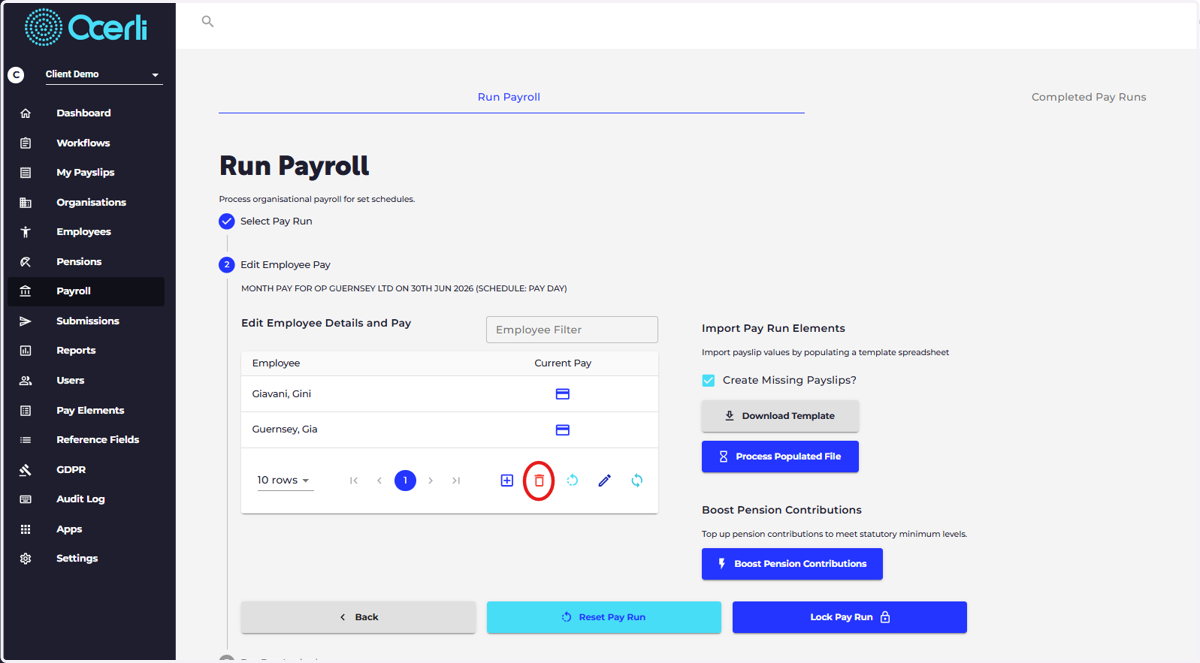
14. Once the payslips have been deleted, the icon next to each employee should be the green + icon as shown below.
Once you are happy, select 'Lock Pay Run'.
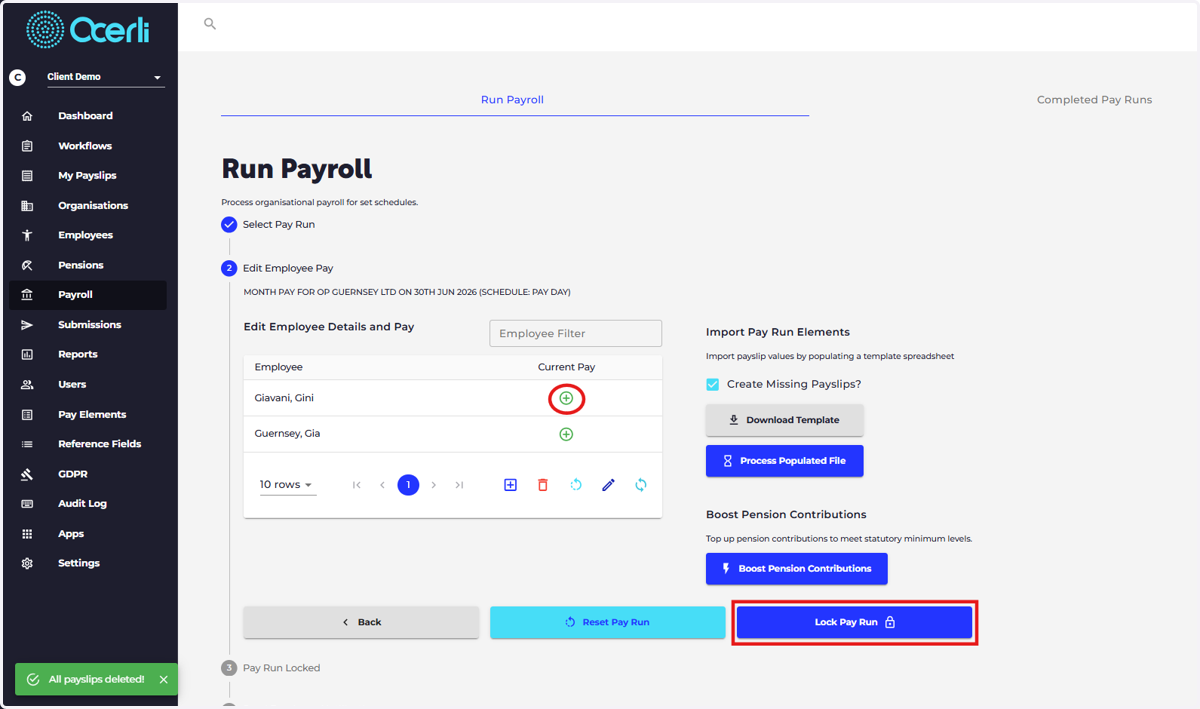
15. Select 'Next'
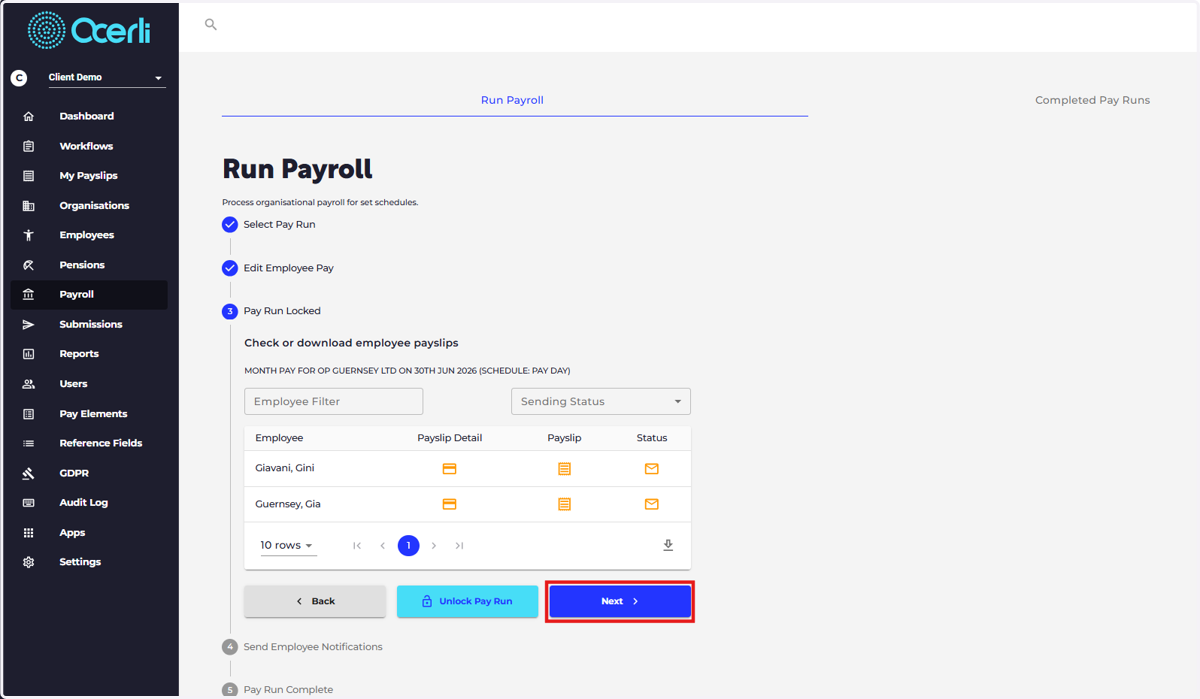
16. Select 'Complete Pay Run'
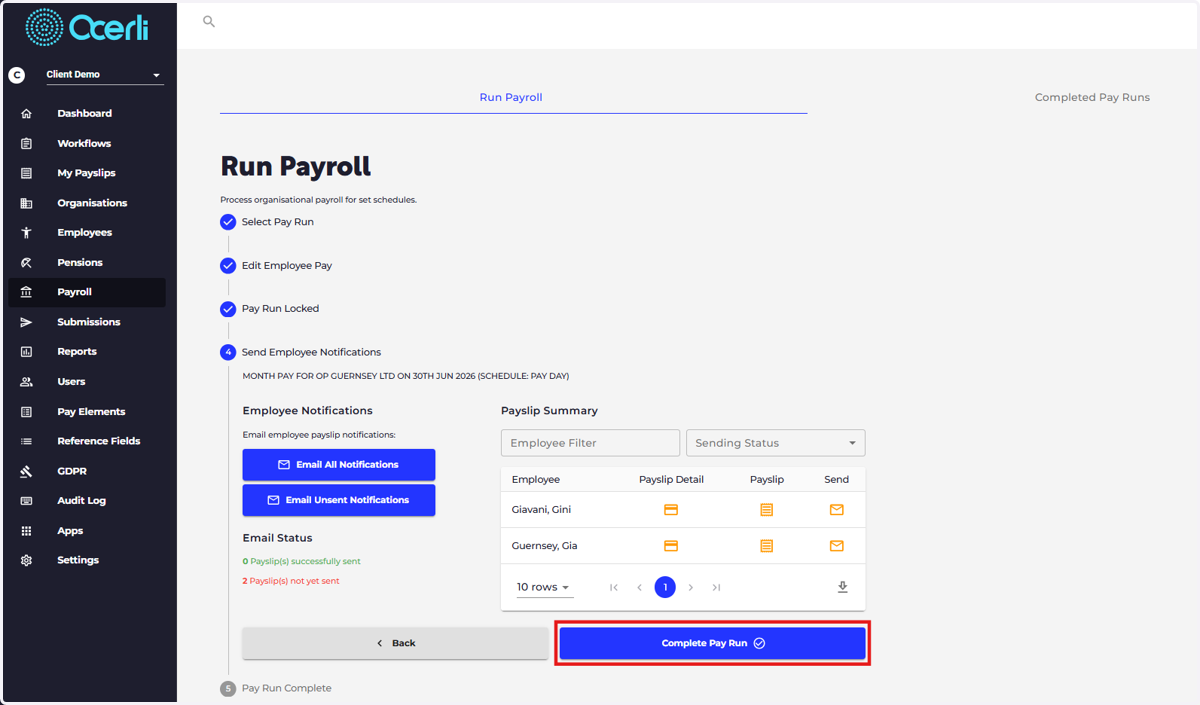
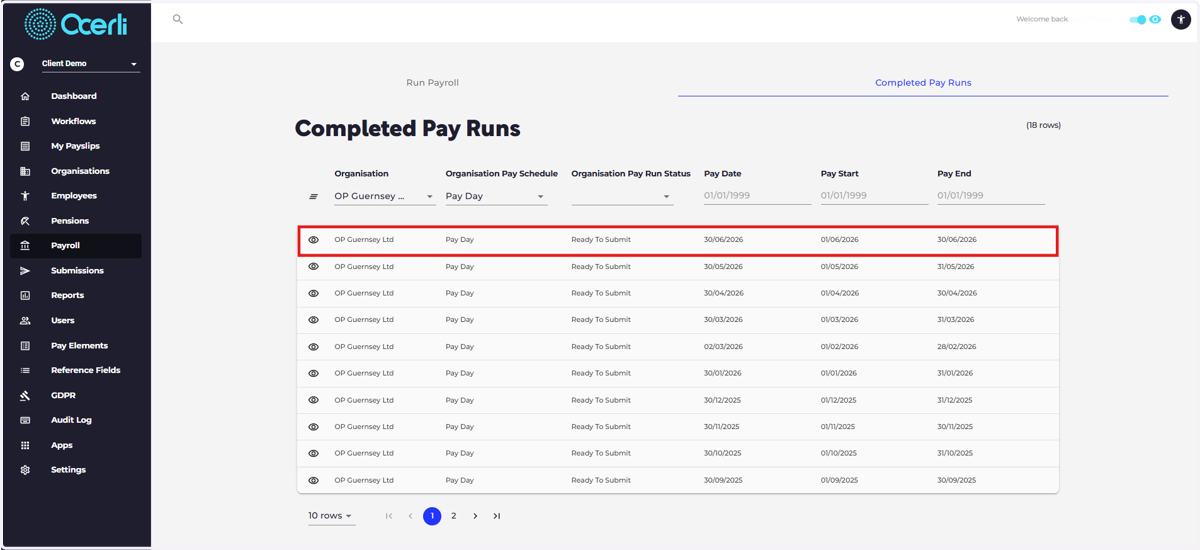
17. You can then view the empty pay run within the 'Complete Pay Runs' screen