Leasing Workflow: Transfers
This guide shows Business Office Directors how to process an internal transfer in the CRM leasing workflow.
5/7/2026 Update: Adding steps for Unit Transfers in Voyager to help BODs keep track of whos transferring. This is not a required step, but encouraged.
Additionally, due to SafelyYou, we are adding an additional step for Residents that are tranferring from IL to AL/WS/EC.
Yardi Systems, Inc. - Yardi Voyager
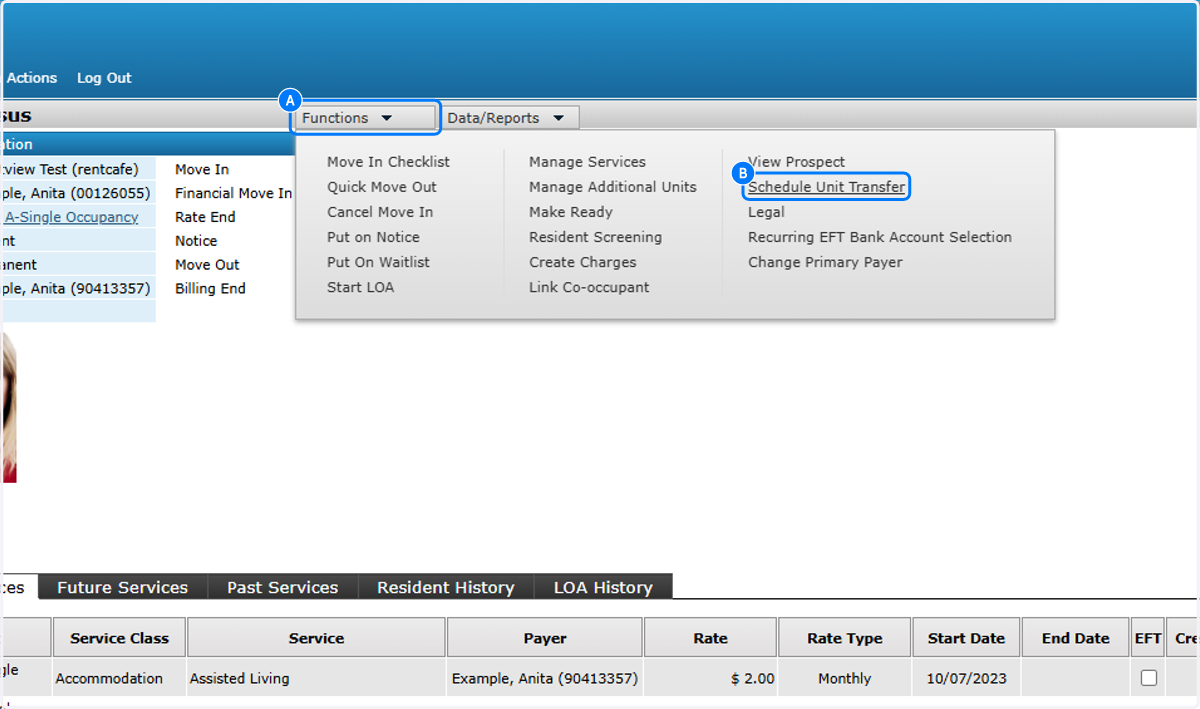
1. A. Click on Functions
1. B. Click on Schedule Unit Transfer
2. Change the Date, Unit and if the Care Level is different for the unit the resident is transferring into

3. Click on Save
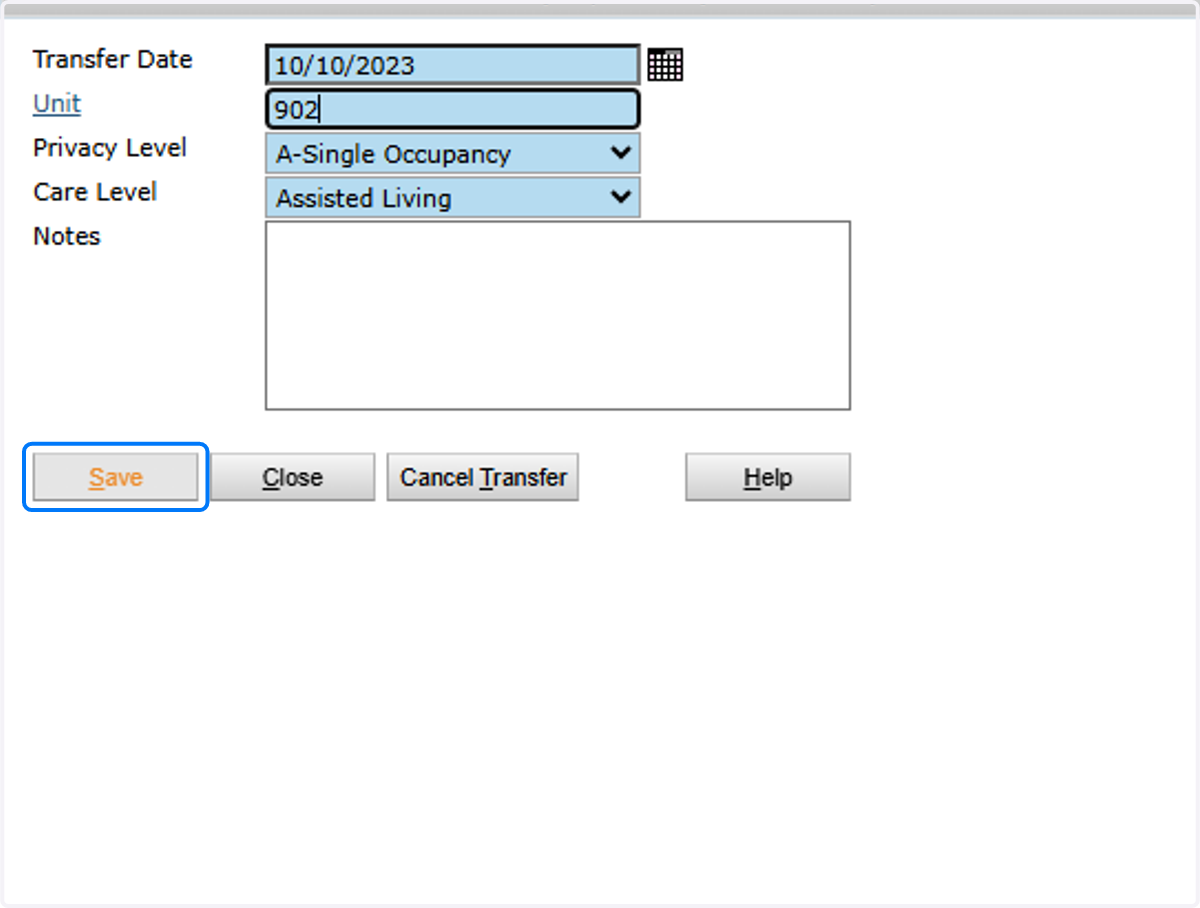
4. Click on Close

Yardi Systems, Inc. - Senior CRM
5. Open Resident Profile
Search for the resident from the CRM dashboard based on their status. Click the link on the resident's name to open the profile.

6. Click on Anita Example(00126055)

7. Click on Documents

8. Click on New Quote Sheet

9. Switch the CareLevel if applicable

10. Click on the Units Filter to find the new apartment.
To show all results, click the triangular filter button and select "Show All Units"

11. Enter new effective date (date of transfer)
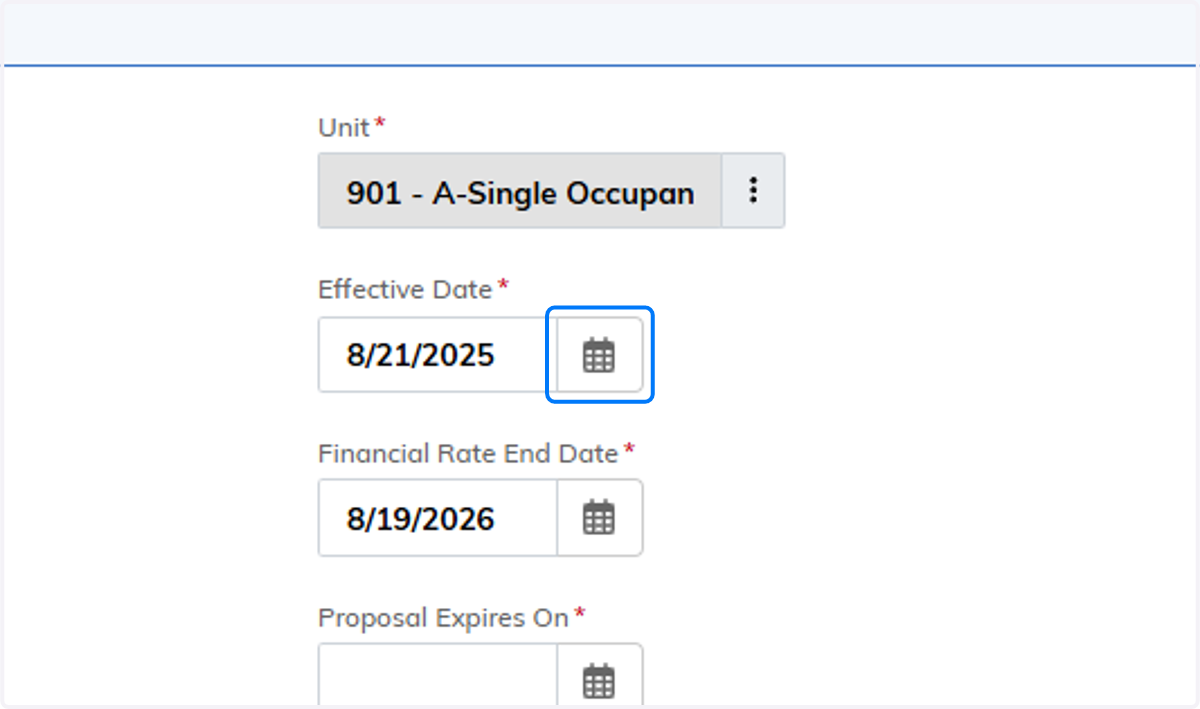
12. Enter the new Financial End date

13. Select an expiration date for the proposal
This is not an important field for transfers, however push it far out enough that the date will not overlap the day they actually transfer

14. Click on Save & Next

15. Click on the Accommodation drop down, and select the monthly rate type
Please note that the rate of the previous unit will be defaulted. To pull in the correct rate, you must clear the Accommodation of the old rate and then reselect the Accommodation which will then pull in the correct Unit rate

16. Verify the correct rate is pulling into the proposal.

17. Click on Save & Next if all of the recurring charges are accurate

18. Click next on the Approvals step, as we do not use this

19. Accept the Quote Sheet
On the Review Quote step, verify that all required data has been entered correctly, paying particular attention to rates, payers, and dates. If anything needs to be updated, return to those steps in the workflow and make corrections.

20. Click on Generate Document

21. Verify the correct Document type, and dates

22. Click on Save & Next through the term and charges
Verify the charges are accurate

23. On the who is signing page, select either E-Signature for a RentCafe signature, or Manual for a wet signature

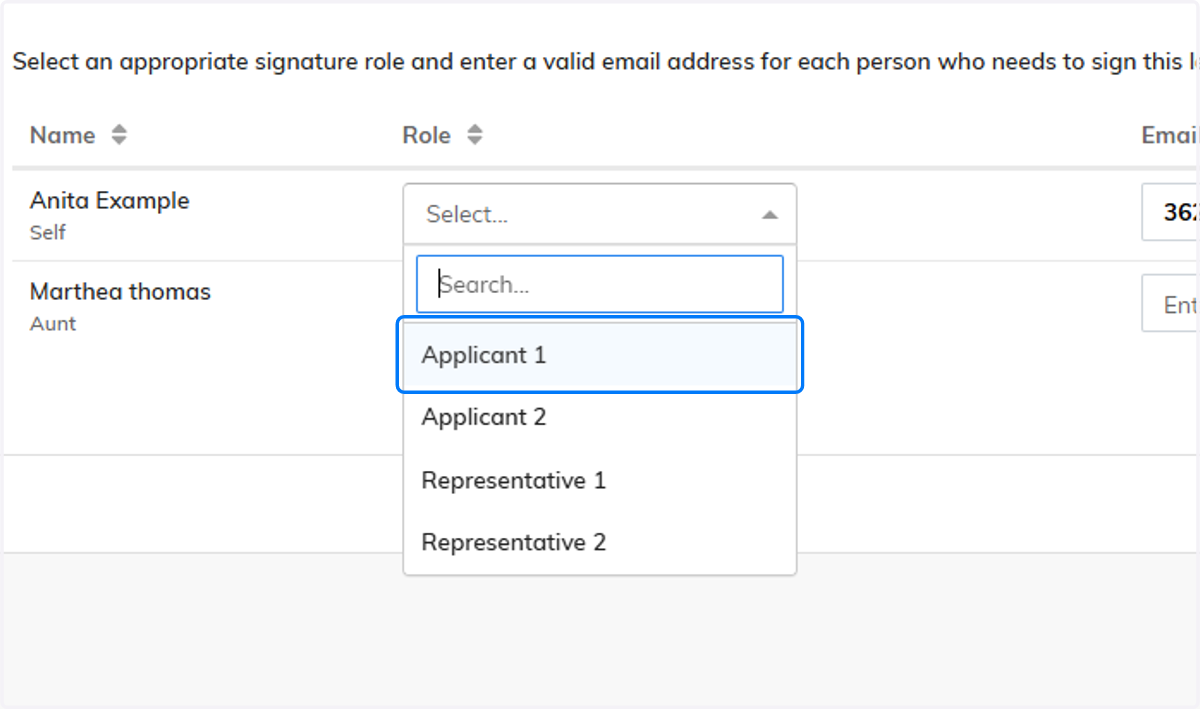
24. Select the role for who is supposed to sign
There is no need to give every contact a role, only select ones that will actually be signing the lease
25. Click on Save & Next

26. Click on Finalize Lease

27. Click View Document to print out the lease

28. Click or Drag a signed lease to be able to move the workflow into manage services

29. Click on Execute Lease after a signed lease has been loaded

30. Click on Close

31. Click on Manage Services in the Resident Profile

32. Click on Next
This may or may not be a Zero dollar batch, it just depends on if Billing for the next month has already been completed
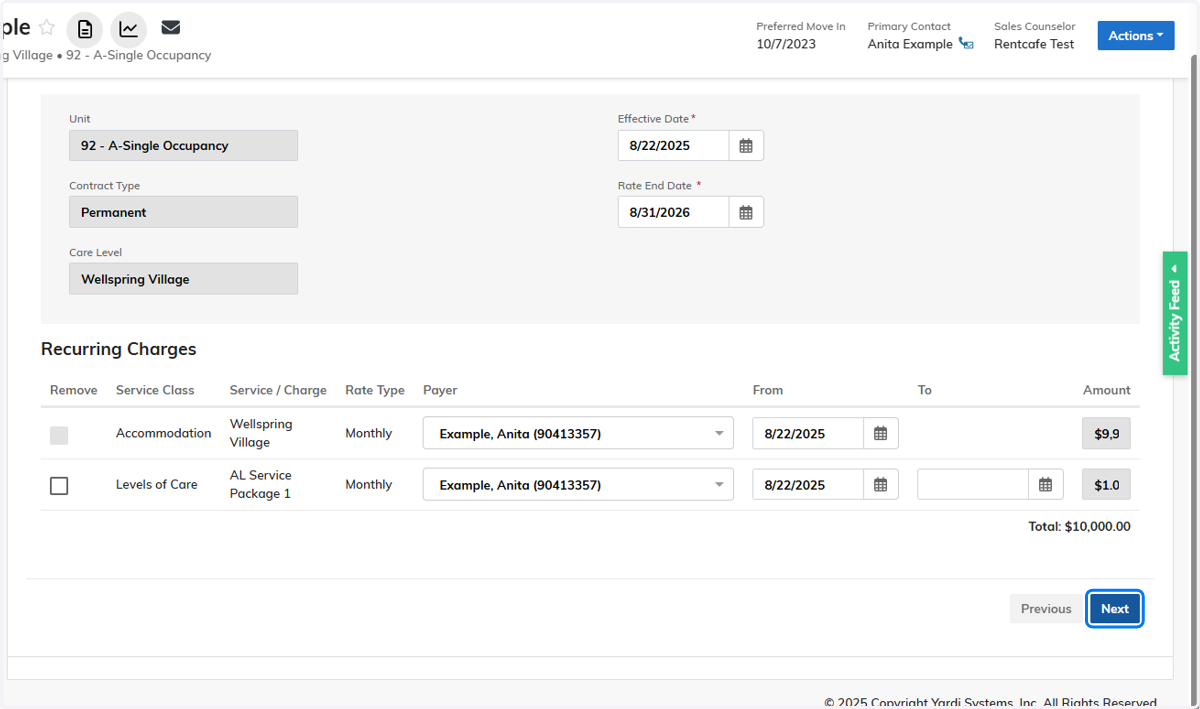
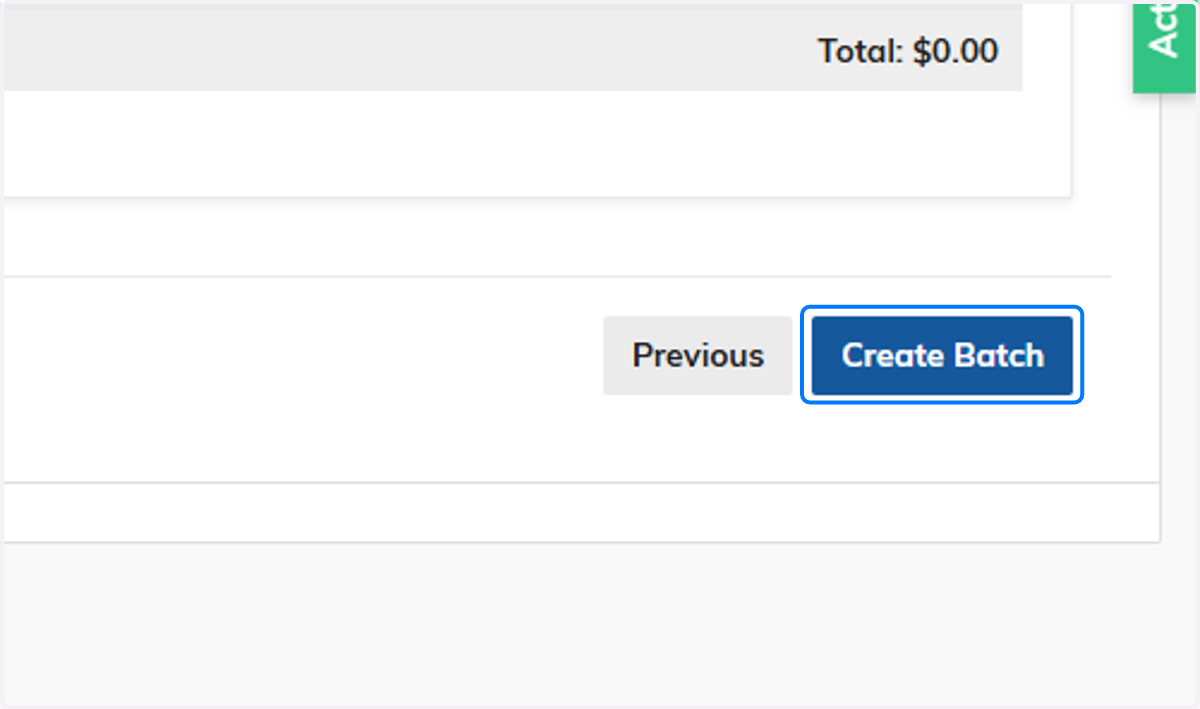
33. Click on Create Batch
You will need to do this for the Co-occupant as well, if there is one.
34. STOP HERE IF THIS A TRANSFER WITHIN THE SAME LEVEL OF CARE
If this is an IL resident transferring into AL/WS/EC please follow the steps below.
Yardi Systems, Inc. - Yardi Voyager
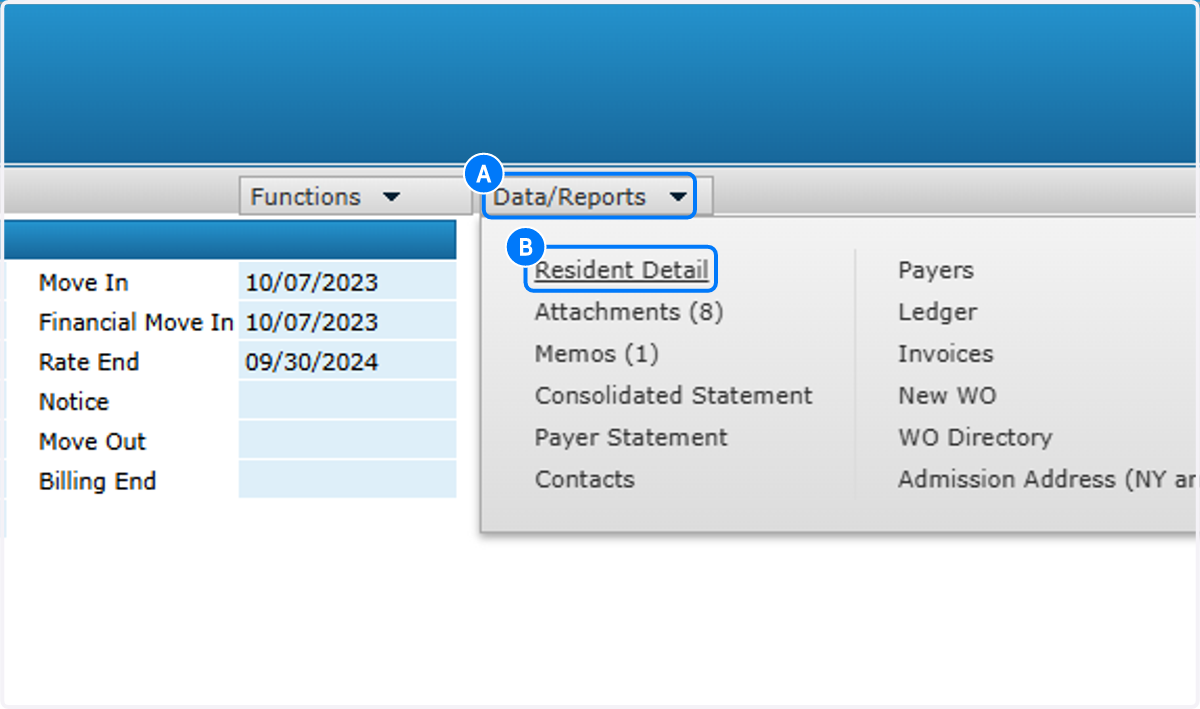
35. A. Click on Data/Reports
35. B. Click on Resident Detail
36. Update the Physical Move In Date to the date of the transfer to the new Care Level. So if the resident is moving to AL on 6/1/2026, please put in the move in date of 6/1/2026
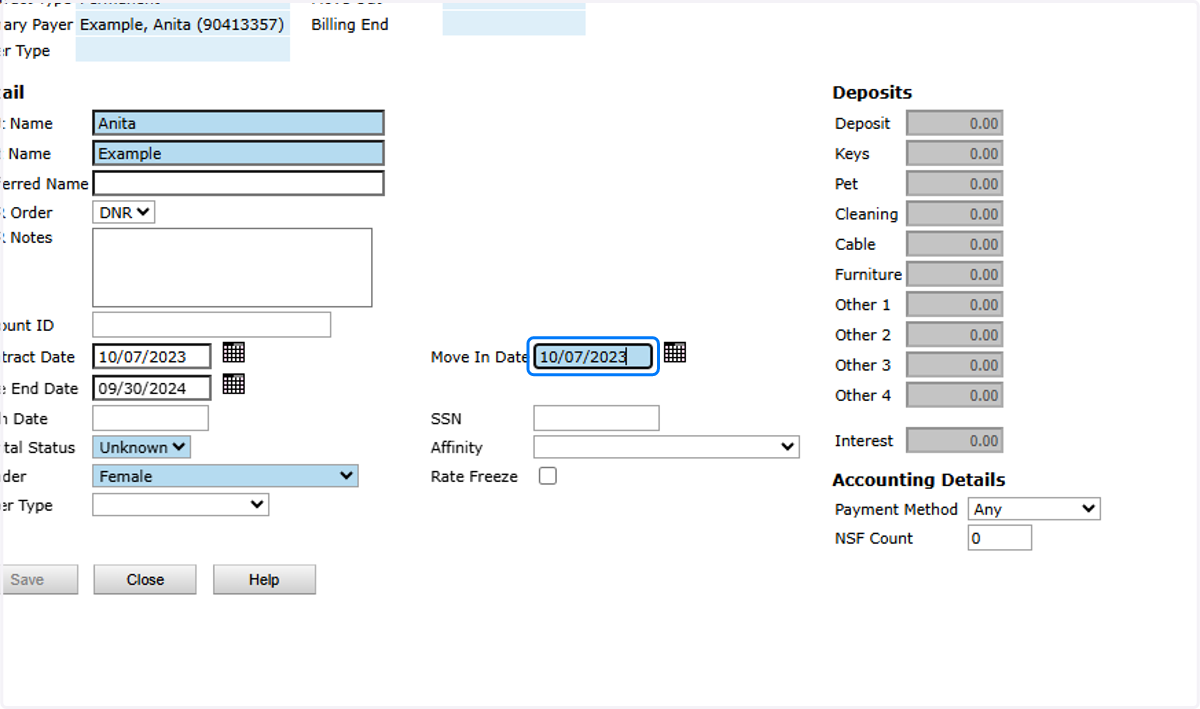
37. Click on Save
