🔐 How to Create a New User in the People Tab
Welcome! In this guide, you'll learn how to create a new user in the People Tab under Company Settings. Whether you're adding one user or many, the process is simple and flexible. Let’s walk through it step by step! 👇
1. ✅ Step 1: Go to the People Tab
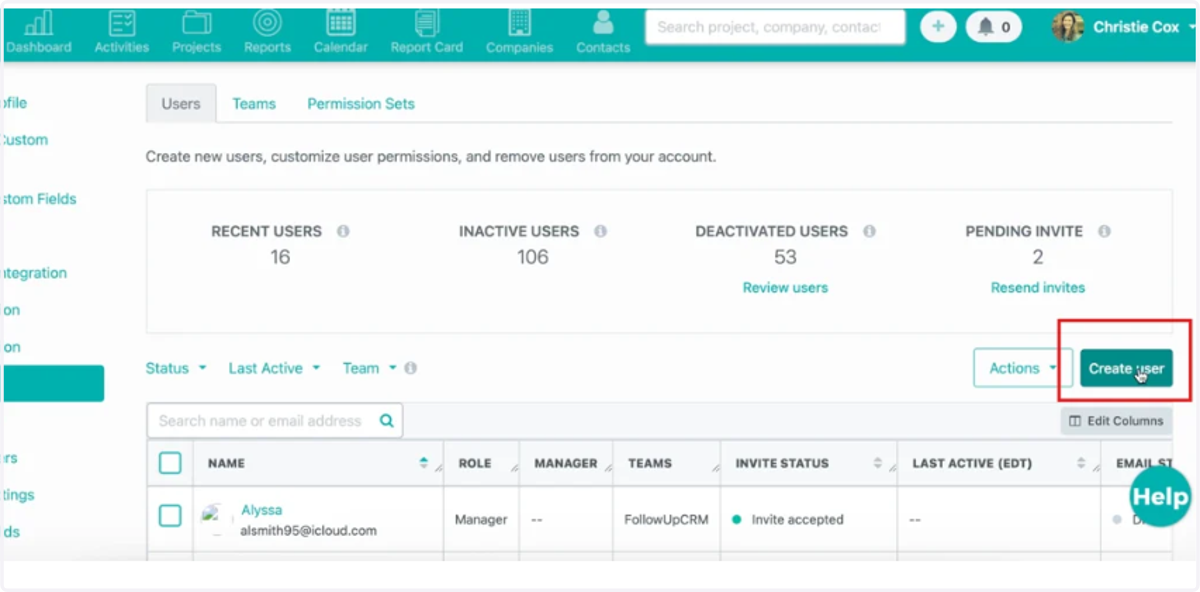
Head to Company Settings.
Click the People tab.
Then click the Create User button.
💡 This is your central hub for managing all team users.
2. 👤 Step 2: Add User Emails
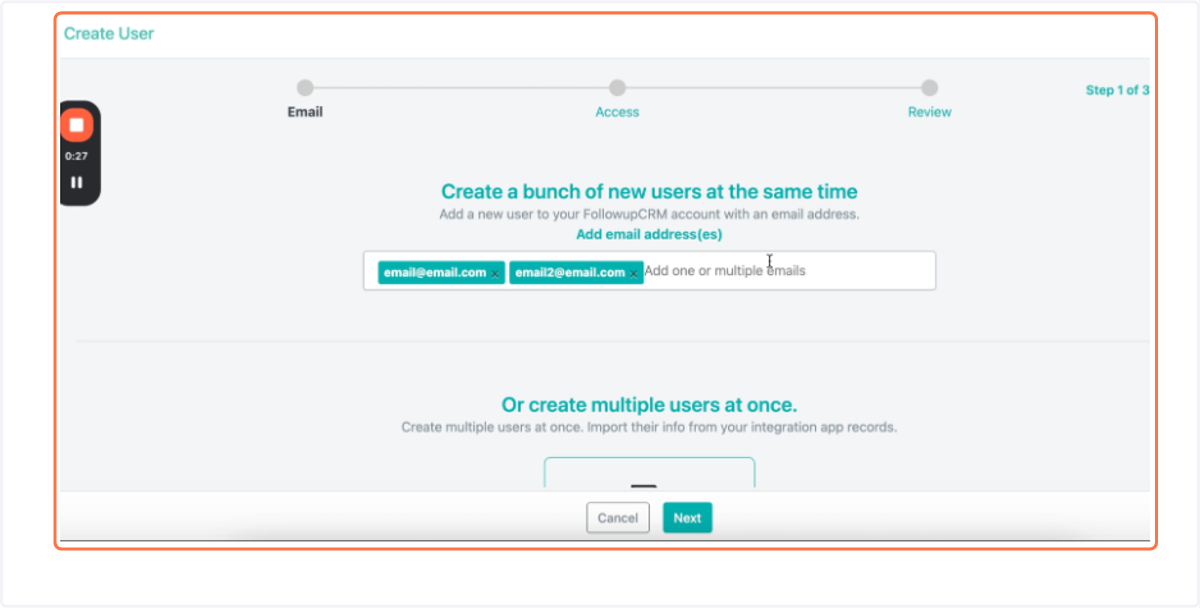
You’ll now be prompted to enter the email address(s) of the new user(s).
Type the first email and press Enter, and it’s added automatically.
Enter more, one at a time, if needed.
Or upload a CSV file to add multiple users in bulk.
⏱ Bulk uploads are ideal for onboarding whole teams fast!
3. 🔑 Step 3: Set User Permissions
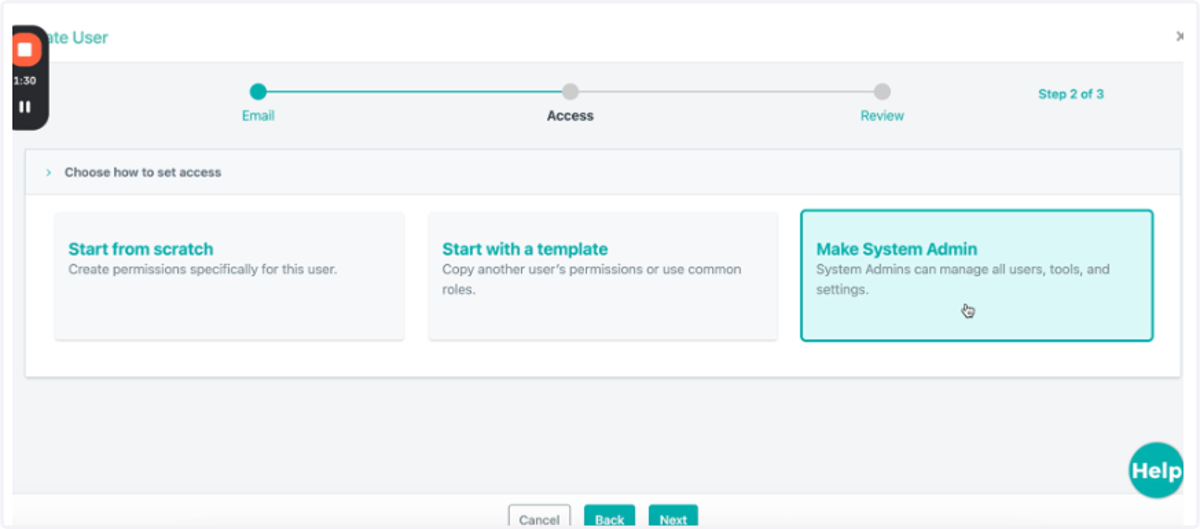
After clicking Next, it’s time to choose how you'll assign access permissions. You have 3 options:
1. Start from Scratch
Create a brand-new custom permission set, unique to this user.
2. Start with a Template
Use a preset or copy another user’s permissions from the dropdown.
3. Make System Admin
Grants the user full, unrestricted access to everything. Use with caution! 🚨
👀 Want to customize later? Templates are fully editable for each team.
4. 🧩 Step 4: Customize Permissions
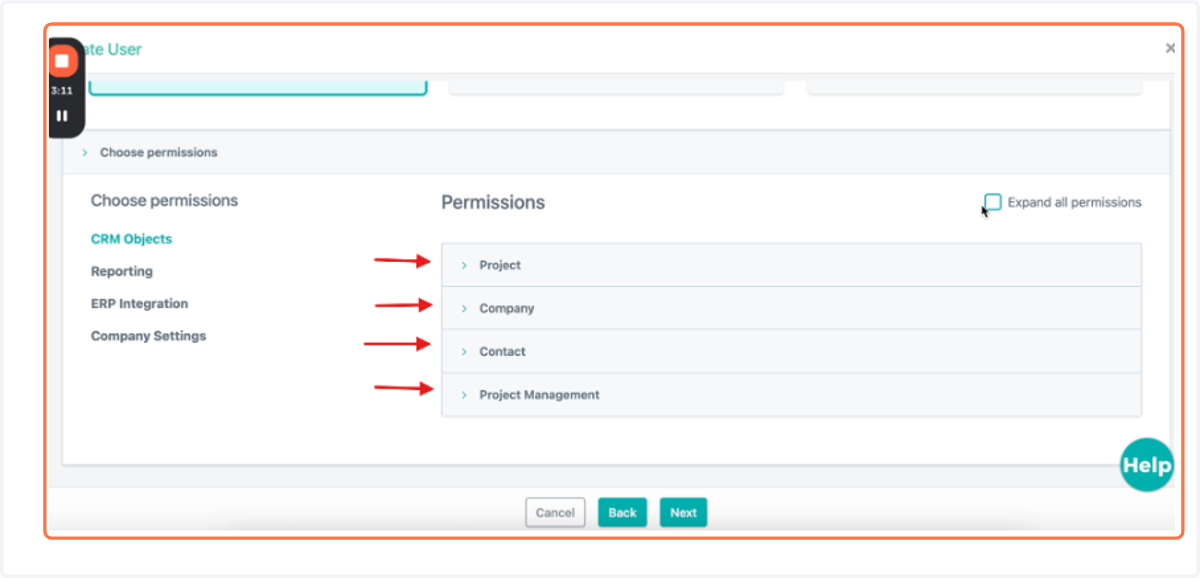
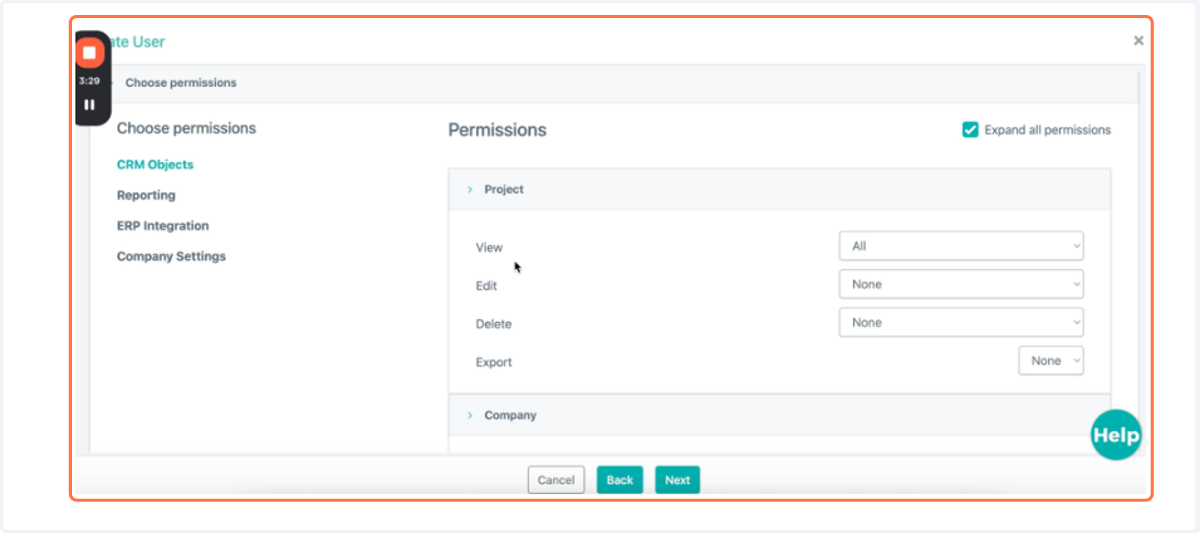
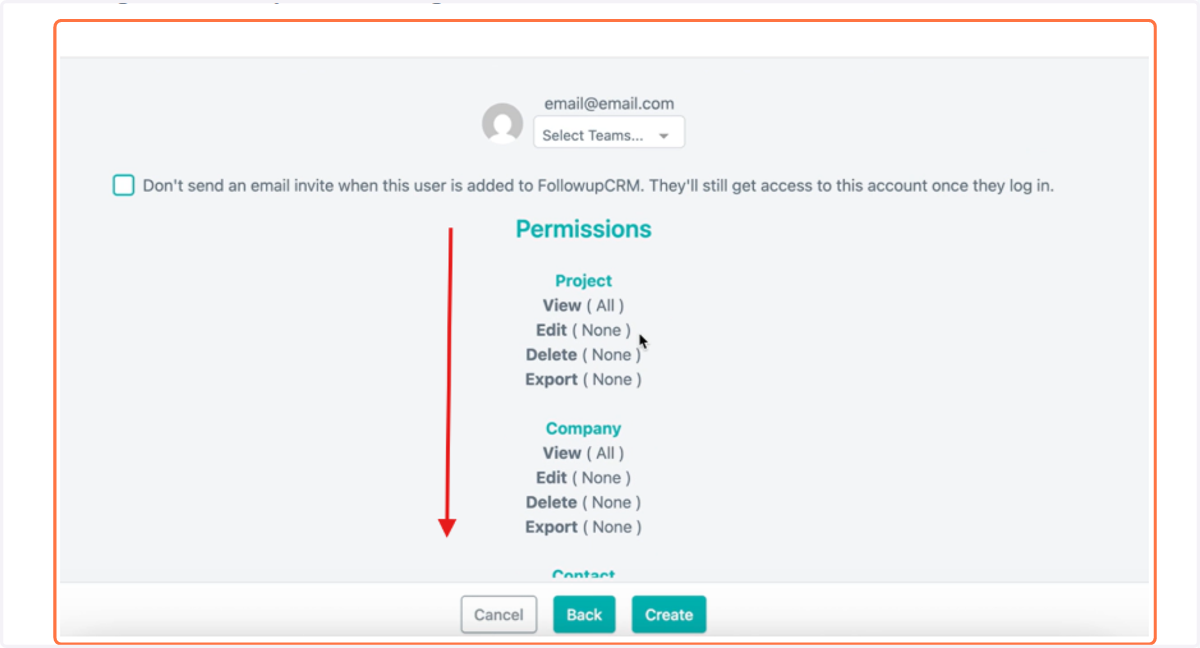
You’ll now see a permissions panel with expandable sections. You can check a box to auto-expand all options for easy review.
Permission Categories:
📁 Project
🏢 Company
👤 Contact
🛠 Project Management
📊 Reporting
🔄 ERP Integration (if enabled)
⚙ Company Settings
🧑🤝🧑 Enterprise Access (for enterprise users)
5. 🛠️ Step 5: Set Access Levels
Each section offers the following permission types:
ActionOptions AvailableViewAll, Assigned, Assigned to Reports, NoneEditAll, Assigned, Assigned to Reports, NoneDeleteAll, Assigned, Assigned to Reports, NoneExportAll, None
✨ Example: If you want a user to only view their own projects and not edit them, assign View > Assigned and leave Edit as None.
6. 📈 ERP Integration (If applicable)
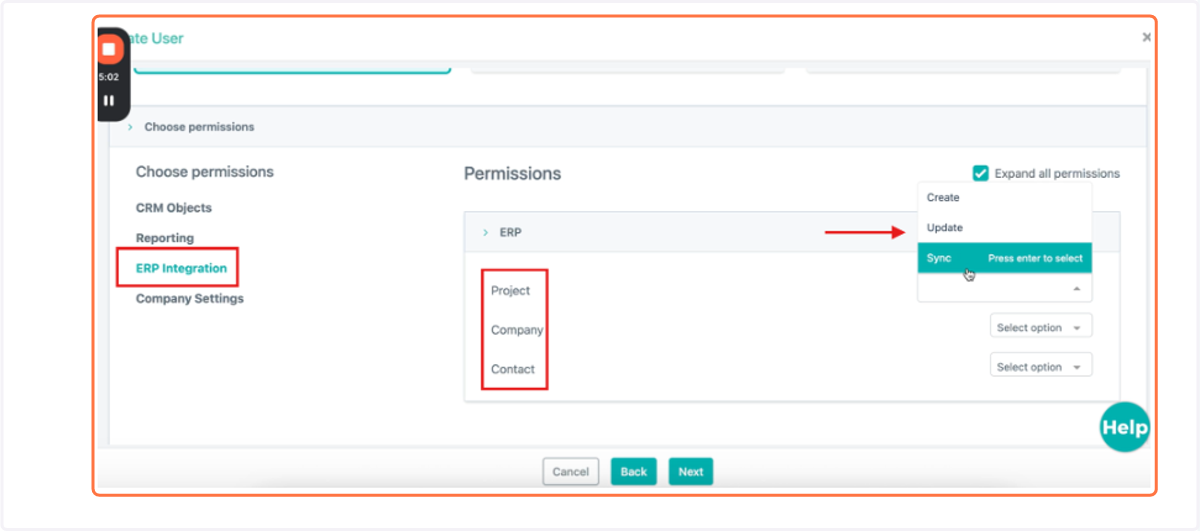
Control what actions a user can perform with your connected ERP system:
Connect – Link records to ERP
Update – Modify synced data
Sync – Manually push/pull data
Mix and match permissions based on the user’s responsibilities!
7. ⚙️ Company Settings Access
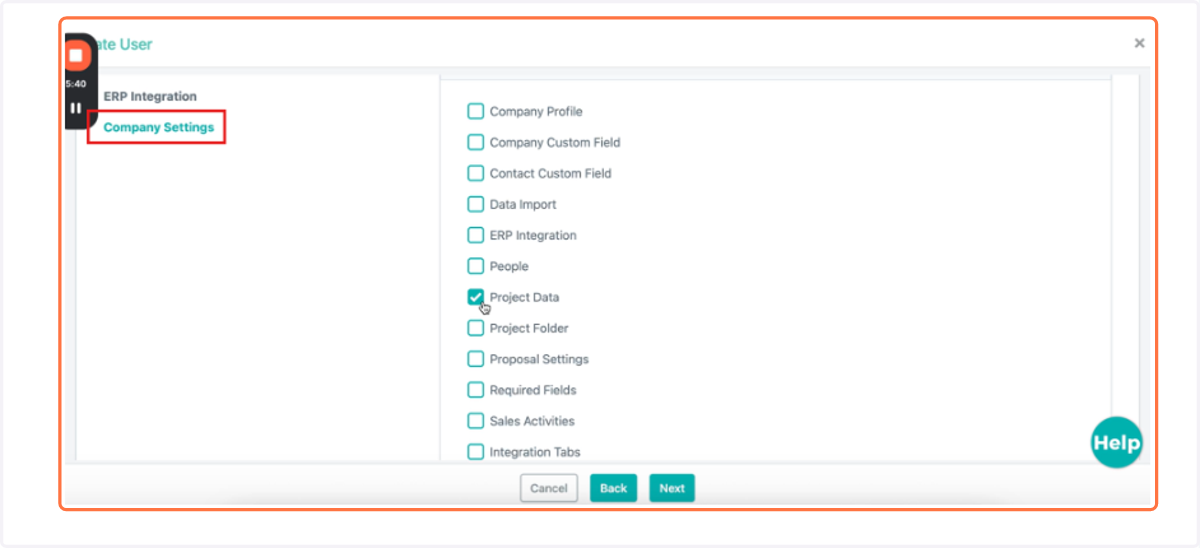
You can give users access to specific sections of your settings area. Example sections:
Project Data
Required Fields
Sales Activities
Just check the relevant boxes to tailor access precisely. 🔍
8. 🌐 Enterprise Access
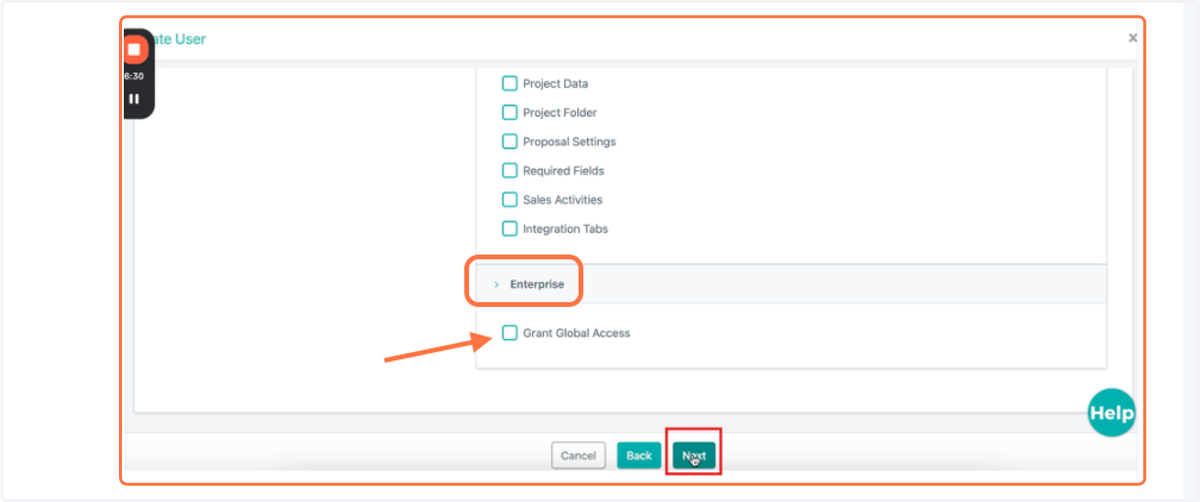
For enterprise accounts:
Check the box to give the user access to all teams.
Leave unchecked to limit them to their assigned team only.
🎯 Helps enterprise orgs control visibility across departments.
9. 🔎 Step 8: Final Review & Confirmation
Once you've made your selections:
Click Next.
Review the summary screen.
Click Create to finalize the user setup.
10. 📌 After the User is Created
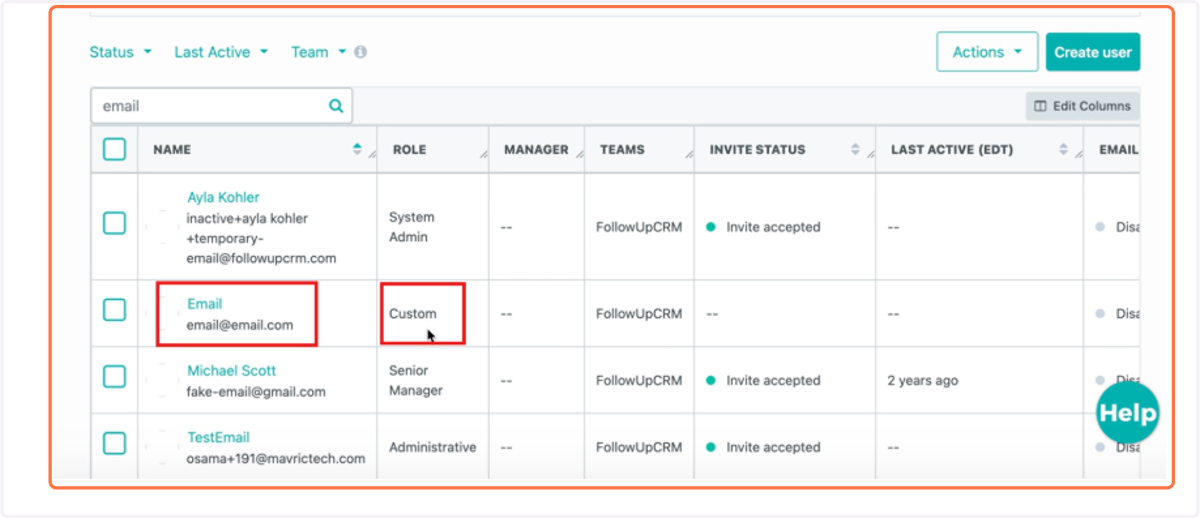
You can now search for the user by their email in the People tab.
Their role will show as “Custom” if you built a unique permission set — a quick way to verify correct setup.
11. 🕒 What if I didn’t send the invite?
You’ll see a “Pending Invite” label at the top of the user’s profile.
Click “Resend Invite” to send the access email when ready.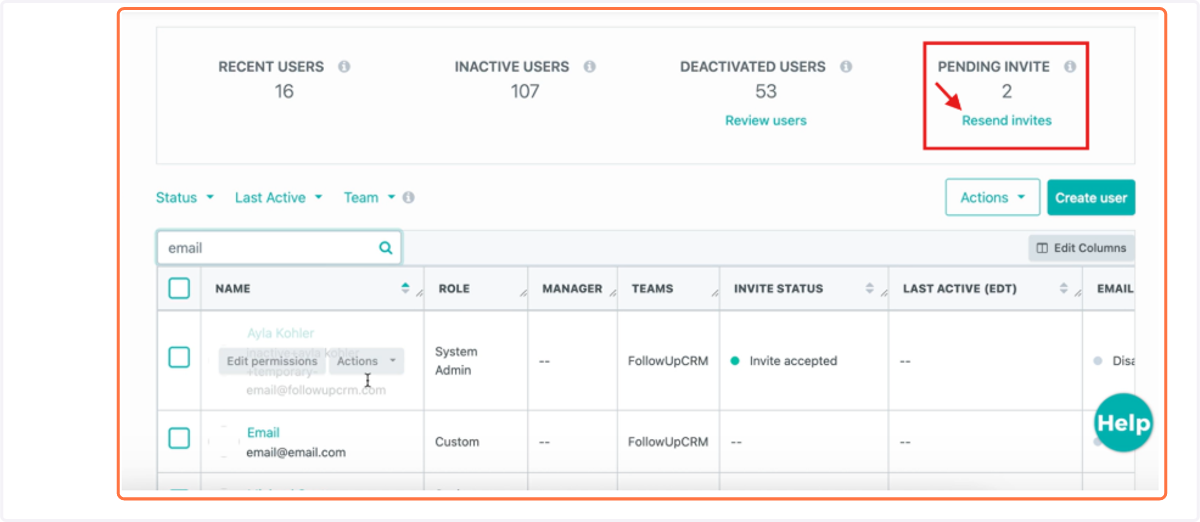
12. 🏁 That’s it!
You've successfully added a user, customized their access, assigned them to teams, and chosen when they’ll be invited.