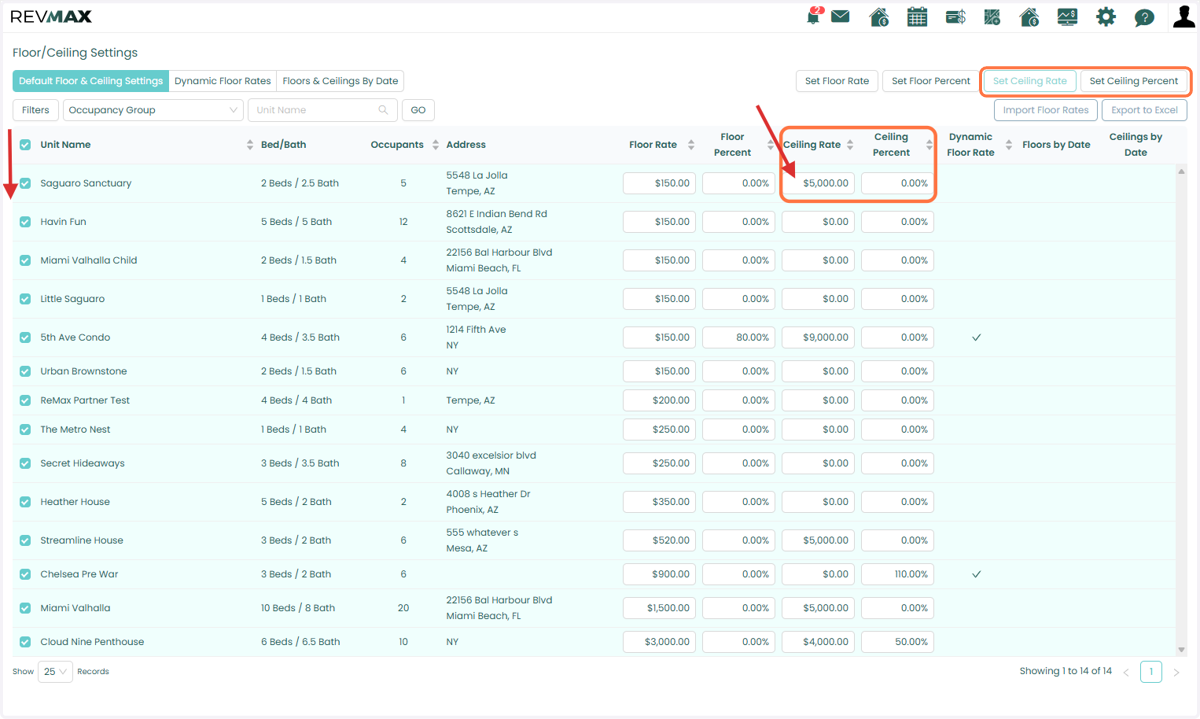
Setting Up Basic Floor and Ceiling Rates
When a new unit is integrated into RevMax, you will typically be prompted to set up Basic Floor Rates. Floor rates serve as a safeguard to ensure your pricing never drops below your break-even point, especially during slower seasons.
1. You may see an alert notifying you that certain units (including newly integrated ones from Streamline) do not yet have floor rates configured in the Home Settings page.
This alert pop-up allows you to quickly apply floor rates across all units.
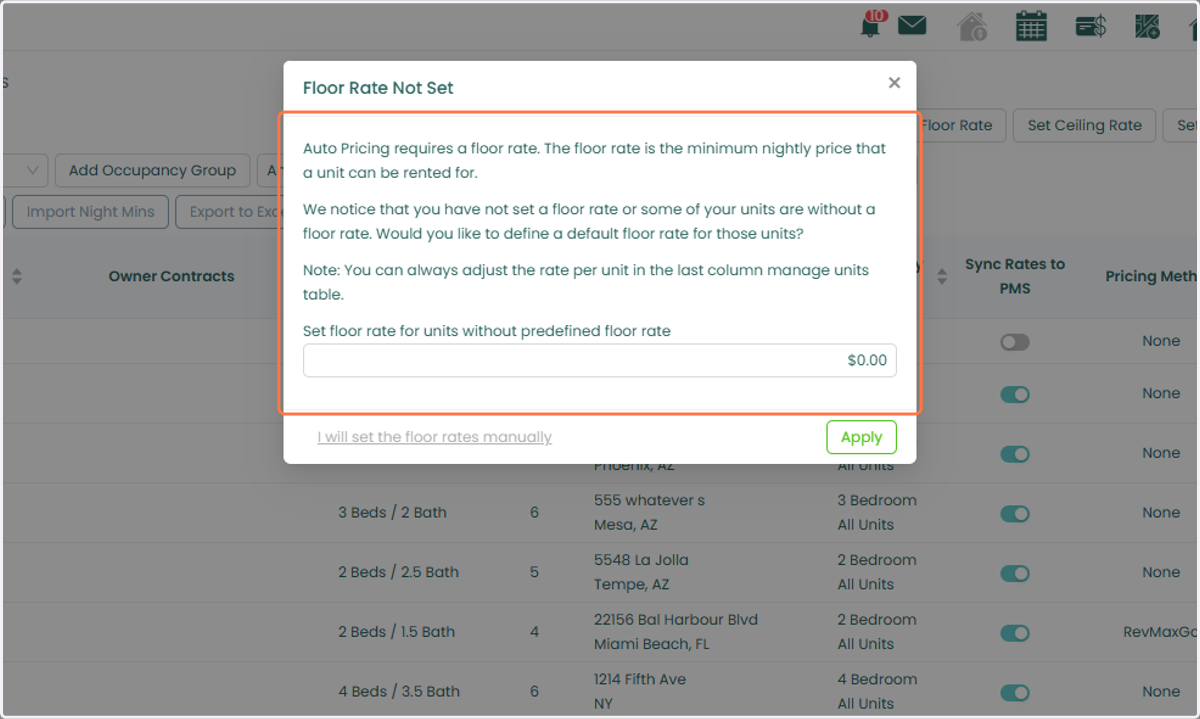
2. If you prefer to assign different floor rates per unit, you can close the alert and manually configure the floor rates on each or a selected group of units.
Within this page, you can filter units using available options such as occupancy group, sync status, or by selecting individual units
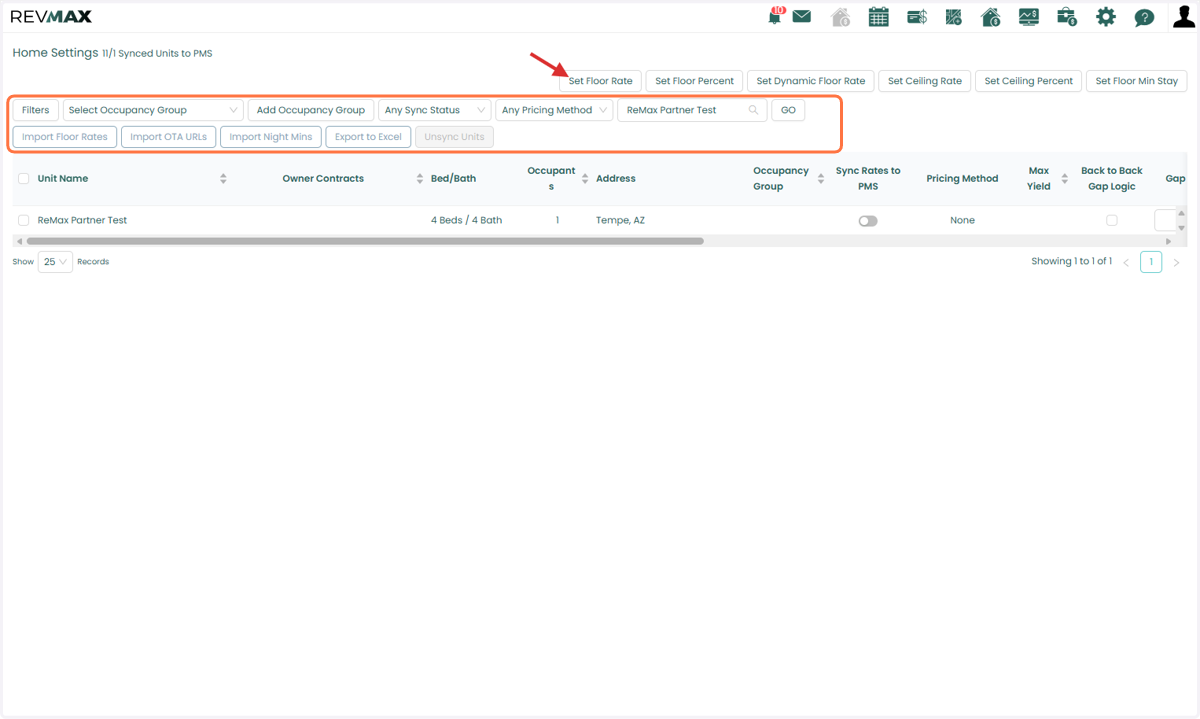
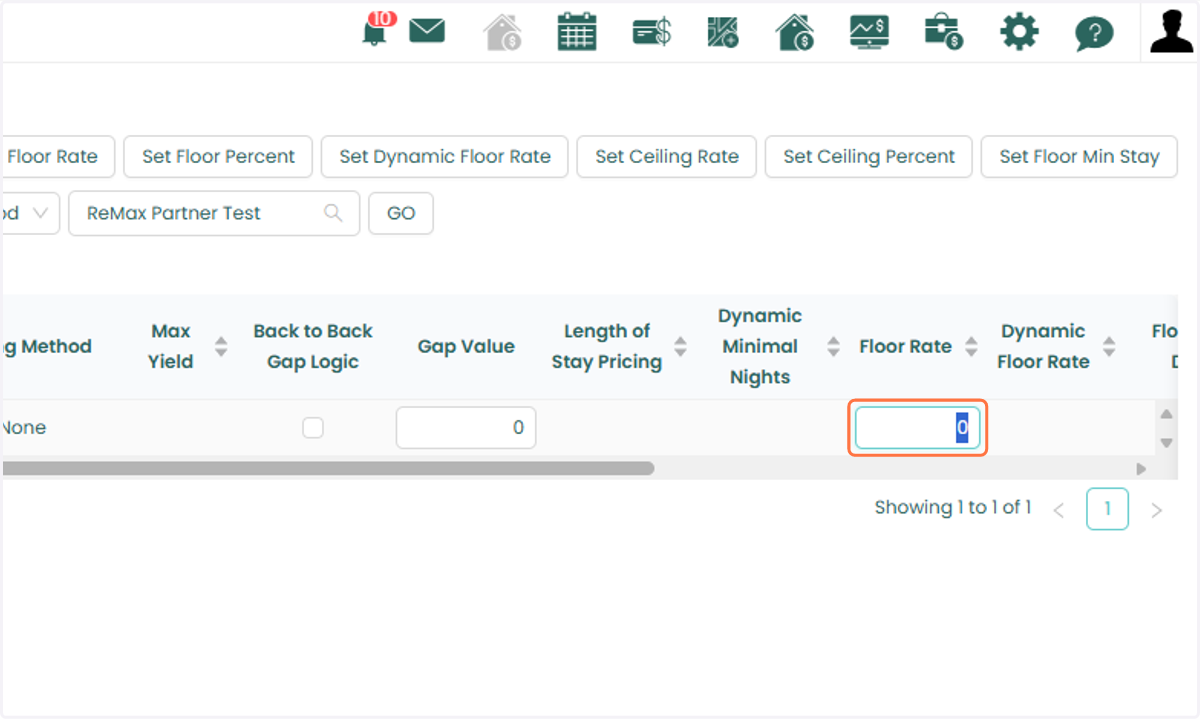
3. Once filtered, you can enter the desired floor rate directly in the Floor Rate column for each unit.
4. You can configure your basic Floor Rates either in bulk or for individual units through the Floor/Ceiling Settings page under Pricing Rules.
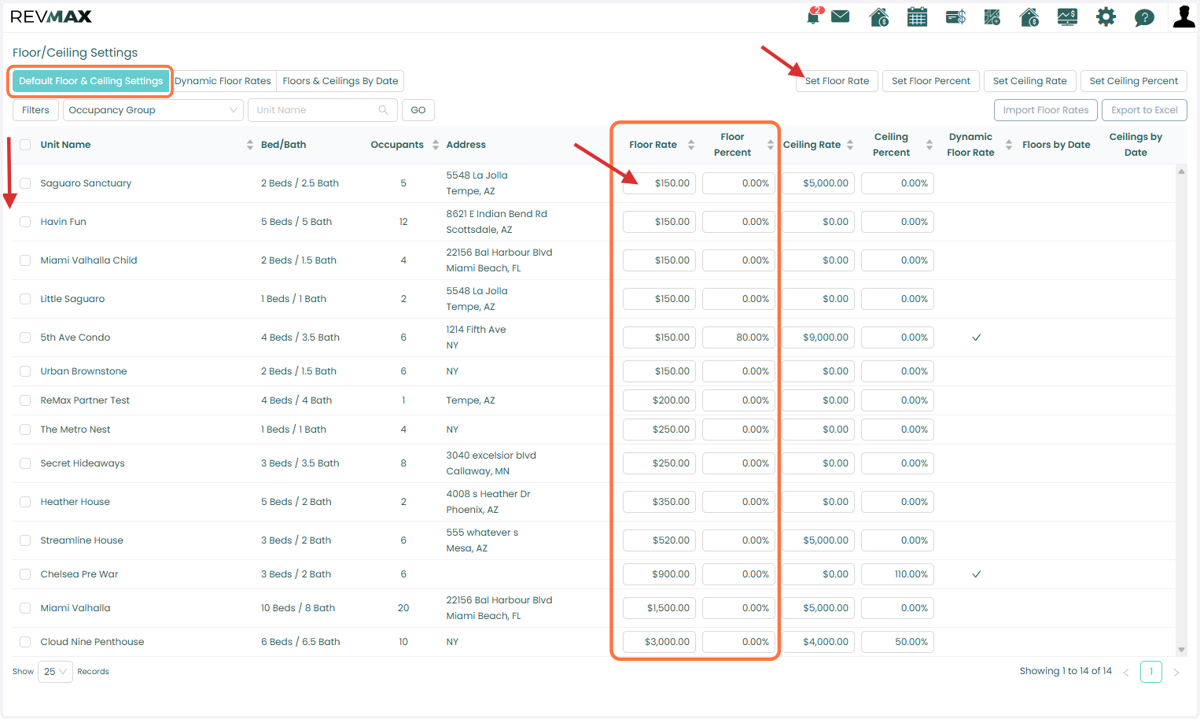
If your RevMax subscription includes the Ceiling Rate feature, you can configure it using the same process and logic as Floor Rates.
Ceiling Rates set the maximum price RevMax can recommend, even during periods of high demand, such as holidays, major events, or peak travel seasons.
5. You can apply Ceiling Rates in bulk through the Home Settings page, allowing you to update multiple units at once
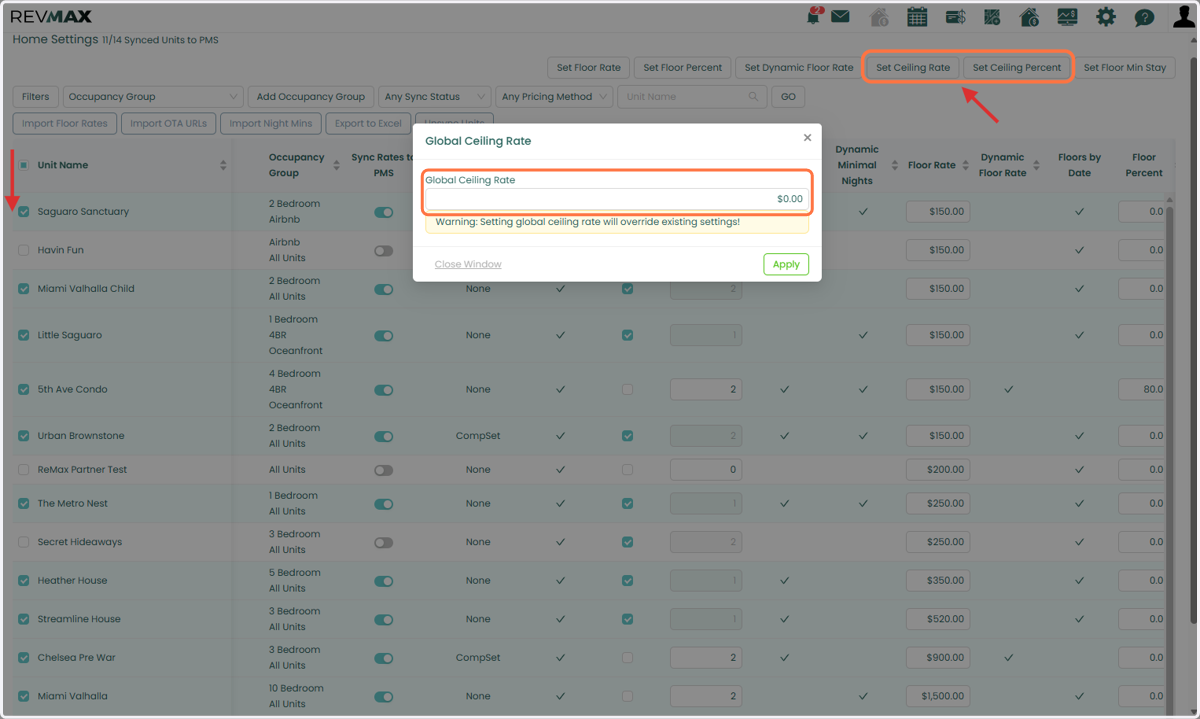
6. Or you can configure them individually by entering a Ceiling Rate for each unit.
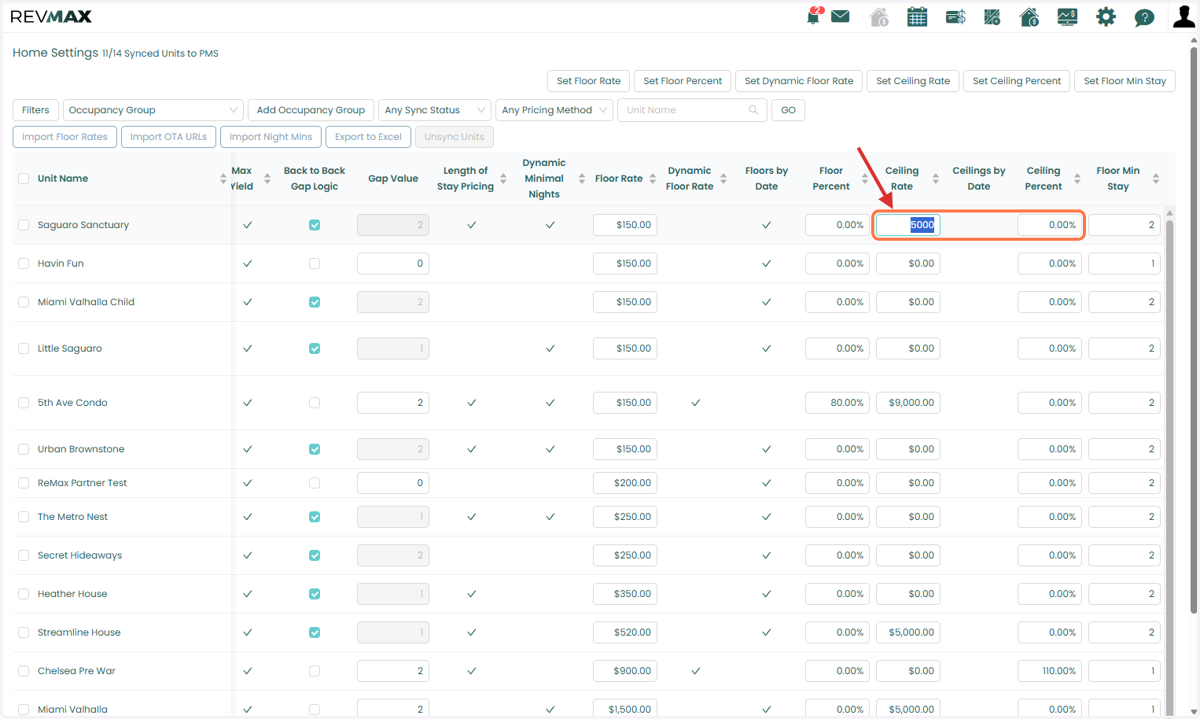
7. When setting a Ceiling Rate, you can choose either a Fixed Amount, which specifies a maximum rate, or a Percentage, which applies a percentage adjustment to the Ceiling Rate.
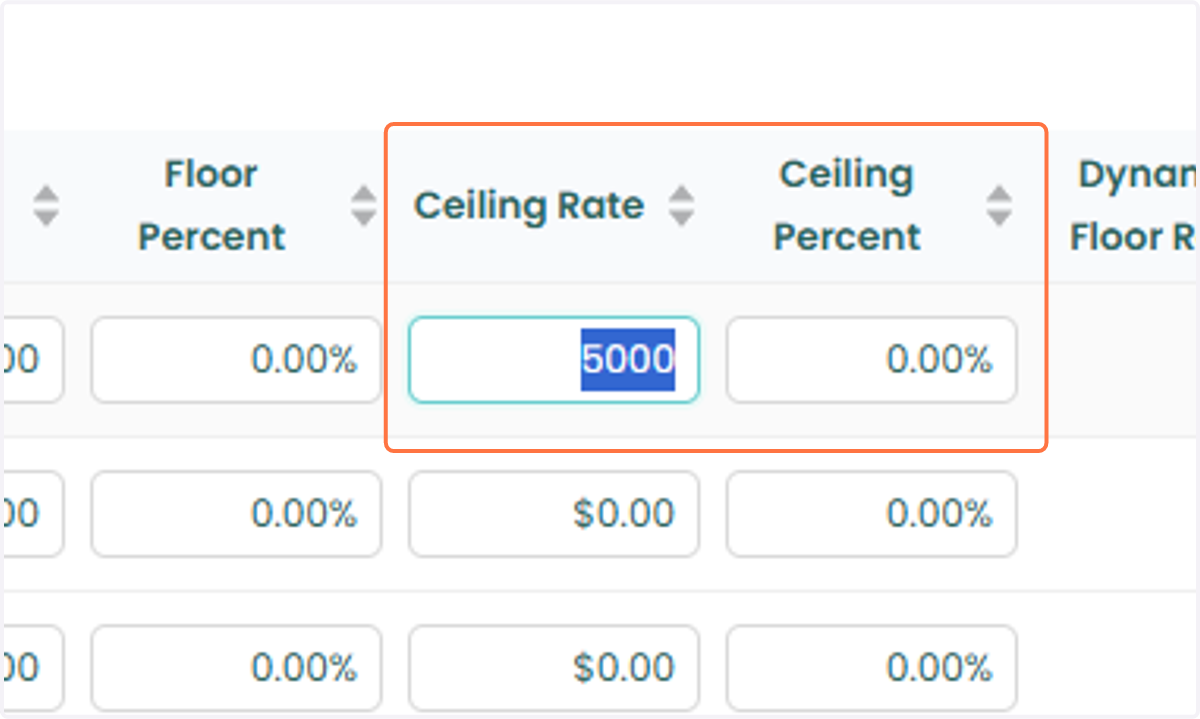
8. You can also manage your basic Ceiling Rates either in bulk or on a per-unit basis through the Floor/Ceiling Settings page, giving you flexibility to update multiple properties or make changes to individual units as needed.