Workflow: Run Payroll Process
Tango
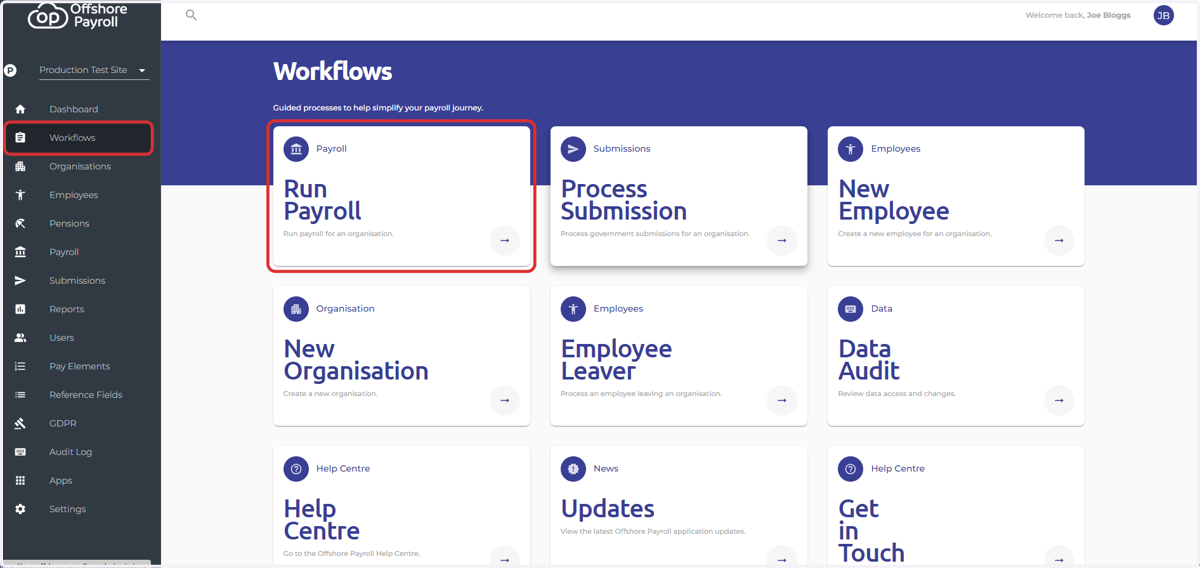
1. Navigate to the 'Workflows' screen on the main menu on the left
Select 'Run Payroll'
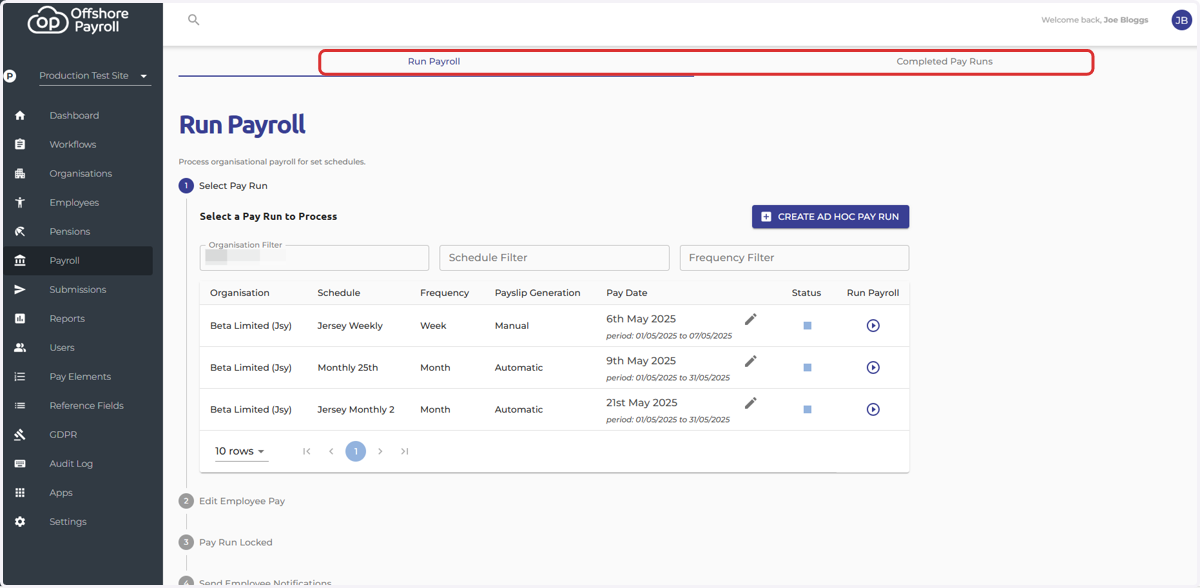
2. At the top right of the screen you will see two areas 'Run Payroll' and 'Completed Pay Runs'
The Run Payroll area is where any incomplete/not started pay runs appear
The Completed Pay Runs area is where all completed pay runs are listed
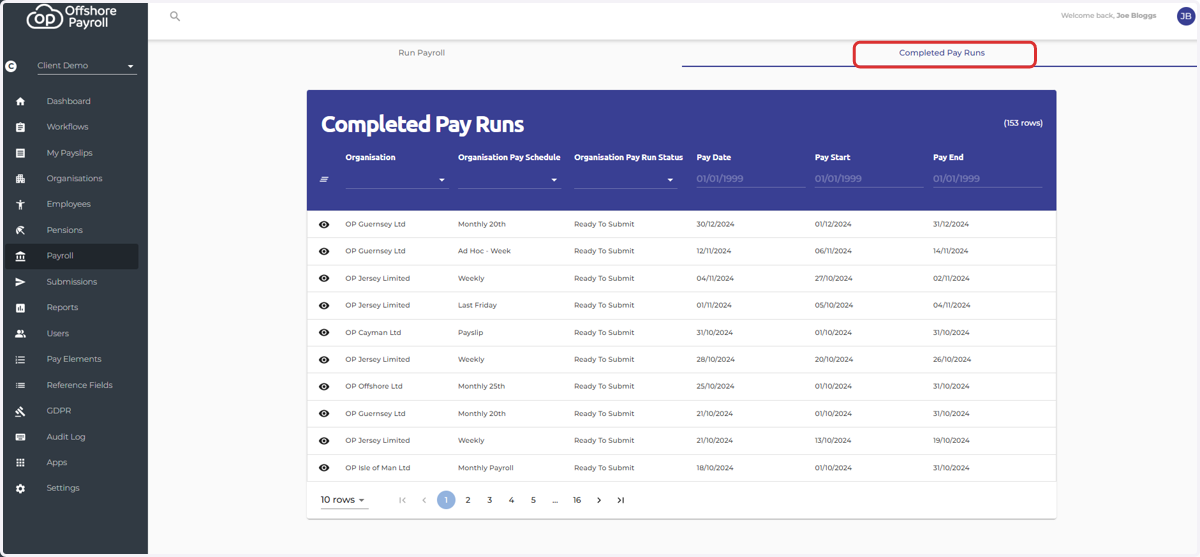
3. Example of the completed payroll screen
4. Pay Run Features
Organisation: The name of the organisation
Schedule: The name of the pay schedule
Frequency: Frequency of the pay run, e.g. month/week
Payslip Connection: Manual or automatic payslips
Pay Date: The pay date is the large date and the pay period is underneath
Status: The icon indicates the status of the pay run
In progress- Play icon
Not started- Blue square icon
Locked- Green Lock icon
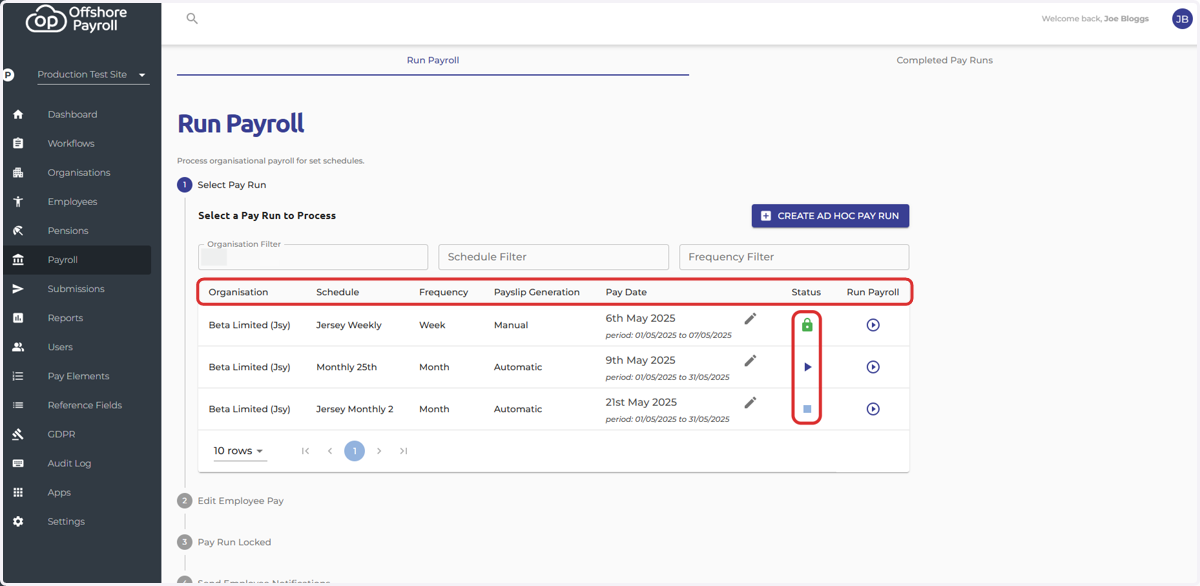
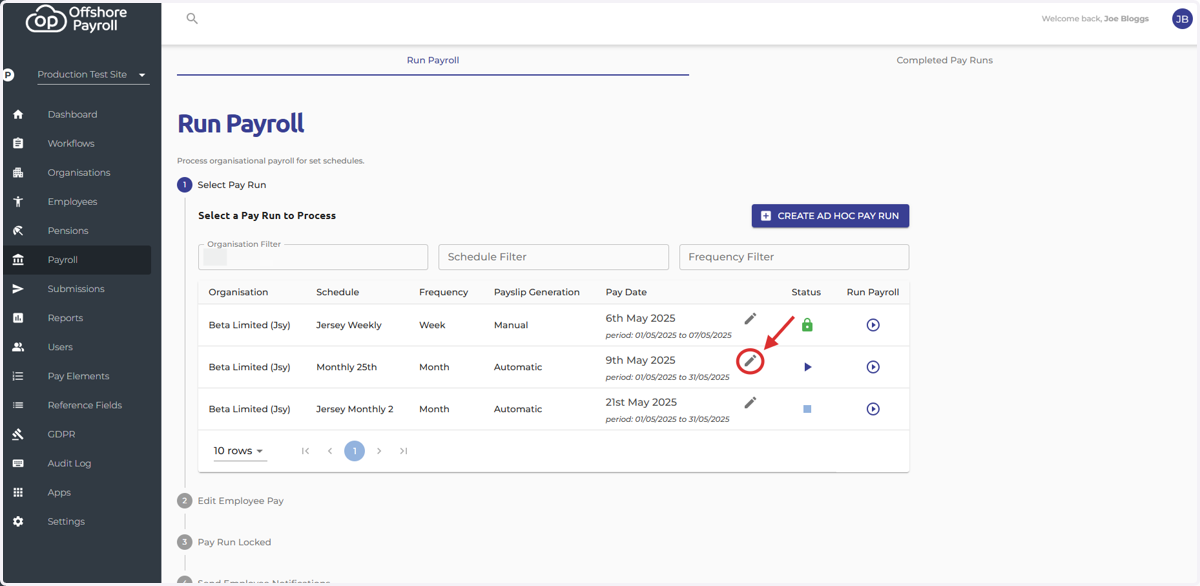
5. Click the pencil icon to review your future pay runs
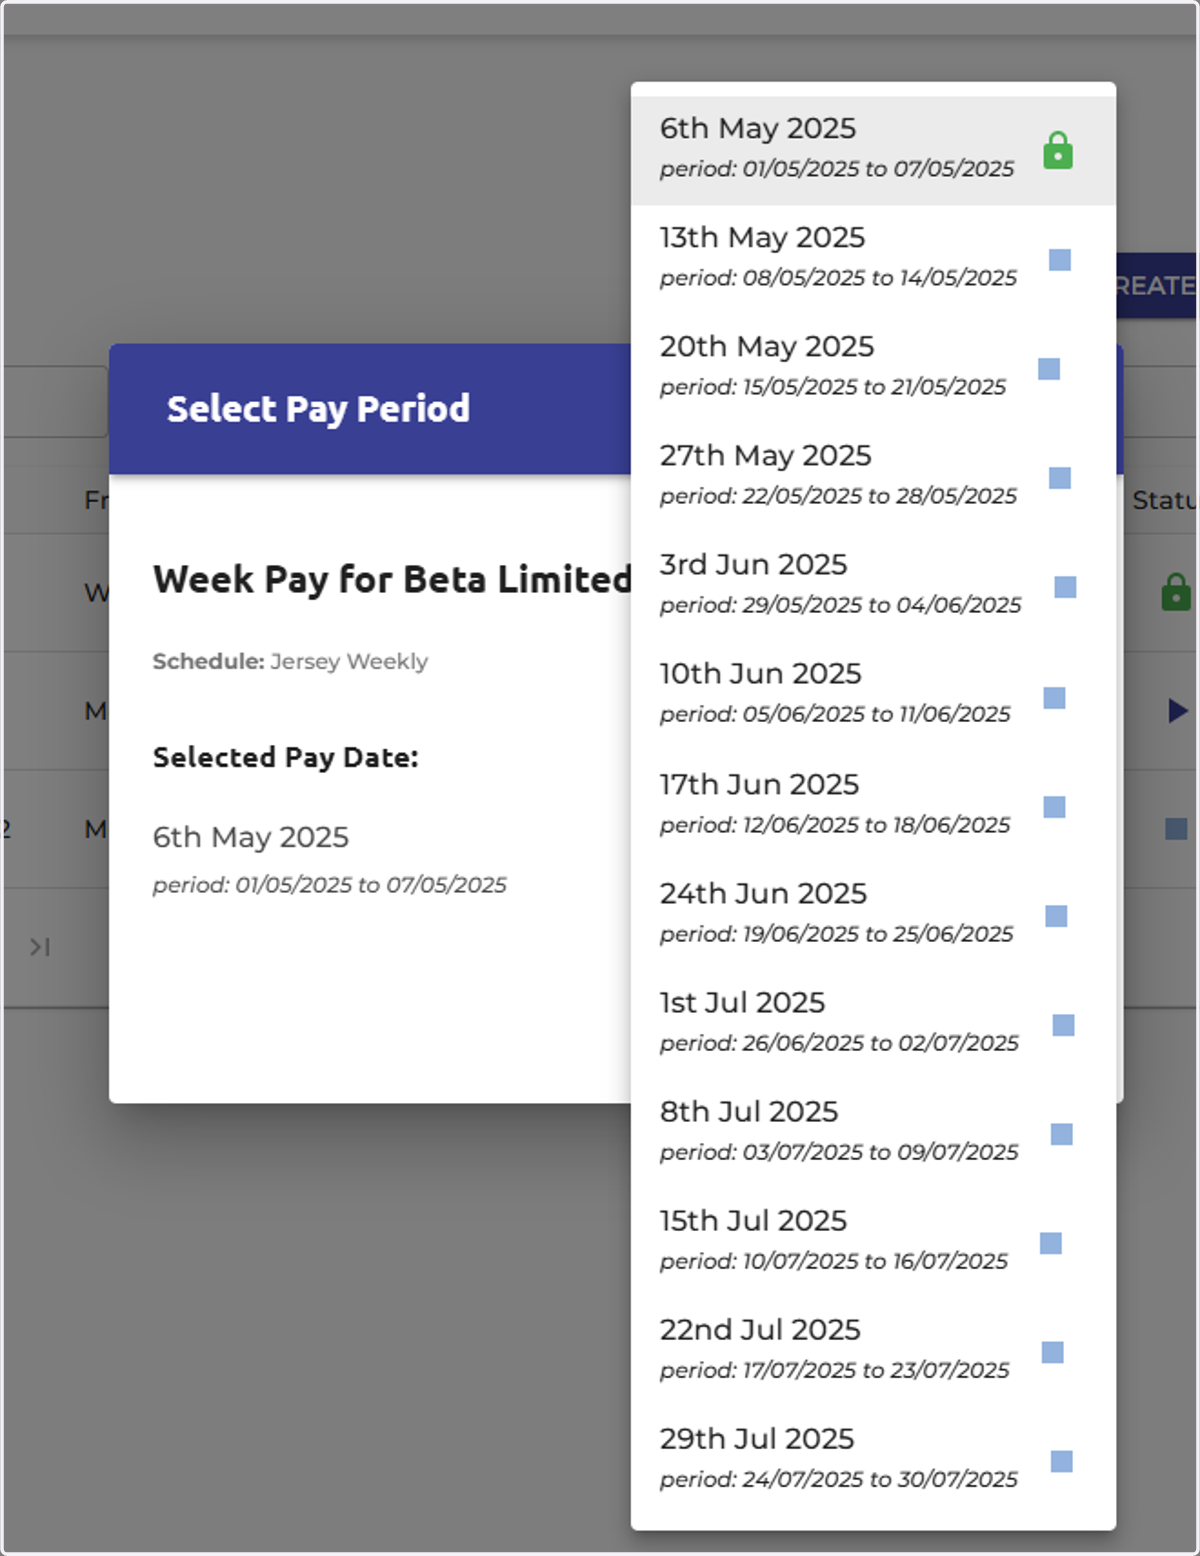
This is a good tool to check that the pay schedule set in the organisation screen is correct.
6. Example of a list of future pay runs
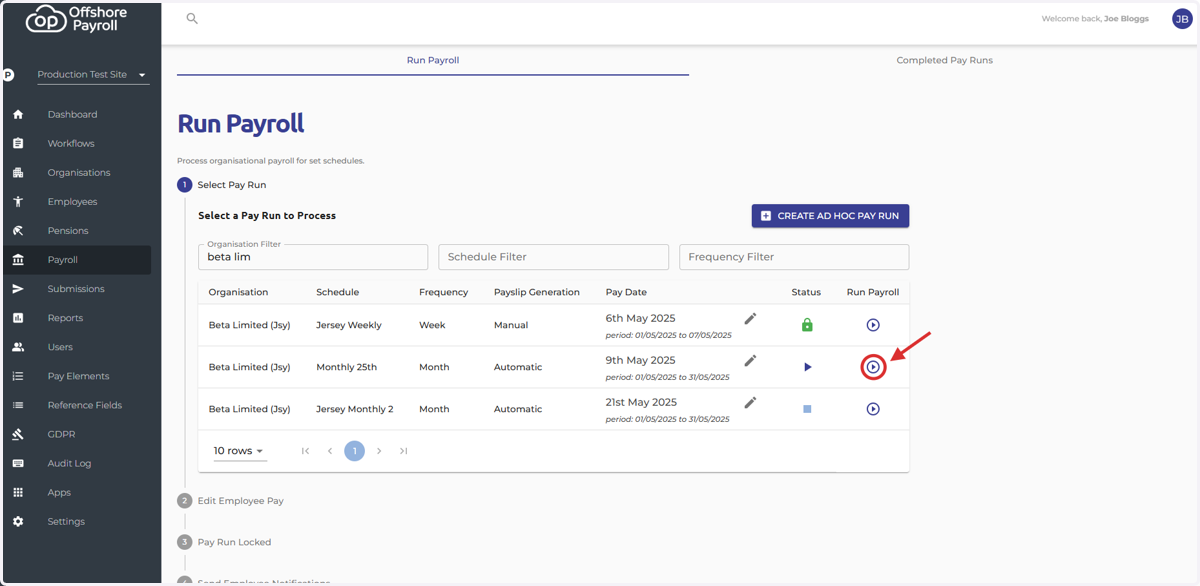
7. Select the 'Run Payroll' icon to start the payroll process
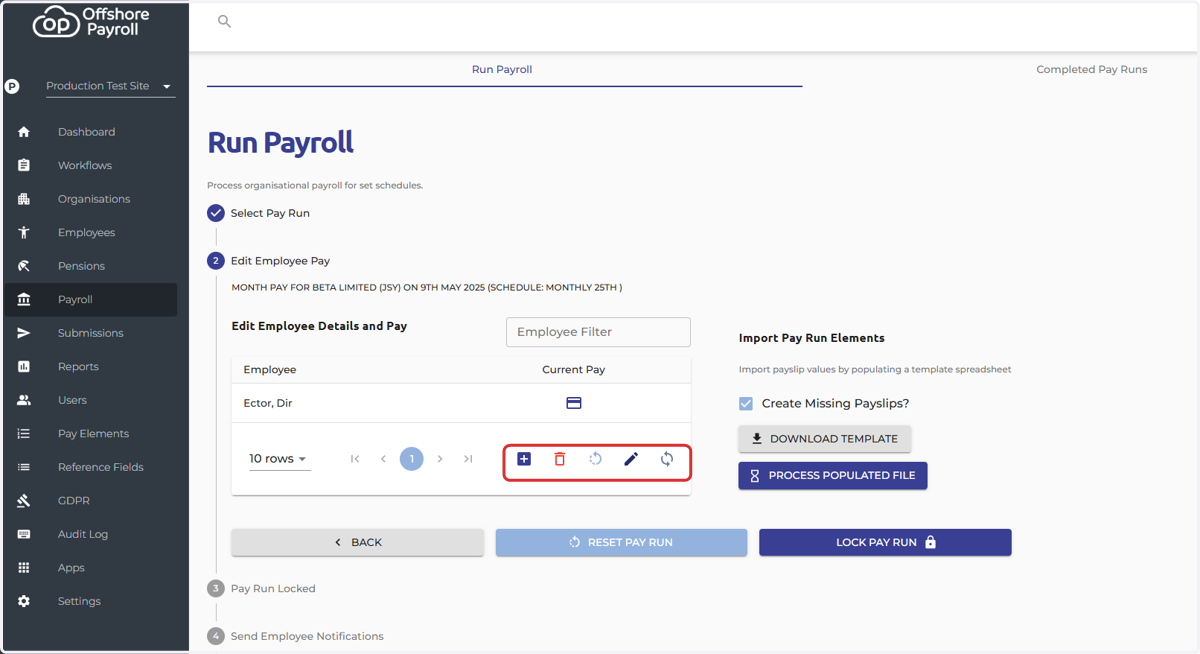
8. There are various features within the payroll process, below is a description of each icon. If you hover over the icons their titles will appear.
Plus icon- Creates all payslips within the pay run
Bin icon- Deletes all payslips
Recalculate icon- Recalculates all payslips in a pay run (If you have made any changes to the employee screen after starting the pay run, you would need to recalculate the payslips)
Pencil icon- Allows you to edit all notes that you may wish to assign to each payslip, either an internal note or a payslip note
Synchorise icon- The synchronise payslip feature allows you to pull employee data through to the payslip. Please visit our guide, linked below.
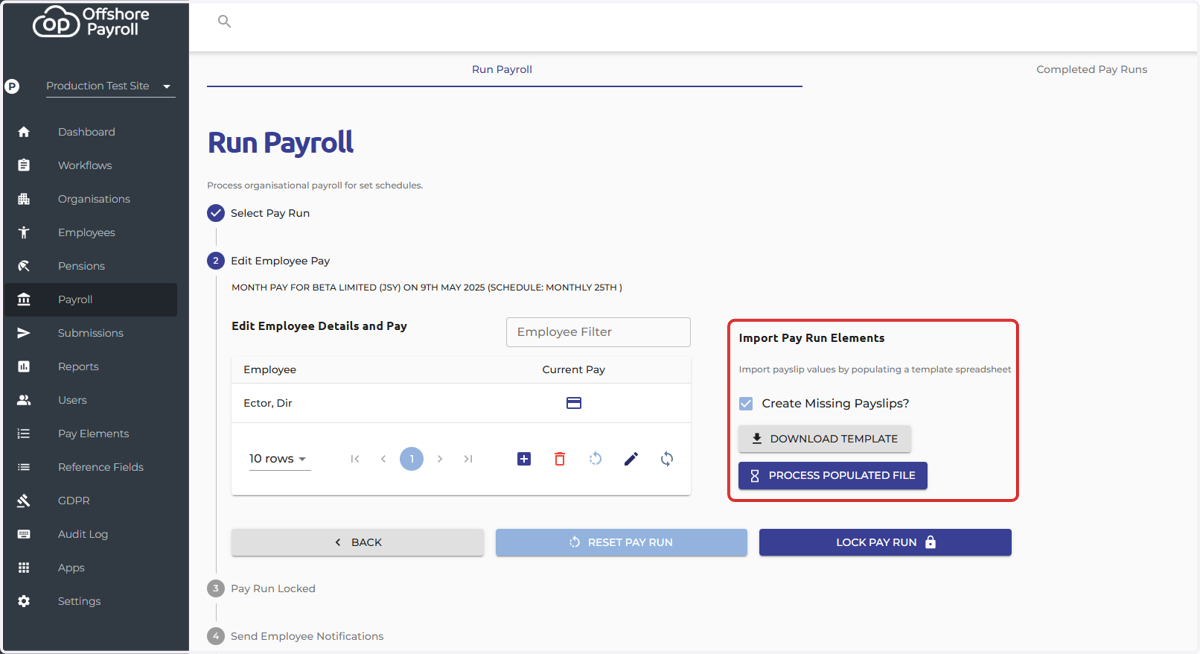
9. You have the option to import pay elements to employee payslips
Please visit our guide linked below on how to import pay run, pay elements.
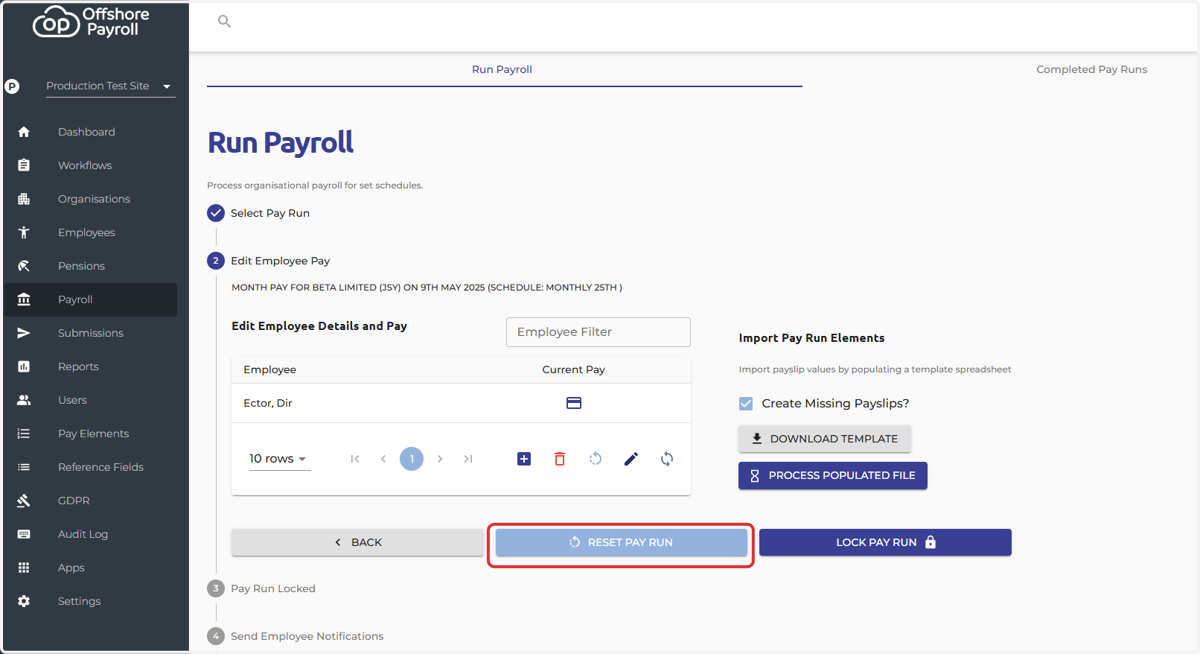
10. Resetting the pay run will simply reset the pay run to its untouched state. By clicking this you will delete all payslips within the pay run
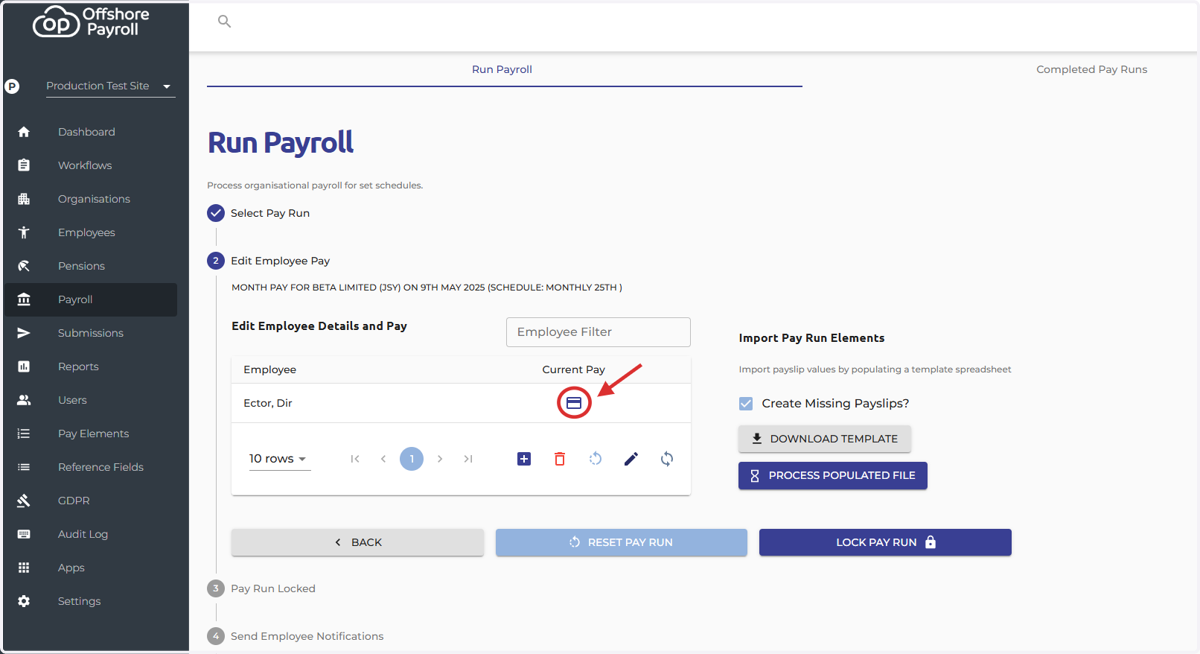
11. Select the payslip icon to open the payslip
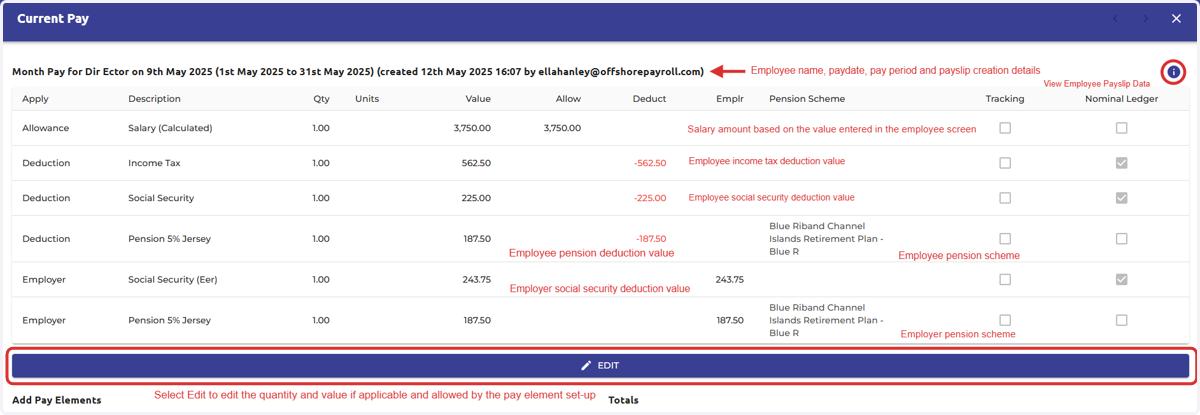
12. An example payslip accompanied by an explanation of each pay element
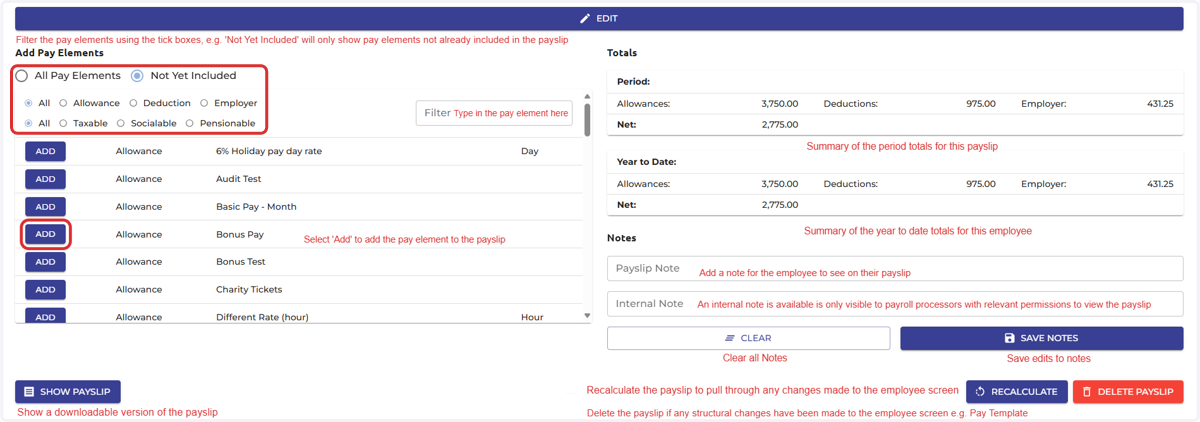
13. An example payslip accompanied by an explanation of each field
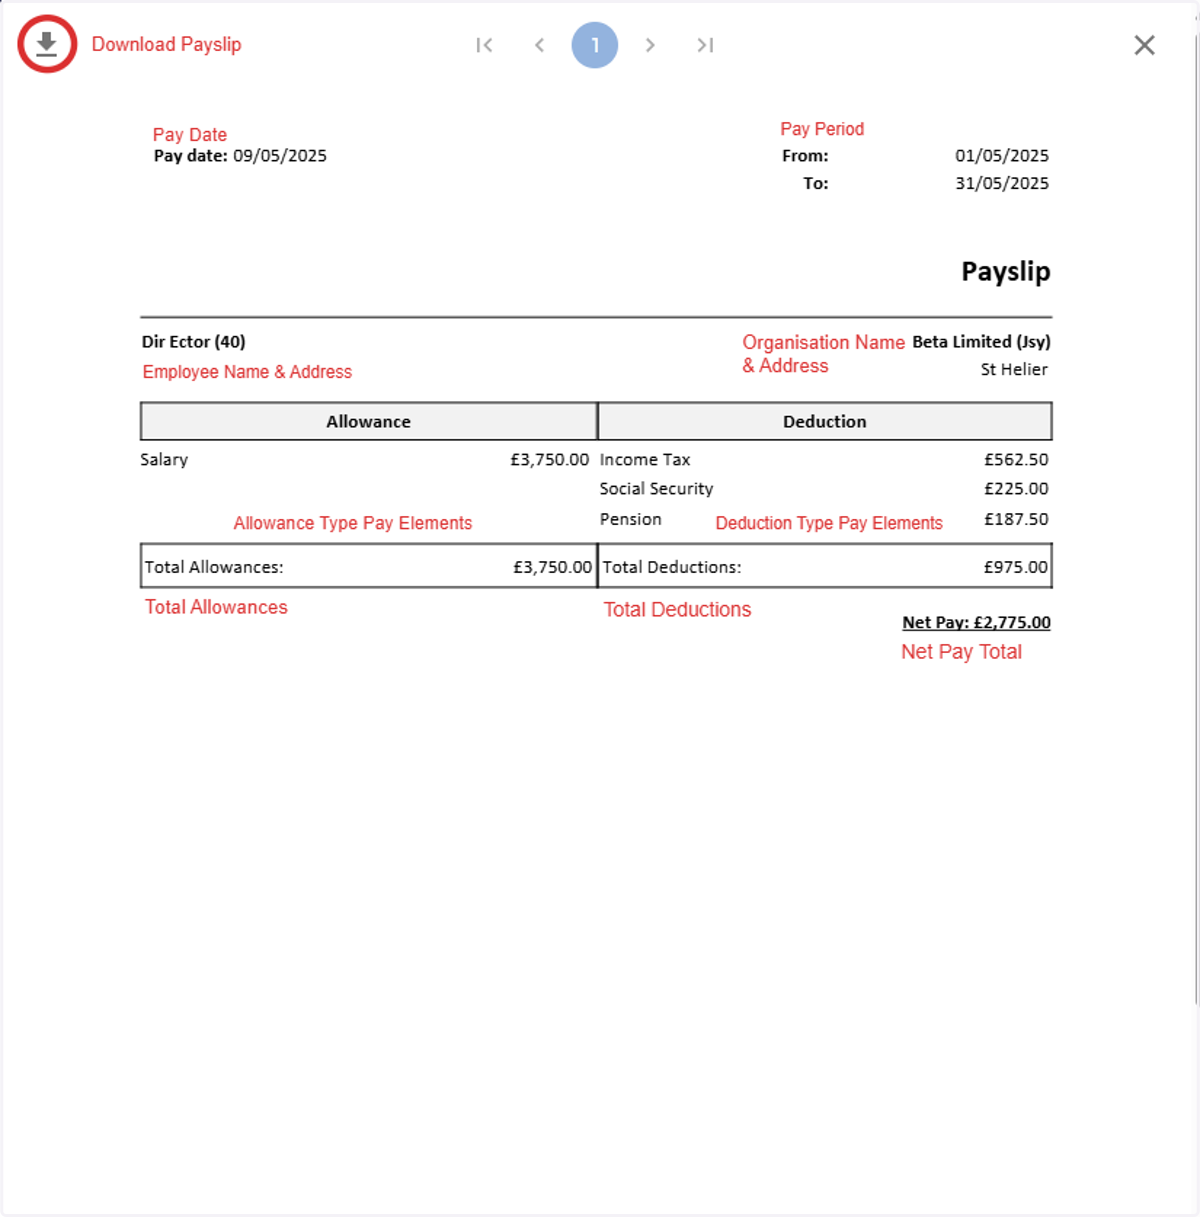
14. Payslip Example & Definitions
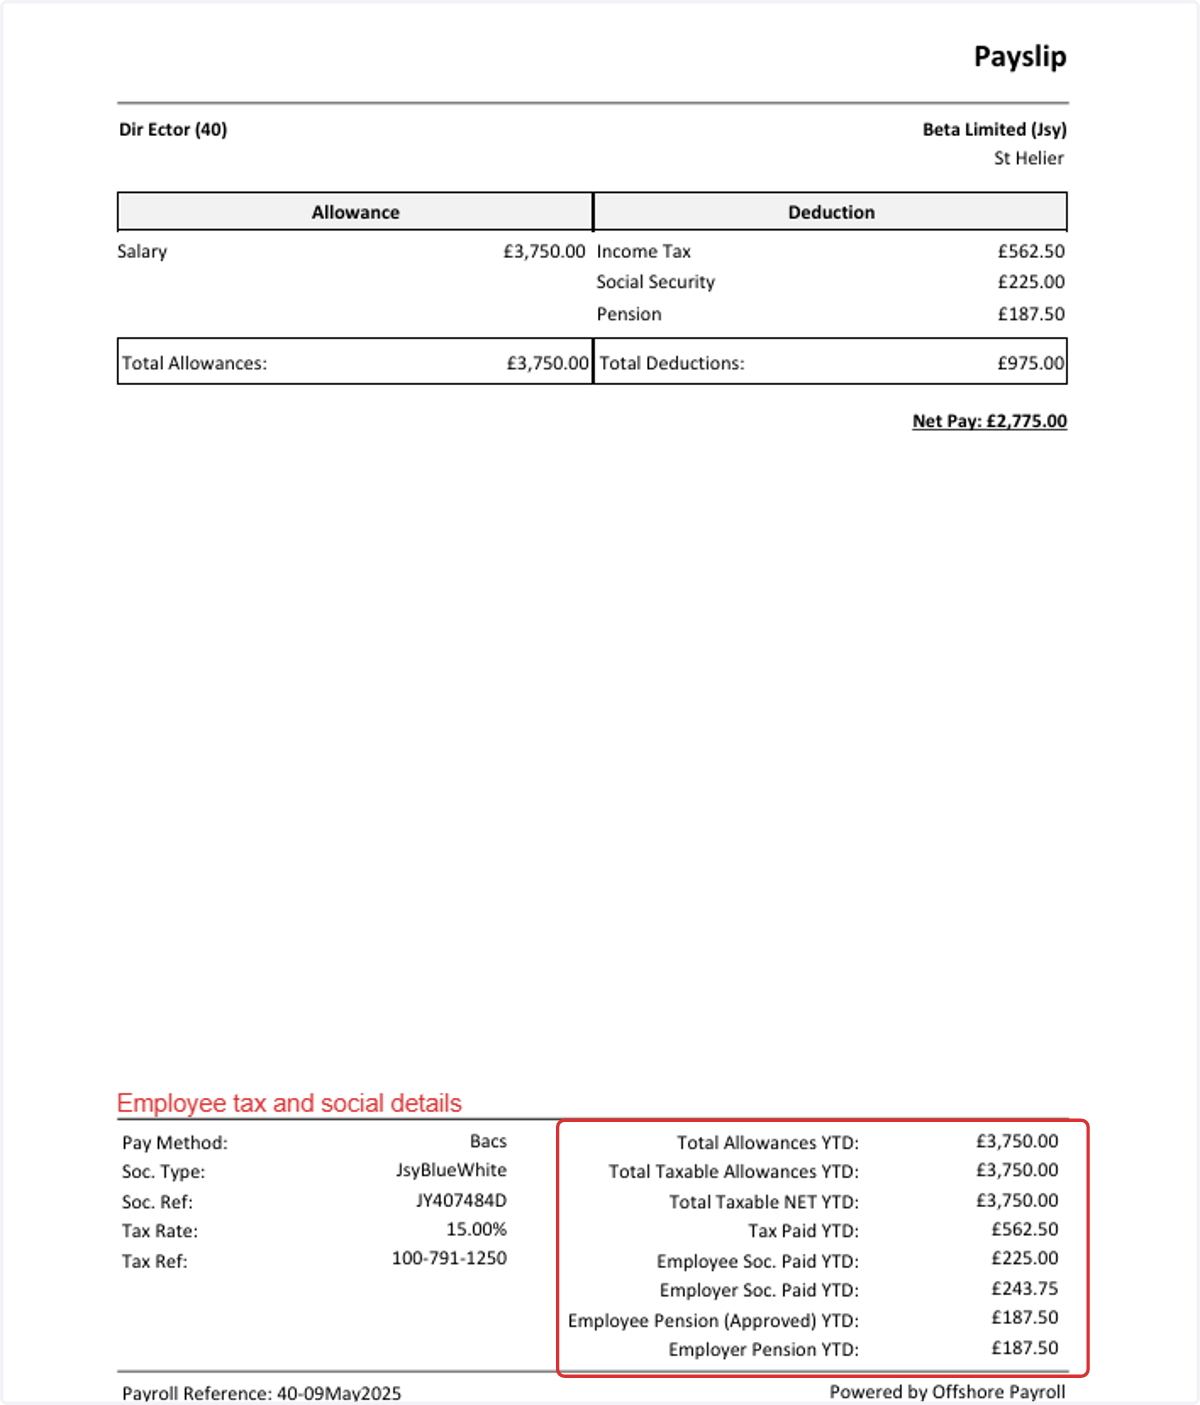
15. Employee payslip downloaded as a PDF
Below is a description of the YTD fields at the bottom right of the payslip.
Total Allowances- Total of all allowances for the period
Total Taxable Allowances- Total of all taxable allowances for the period
Total Taxable Net- This is calculated as taxable allowances - taxable deductions
Tax Paid YTD- Total tax paid YTD
Employee Soc. Paid YTD- Total social paid YTD
Employer Soc. Paid YTD- Total employer social paid YTD
Employee Pension (Approved) YTD- Total pension approved YTD
Employer Pension YTD- Total employer pension YTD
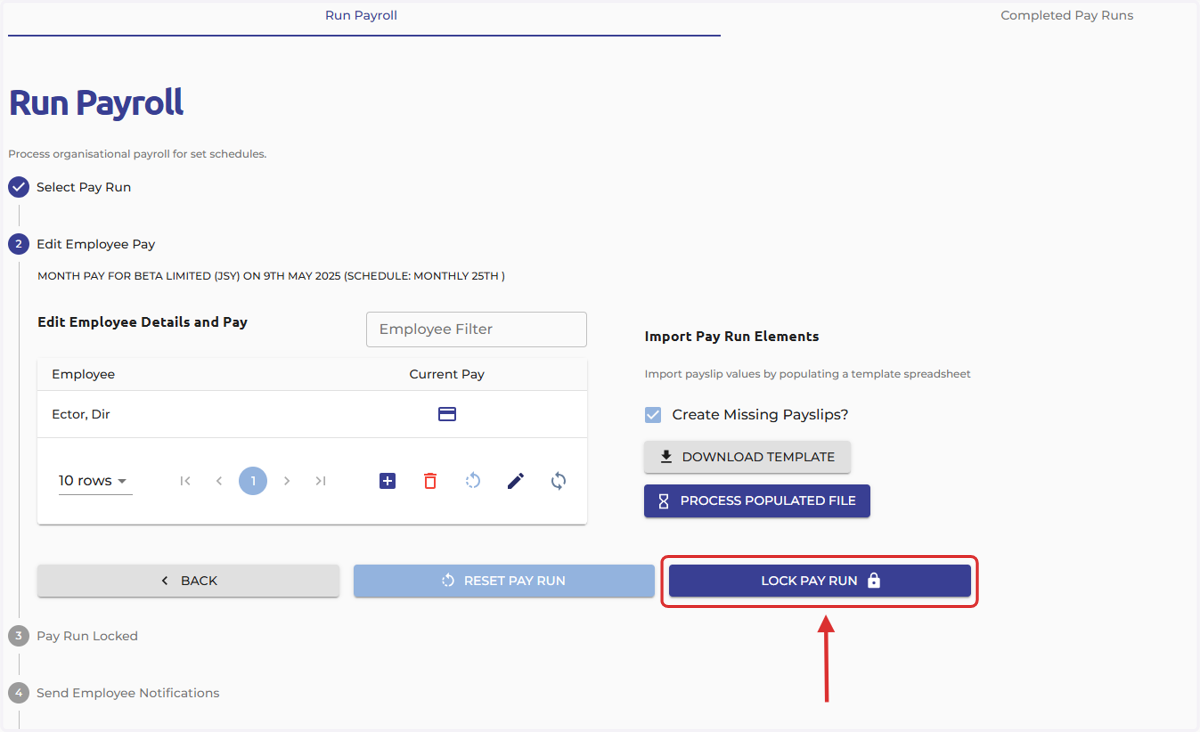
16. Lock Pay Run
After confirming the accuracy of the payslips, you can proceed with locking the pay run
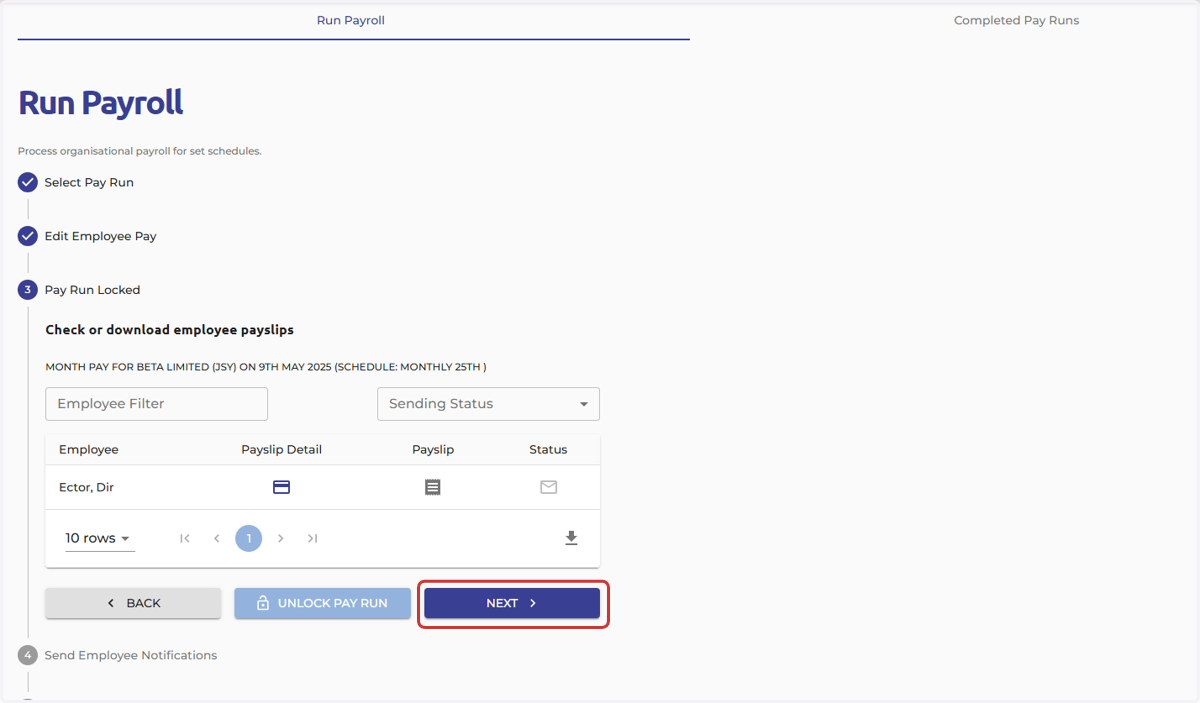
17. Once you have completed your final checks and are ready to finalise the pay run, please click 'Next' to proceed
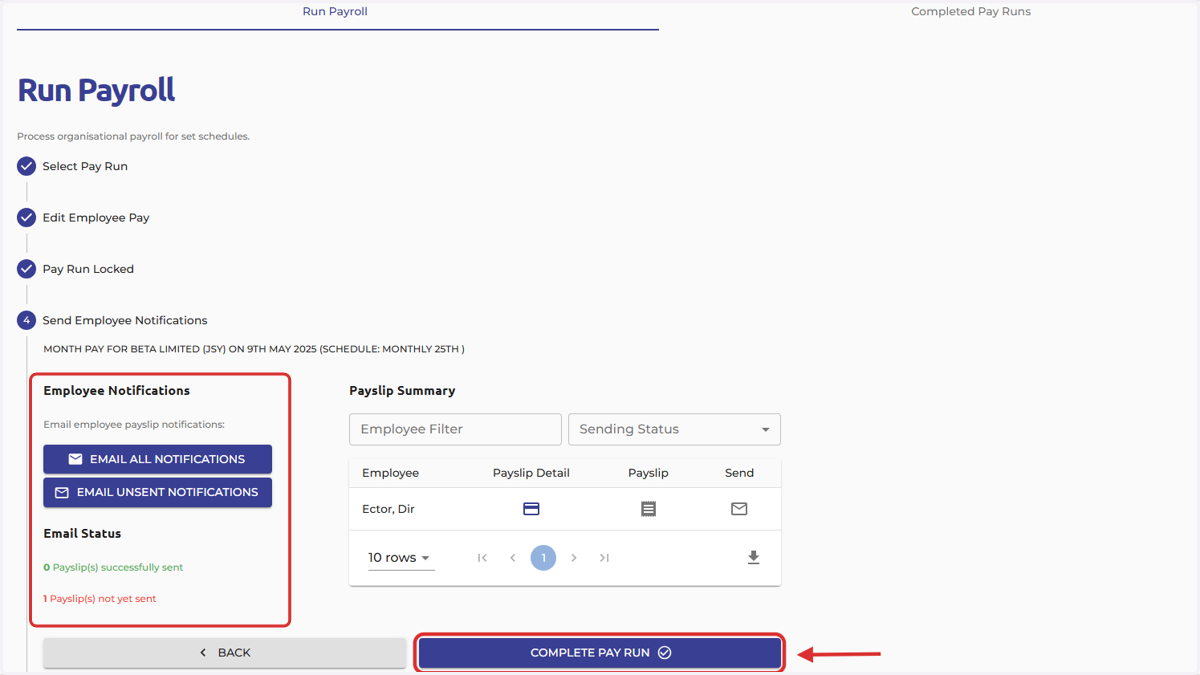
18. Complete Pay Run
The Send Employee Notifications step allows you to notify employees that their pay slips are available to view. Notifications are sent via email, with links prompting employees to log into the portal and view their pay details.
Note: Notifications can only be sent if the pay run is either locked, complete or the pay date has passed.
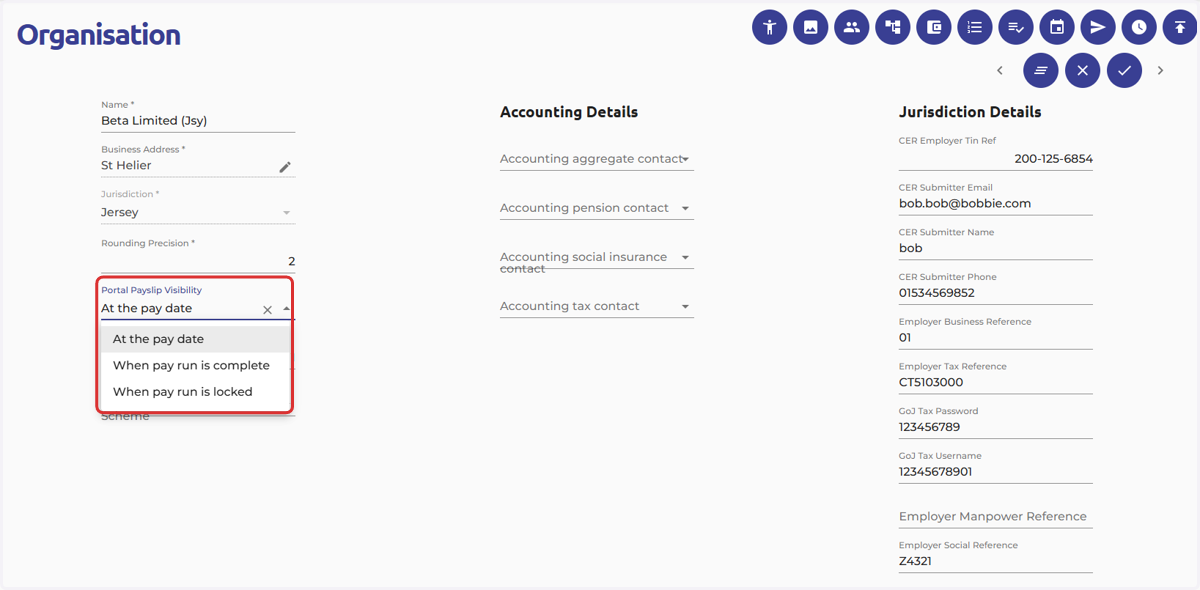
19. The payslip portal visibility is set at organisation level
At the pay date- Employee payslips will only be visible once the pay date has been reached
When pay run is complete- Employee payslips will be visible once the pay run is complete
When pay run is locked- Employee payslips will be visible once the pay run is locked
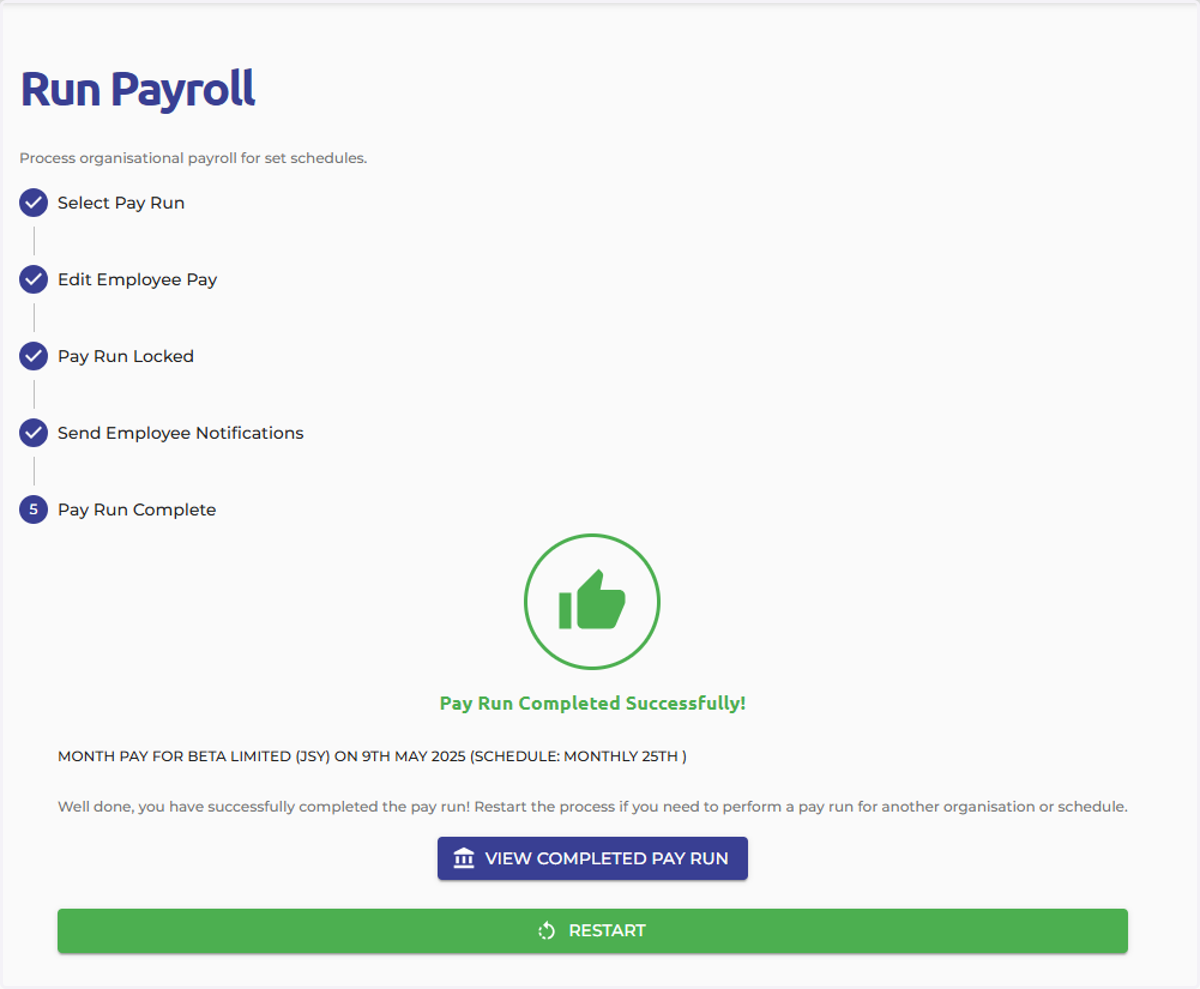
20. It’s important to complete all the payroll steps until you see the large green thumbs-up icon on your screen. This indicates that your payroll has been successfully finalised.